(248) 297-3485

(248) 297-3485

Air Care Dryer Vent Cleaning: Ensuring Safe and Efficient Appliance Performance

Maintaining a clean and efficient dryer vent is essential for the safety and longevity of your home. Regular dryer vent cleaning can reduce the risk of fire hazards and enhance the performance of your dryer, saving you time and energy costs. Over time, lint buildup can obstruct airflow, leading to inefficient drying cycles and potential damage to your appliance.

Engaging professional services for dryer vent cleaning can provide peace of mind. These experts ensure that all lint and debris are thoroughly removed, promoting a safer environment. By prioritizing this maintenance task, you contribute to the overall efficiency of your home and reduce the likelihood of expensive repairs in the future.

Choosing a company like Totally Maintained offers a comprehensive approach to home care. With services tailored for preventive maintenance, you can ensure that essential tasks like dryer vent cleaning are taken care of without the hassle of coordinating multiple service providers.

The Importance of Dryer Vent Cleaning

Maintaining a clean dryer vent is essential for ensuring your appliance operates safely and efficiently. Regular dryer vent cleaning can prevent serious hazards, enhance dryer performance, and extend the lifespan of your equipment.

Preventing Fire Hazards

A clogged dryer vent significantly elevates the risk of fire in your home. Lint buildup creates an environment where heat accumulates, potentially igniting nearby materials. According to the U.S. Fire Administration, failing to clean dryer vents is one of the leading causes of dryer fires.

To mitigate this risk, you should schedule regular cleaning. This service removes hazardous lint that can spark. Regular inspections can reveal any blockages or issues, providing peace of mind that your home remains safe.

Improving Efficiency and Performance

When your dryer vent is obstructed, your dryer must work harder to circulate air. This inefficiency results in longer drying times, increased energy consumption, and higher utility bills. A clean dryer vent allows for optimal airflow, which reduces drying times and saves energy.

By improving your dryer’s performance, you not only enhance your daily routines but also minimize wear and tear on the machine. A well-maintained vent can translate to monthly savings on your energy bills.

Extending Dryer Lifespan

Regular dryer vent cleaning directly contributes to the longevity of your appliance. Lint buildup can strain various components of your dryer, leading to breakdowns and costly repairs. By investing in preventive maintenance, you reduce the strain on your dryer, allowing it to operate efficiently.

An extended lifespan means that you can get the maximum return on your investment. Routine maintenance helps you avoid premature replacements and keeps your dryer functioning optimally for years to come.

By prioritizing dryer vent cleaning, you are safeguarding your home against potential hazards and optimizing your dryer’s performance.

Understanding Your Dryer Vent System

A properly functioning dryer vent system is crucial for the safe and efficient operation of your gas dryer. Knowing its components and types can help you maintain it effectively and avoid hazards.

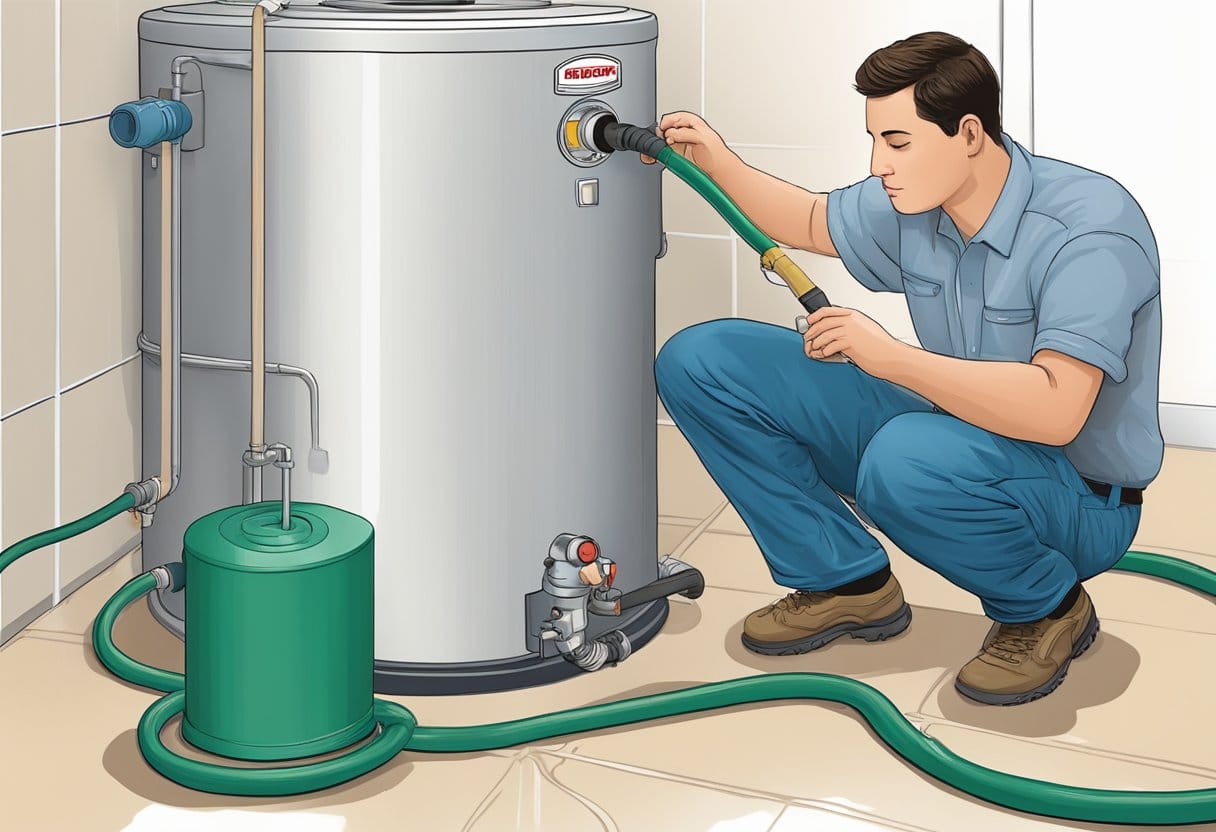
Components of a Dryer Vent

Your dryer vent system consists of several key components:

  • Vent Pipe: This duct connects your dryer to the outside. It’s essential for expelling hot air, moisture, and lint.
  • Louvered Exhaust Hood: This prevents outside air from entering your home and allows lint to escape during dryer operation.
  • Connector Hose: This flexible tube attaches the dryer to the vent pipe and may need regular inspection for wear or blockages.
  • Clamps and Fasteners: Secure connections are vital. Ensure they are rust-free and tight, preventing any disconnections during use.

Regularly checking these components ensures your system remains efficient and reduces fire hazards.

Types of Dryer Vents

There are various types of dryer vents to consider, each with different materials and uses:

  • Rigid Metal Ducts: These are the most recommended option due to their durability and minimal lint buildup. Made of stainless steel or aluminum, they resist bending and can efficiently expel air.
  • Flexible Aluminum Ducts: These are easier to install in tight spaces but may collect lint more easily. Ensure they are kept straight to minimize airflow resistance.
  • Plastic Venting: While cheap, this type is not recommended as it can easily melt or become a fire hazard.

Choosing the right type depends on your home layout and local building codes. Regular maintenance and inspections can help ensure optimal dryer vent performance.

Professional Vent Cleaning Process

Understanding the professional vent cleaning process is essential for maintaining the efficiency and safety of your HVAC system. This involves a thorough inspection, effective cleaning techniques, and implementing post-cleaning maintenance strategies to ensure optimal performance.

Inspection and Assessment

The first step involves examining your dryer vent system to identify any potential issues. Professionals typically use cameras and other tools to assess the condition of ducts. This allows for the detection of clogs, damages, or other problems that could hinder airflow.

During this assessment, technicians will also check for proper connections and ensure there are no bends or kinks in the ductwork. Addressing these findings early is crucial to prevent future problems and enhance the efficiency of your system.

A detailed report after inspection can help you understand the condition of your vents and necessary cleaning needs.

Cleaning Techniques and Equipment

Effective vent cleaning involves specialized equipment designed to remove lint and debris accumulated within the ducts. Professional services often utilize high-powered vacuums equipped with HEPA filters to ensure that dust and allergens are contained.

Tools like rotary brushes can effectively dislodge stubborn debris from the duct walls. These brushes reach deep into the ductwork, clearing obstructions that may not be visible during the inspection phase.

Moreover, the use of a vacuum system during cleaning ensures that removed contaminants don’t recirculate in your home. Using professional-grade equipment is vital for thorough and safe vent cleaning.

Post-Cleaning Maintenance

After completing the cleaning process, it’s essential to implement a maintenance plan to keep your vents in good condition. Regular inspections should be scheduled—ideally once a year—to monitor vent performance and prevent buildup.

You should also maintain awareness of dryer performance. If you notice longer drying times or excessive heat, it may indicate that the vents need attention again.

Incorporating preventive measures, such as using lint traps and ensuring proper installation of vent covers, will significantly extend the lifespan of your vent system. This proactive approach is key to avoiding costly repairs down the line.

DIY Dryer Vent Cleaning Tips

Proper maintenance of your dryer vent is essential for ensuring efficiency and safety. Knowing when to clean your dryer vent, how to do it step-by-step, and understanding safety precautions can help you manage this task effectively.

When to Clean Your Dryer Vent Yourself

You should consider cleaning your dryer vent if you notice any of the following signs:

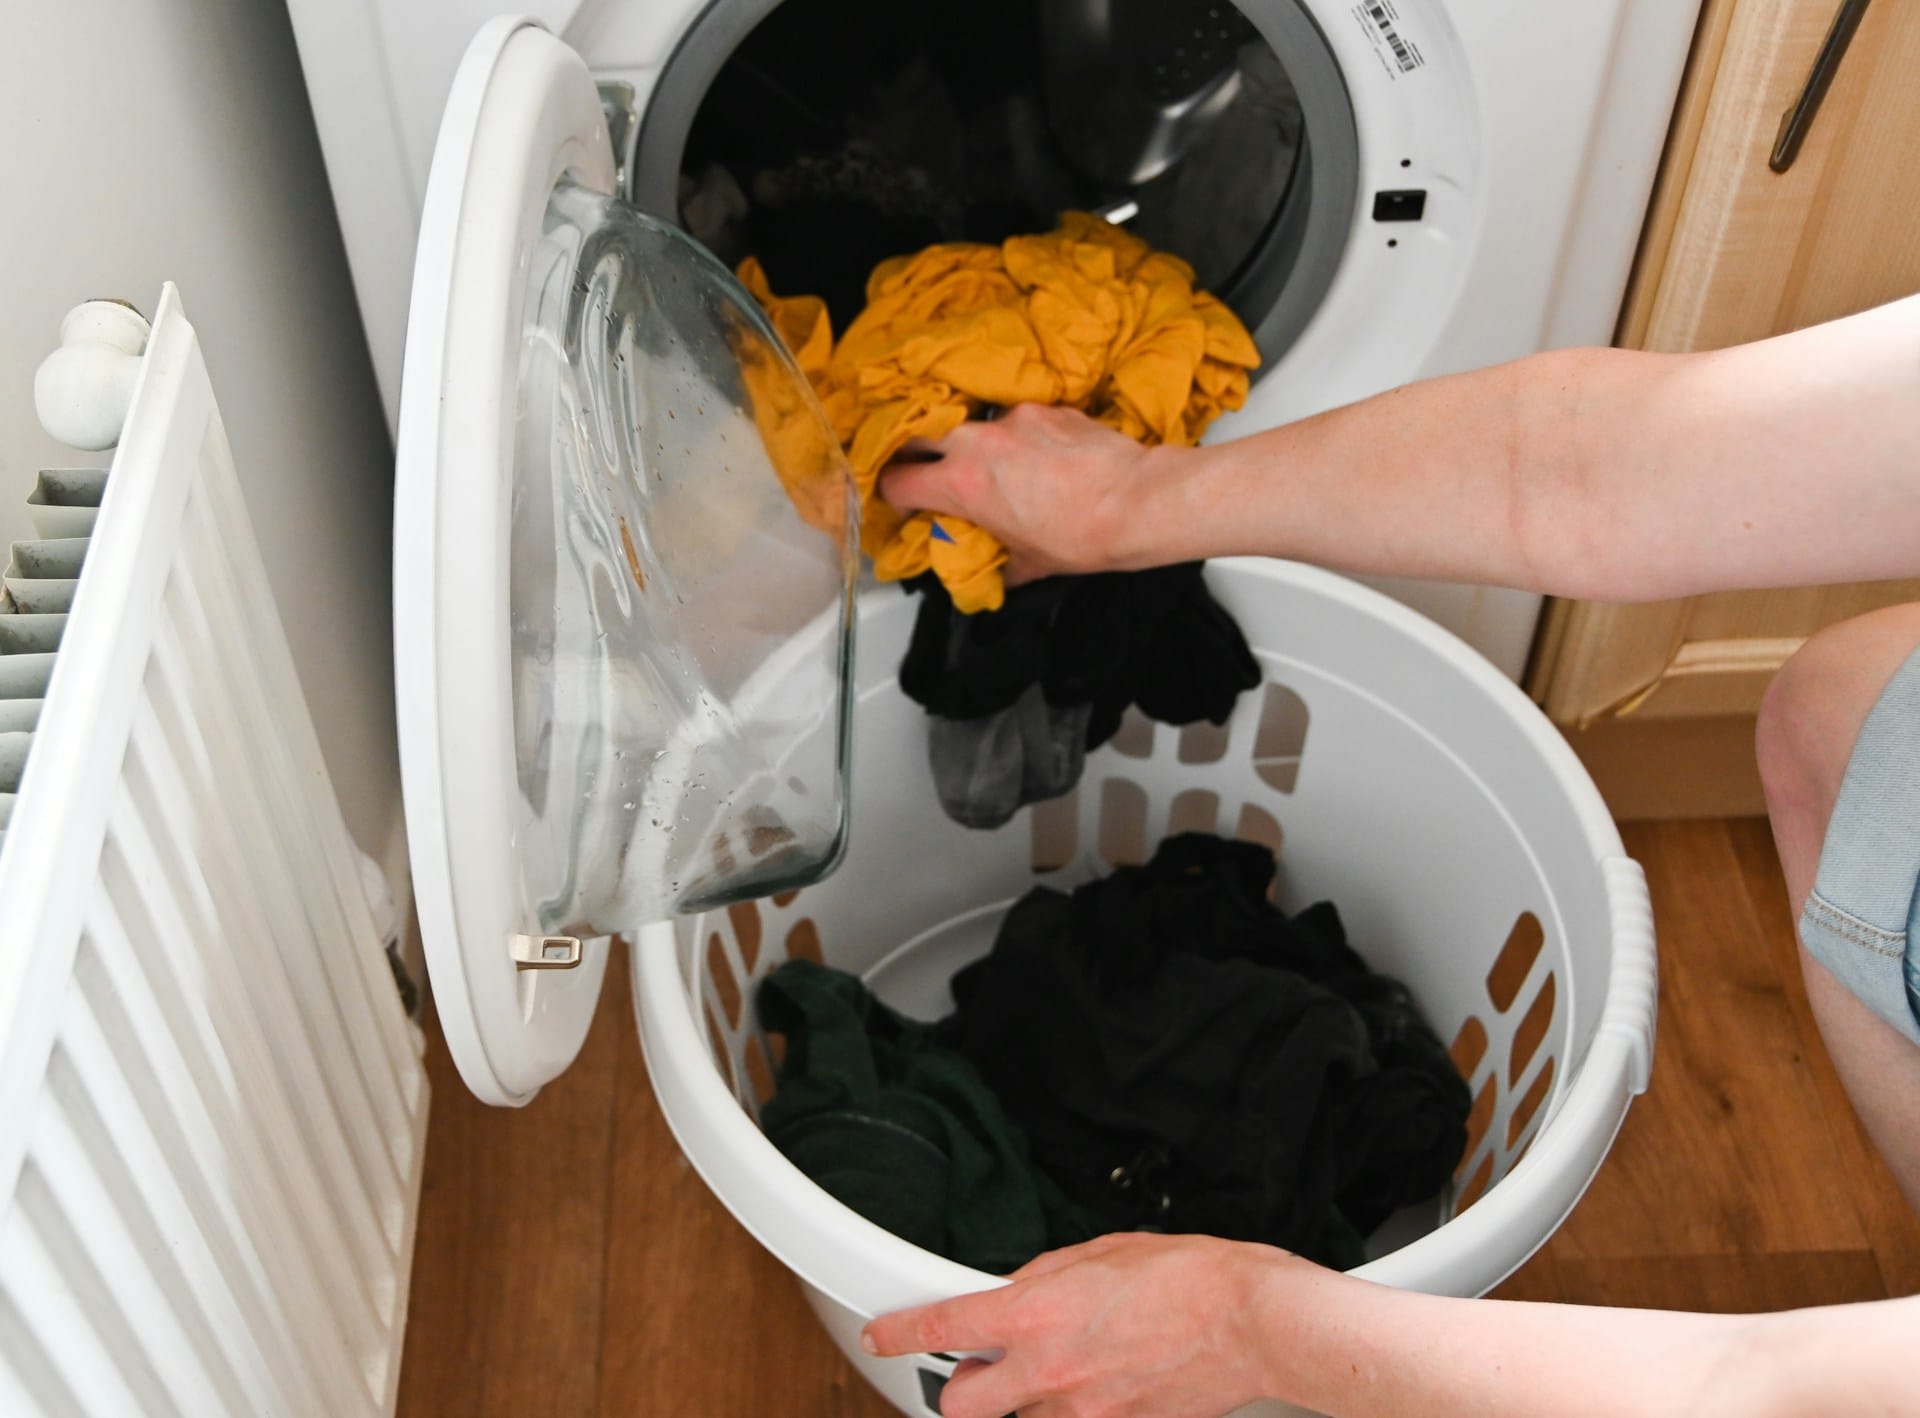
  • Longer Drying Times: If your clothes take longer than usual to dry, it may indicate a clogged dryer vent.
  • Heat or Moisture Accumulation: Excess heat and moisture around your dryer during operation can signal a blockage.
  • Lint Buildup: Regularly check the lint trap and vent for excessive lint accumulation.
  • Burning Smell: If you detect a burning smell while the dryer is operating, stop immediately and clean the vent.

It’s advisable to clean your dryer vent at least once a year, or more frequently if you use your dryer regularly. This preventive measure helps maintain the efficiency of your appliance and can reduce fire hazards.

Step-by-Step Cleaning Guide

  1. Unplug the Dryer: Always start by disconnecting the dryer from the power source.
  2. Pull Out the Dryer: Move the dryer away from the wall to access the vent.
  3. Disassemble the Vent: Carefully detach the vent duct from the back of the dryer. Remember to note how it’s configured for reassembly.
  4. Use a Brush Kit: Utilize a dryer vent cleaning brush to remove lint buildup. Insert the brush into the vent and rotate it while pulling it out.
  5. Vacuum the Duct: Use a vacuum with a hose attachment to clean both the duct and the area behind the dryer.
  6. Check Outside Vent: Don’t forget to clean the exterior vent cover to ensure airflow isn’t obstructed.
  7. Reassemble: Once everything is clean, reattach the vent and push the dryer back into place before plugging it in.

Make this a part of your home maintenance routine to ensure optimal dryer performance.

Safety Considerations

Always prioritize safety while cleaning your dryer vent:

  • Avoid Overheating: Regularly cleaning the vent reduces the risk of lint catching fire due to heat accumulation.
  • Use Protective Gear: Wear gloves and a mask to protect yourself from dust and lint particles.
  • Take Your Time: Be thorough to avoid missing areas that might still be clogged.
  • Check for Damage: Inspect the vent for any cracks or damage that could worsen airflow issues.

By following these safety guidelines, you can perform dryer vent cleaning effectively and securely.

Recognizing When Professional Help is Needed

Understanding when to seek professional assistance for dryer vent cleaning is crucial for maintaining your home safety and efficiency. Certain signs indicate a clogged dryer vent, and knowing these can help you prevent potential hazards.

Signs of a Clogged Dryer Vent

Recognizing a clogged dryer vent is essential for your safety and the efficiency of your appliance. Here are key indicators:

  • Longer Drying Times: If your clothes consistently take more than one cycle to dry, this may signal lint buildup.
  • Burning Smell: A noticeable burning odor during operation is a warning sign of overheating, which can indicate a clogged vent.
  • Excessive Lint: Accumulation of lint around the dryer or visible outside the vent indicates obstruction.
  • Hot Exterior: If the dryer feels unusually hot to the touch while running, it may suggest a blocked vent.
  • Increased Utility Bills: Higher energy costs can result from the dryer working harder due to inadequate airflow.

Prompt attention to these signs can prevent fire hazards and maintain your machine’s efficiency.

Benefits of Hiring Professionals

Bringing in a professional for dryer vent cleaning offers numerous advantages:

  • Expertise: Professionals are trained to identify and address specific issues efficiently, ensuring thorough cleaning.
  • Safety: A certified technician can safely handle tasks and reduce the risk of fire hazards associated with clogged vents.
  • Time-Saving: Hiring a professional allows you to focus on your daily activities while the job is completed efficiently.
  • Comprehensive Services: Many companies, like Totally Maintained, offer a range of home maintenance services, streamlining your maintenance needs.

By opting for professional help, you ensure a safer and more effective cleaning, extending the life of your dryer and enhancing its performance.

Frequently Asked Questions

This section addresses common questions regarding dryer vent cleaning, covering costs, signs that cleaning is needed, and frequency of service. Understanding these aspects helps you make informed decisions about maintaining your dryer vent.

How much does it typically cost to have a dryer vent cleaned by a professional?

The cost of professional dryer vent cleaning generally ranges from $100 to $300. Factors influencing the price include the location, complexity of the vent system, and whether any additional services are required.

What are the signs that my dryer vent needs to be cleaned?

Signs that indicate your dryer vent needs cleaning include longer drying times, a burning smell during operation, and lint buildup around the dryer. Additionally, if the vent cap flutters when the dryer is running, it may signal a blockage.

How often should dryer vent cleaning services be scheduled?

It is recommended to schedule dryer vent cleaning at least once a year for optimal safety and efficiency. If you use your dryer frequently, consider cleaning it more often, such as every six months.

What is the average duration of a professional dryer vent cleaning service?

A professional dryer vent cleaning service typically takes between 30 minutes to an hour. The duration may vary based on the vent’s length and condition.

Can cleaning my dryer vent improve the efficiency of my dryer?

Yes, cleaning your dryer vent can significantly improve the efficiency of your dryer. A clean vent allows for better airflow, which can reduce drying times and energy consumption.

What should I look for when choosing a dryer vent cleaning service provider?

When selecting a dryer vent cleaning service, prioritize providers with proper certifications, positive customer reviews, and a clear understanding of safety protocols. It’s also beneficial to inquire about their cleaning techniques and equipment to ensure comprehensive service.

How to Find the Best Gutter Maintenance Service for Your Home’s Needs

Maintaining your gutters is a crucial aspect of home upkeep that can prevent significant damage to your property. Clogged gutters can lead to water overflow, causing harm to your home’s foundation and structure. To find the best gutter maintenance service, focus on local companies with strong reviews and a proven track record in managing gutter systems effectively.

Your choice of service can greatly influence the longevity of your gutter system. Look for professionals who prioritize preventive maintenance rather than just repairs. This proactive approach ensures that issues are addressed before they escalate, saving you money and hassle in the long run.

When selecting a gutter maintenance service, consider those that offer comprehensive home maintenance options. A reliable provider allows you to tackle multiple tasks in a single visit, minimizing the need for various service providers and making your home maintenance more efficient.

Understanding Gutter Maintenance

Gutter maintenance is crucial for protecting your home from water damage and ensuring that your drainage system functions effectively. Regular care prevents clogs and other issues that could lead to significant problems down the line.

Importance of Regular Gutter Care

Regular gutter cleaning is essential to prevent clogs caused by leaves, twigs, and other debris. When gutters are blocked, water cannot flow freely, leading to overflows. This situation can cause water to seep into your roof, walls, or foundation.

By scheduling routine inspections and cleanings, you ensure that your gutters remain in optimal condition. This preventive maintenance helps identify minor issues before they escalate. Investing in regular care saves you money on costly repairs that stem from major water damage.

Consider hiring a professional service that specializes in gutter maintenance. Totally Maintained, for example, can handle multiple maintenance tasks during a single visit, saving you time and effort.

Consequences of Neglect

Neglecting your gutters can lead to serious consequences. Without routine cleaning, debris accumulates, creating blockages that can cause water damage to your home. Over time, this can result in structural issues such as mold growth, rotting wood, and damage to your foundation.

Water that overflows from clogged gutters can also pool around your property, leading to erosion and landscape damage. In extreme cases, neglect can force you into costly repairs or even replacements of your gutter system.

To avoid these issues, create a maintenance schedule. Aim to inspect your gutters at least twice a year, especially before and after heavy rain seasons. Taking these steps preserves your home’s integrity and protects your investment.

Choosing the Right Gutter Service

Selecting the right gutter service involves careful consideration of the company’s professionalism and understanding of costs. Evaluating these factors will help ensure your gutters are well-maintained and effectively protected from damage.

Assessing Professional Gutter Cleaning

When choosing a gutter cleaning service, prioritize professionalism and experience. Look for companies with proven track records in residential gutter maintenance.

Key factors to consider include:

  • Experience and Expertise: Ensure the company has a history of successfully handling gutter maintenance. Established businesses often have the best practices in place.
  • Customer Reviews: Check online reviews and ratings. Positive feedback from previous clients is a strong indicator of quality service.
  • Free Estimates: Obtain detailed quotes from multiple companies. A transparent estimate helps you understand the services offered and avoid hidden charges.

Additionally, inquire about their cleaning methods. Professional services should utilize safe techniques that protect your home’s exterior while ensuring the gutters are thoroughly cleaned.

Comparing Gutter Cleaning Costs

Gutter cleaning costs can vary widely depending on several factors. Understanding these variables allows you to make an informed decision.

Consider these cost-related factors:

  • Service Scope: The more extensive the service (e.g., repairs, maintenance plans), the higher the cost may be. Ensure you know what’s included.
  • Location: Searching for “gutter cleaning near me” can provide localized pricing options. Rates may differ based on your region.
  • Seasonality: Prices may fluctuate during peak seasons. Scheduling during off-peak times can sometimes lead to savings.

Always ask for specifics about what is covered in the fee. Establishing clarity on pricing will help you find a service that fits your budget while ensuring quality maintenance of your gutters.

Gutter Guards and Gutter Protection

Gutter guards play a crucial role in maintaining your home’s gutter system by preventing debris buildup. They significantly reduce the frequency of cleaning and the risk of clogs, ultimately protecting your home from water damage. Understanding the benefits of gutter guard installation and how to find the best system is essential for effective gutter maintenance.

Benefits of Gutter Guard Installation

Installing gutter guards offers several advantages. First, they significantly reduce the need for regular cleaning, saving you time and effort. With a quality gutter shutter system, you won’t have to climb ladders frequently to clear leaves and debris.

A common feature of many gutter guards is a clog-free guarantee or no-clog warranty. This ensures that your gutters will function properly, diverting water away from your home without blockages. Additionally, they can extend the lifespan of your gutters by preventing rust and corrosion caused by stagnant water.

Gutter guards also enhance the aesthetic appeal of your home. Many systems are designed to blend seamlessly with your roofline, offering a discrete appearance while functioning effectively.

Finding the Best Gutter Guard System

When searching for the best gutter protection, consider several factors. Start by evaluating the materials used in the construction of the gutter guards. Stainless steel and aluminum offer durability, while mesh options can provide excellent filtration.

Look for customer reviews and ask for recommendations to find reliable brands. Some well-reviewed options include systems that come with a no-clog warranty, ensuring you invest in a reliable product that fits your needs.

Consult professionals for gutter guard installation advice. Expertise can help determine the best match for your home’s architecture and local environment. Conducting thorough research will aid in selecting the right gutter guards, ensuring optimal performance and protection for your home.

Gutter Maintenance Techniques

Maintaining clean gutters is essential for preventing water damage and ensuring your home’s structural integrity. You can choose to tackle this task yourself or hire professional services, each offering its benefits.

DIY Cleaning Tips and Tools

When cleaning your gutters, the right tools can make all the difference. Start with a sturdy ladder to safely reach those hard-to-access areas. Wear protective clothing, including gloves and goggles, to shield yourself from debris and potential allergens.

Using a high-pressure hose or a standard garden hose with a spray nozzle can help wash out blockages effectively. A gutter scoop is also beneficial for removing leaves and dirt. For heavy buildup, consider using a power washer, but use it cautiously to avoid damaging the gutters.

Establish a routine cleaning schedule, ideally twice a year, or more frequently in areas with heavy foliage. This proactive approach helps maintain clean gutters and prevents costly repairs down the road.

Professional Services Vs. Self-Maintenance

Deciding between DIY maintenance or hiring professionals depends on your comfort level and the complexity of the task. Professional services typically handle the job more efficiently and may identify issues you might overlook, such as sagging gutters or leaks.

If you opt for a professional gutter cleaning service, choose a company with a solid reputation. Inquire about their cleaning process and the tools they use. For example, services that include power washing can ensure thorough cleaning.

While self-maintenance saves on costs, hiring professionals frees you from the physical demands of the work, allowing you to focus on other home maintenance tasks. Weigh the pros and cons to find what best suits your needs.

Making an Informed Decision

Choosing the right gutter maintenance service requires careful consideration of various options. Evaluating the services available and taking appropriate action will ensure your gutters are properly maintained for optimal performance.

Evaluating Service Options

Start by researching professional gutter maintenance services in your area. Look for companies that prioritize experience, using trained technicians to perform tasks effectively. Focus on those with positive customer reviews, indicating reliability and quality.

Consider the types of services offered. A comprehensive provider may include gutter cleaning, installation, and repairs to cover all your needs. Ensure they are familiar with different gutter styles and materials. It’s also essential to inquire about safety measures they implement during service.

Don’t forget to explore financing options if budget constraints are a concern. Many companies offer flexible payment plans that can make maintaining your home’s gutters more manageable. This way, you can prioritize necessary work without financial stress.

Taking Action for Your Home

Once you have evaluated your options, it’s time to engage with potential services. Reach out to a few top candidates for quotes and detailed descriptions of their offerings. Ask specific questions about their processes and the equipment they use to ensure high standards.

When hiring a professional, confirm that they have the necessary licenses and insurance. This protects you from liability in case of accidents. Always request written estimates and contracts to avoid misunderstandings.

After selecting a service, schedule an appointment for an initial assessment. This helps the provider identify specific needs, which might include regular maintenance schedules. Taking proactive steps now can extend the lifespan of your gutters, ultimately saving you money on repairs and replacements in the future.

Frequently Asked Questions

Understanding the common questions about gutter maintenance can help you make informed decisions. This section addresses essential factors to consider, maintenance frequency, signs of needed repairs, cost variations, qualifications for service providers, and the benefits of gutter guards.

What factors should be considered when selecting a gutter maintenance service?

When selecting a gutter maintenance service, consider the company’s experience and expertise in the field. Look for established companies with positive customer reviews and a solid reputation. Additionally, verify their licensing and insurance to ensure they meet industry standards.

How often should gutters be inspected and cleaned to prevent damage?

You should inspect your gutters at least twice a year, ideally in the spring and fall. Cleaning may be necessary more frequently if you live in an area with a lot of trees, as leaves and debris can quickly clog your gutters.

What are the signs that indicate the need for professional gutter repair or cleaning?

Look for signs such as water spilling over the sides of your gutters, rust or corrosion, or sagging sections. Additionally, if you notice mold or water damage around your home’s foundation, it may be time to seek professional help.

How do gutter maintenance costs vary by service and what influences these prices?

Gutter maintenance costs can vary based on factors like the size of your home, the type of service needed, and your location. Regular cleaning services typically cost less than repairs. Specific requirements, such as accessing high or steep roofs, may also increase costs.

What qualifications and certifications should a reliable gutter service provider have?

A reliable gutter service provider should have appropriate certifications and licenses to operate in your area. Consider looking for providers associated with industry organizations that highlight their commitment to best practices and ongoing education.

Can the installation of gutter guards reduce the need for frequent maintenance?

Yes, installing gutter guards can significantly reduce the frequency of maintenance required. These guards help prevent debris accumulation, thereby minimizing the need for regular cleaning and allowing for smoother water flow, ultimately protecting your home from potential water damage.

How Long to Drain Water Heater: A Step-by-Step Guide

Draining your water heater is an essential part of regular home maintenance that can enhance its efficiency and lifespan. Typically, it takes about 15 to 45 minutes to fully drain a water heater, depending on the size and water flow rate. Knowing this timeframe can help you plan your maintenance tasks effectively.

Neglecting this simple procedure can lead to sediment buildup, which may cause your unit to overwork and decrease its efficiency. By incorporating this quick maintenance task into your routine, you can save money on energy bills and extend the life of your appliance. Regularly maintaining your water heater is a smart move that can prevent costly repairs in the future.

Understanding Water Heaters

Water heaters play a crucial role in everyday comfort by providing hot water for various household needs. There are different types of water heaters, each with unique features, and understanding their components can enhance your maintenance practices.

Types of Water Heaters

You will primarily encounter two types of water heaters: tank water heaters and tankless water heaters.

  • Tank water heaters store hot water in a large reservoir, typically ranging from 20 to 80 gallons. They heat water continually, ensuring it’s available on demand. These units may require regular draining to remove sediment buildup.
  • Tankless water heaters, on the other hand, heat water instantly as it flows through the unit. They are more energy-efficient than tanks and do not take up much space. However, sediment can still accumulate, necessitating a different maintenance approach.

Understanding these types helps tailor your maintenance and drainage practices according to your specific heater type.

Role of the Drain Valve

The drain valve is a vital component of your water heater. It is typically located near the bottom of the tank and is used for draining and flushing the system.

To maintain optimal performance, you should regularly use the drain valve. This involves connecting a hose and allowing sediment to flow out of the tank. Sediment can affect heating efficiency and may even lead to tank corrosion.

Make sure to check the valve periodically for leaks or blockages. A properly functioning drain valve extends the lifespan of your water heater and improves its efficiency.

Sediment Buildup and Its Impact

Sediment buildup occurs when minerals, such as calcium and magnesium, accumulate at the bottom of your water heater. This can significantly impact its performance.

When sediment builds up, it creates a barrier between the water and the burner, forcing the unit to work harder to heat water. This inefficiency not only increases energy bills but can also lead to premature failure.

Regularly flushing your tank (at least once a year) helps manage sediment buildup. If you notice unusual noises or inconsistent hot water supply, it may indicate a problem with sediment accumulation. Addressing these issues promptly will help maintain the efficiency and longevity of your water heater.

Preparation for Draining a Water Heater

To effectively drain your water heater, you must prepare by ensuring that you prioritize safety and locate the necessary valves and drains. This process involves several critical steps that will make the draining task more efficient and safe.

Safety First: Turning Off Power and Water Supply

Before you begin draining your water heater, safety is paramount. If you have an electric water heater, make sure to turn off the power at the circuit breaker. This prevents any electrical hazards while working. For gas water heaters, turn the thermostat to the “off” position to stop the burner from engaging.

Next, shut off the cold water supply valve, typically located at the top of the unit. This stops any new water from entering while you drain the tank. It’s a good idea to turn on a hot water tap somewhere in your home to relieve pressure in the system, making the draining process smoother.

Locating the Valves and Drains

Identifying the correct valves and drain is key to a successful draining process. Locate the drain valve, usually found near the bottom of the water heater. This valve is often a standard garden hose fitting. You will connect a hose to this drain valve to direct water safely outside or into a bucket.

Next, find the cold water valve, which feeds water into the tank, and the hot water valve, which delivers hot water to your home. Understanding these connections is crucial before proceeding, as it will ensure that you can properly manage water flow throughout the draining process. Following these steps will help facilitate a smooth and efficient draining of your water heater.

Draining and Flushing the Tank

Properly draining and flushing your water heater is essential for maintaining its efficiency and extending its lifespan. This process removes sediment buildup that can lead to poor performance and damage.

Draining Steps and Procedures

To drain your water heater, follow these steps:

  1. Turn Off the Heater: Shut off the power to your electric water heater or set your gas unit to pilot.
  2. Connect a Hose: Attach a garden hose to the drain valve located at the bottom of the tank. Ensure the other end of the hose is placed in a bucket or outside.
  3. Open the Drain Valve: Carefully open the drain valve. Water will flow out through the hose. Monitor the flow to avoid overflow.
  4. Flush the Tank: To remove sediment, turn on a hot water faucet in your home. This allows air into the tank, helping the water drain better.
  5. Close Valve and Refill: Once the tank is empty, close the drain valve, remove the hose, and turn the water supply back on.

Flushing Out Sediment

Flushing your water heater helps eliminate sediment buildup. Regular maintenance can prevent issues. Here’s how to effectively flush it:

  1. Refill the Tank: After draining, close the drain valve. Allow the tank to refill completely to avoid running your heater dry.
  2. Heat the Water: Once filled, turn the power back on to the heater. Let it heat the water to the desired temperature.
  3. Repeat the Drain: After the heater cycles a few times, repeat the draining procedure to remove any remaining sediment.
  4. Frequency: It’s recommended to perform this flushing process at least once a year to maintain optimal performance and efficiency.

Maintaining your water heater through draining and flushing can help prevent costly repairs and inefficiencies caused by sediment buildup.

Post-Draining Steps and Reconnection

After draining your water heater, it’s essential to follow proper steps to ensure safe and effective reconnection. This process involves refilling the tank and reactivating the unit for optimal performance.

Refilling the Water Heater Tank

Start by ensuring the faucet connected to the hot water line is open. This allows air to escape while filling the tank, preventing pressure buildup. Next, close the drain valve and connect a garden hose if it’s still attached.

Turn on the cold water supply valve slowly. Monitor the tank—once you see water flowing steadily from the open faucet, you know it’s filling properly. Continue filling until water flows freely from the faucet, then close it. Check for leaks around the valve where you filled the tank and ensure no sediment buildup is present in the tank.

Reactivating the Water Heater

Once the tank is filled, you can reactivate your water heater. If it’s electric, switch the power back on. For gas models, set the thermostat to the desired temperature, usually between 120°F and 140°F.

Allow the heater to run for approximately 30 minutes to an hour. This duration ensures the water heats adequately. Keep an eye on the unit for any signs of malfunction or leaks during this time. Regular checks after maintenance can help prolong the lifespan of your water heater and minimize issues related to sediment buildup or pressure.

Ongoing Maintenance and Care

Regular maintenance of your water heater is essential for optimal performance and longevity. Key aspects include routine inspections, addressing any hard water issues, and proper winterizing techniques to prevent damage during cold months.

Regular Inspection and Preventive Measures

Conducting regular inspections of your water heater can help identify issues before they escalate. Schedule inspections at least once a year. During these checks, look for signs of leaks, corrosion, and unusual noises.

Consider testing the pressure relief valve to ensure it operates correctly. If you notice any changes in water temperature or pressure, these may indicate a malfunction.

Preventive maintenance tasks, such as flushing the tank to remove sediment, can extend the heater’s lifespan. Sediment build-up can lead to decreased efficiency and potential damage.

Keeping a maintenance log can help track when tasks were completed and when the next service is due.

Addressing Hard Water Issues

If you live in an area with hard water, you may experience increased mineral build-up in your water heater. This can lead to decreased efficiency and higher energy bills.

To manage this, consider installing a water softener, which helps reduce the hardness of your water. Routine descaling can also help mitigate issues caused by mineral deposits. Use descaling solutions specifically designed for water heaters and follow the manufacturer’s instructions.

Additionally, check your heater’s anode rod every two years. Replacing a corroded anode rod can prolong the tank’s life and reduce sediment accumulation.

Implementing these measures will improve performance and increase efficiency, ultimately saving you money.

Proper Winterizing Techniques

Preparing your water heater for winter is crucial if you live in colder climates. Start by draining the tank entirely. This prevents any remaining water from freezing and potentially damaging the unit.

Add antifreeze to the system, particularly if you have a vacation home or plan to turn off the heater for an extended period.

Ensure all pipes, including the bypass valve, are properly insulated to prevent drafts. This maintains internal temperatures and avoids freeze-related issues.

Check the thermostat settings and adjust them as necessary. Keeping your heater properly winterized safeguards against unexpected failures and ensures reliable performance when colder months arrive.

Frequently Asked Questions

Understanding the finer points of draining a water heater can help you manage your appliance more effectively. Here’s specific information to address common queries you may have.

What is the typical duration for draining a 50-gallon water heater?

Draining a 50-gallon water heater typically takes about 30 to 45 minutes. Factors such as water pressure and sediment buildup can influence the time required.

Why might a water heater take an extended period to drain?

If your water heater takes longer than expected to drain, it could be due to sediment buildup clogging the drain valve or a lower water pressure in your home. These issues can impede the flow of water, slowing the draining process.

What steps should be taken to thoroughly flush a water heater?

To flush a water heater, first turn off the power and let the water cool. Connect a hose to the drain valve, open the valve, and let the water flow out. After draining, close the valve, remove the hose, and refill the tank.

What are some tips for quickly draining a hot water heater?

To expedite the draining process, open a hot water faucet in your home to allow air in, which can help water flow more freely. Ensure the drain valve is fully open and consider using a larger diameter hose to reduce resistance.

What is the estimated time required to drain a 40-gallon water heater?

Draining a 40-gallon water heater generally takes around 30 minutes. Variables like water temperature and sediment can affect the exact time.

Is there a reason a water heater would continuously drain without stopping?

A water heater may continuously drain due to a malfunctioning drain valve or a problem with the plumbing system, such as a leak. Identifying and addressing these issues promptly is crucial to prevent water damage.

How to Remove Sediment from Hot Water Heater: A Step-by-Step Guide for Maintenance

If you notice your hot water isn’t as hot as it used to be or your water heater is making unusual noises, sediment buildup might be the culprit. Removing sediment from your hot water heater is essential to maintaining its efficiency and prolonging its lifespan. This process not only improves the quality of your hot water but also helps prevent costly repairs down the line.

Understanding how to flush your water heater is a straightforward yet crucial skill for any homeowner. It typically involves turning off the power, draining the tank, and flushing it out with water. This simple maintenance task can significantly enhance the performance of your water heater and ensure that you have consistent hot water when you need it.

By taking the time to manage sediment in your water heater, you can enjoy peace of mind and a more efficient system. Dive into this guide to learn the step-by-step process for removing sediment and keeping your hot water heater in prime condition.

Understanding Sediment in Hot Water Heaters

Sediment build-up in hot water heaters can significantly impact their efficiency and lifespan. Understanding the causes and types of sediment, as well as their effects, is crucial for maintaining optimal performance of your hot water system.

What Causes Sediment Build-Up

Sediment build-up in hot water heaters typically results from mineral deposits, especially in areas with hard water. As water is heated, minerals like calcium and magnesium precipitate out and settle at the bottom of the tank.

Additionally, organic debris such as rust and dirt can enter the tank through the inlet supply line. Inconsistent maintenance can exacerbate this issue. When these materials accumulate, they create a layer that can reduce heating efficiency, leading to increased energy bills and possibly affecting the quality of your hot water.

Types of Sediment and Debris

There are several types of sediment that can accumulate in your hot water heater:

  • Mineral Deposits: Mainly consist of calcium and magnesium, which come from hard water.
  • Rust and Corrosion: Often originates from deteriorating tanks or pipes, introducing iron and other contaminants.
  • Organic Matter: Includes dirt, sand, and other debris that may enter the system.

Each type contributes differently to the overall sediment build-up. The presence of these sediments can lead to scaling on heating elements, which negatively affects heating performance and can eventually lead to the need for repairs.

Effects on Hot Water and Performance

The build-up of sediment can have several adverse effects on your hot water heater’s performance:

  1. Reduced Efficiency: Sediment acts as insulation, preventing the efficient transfer of heat. Your heater has to work harder, increasing energy consumption.
  2. Temperature Fluctuations: As sediment accumulates, you may experience inconsistent water temperatures, which can be frustrating during daily use.
  3. Potential Damage: Over time, excessive sediment can lead to tank corrosion or even complete failure of the unit, requiring costly repairs or replacements.

Regular maintenance and flushing of the tank can help mitigate these effects, ensuring your hot water heater operates efficiently and lasts longer.

How to Remove Sediment from Your Hot Water Heater

Maintaining your hot water heater by removing sediment is crucial for its efficiency and longevity. This process involves several key steps, from flushing the tank to utilizing tools such as a garden hose and drain valve for a thorough clean.

Flushing the Tank Step by Step

To flush your hot water heater, start by turning off the power or gas supply to the unit. Next, turn the cold water supply valve off. Attach a garden hose to the drain valve at the bottom of the tank, directing the other end of the hose into a drainage area.

Open the drain valve slowly to release the water and sediment buildup. Allow the tank to empty fully, which could take several minutes. Once drained, briefly turn the cold water supply back on to disturb any remaining sediment. After this, close the drain valve, remove the hose, and refill the tank by opening the cold water supply valve.

Make sure to turn the power back on once the tank is full.

Using a Garden Hose and Drain Valve

Using a garden hose and drain valve is essential for effectively removing sediment. First, ensure you have a hose long enough to reach your intended drainage area. Attach the hose securely to the drain valve located at the bottom of the water heater.

When opening the valve, water will flow out, carrying sediment with it. Be cautious, as the water may be hot. For increased effectiveness, let the tank sit empty for a few moments before closing the valve and giving the tank a final flush. This method minimizes sediment buildup and helps maintain your heater’s efficiency, extending its lifespan.

Cleaning Out Remaining Sediment

After the initial flush, some sediment may still remain in the tank. To tackle this, consider using a vinegar flush. This involves pouring a solution of vinegar and water into the tank, letting it sit for a couple of hours. The acidic properties of vinegar work to dissolve stubborn sediment.

After the soaking period, flush the tank again. Open the cold water supply while the drain valve is still open to rinse away any dissolved sediment. Repeat this process if necessary. Regularly cleaning out sediment not only improves performance but also enhances water quality, ensuring it remains safe for use.

Tools and Precautions for Safe Sediment Removal

Ensuring you have the right tools and taking necessary precautions is essential for safely removing sediment from your hot water heater. Being well-prepared will make the process smoother and minimize risks during the task.

Necessary Plumbing Tools and Equipment

To successfully flush out sediment, gather the following essential tools:

  • Garden Hose: Use a reliable garden hose to direct wastewater safely outside or into a bucket.
  • Bucket or Drain Pan: Position this to catch any water that drains from the heater.
  • Wrench: A standard adjustable wrench will help with loosening and tightening fittings.
  • Screwdriver: A flathead screwdriver can assist with any screws on the water heater.
  • Thermometer: Optional, but useful for ensuring that the water temperature is safe before beginning.

Make sure all tools are in good condition before starting the process. Having these items ready allows you to address issues as they arise.

Safety Tips for Home Repair

Prioritize safety throughout the sediment removal process. Here are key precautions:

  • Turn Off Power: Before starting, ensure the water heater is turned off to avoid electric shock. This applies to both gas and electric units.
  • Check Temperature: Confirm that the water is cool enough to handle, ideally below 120°F (49°C).
  • Wear Protective Gear: Use gloves and safety goggles to protect against splashes and debris.
  • Ventilation: Ensure the area is well-ventilated to avoid fumes, especially if you’re using cleaning solutions.
  • Stability: Keep your work area uncluttered to prevent accidents. If you’re using ladders or other fixtures, make sure they are stable.

Following these tips can significantly reduce the risks involved in the sediment removal process.

Preventing Future Sediment Build-Up

To reduce sediment accumulation in your hot water heater, consider implementing specific measures. Utilizing water softeners and filters, along with routinely inspecting critical components like the dip tube and anode rod, can significantly enhance your system’s efficiency and longevity.

Using Water Softeners and Filters

Installing a water softener can be a game changer if you have hard water. Hard water contains minerals like calcium and magnesium that contribute to sediment build-up in your water heater. A water softener exchanges these hard minerals for sodium ions, effectively reducing scale formation.

Additionally, using a sediment filter can capture particles before they reach your water heater. Place the filter in the water supply line feeding the heater. Regularly replacing these filters ensures optimal functionality. Together, water softeners and filters mitigate sediment accumulation, prolonging the life of your heater and improving water quality.

Inspecting the Dip Tube and Anode Rod

The dip tube directs incoming cold water to the bottom of the tank, which helps maintain consistent heating. If your dip tube is damaged or deteriorated, it can lead to sediment stirring in the tank. Inspect it for cracks or blockage during regular maintenance. Replacing a faulty dip tube can help maintain efficiency.

The anode rod plays a vital role in preventing corrosion within the tank. As the rod degrades, it attracts corrosive elements, protecting the metal tank. Regularly check the anode rod and replace it if significantly corroded. By ensuring both the dip tube and anode rod are in good condition, you can effectively minimize sediment build-up and extend your water heater’s lifespan.

Special Considerations for Different Water Heater Types

Understanding how different water heater types function can assist you in effectively managing sediment removal. Electric and gas water heaters may require distinct maintenance approaches. Additionally, monitoring components like faucet aerators and pressure relief valves is crucial for overall functionality.

Electric Water Heaters vs. Gas Water Heaters

For electric water heaters, sediment buildup often occurs at the bottom of the tank. Flushing the tank regularly helps prevent this issue. Disconnect the power supply before starting the process to ensure safety.

In contrast, gas water heaters may have different sediment challenges due to the combustion process. High temperatures can contribute to mineral buildup. It’s recommended to maintain appropriate temperature settings to minimize sediment formation.

Both types benefit from periodic maintenance, but the approach may vary based on the energy source. Always refer to your specific unit’s manual for tailored advice.

Maintaining Fixtures Like Faucet Aerators

Sediment can also affect faucet aerators, which can lead to reduced water flow. Periodically inspect and clean aerators to ensure they are free from blockages. Unscrew the aerator from the faucet and soak it in vinegar to help dissolve any mineral deposits.

Make sure to rinse it well before reattaching. Keeping your faucet aerators clean will enhance water pressure and improve the overall efficiency of your plumbing system. Regular maintenance of these small fixtures complements your water heater upkeep.

Checking the Pressure Relief Valve

The pressure relief valve is a critical component of your water heater’s safety system. It regulates pressure within the tank, preventing dangerous situations. Test this valve at least once a year to ensure it functions correctly.

To do this, lift the lever on the valve and allow some water to escape. If water flows freely and stops when you release the lever, the valve is operating correctly. If not, it may need replacement. Ensuring your pressure relief valve works effectively contributes to your water heater’s safety and longevity.

Frequently Asked Questions

This section addresses common queries regarding sediment buildup in hot water heaters. Understanding these points can help you maintain your system effectively and prevent potential issues.

What are the symptoms that indicate sediment buildup in a hot water heater?

You may notice signs such as reduced hot water supply, unusual noises like clanking or popping, or discolored water. These symptoms are often indicators that sediment is accumulating at the bottom of the tank.

Can sediment accumulation in a hot water tank be hazardous?

Yes, sediment buildup can lead to overheating, which increases the risk of tank failure or leaks. In extreme cases, it may even pose a fire hazard, especially in electric water heaters.

What is the correct procedure to flush an electric water heater?

Start by turning off the power to the heater. Next, connect a garden hose to the drain valve at the bottom of the tank and place the other end in a suitable drainage area. Open the drain valve and allow the tank to empty, then flush it with cold water until the water runs clear.

How can vinegar be used to clean a hot water heater?

To use vinegar, first, you need to drain some water from the tank. Then, pour vinegar into the tank through the cold water inlet. Allow it to sit for several hours or overnight to dissolve the sediment. Finally, flush the tank thoroughly with water.

What are the steps to drain a hot water heater quickly?

Turn off the power or gas supply to the heater. Attach a garden hose to the drain valve and ensure it flows to a drain or outside. Open the valve and let the water flow out, then flush with cold water to remove sediments until it runs clear.

How can one prevent sediment from accumulating in a water heater?

Regular maintenance is key. You can flush your water heater annually to remove sediment buildup. Additionally, consider using a water softener if your water supply is hard, as this reduces mineral deposits.

Residential Maintenance Team: Ensuring Optimal Home Care and Efficiency

A residential maintenance team plays a crucial role in ensuring your home remains in top condition. By focusing on preventive maintenance rather than repairs, these teams help extend the lifespan of your home systems and appliances, ultimately saving you money. You can think of them as your dedicated partners in home upkeep, tackling tasks such as dryer vent cleaning, window cleaning, and pressure washing.

Having a reliable maintenance team allows you to schedule multiple services in one visit, simplifying the process of home care. Instead of juggling several service providers for differing needs, you can streamline your experience with a single point of contact. This not only makes your life easier but also ensures consistent service quality across the board.

Investing in a residential maintenance team is a proactive approach to homeownership. Regular upkeep prevents small issues from escalating into costly repairs, giving you peace of mind and a well-maintained living environment.

Roles and Responsibilities

A residential maintenance team plays a vital role in ensuring that your home remains in optimal condition. Their responsibilities span various aspects of home upkeep, from routine tasks to specialized services that enhance both functionality and aesthetics.

Routine Maintenance

Routine maintenance includes scheduled tasks aimed at preserving the integrity of your home. This can involve inspections of heating and cooling systems, checking smoke detectors, and cleaning dryer vents.

It’s essential to stay on top of these tasks to prevent major issues from arising. Regular checks on plumbing systems can avert leaks and water damage. Other tasks may include changing air filters and testing security systems.

You may also want to consider pressure washing your home’s exterior. This not only improves appearance but can also prevent mold and mildew buildup.

Electrical and Plumbing

Maintenance regarding electrical and plumbing systems is crucial for safety and efficiency. Your maintenance team should regularly inspect wiring and outlets to prevent hazards. This includes replacing outdated fixtures and ensuring that all installations meet safety codes.

Plumbing tasks involve checking for leaks, clogs, and water pressure issues. Regular maintenance can extend the lifespan of your plumbing systems and prevent costly repairs later on.

Should issues arise, having a maintenance team readily available ensures that problems are addressed promptly. This minimizes disruptions and provides peace of mind.

Landscaping and Curb Appeal

Curb appeal significantly impacts your home’s value and overall impression. A well-maintained exterior can make your property more inviting. Tasks in this area include mowing the lawn, trimming bushes, and clearing debris.

Your maintenance team should also attend to seasonal needs, such as mulching in spring or raking leaves in fall. These activities keep your landscaping healthy and visually appealing.

In addition to the upkeep, consider enhancing features like flower beds and walkways. Regular care in landscaping can elevate the aesthetic of your property while increasing its market value.

Cleaning and Painting

Cleaning and painting are essential for maintaining the aesthetic and structural integrity of your home. Routine cleaning services should include window cleaning, pressure washing, and deep cleaning of all surfaces.

Not only does cleaning improve appearance, but it also helps prevent long-term damage. For example, neglecting areas can lead to mold growth, which poses health risks.

Painting should be performed every few years to protect surfaces from weather damage and to refresh your home’s aesthetic. Choosing the right colors and finishes can significantly enhance the overall look of your property.

Staffing the Maintenance Team

Effective staffing is crucial for a residential maintenance team to ensure smooth operation and high-quality service delivery. Your team must be proficient in various maintenance tasks, including electrical work, plumbing, and HVAC maintenance, to meet homeowner needs efficiently.

Hiring and Training

When hiring for your maintenance crew, focus on individuals with specialized skills in areas such as electrical work, plumbing, and HVAC systems. Consider certifications or prior experience that demonstrate competence in these fields.

Training is equally important; it should emphasize safety protocols, customer service, and the specific maintenance tasks that your team will handle. Regular training sessions can keep your staff updated on new techniques and technologies in home maintenance. Offer opportunities for advancement to motivate employees and reduce turnover.

Assembling a Diverse Skill Set

A well-rounded maintenance team requires a diverse skill set to tackle various tasks. Ensure that your crew includes members with expertise in different areas. This diversity allows your team to address a wide range of homeowner concerns without needing to call in additional contractors.

For instance, having staff skilled in plumbing can quickly resolve leaks, while HVAC experts can handle heating and cooling systems. This structure improves efficiency and responsiveness. Regular skill assessments can identify gaps in your team’s capabilities, allowing for targeted training and hiring to fill those needs.

Maintenance Operations

Effective maintenance operations are essential for ensuring your home remains in optimal condition. By implementing structured processes for scheduling inspections, addressing issues, and promoting efficiency, you can enhance the overall functionality of your living space.

Scheduling Inspections

Regular inspections are vital for identifying potential issues before they escalate. You should consider establishing a routine schedule, perhaps quarterly, to assess critical systems within your home. This includes checking HVAC systems, plumbing, and even structural elements.

Using a maintenance services provider can streamline this process. They can organize inspections to coincide with other maintenance tasks, reducing disruption and allowing for a comprehensive review of your home’s condition. Online scheduling platforms can make this even easier, giving you the flexibility to choose times that fit your schedule.

Addressing Maintenance Issues

When maintenance issues arise, a swift response is crucial. You should prioritize addressing problems immediately to prevent further damage. Develop a system for reporting issues quickly, whether through a mobile app or a dedicated hotline.

Having a dedicated maintenance team is beneficial. They can handle various maintenance services, such as dryer vent cleaning or pressure washing, effectively and professionally. This proactive approach minimizes the chance of long-term repairs and ensures your home remains safe and comfortable.

Efficiency and Community Impact

Efficient maintenance operations don’t just benefit your home; they positively impact the entire community. A well-maintained property contributes to neighborhood aesthetics and can even enhance property values. You can encourage others in your community to adopt similar practices, leading to an overall improvement in local living standards.

Moreover, when maintenance tasks are performed regularly, community resources can be utilized more effectively. Streamlining maintenance processes helps your local service providers manage workloads better, ensuring prompt responses to issues in the area. This cooperative approach fosters a sense of community and shared responsibility for maintaining public and private spaces.

Maintaining Systems and Equipment

Proper maintenance of home systems and equipment is essential for ensuring efficiency and longevity. Focused care can prevent major issues and save costs over time, allowing you to enjoy a comfortable living environment without frequent disruptions.

HVAC Systems

Your HVAC system requires regular attention to operate efficiently. Schedule routine maintenance checks at least twice a year to clean filters, inspect ductwork, and ensure the refrigerant levels are adequate. A clean system improves air quality and reduces energy bills.

It is also crucial to monitor for unusual noises or smells, which can indicate underlying issues. Investing in preventive maintenance can extend the life of your HVAC, avoiding costly repairs or replacements. Consider professional services for tasks like dryer vent cleaning to further enhance system efficiency.

Electrical Systems

Maintaining your electrical systems is vital for safety and functionality. Regular inspections by a qualified professional can help identify potential hazards such as frayed wiring or overloaded circuits. Keeping your electrical panels and outlets in good condition is critical for preventing fires or outages.

You should also replace faulty light bulbs promptly and avoid using extension cords as permanent solutions. Implementing routine checks reduces risks and ensures that your home’s electrical systems are performing at their best. Regular electrical work can significantly enhance the reliability of your fixtures and devices.

Plumbing Systems

Your plumbing systems should be routinely assessed to avoid leaks and clogs. Regular maintenance includes checking for slow drains, inspecting water heaters, and ensuring all pipes are leak-free. Addressing these issues promptly can prevent larger, costly damages in the future.

Keep a watchful eye on water pressure and the condition of fixtures. Cleaning out drains and maintaining adequate water flow also contributes to a healthier plumbing system. Engaging a professional for periodic inspections can help catch problems early, ensuring your plumbing remains efficient.

Enhancing Property Value

Maintaining and enhancing your property’s value is essential for maximizing your investment. Focusing on aesthetics and functional improvements can significantly impact how potential buyers perceive your property.

Improving Aesthetics

Curb appeal plays a crucial role in attracting potential buyers. Simple tasks such as landscaping, fresh painting, and regular maintenance create a welcoming exterior.

  • Landscaping: Trimmed hedges, colorful flower beds, and defined pathways improve the overall look.
  • Painting: A fresh coat of paint can rejuvenate surfaces, making your home look new. Choose neutral colors to appeal to a wider audience.

Don’t underestimate the importance of small details. Clean windows and pressure-washed exteriors enhance brightness and freshness. Regular updates to outdoor spaces can also significantly increase perceived value.

Functional Improvements

Functional enhancements ensure your home operates efficiently. Investing in essential systems like electrical and plumbing can yield long-term savings.

  • Electrical: Upgrading outdated wiring can improve safety and efficiency. Consider replacing old fixtures and adding dimmer switches for versatility.
  • Plumbing: Regular inspections can prevent leaks and clogs. Updating fixtures not only boosts functionality but can also enhance aesthetics.

Regular preventive maintenance checks extend the lifespan of systems and appliances, helping you avoid larger issues down the line. By focusing on both aesthetics and functionality, you create a home that is attractive and efficient.

Frequently Asked Questions

Understanding the roles and responsibilities of a residential maintenance team can help you ensure that your property is well cared for. The following sections address common inquiries regarding job functions, services provided, and effective maintenance practices.

What are the typical roles and responsibilities of a residential maintenance team?

A residential maintenance team typically handles routine inspections, preventive maintenance, and repairs. Their responsibilities may include landscaping, waste management, and ensuring compliance with safety standards.

Team members are skilled in various trades, allowing them to address a wide range of maintenance needs. This capability ensures that all aspects of property upkeep are managed efficiently.

What jobs are commonly associated with residential maintenance teams?

Common jobs for residential maintenance teams include plumbing, electrical work, and carpentry. They also manage tasks such as HVAC servicing, painting, and general cleaning to keep properties in optimal condition.

Team members often work on both indoor and outdoor maintenance projects, ensuring that every area of the property is well maintained.

What services are usually included in property maintenance?

Property maintenance services often include regular cleaning, lawn care, pest control, and seasonal maintenance tasks. Additional services may cover pressure washing, window cleaning, and dryer vent cleaning.

These services are crucial for preserving the quality and safety of your home while preventing costly repairs down the road.

Could you describe the job description for a residential maintenance worker?

A residential maintenance worker is typically responsible for performing routine inspections and conducting maintenance tasks. They may also oversee repairs, keep detailed service records, and ensure compliance with health and safety regulations.

Strong communication skills are essential, as workers often interact with residents and other team members to address needs promptly.

How should one conduct a property maintenance checklist?

To create a property maintenance checklist, identify key areas that require regular attention, such as plumbing, electrical systems, and exterior features. Schedule inspections for each area and note any upcoming maintenance tasks.

Regularly updating the checklist ensures that nothing is overlooked, helping maintain the property efficiently.

What are the different types of property maintenance?

Property maintenance can be categorized into preventive, corrective, and routine maintenance. Preventive maintenance focuses on regular upkeep to avoid major repairs, while corrective maintenance addresses existing issues.

Routine maintenance involves day-to-day tasks that keep the property functioning smoothly, ensuring a safe and pleasant environment for residents.

Do You Have to Flush a Tankless Water Heater for Optimal Performance?

When it comes to tankless water heaters, regular maintenance is crucial for optimal performance. Flushing your tankless water heater at least once a year is necessary to remove mineral deposits that can accumulate and impact efficiency. If you live in an area with hard water, this maintenance becomes even more important to ensure a continuous supply of hot water.

Neglecting to flush your tankless water heater can lead to decreased water pressure, longer wait times for hot water, and ultimately, costly repairs. Many homeowners wonder whether this maintenance task is essential, and the answer is a resounding yes. Your water heater works hard to provide comfort, and maintaining it properly will extend its lifespan.

In this article, you will discover the benefits of flushing your tankless water heater and learn how to perform the task effectively. Understanding this process can save you money and ensure reliable hot water when you need it most.

Understanding Tankless Water Heaters

Tankless water heaters are designed to provide on-demand hot water, making them a popular choice among homeowners seeking efficiency and performance. Understanding how these systems work and their maintenance requirements is essential for optimal use.

How Tankless Water Heaters Work

Tankless water heaters operate by heating water directly as it flows through the unit. When you turn on a hot water tap, cold water travels through a pipe into the unit, where a powerful heating element or burner activates. This allows for an uninterrupted supply of hot water without the need for a bulky storage tank.

Energy efficiency is a significant advantage of tankless systems, as they heat water only when needed. This can lead to lower energy bills compared to traditional tank models, which continuously heat and store water. For those with higher hot water demands, multiple units can be installed to ensure adequate supply.

Differences Between Tank and Tankless Systems

Tank water heaters store a set amount of hot water, typically ranging from 20 to 80 gallons. They must maintain this temperature, leading to standby heat loss, which can waste energy. In contrast, tankless systems have no storage and provide hot water instantly, significantly improving efficiency.

Additionally, tankless water heaters tend to have a longer lifespan, often exceeding 20 years with proper maintenance, compared to 10-15 years for tank versions. While tank models have lower initial costs, tankless systems save money over time through enhanced efficiency and reduced energy consumption.

Importance of Regular Maintenance

Regular maintenance is crucial for the performance of your tankless water heater. Over time, mineral buildup from hard water can affect efficiency and reduce the lifespan of the unit. Flushing the system annually helps remove these deposits, ensuring optimal functionality.

You may also need to check the water filters and intake pipes for clogs, as blockages can lead to decreased water flow and pressure. By staying on top of maintenance, you can ensure that your tankless system provides reliable hot water while extending its operational life. Regular care can minimize the risk of costly repairs or replacements in the future.

Why Flushing a Tankless Water Heater Is Necessary

Flushing your tankless water heater is crucial for maintaining its efficiency and longevity. Proper care can prevent common issues like scaling and mineral buildup that negatively impact performance and energy efficiency. Understanding these factors will help you make informed decisions about your home maintenance routine.

Preventing Scaling and Mineral Buildup

Hard water is a significant concern for tankless water heaters. When minerals like calcium and magnesium present in hard water accumulate, they lead to scaling inside the heating chamber. This scaling can erode the walls, diminishing the unit’s effectiveness and lifespan.

Regular flushing helps remove these mineral deposits, keeping your system clean. It is often recommended to flush your tankless water heater at least once a year, especially in areas with hard water. If left unchecked, scaling can create blockages, reducing water flow and leading to further plumbing issues.

Impact on Performance and Energy Efficiency

A tankless water heater that hasn’t been flushed may struggle to maintain the desired water temperature. Scaling acts as an insulator, requiring more energy to heat water effectively. This inefficiency can lead to increased energy costs, which is contrary to the benefits a tankless system offers.

By maintaining a routine flushing schedule, you ensure that your heater operates efficiently. This not only helps in providing hot water on demand but also optimizes energy performance. Homeowners who neglect this maintenance may experience reduced flow rates and inconsistent temperatures, detracting from the comfort and convenience their systems should provide.

Risks of Skipping the Flushing Process

Neglecting to flush your tankless water heater can result in serious consequences. Without regular maintenance, you put your unit at risk of costly repairs due to extensive scaling and mineral buildup.

Clogged systems often lead to decreased water flow, and in some cases, complete breakdowns. Additionally, reduced efficiency can increase energy consumption significantly, which is not ideal for your budget. Timely flushing not only extends the heater’s life but also enhances performance and maintains lower energy costs. Therefore, prioritizing this task can make a notable difference in your home’s plumbing health.

How to Flush a Tankless Water Heater

Flushing your tankless water heater is essential for maintaining its efficiency and lifespan. This process involves using a descaling solution, typically white vinegar, to remove mineral buildup inside the unit. Below are the required tools and a detailed step-by-step guide to perform the flushing.

Required Tools and Supplies

To effectively flush your tankless water heater, gather the following tools and supplies:

  • White vinegar or a suitable descaling solution
  • Submersible pump: This will help circulate the vinegar through the system.
  • Flush kit: Most kits include hoses and fittings for easy connection.
  • Isolation valves: These allow you to isolate the heater from the water supply.
  • Bucket: Use this to collect used vinegar or descaler.
  • Pressure relief valve: Ensure that the system is safely depressurized before starting.

Having these items ready will streamline the flushing process and help prevent unnecessary complications.

Step-by-Step Flushing Instructions

  1. Turn Off the Power: Before starting, make sure to turn off the power to the tankless water heater.
  2. Close the Isolation Valves: Shut off the cold water supply valve and the hot water outlet valve to isolate the heater.
  3. Connect the Flush Kit: Attach the flush kit to the isolation valves. Ensure all connections are secure.
  4. Add Vinegar: Pour 4 to 5 gallons of white vinegar into the bucket, then place the submersible pump in the bucket.
  5. Start the Pump: Turn on the pump to circulate the vinegar through the heater. Let it run for about 30 minutes.
  6. Flush the System: After the time is up, disconnect the pump and open the isolation valves to flush the system with fresh water.
  7. Check the Inlet Filter: Inspect and clean the inlet filter during this process to enhance efficiency.

Completing these steps will help ensure your tankless water heater operates efficiently.

Common Mistakes to Avoid

When flushing your tankless water heater, you should avoid certain common pitfalls:

  • Neglecting Safety: Always turn off the power and let the unit cool before starting.
  • Skipping Vinegar: Using only water may not effectively remove mineral buildup. White vinegar is preferred for descaling.
  • Improper Connections: Ensure all hoses and fittings are correctly attached to avoid leaks.
  • Ignoring Maintenance: Regular flushing is crucial. Don’t wait too long between flushes, as prolonged neglect can cause damage.

By being aware of these mistakes, you can achieve better results during maintenance.

Factors Influencing Flushing Frequency

Several elements affect how often you should flush your tankless water heater. Understanding these factors can help you maintain efficient performance and prolong the lifespan of your unit.

Effects of Water Hardness

Water hardness significantly impacts the flushing frequency of your tankless water heater. Hard water contains elevated levels of calcium and magnesium, which can lead to mineral buildup inside the unit. This buildup can impede efficiency and heat transfer.

If you live in an area with hard water, consider flushing your system every 6-12 months. Regular flushing prevents sediment from accumulating and helps maintain optimal performance. You might also notice decreased energy bills as the unit works more efficiently.

Role of a Water Softener or Filter

Using a water softener can greatly influence the frequency with which you need to flush your heater. A water softener reduces the concentration of calcium and magnesium in your water, minimizing the risk of mineral buildup.

As a result, this can extend the flushing interval to once every 12-24 months. If you install a quality filtration system, it can further help in reducing sediments and impurities, which can enhance your unit’s longevity and functionality.

Considerations for Well Water and Soft Water

If you rely on well water, you must be particularly vigilant about flushing. Well water can contain various minerals and sediments that contribute to buildup in your tankless water heater. This might necessitate more frequent flushing, potentially every 6-12 months, depending on your water quality.

On the other hand, if you use soft water, the risk of buildup is lower. In such cases, flushing might only be necessary every couple of years. Always test your water quality to tailor your maintenance schedule according to your specific situation.

Troubleshooting and Expert Recommendations

Maintaining your tankless water heater is crucial for optimal performance. Proper troubleshooting can help you identify issues early, and consulting verified experts ensures you receive the right care for your system.

Recognizing Signs of Issues

You should be aware of specific indicators that suggest your tankless water heater may need attention. Some common signs include:

  • Reduced Water Flow: If you notice a significant decrease in the water flow, it may mean that the system needs descaling.
  • Inconsistent Water Temperature: Fluctuations in temperature can signal mineral buildup affecting performance.
  • Leaks: Observe for any pooling water around the unit, indicating potential leaks that could require immediate attention.

It’s essential to address these issues promptly to prevent further damage and maintain efficiency.

When to Consult Verified Experts

If you notice signs of trouble that you cannot resolve, it’s time to consult a verified expert. Professionals can provide a comprehensive diagnostic of your system. Look for:

  • Certification: Ensure your technician has the appropriate certifications and experience with tankless water heaters.
  • References: Checking reviews or getting recommendations can help you choose someone who understands specific brands like Takagi.

Consulting an expert can ultimately save you money by preventing more costly repairs later.

Manufacturer Guidelines: Takagi and Others

Following manufacturer guidelines is essential for maintaining your tankless water heater, especially for brands like Takagi. Familiarize yourself with the specific maintenance schedule and recommendations, including:

  • Flushing Frequency: Typically, tankless water heaters should be flushed annually to remove mineral buildup.
  • Proper Ventilation: Ensure the unit is well-ventilated to reduce stress on the system.
  • Water Quality: Check that water hardness is within the recommended levels to avoid scale buildup.

Adhering to these guidelines can extend the lifespan of your water heater and optimize performance.

Frequently Asked Questions

Flushing a tankless water heater is an essential aspect of maintenance. Here, you will find answers to common questions that can help ensure your unit operates efficiently and lasts longer.

What is the recommended frequency for flushing a tankless water heater?

You should flush your tankless water heater at least once a year. If you have hard water, consider flushing it every six to nine months. This helps remove mineral buildup that can impede performance.

Can you use vinegar to flush a tankless water heater, and if so, for how long?

Yes, you can use vinegar to flush a tankless water heater. It is advisable to let the vinegar sit in the unit for about 60 minutes to effectively dissolve mineral deposits. Afterward, make sure to flush with clean water.

What are the steps involved in flushing a tankless water heater?

To flush the unit, turn off the power and cold water supply. Connect a hose to the heater’s service valves, and place the other end in a bucket with descaling solution or vinegar. Open the service valves and let the solution circulate for the recommended time before flushing with clean water.

Is a flush kit necessary for tankless water heater maintenance, and what does it typically include?

A flush kit is not strictly necessary but makes the process easier. A typical kit includes a pump, hoses, and fittings required for flushing. This equipment helps to efficiently circulate the cleaning solution through the heater.

What is the average cost of professional tankless water heater maintenance?

The cost for professional maintenance generally ranges from $100 to $300, depending on the service provider and region. This includes the flushing process and any additional checks on your unit.

Are there any specific flushing procedures for a Rinnai tankless water heater?

Rinnai units typically require a similar flushing process. Ensure to follow the manufacturer’s guidelines, which might include specific solutions or conditions. Flushing should be done annually, along with routine checks to maintain efficiency.

How Does Kitchen Ventilation Servicing Improve Air Quality in Your Home?

Proper kitchen ventilation is crucial for maintaining indoor air quality, especially in spaces where cooking occurs frequently. Regular servicing of kitchen ventilation systems significantly improves air quality by effectively removing pollutants and moisture generated during cooking. By ensuring that your ventilation system operates efficiently, you can prevent the buildup of harmful contaminants, which can have detrimental effects on your health and safety.

Neglecting kitchen ventilation can lead to poor air quality, causing respiratory issues and lingering odors. When a ventilation system is properly serviced, it enhances airflow and reduces the concentration of indoor air pollutants, creating a fresher and healthier cooking environment. This proactive approach not only benefits your health but also extends the lifespan of your kitchen appliances.

Investing in kitchen ventilation servicing is a wise choice for any homeowner. By focusing on preventive maintenance, you can ensure that your ventilation system continues to function optimally, safeguarding your home from potential air quality issues while enhancing your overall cooking experience.

Understanding Kitchen Ventilation

Kitchen ventilation is essential for maintaining indoor air quality and ensuring a safe cooking environment. It involves various components and techniques, including both natural and mechanical systems. Understanding these elements is critical to making informed choices about your kitchen ventilation.

Components of Kitchen Ventilation Systems

A well-functioning kitchen ventilation system consists of several key components. The ventilation hood captures smoke, steam, and odors produced during cooking. It is often equipped with filters to reduce grease and particulates.

Ducts direct the contaminated air outside or to a filtration system. High-quality ducts minimize air leaks, ensuring efficient airflow.

Fans play a crucial role in moving air. They can be found in both natural and mechanical systems. Depending on your setup, you might also have additional features like makeup air units that bring in fresh air to maintain pressure balance. Regular servicing of these components is vital to ensure they operate efficiently and effectively.

Comparing Natural and Mechanical Ventilation

Natural ventilation relies on passive air movement through windows, doors, and vents. It can be effective in moderate climates but may not sufficiently remove cooking pollutants. This type of system depends heavily on outdoor conditions and may lead to inconsistent indoor air quality.

Mechanical ventilation uses fans and ductwork to actively remove pollutants. It is generally more reliable for maintaining air quality in kitchens, especially those that generate a lot of smoke or odors. A properly designed mechanical system can provide continuous airflow and is often equipped with filters to enhance air quality.

Each system has its benefits and limitations, and your choice should reflect your cooking habits, kitchen layout, and climate conditions.

Effects of Cooking on Indoor Air Quality

Cooking can significantly impact indoor air quality due to the release of various pollutants. These pollutants may include particulate matter and gases that can affect your health. Understanding these effects can help you make informed decisions about your kitchen environment.

Cooking Pollutants and Particulate Matter

When you cook, especially with gas or oil, your kitchen can become filled with pollutants. Common cooking pollutants include nitrogen dioxide and carbon monoxide, both of which can affect respiratory health.

Particulate matter (PM) is another significant concern. PM consists of tiny particles that can penetrate the lungs and even enter the bloodstream. Studies indicate that these pollutants can exceed outdoor air quality standards, making effective mitigation essential.

Proper kitchen ventilation can help reduce these harmful emissions. Without adequate airflow, the concentration of indoor pollutants can increase, leading to potential health risks.

The Role of Range Hoods in Air Quality

Range hoods play a crucial role in improving indoor air quality during cooking. A properly installed and functioning range hood can effectively capture and expel smoke, steam, and cooking fumes.

When using a vented range hood, make sure it is powerful enough to handle the cooking activity. Many range hoods are designed to remove pollutants right at the source, significantly lowering indoor air pollution levels.

Regular maintenance of your range hood is vital for optimal performance. Clean filters and ensure the exhaust system is free from obstructions to maximize air quality benefits. Investing in quality ventilation not only improves health but can also enhance the overall comfort of your home environment.

Maintenance and Servicing of Ventilation Systems

Proper maintenance of your ventilation system is crucial for ensuring optimal air quality in your kitchen. Regular servicing helps prevent issues that can compromise efficiency and health.

Regular Maintenance for Optimal Performance

Conducting regular maintenance on your ventilation system is essential for its longevity and efficiency. Schedule service intervals at least twice a year to keep the system running smoothly. During these visits, filters should be inspected and replaced if necessary. Clogged filters can significantly reduce airflow and lead to poor air quality.

Furthermore, cleaning ducts and hoods removes grease buildup, which can be a fire hazard. Maintain electrical components and check for signs of wear or damage. By proactively addressing these areas, you can extend the lifespan of your system and minimize costly repairs.

Identifying Common Issues in Ventilation Equipment

Recognizing common issues early can save you time and resources. One frequent problem is insufficient airflow, often caused by obstructed ducts or dirty filters. If you notice unusual noises or odors, this may indicate mechanical issues or buildup in the system.

Frequent hotspots in your kitchen may signal a malfunctioning exhaust system. Regular checks will allow you to spot and resolve these problems before they escalate. Prompt servicing not only enhances air quality but also ensures compliance with health regulations, making your kitchen safer for staff and customers.

Improving Health and Safety

Proper kitchen ventilation servicing plays a critical role in maintaining a safe and healthy cooking environment. It mitigates exposure to harmful contaminants and reduces the risk of fire hazards, ensuring that your kitchen remains a secure space for both cooking and dining.

Reducing Exposure to Hazardous Contaminants

Effective ventilation systems are essential for reducing exposure to hazardous indoor pollutants such as volatile organic compounds (VOCs), radon, and carbon monoxide. When cooking, these contaminants can accumulate, impacting indoor air quality (IAQ) and potentially causing health problems.

A well-designed ventilation system captures and removes these pollutants, replacing them with fresh air. Regular servicing of these systems ensures that filters are clean and functioning correctly. This helps minimize the risk of respiratory issues and allergies, contributing to a healthier kitchen atmosphere.

To enhance your kitchen’s air quality, consider installing high-efficiency range hoods. These devices not only clear the air but also improve the overall comfort of the cooking environment.

Preventing Fire Hazards and Grease Buildup

Fire hazards in kitchens often arise from grease buildup, which can occur in ducts and vents if not properly maintained. Grease particles from cooking can accumulate over time, creating a flammable layer in ventilation systems.

Regular cleaning and maintenance of these systems significantly reduce this risk. A proper kitchen ventilation service program includes inspection and cleaning of exhaust systems to prevent grease accumulation. This protects not only your kitchen but also the safety of your entire home.

Installing an automatic fire suppression system can further enhance safety. These systems are designed to detect heat and suppress fires before they can escalate, ensuring a safer cooking environment. Prioritizing ventilation maintenance will help you create a safer and healthier kitchen space.

Energy Efficiency and Cost Considerations

Effective kitchen ventilation systems can significantly enhance energy efficiency while reducing operating costs. Understanding the relationship between ventilation and energy consumption, as well as evaluating the cost-benefits of efficient systems, can lead to substantial savings and improved indoor air quality.

Impact of Ventilation on Energy Consumption

Proper kitchen ventilation directly influences energy consumption. An efficient system circulates air and minimizes the workload on HVAC systems. By removing heat and humidity produced during cooking, you can maintain a comfortable temperature without overworking your air conditioning.

Consider the following benefits:

  • Reduced Energy Costs: Lower energy bills due to decreased reliance on cooling systems.
  • Less Greenhouse Gas Emissions: Efficient ventilation leads to a smaller carbon footprint.
  • Optimized Performance: HVAC systems operate more effectively when not burdened by excessive heat.

Keeping your ventilation system well-maintained ensures it operates at peak efficiency, contributing to overall energy savings.

Cost-benefits of Efficient Kitchen Ventilation

Investing in high-quality kitchen ventilation may seem costly upfront, but the long-term savings are noteworthy. Energy-efficient systems not only lower your monthly utility bills but also reduce maintenance costs.

Key advantages include:

  • Lower Operating Expenses: Better energy performance leads to reduced energy costs.
  • Increased System Longevity: Regular maintenance can extend the lifespan of your ventilation and HVAC systems.
  • Improved Health: Higher air quality reduces the potential for health issues, which can lead to less incurred medical costs.

By prioritizing efficient ventilation, you not only enhance comfort but also invest in a sustainable solution that pays off over time.

Frequently Asked Questions

Maintaining your kitchen ventilation system is essential for ensuring clean and healthy air in your home. Addressing specific concerns can help you understand how regular servicing impacts air quality and the benefits of a well-functioning system.

What are the benefits of regular maintenance on kitchen ventilation systems for indoor air quality?

Regular maintenance of your kitchen ventilation system can significantly enhance indoor air quality. It ensures that all components are functioning efficiently, removing grease, smoke, and odors that can accumulate over time. This leads to healthier air for you and your family.

In what ways does a well-serviced kitchen ventilation system contribute to air purity?

A well-serviced kitchen ventilation system effectively captures airborne pollutants during cooking. By eliminating these contaminants, it prevents them from circulating throughout your home, maintaining a cleaner and more breathable environment.

How does a kitchen exhaust system reduce pollutants in the air?

A kitchen exhaust system works by drawing in air from the kitchen and filtering it. It expels harmful pollutants outside, greatly reducing their concentration indoors. This process is crucial during cooking, where smoke and particles can quickly accumulate.

Why is it important to service kitchen ventilation systems for maintaining a healthy indoor environment?

Servicing your kitchen ventilation system is vital to prevent the buildup of grease and other contaminants. Without regular cleaning, these can lead to health risks and poor air quality. Proper maintenance supports a fresher environment.

What improvements to air quality can be expected after professional kitchen ventilation cleaning?

After professional cleaning, you can expect noticeable improvements in air quality. The removal of built-up grease and debris allows for better airflow, resulting in fewer odors and a reduction in airborne pollutants that can affect your health.

How does cleaning and servicing of HVAC systems impact kitchen air quality?

Cleaning and servicing HVAC systems help eliminate dust, allergens, and other pollutants that can affect kitchen air quality. When air circulates freely through clean ducts, it enhances overall ventilation and reduces the risk of contamination from stagnant air.

How to Clean Water Heater Sediment: A Step-by-Step Guide for Optimal Performance

Maintaining your water heater is essential for its efficiency and longevity. Over time, sediment can build up inside the tank, reducing performance and leading to costly repairs. Cleaning water heater sediment is a straightforward process that can greatly enhance the lifespan of your appliance and ensure it runs effectively.

By regularly flushing the tank, you can remove sediment that accumulates from minerals in the water. This simple maintenance task not only improves heating efficiency but also safeguards against unexpected breakdowns. By taking the time to clean out your water heater, you are investing in the reliability of your home’s hot water supply.

With a few easy steps, you can tackle this important maintenance task yourself. You’ll find that knowing how to clean sediment buildup will empower you as a homeowner, saving you both time and money in the long run.

Understanding Water Heater Sediment

Sediment build-up in water heaters can lead to reduced efficiency and increased costs. Knowing its nature, causes, and impacts can help you maintain your water heater more effectively.

What Is Sediment Build-Up

Sediment build-up refers to the accumulation of minerals and debris at the bottom of your water heater tank. This typically consists of mineral deposits like calcium and magnesium, especially common in areas with hard water. As hot water rises and cool water enters, these particles settle. Over time, they can create a thick layer, which may restrict water flow and heating efficiency. Regular inspection and maintenance are essential to prevent significant build-up, as neglecting sediment can lead to costly repairs or replacements.

Common Causes of Sediment in Water Heaters

Several factors contribute to sediment accumulation in your water heater. The primary cause is water quality; if your supply contains high levels of minerals, sediment formation is more likely. Utilizing hard water can exacerbate this issue. Other causes include infrequent maintenance or a lack of flushing. Seasonal changes in water supply can also introduce additional debris. Additionally, heaters that operate at lower temperatures might not effectively dissolve these minerals, allowing them to accumulate faster.

Impacts of Sediment on Water Heater Performance

Sediment can significantly affect the performance of your water heater. Even a small amount can lead to reduced heating efficiency, increasing energy costs. Sediment acts as an insulator, preventing heat from effectively transferring to the water. This can result in longer heating times and inadequate hot water supply. Moreover, excessive sediment build-up can cause corrosion and damage to the tank, leading to leaks or complete failure. This not only disrupts your access to hot water but can also incur substantial repair costs. Regular maintenance helps mitigate these risks and ensures optimal performance.

Signs Your Water Heater Needs Sediment Cleaning

Your water heater’s performance can be significantly affected by sediment accumulation. Recognizing the signs early can prevent further issues and maintain efficient operation. Below are the symptoms to watch for, which indicate that your water heater may need immediate attention.

Symptoms of Sediment Accumulation

Sediment accumulation typically manifests in several noticeable ways. One of the first signs is a reduction in hot water availability. This happens when the buildup of minerals and debris settles at the bottom of the tank, taking up space that hot water should occupy.

You might also notice cloudy water or discoloration. If your hot water appears rusty or contains particles, this is often due to corrosion or sediment disrupting the water quality. Regularly checking for visual changes can help you catch any potential problems early.

Consistent monitoring of these symptoms helps maintain excellent water quality and extends the lifespan of your water heater.

Reduced Hot Water Pressure

If you’ve noticed a drop in hot water pressure, sediment buildup could be the culprit. Sediment can obstruct water lines or accumulate near the heating element, reducing flow.

You can test your hot water pressure by turning on the hot water faucet. If the pressure is noticeably weaker than before, it may be time to check for sediment. Regular maintenance helps prevent this problem, ensuring a steady supply of hot water for daily needs.

Be sure to inspect both consistency and volume during your hot water usage. Early detection can save you from more extensive repairs down the line.

Unusual Noises and Debris

Unusual noises coming from your water heater can indicate sediment buildup. Common sounds include popping or rumbling noises, which occur when the heating element works harder to heat water around the sediment.

It’s also essential to pay attention to any debris that may escape the faucet. If you see small flecks of sediment or rust in your hot water, the accumulation could be reaching problematic levels.

This kind of cleaning issue calls for immediate action. Addressing unusual noises or visible debris can enhance performance and prevent further damage.

Evaluating Water Quality Issues

Poor water quality can stem from sediment buildup in your hot water heater. If you notice changes in taste, odor, or clarity, sediment removal may be necessary.

Cloudy or foul-smelling water typically signifies mineral accumulation or potential bacterial growth, both of which can affect your overall water quality. Regularly testing your water can help you stay ahead of these issues.

Investing time in evaluating your water quality leads to better health outcomes and more reliable hot water experiences. Awareness of these factors can guide you in cleaning and maintaining your water heater effectively.

Preparing for the Sediment Removal Process

Before starting the sediment removal process, it’s essential to ensure that you’re well-prepared. The right tools and safety measures will streamline the procedure and enhance safety. Familiarizing yourself with turning off your water supply and power will further ensure a smooth experience.

Gathering Essential Tools and Materials

To effectively clean sediment from your water heater, gather the necessary tools and materials beforehand. You’ll need:

  • Garden Hose: Make sure to have a long garden hose that can reach your outdoor area for draining the tank.
  • Bucket: A bucket can be helpful for any excess water.
  • Funnel: This can aid in pouring and managing water if needed.
  • Wrench: Use this to open or close valves securely.
  • Towels: Keep some towels handy to wipe up any spills during the process.

Having everything ready will make your job easier and more efficient, minimizing the chance of forgetting anything during the procedure.

Safety Precautions for Home Repair

Safety is a priority when working on your water heater. Here are important precautions:

  • Protective Gear: Wear gloves and goggles to protect against hot water splashes and debris.
  • Ventilation: Ensure the area is well-ventilated to minimize inhalation of any gases, especially if you have a gas water heater.
  • Clear Surroundings: Remove any flammable materials around the heater to avoid accidents.
  • Inform Family: Let others in your home know you will be working on the heater to prevent accidental interruptions.

Taking these steps will enhance your safety while performing the task, making it a more secure experience.

Turning Off Power and Water Supply

Before proceeding, it’s critical to turn off the power and water supply to your water heater:

  • Electric Water Heater: Locate the power switch or circuit breaker and turn it off. This prevents electrical hazards while you work.
  • Water Supply: Shut off the cold-water valve connected to the water heater to stop water from entering the tank.
  • Hot Water Faucet: Open a nearby hot water faucet to relieve pressure in the system.

These actions are crucial for ensuring that you can work safely without risking electric shocks or leaks. It sets the groundwork for the entire sediment removal process.

Step-by-Step Guide to Cleaning Water Heater Sediment

Cleaning sediment from your water heater is essential for maintaining its efficiency and longevity. This guide provides a clear process to help you manage sediment buildup and ensure your water heater operates effectively.

Draining the Tank with a Garden Hose

Start by turning off the power supply to your electric water heater. This ensures safety while working on the unit. Next, connect a garden hose to the drain valve located at the base of the tank. Position the other end of the hose in a suitable drainage area, such as a floor drain or outside.

Open a hot water faucet in your home to allow air into the system, which helps with the draining process. Once the air is introduced, open the drain valve, letting the water flow out. Allow the tank to drain completely. Keep an eye on the hose to ensure it doesn’t clog with sediment.

Flushing Out Sediment and Debris

Once the tank is empty, it’s vital to flush out any remaining sediment. With the drain valve still open, turn off the cold water supply valve. Then, briefly open the cold water valve to let water flow back into the tank. This process stirs up any lingering debris.

Let the water run for a few minutes, then close the drain valve and remove the garden hose. Open the cold water valve fully to fill the tank again and switch on the power supply. This step ensures that any sediment is cleared out completely, enhancing the efficiency of your water heater.

Cleaning the Drain Valve and Dip Tube

After flushing, inspect the drain valve for any debris that may be stuck. If it’s clogged, clean it thoroughly. A small brush can help dislodge sediment from inside the drain valve. Ensure the valve is functional by opening and closing it a few times.

Next, locate the dip tube, which directs cold water to the bottom of the tank. Check for blockages or corrosion. Cleaning the dip tube can greatly improve the water heater’s performance by ensuring proper water flow. If the dip tube is damaged, consider replacing it for optimal efficiency.

Inspecting Anode Rod and Sacrificial Anode

An essential part of maintaining your water heater is to check the anode rod, which helps prevent corrosion inside the tank. Access the anode rod by removing the top cover of the water heater. Visibly inspect for significant wear or corrosion.

A well-maintained anode rod typically lasts several years, but if it is thin or corroded, replace it. You may find different types, such as magnesium or aluminum rods. A new sacrificial anode will extend the life of your water heater by absorbing corrosive elements, ensuring that the tank remains intact and functional longer.

Preventing Future Sediment Build-Up

To maintain the efficiency of your water heater, it’s crucial to take proactive steps that prevent sediment accumulation. By focusing on specific interventions, you can significantly extend the lifespan of your water heater and improve overall performance.

Installing Water Softeners and Filtering Systems

Installing a water softener can greatly reduce sediment build-up. Hard water contains minerals like calcium and magnesium, which contribute to scale accumulation over time. A water softener works by replacing these minerals with sodium ions, resulting in softer water that minimizes sediment formation.

In addition to water softeners, consider a filtering system. This system will help capture contaminants before they enter your water heater. Look for filters that are designed to tackle sediment, rust, and other impurities. Regularly maintaining these systems ensures that your water remains clean and reduces wear on your water heater.

Regular Maintenance Procedures

Implementing a schedule for regular maintenance is essential for preventing sediment build-up. At a minimum, you should flush your water heater once a year. This process involves draining the tank to remove built-up sediment.

In addition to flushing, check the anode rod periodically. This rod helps protect your water heater from corrosion. If the rod is significantly corroded, replace it to ensure continued protection. Regular checks and flushes not only improve performance but also extend the longevity of your system.

Adjusting Thermostat for Optimal Heat Transfer

Setting your water heater’s thermostat correctly can also prevent sediment build-up. Keeping the temperature too high can accelerate mineral deposits. A temperature setting between 120°F and 140°F is generally recommended for efficient heat transfer without excessive sediment creation.

When the temperature is optimized, it promotes better circulation within the tank. This circulation helps to dissolve any minerals that might settle. Regularly review and adjust your thermostat setting as needed, especially if you notice changes in water quality or heater performance. This simple adjustment can have lasting benefits for your water heater’s efficiency.

When to Seek Professional Assistance

When dealing with water heater sediment, certain situations may require professional attention. Understanding when to seek help can ensure the longevity of your tank and provide peace of mind.

Identifying Complex Plumbing Issues

If you encounter persistent issues like low water pressure or frequent temperature fluctuations, it’s wise to consult a plumbing expert. These signs can indicate underlying problems such as pipe obstructions or corrosion in your system.

Often, complex plumbing issues are not easily identifiable and can worsen without proper diagnosis. A licensed plumber can efficiently identify these problems and recommend a targeted solution, saving you time and potential future costs.

Regardless of whether you have an electric water heater or a gas model, addressing complicated concerns promptly can prevent further damage and ensure the safe operation of your system.

Understanding Warranty and Repair Services

Check if your water heater is still under warranty before attempting repairs. Many warranties require professional service to remain valid. If you perform repairs yourself or hire an unqualified technician, you risk voiding this essential coverage.

In some cases, using services like JustAnswer can connect you with professionals who can advise on warranty terms and repair options. They can assist you in determining the best course of action based on your specific water heater model and situation.

If repairs are needed, choose a service that understands the nuances of your warranty. This can save you from incurring unexpected expenses.

Upgrading Older or Inefficient Water Heaters

If your water heater is over ten years old or showing signs of inefficiency, replacing it may be a better option than repairs. Newer models offer enhanced energy efficiency and can reduce your monthly utility bills.

Consult a professional to evaluate whether an upgrade is necessary. They can help you select the right model for your needs and ensure proper installation.

Given the significant advancements in hot water heater technology, upgrading can also enhance your home’s comfort and convenience. An informed decision can lead to long-term savings, making professional guidance essential in this process.

Frequently Asked Questions

Understanding how to manage sediment in your water heater is crucial for maintaining its efficiency. Here are answers to common questions that can guide you in addressing sediment issues effectively.

What are the symptoms indicating the presence of sediment in a water heater?

You may notice several symptoms of sediment buildup. These include a decrease in hot water supply, unusual noises like popping or rumbling, and discolored or cloudy water. If your water heater is taking longer to heat water, sediment may be the culprit.

What is the recommended procedure for flushing sediment from a water heater?

To flush sediment from your water heater, start by turning off the power or gas supply. Next, shut off the cold water supply and attach a hose to the drain valve. Open the valve and allow the water to flow out until it runs clear. Be cautious, as water can be very hot.

Are there any dangers associated with sediment buildup in a hot water tank?

Sediment buildup can lead to a number of risks. It may cause the tank to overheat, which can damage the heating elements or even result in a tank failure. Additionally, sediment can reduce your water heater’s efficiency, leading to higher energy costs.

How can sediment accumulation in a water heater be prevented?

To prevent sediment buildup, consider flushing your water heater regularly, ideally every six months to a year. You can also use a water softener if you have hard water, reducing mineral deposits. Regular maintenance checks also help in identifying issues early.

Can vinegar be used to clean sediment from a hot water heater, and if so, how?

Yes, vinegar can effectively clean sediment. Pour a gallon of white vinegar into the cold water line, and let it sit for an hour to help dissolve sediment. Afterward, flush the tank with clean water to remove any remaining debris.

What does the sediment in a water heater typically look like?

Sediment in a water heater often appears as a layer of rust or mineral deposits, which may look like small flakes or granules. It typically collects at the bottom of the tank and can vary in color from yellow to brown or even white, depending on the minerals present in your water.

How to Prevent Dryer Vent Blockages: Essential Tips for Safety and Efficiency

Preventing dryer vent blockages is essential for maintaining the efficiency and safety of your laundry appliances. Regularly cleaning your lint screen, scheduling professional maintenance, and ensuring proper vent installation are key steps in avoiding clogs. Ignoring these practices can lead to more significant issues, including fire hazards and inefficiencies that cost you money.

Understanding the common causes of dryer vent blockages can further empower you to take proactive measures. Factors such as lint buildup, incorrect venting, and even the type of dryer you use play significant roles in the health of your dryer system. By staying informed and implementing these preventative strategies, you can protect your home and extend the lifespan of your dryer.

The peace of mind that comes with a well-maintained dryer vent is invaluable. You can prevent unexpected repairs and ensure your appliance operates at peak performance by taking these measures seriously. Keep reading to learn detailed steps and tips for maintaining a blockage-free dryer vent.

Understanding Dryer Vent Blockages

Dryer vent blockages are a common issue that can significantly affect your appliance’s efficiency and safety. Recognizing the factors contributing to these blockages will help you take proactive steps in maintaining your dryer.

The Role of Lint in Clogging Vents

Lint is the primary culprit behind clogged dryer vents. Every time you run your dryer, fibers from your clothes break free and accumulate in the vent system. Over time, this buildup can restrict airflow, causing your dryer to work harder.

To minimize lint accumulation, consider the following:

  • Clean the lint trap: Empty it after each use to reduce initial buildup.
  • Inspect vents regularly: Look for obstructions that may have collected.
  • Use high-quality lint traps: They can capture more lint before it enters the vent system.

Taking these steps can significantly reduce the risk of clogs, ensuring your dryer operates efficiently and safely.

Differences Between Gas and Electric Dryers

Both gas and electric dryers can experience vent blockages, but their operational mechanics differ slightly. A gas dryer uses gas to generate heat, while an electric dryer relies on electricity.

With gas dryers, it’s crucial to ensure proper ventilation to prevent dangerous gas buildup, which can occur with blockages. Electric dryers, on the other hand, may not present immediate hazards but still experience decreased efficiency with clogged vents.

Key considerations include:

  • Vent termination: Ensure both types have proper venting to the outside.
  • Maintenance schedules: Implement regular cleaning for both systems to prevent lint buildup.

By understanding these differences, you can tailor your maintenance efforts, keeping your dryer running safely and effectively.

Regular Maintenance and Cleaning

Maintaining and cleaning your dryer vent is crucial for preventing blockages. Regular upkeep not only improves efficiency but also enhances safety. Below are essential methods for keeping your dryer vent system in optimal condition.

How to Clean the Lint Screen

Cleaning the lint screen should be a routine practice after every dryer cycle. This step is critical as lint buildup can restrict airflow and contribute to overheating.

  1. Remove the Lint Screen: Pull it out gently from the dryer.
  2. Clean the Screen: Use your fingers or a soft brush to remove lint. Ensure no lint remains in the screen mesh.
  3. Wash Occasionally: Wash the lint screen with warm, soapy water every few months to remove residue.

Maintaining a clean lint screen not only enhances drying efficiency but also extends the life of your dryer.

Using a Dryer Cleaning Kit

Investing in a dryer cleaning kit can simplify the maintenance process. These kits typically include specialized brushes and attachments designed to reach deep into the vent system.

  1. Disconnect the Dryer: Always unplug the dryer before cleaning.
  2. Use the Brush: Insert the brush into the vent opening and rotate it to dislodge lint and debris.
  3. Vacuum the Vent: Attach a vacuum cleaner to the brush to suction out the loosened debris.

Regularly using a cleaning kit helps you target hard-to-reach areas, reducing fire hazards and improving dryer efficiency.

Hiring an Appliance Technician

For a thorough vent cleaning, consider hiring an appliance technician. Professionals have the tools and expertise to perform comprehensive cleaning and maintenance.

  1. Schedule Annual Inspections: Plan to have your vent professionally cleaned at least once a year.
  2. Check Credentials: Choose a technician with experience in dryer vent cleaning.
  3. Discuss Services: Ensure the technician covers all aspects of cleaning, including the internal vent and ductwork.

Engaging a professional can provide peace of mind, knowing your dryer vent system is functioning optimally and safely.

Preventative Measures

Maintaining clear dryer vents is essential for efficient operation and fire safety. Implementing specific measures can significantly reduce the likelihood of blockages in your dryer vent system.

Proper Installation of Vent Pipe

The installation of your vent pipe plays a crucial role in preventing clogs. Use a metal vent pipe rather than plastic, which is more prone to lint buildup and can be a fire hazard. Ensure the vent pipe is as straight as possible with minimal bends; each bend can trap lint and debris.

Make sure to use the appropriate diameter for your vent pipe; typically, a 4-inch diameter is recommended. Seal the connections with metal tape to prevent gaps where lint can escape and accumulate. Regularly inspect the vent pipe for any signs of damage or obstruction, as this can lead to significant problems over time.

Establishing a Cleaning Schedule

Routine maintenance is vital for keeping your dryer vent clean. You should clean the lint filter after each load to minimize lint buildup in the system. Schedule a professional inspection and cleaning at least once a year, especially if you frequently use your dryer.

When selecting a service, look for companies that specialize in dryer vent cleaning, as they have the right tools and expertise. During your cleaning schedule, also check the vent pipe to ensure it is free of any blockages or damage. This proactive approach will help maintain your dryer’s efficiency and safety.

Avoiding Empty Dryer Cycles

Avoid running your dryer when it’s empty, as this can contribute to inefficient operation. When there’s no load, the dryer runs longer than necessary, which can cause excess heat to build up in the venting system. This heat can exacerbate any existing lint buildup.

Instead, bundle small loads together for drying whenever possible. This ensures that your dryer operates under optimal conditions while reducing the risk of lint accumulation in the vent. Additionally, keep the area around your dryer free from clutter to ensure proper airflow, further minimizing the chances of blockages.

Recognizing Warning Signs

Understanding the warning signs of clogged dryer vents can help you take proactive measures. By recognizing these indications, you can prevent potential hazards and maintain your appliance efficiently.

Indications of Clogged Vents

You may notice several signs that your dryer vents are clogged. One of the primary indications is clothes taking longer than usual to dry. If your drying cycle seems prolonged, it might indicate airflow issues.

Other signs include:

  • Hot dryer exterior: If the outside of the dryer is hot to the touch, it suggests that the heat is not escaping as it should.
  • Excess lint: A buildup of lint around the dryer or in the lint trap often signifies that the exhaust path is obstructed.
  • Burning smell: If you detect a burning odor while the dryer is in use, this is a major warning sign that should not be ignored.

Prompt attention to these signs can prevent further issues.

When to Perform Immediate Cleaning

Immediate cleaning of your dryer vent is essential if you encounter specific warning signs. If you notice that clothes remain damp or excessively hot after a drying cycle, you should act quickly.

Additionally, if the dryer produces unusual noises, like banging or rattling, this could point to a serious blockage.

Consider cleaning your dryer vent if you observe any of the following:

  • Lint accumulation: If lint buildup is visible outside the vent or in the exhaust duct, it needs immediate attention.
  • Unusual appliance behavior: If the dryer frequently shuts off mid-cycle, there could be a dangerous blockage.

Regular dryer vent cleaning is vital for not only maintaining efficiency but also preventing potential fire hazards associated with clogged ducts.

Mitigating Risks Associated with Blocked Vents

Blocked dryer vents can lead to serious hazards, primarily increasing the risk of fire and reducing the efficiency of your dryer. Addressing these risks requires specific actions to ensure your home remains safe and your appliances function properly.

Preventing Potential Fire Hazards

To reduce the fire hazard associated with dryer lint accumulation, regular cleaning is essential. Schedule professional dryer vent cleaning at least once a year to diminish lint buildup. This proactive step significantly lowers the chance of lint igniting due to the heat generated during drying cycles.

Inspect your dryer and venting system for any signs of blockage. Look for kinks or sharp bends in the ductwork that can trap lint. Make sure the vent termination on the exterior of your home is clear as well.

You can also enhance airflow by using short, metal ducts instead of flexible plastic ones. This change not only improves ventilation but also makes cleaning easier. Keeping your dryer’s lint filter clean after each load further aids in minimizing risks. Implementing these steps will help protect your home and your family from fire hazards linked to dryer vent blockages.

Frequently Asked Questions

Understanding the common concerns related to dryer vent blockages can help you maintain a safer and more efficient home. Here are answers to some frequently asked questions that address identification, maintenance, and prevention strategies.

How can I identify the signs of a clogged dryer vent?

Look for several key indicators of a clogged dryer vent. If your dryer takes longer than usual to dry clothes, it may be a sign of blockage. Additionally, if you notice a burning smell or excessive heat coming from the dryer, these are critical warnings that require immediate attention.

What are the best practices for maintaining a clear dryer vent?

To keep your dryer vent clear, regularly clean the lint filter before each load. Additionally, ensure that the vent duct is free of kinks and turns that can trap lint. Install a vent cover that can be easily cleaned to prevent debris buildup from outside sources.

How often should dryer vents be cleaned to prevent blockages?

It is advisable to clean your dryer vents at least once a year. If you do a lot of laundry or notice any symptoms of blockage, consider cleaning them more frequently. Regular maintenance helps to prevent severe blockages and fire hazards.

In what ways can a dryer vent become obstructed?

Dryer vents can become obstructed by lint buildup, which is the most common cause. Other factors include foreign objects accidentally getting into the vent, birds or insects building nests, and creases or bends in the ducting that trap debris.

What tools are recommended for effective dryer vent cleaning?

For effective dryer vent cleaning, you can use a lint brush, vacuum with a long hose attachment, and specialized dryer vent cleaning kits that usually include brushes and flexible rods. These tools help to remove lint and debris from hard-to-reach areas.

Can installing a dryer vent booster reduce the risk of vent blockages?

Yes, installing a dryer vent booster can significantly reduce the risk of blockages. A booster fan can improve airflow, especially in long vent runs, and help prevent lint accumulation. This is especially useful for homes with complicated venting setups.

Can I Use Compressed Air to Clean Refrigerator Coils? A Practical Guide

Cleaning refrigerator coils is essential for optimal appliance performance, and many homeowners wonder about the best methods to do so. You can use compressed air to clean refrigerator coils effectively, but it requires careful consideration to avoid potential downsides. Using compressed air can dislodge dust and debris in hard-to-reach areas, making it a convenient option when performed correctly.

In addition to compressed air, several other methods exist for cleaning refrigerator coils. Each has its advantages and possible drawbacks, depending on your specific situation. This article will guide you through the best practices for maintaining your refrigerator coils, ensuring efficiency and longevity for your appliance.

Understanding Refrigerator Coils

Refrigerator coils play a crucial role in your appliance’s operation. They help maintain energy efficiency by transferring heat away from the interior to keep your food cold.

There are two main types of coils in a refrigerator:

  • Condenser Coils: Located on the back or bottom, these coils release the heat absorbed from inside the fridge to the outside air.
  • Evaporator Coils: Found inside the fridge, they absorb heat, allowing the refrigerant to cool the air circulating within your appliance.

Keeping these coils clean is essential. Dust and debris can accumulate, hindering their performance. When coils are dirty, your refrigerator has to work harder, leading to increased energy consumption and reduced lifespan.

Using compressed air is an effective method to clean condenser coils. It reaches tight spaces, dislodging dust without causing damage. For best results, make sure your refrigerator is unplugged before cleaning.

Regular maintenance of your refrigerator coils not only improves energy efficiency but also saves you money in the long run. Clean coils can lead to better cooling performance and reduced wear, enhancing the overall lifespan of your appliance.

Benefits of Cleaning Refrigerator Coils

Cleaning refrigerator coils brings several advantages that enhance performance and efficiency.

1. Improved Energy Efficiency
Dirty coils can hinder heat transfer, making your refrigerator work harder. Regular cleaning can lead to more efficient operation, reducing energy consumption and lowering your electricity bills.

2. Enhanced Cooling Performance
Clean coils help maintain optimal cooling. This means your food stays fresher for longer, reducing spoilage and waste.

3. Extended Appliance Lifespan
By keeping your refrigerator coils clean, you support the longevity of your appliance. Less strain on the system translates to fewer repairs and a longer lifespan.

4. Easy Maintenance
Using tools like compressed air can simplify the cleaning process. This method allows you to reach tight spaces and effectively remove dust and debris.

5. Environmental Benefits
Increased energy efficiency not only saves you money but also reduces your carbon footprint. A well-maintained refrigerator is better for the planet.

Regularly cleaning your refrigerator coils is a simple yet effective step in home maintenance. This proactive measure can result in significant benefits for both your wallet and the environment.

Preparing to Clean Refrigerator Coils

Cleaning refrigerator coils is essential for maintaining efficiency. Before you start, focus on safety and gather the necessary tools. This preparation will make the cleaning process effective and straightforward.

Safety Considerations

Before you begin, ensure your safety by unplugging the refrigerator. This eliminates the risk of electric shock while working on the coils.

Wear Safety Gear: Use safety goggles and a dust mask. These items protect your eyes and lungs from dust and debris.

Secure the Area: Clear the area around the refrigerator. This reduces the risk of tripping over items and gives you space to work comfortably.

Avoid Sharp Objects: When cleaning, avoid using sharp tools that could damage the coils. This can lead to costly repairs.

Be Aware of Possible Dust: Dust accumulation can be significant. Use a vacuum with a HEPA filter to minimize dust spread in your home.

Gathering Necessary Tools

Having the right tools is crucial for an effective cleaning process. Start by gathering the following items:

  • Coil Brush: This tool is specifically designed to reach between coils, making it efficient for removing dust.
  • Air Compressor: Using an air compressor can blow away stubborn dust that a vacuum may miss.
  • Shop Vac: A shop vac can quickly collect debris from the area, making cleanup easier.
  • Compressed Air Cans: These are useful for reaching tight spots where larger tools cannot fit.
  • Soft Cloths: Use these for wiping down areas around the coils after the dust has been removed.

Preparing properly means you can clean the coils safely and effectively. By focusing on safety and having the right tools, you ensure the process is smooth and beneficial for your refrigerator’s performance.

Step-by-Step Guide to Cleaning Coils with Compressed Air

Cleaning your refrigerator coils with compressed air can effectively remove dust and debris, enhancing your appliance’s efficiency. Follow these steps for optimal results.

Accessing the Coils

To begin, locate the coils on your refrigerator. They are usually found either at the back or beneath the appliance.

  1. Unplug the Refrigerator: Safety first. Disconnect the refrigerator from the power source to avoid any electrical hazards.
  2. Move the Refrigerator: If the coils are at the back, carefully pull the refrigerator away from the wall. If they’re underneath, ensure you have sufficient space to work.
  3. Check the Area: Look for any visible dust or debris near the coils. This can give you an idea of how much cleaning is needed.

Gather your cleaning materials, including a compressor and appropriate nozzle attachment, to effectively reach and clean those coils.

Compressed Air Cleaning Technique

Using compressed air can effectively blow out dust and dirt from the coils. Here’s how to do it properly:

  1. Attach the Nozzle: Connect the narrow nozzle to your compressor. This will help deliver focused air to tight spaces.
  2. Maintain Distance: Hold the nozzle about 6-12 inches from the coils. This distance prevents moisture from the air compressor from reaching the coils.
  3. Blow Out Dust: Turn on the compressor and direct the air towards the coils. Sweep from top to bottom to ensure all debris is removed. Move the nozzle along the length of the coil to dislodge any stubborn dust.
  4. Check Progress: Periodically inspect the coils to see how much dust has been dislodged. Repeat the process as necessary until the coils look clean.
  5. Wear Protective Gear: Utilize a dust mask to avoid inhaling particles that may become airborne during this process.

Post-Cleaning Steps

After cleaning, take a few additional actions to ensure your refrigerator functions efficiently:

  1. Inspect the Coils: Check that all dust and debris have been removed. If any particles remain, consider a second pass with the compressed air.
  2. Plug the Refrigerator Back In: Once satisfied with the cleaning, reconnect the refrigerator to the power source.
  3. Return the Appliance: Carefully push the refrigerator back into its original position. Ensure no cords or hoses are pinched.
  4. Set a Cleaning Schedule: Make a note to clean the coils every six months or more frequently if you have pets or high dust conditions.

Following these steps will help maintain your refrigerator and extend its lifespan by ensuring it operates efficiently.

Maintaining Your Refrigerator Post-Cleaning

After cleaning your refrigerator coils, it’s crucial to take steps to maintain its efficiency. Regular maintenance keeps your appliance running smoothly and prolongs its lifespan.

Check the Temperature Settings: Ensure your refrigerator is set between 35°F and 38°F. This range helps preserve food without overworking the compressor.

Clean Coils Regularly: Aim to clean the coils every six months. Use a vacuum or a can of compressed air to remove dust buildup, ensuring the appliance operates efficiently.

Inspect Door Seals: Examine the door seals for tears or gaps. Faulty seals can lead to energy waste. If damaged, replace them to improve efficiency.

Clear Space Around the Refrigerator: Maintain at least a few inches of space around your fridge. This promotes airflow and helps prevent overheating.

Monitor for Unusual Noises: If the refrigerator makes strange sounds or runs constantly, check for issues that might require attention. Early detection can prevent larger problems.

Schedule Regular Maintenance: Consider professional home maintenance services. These can include dryer vent cleaning or pressure washing, which help keep your home systems in top condition.

By implementing these practices, you ensure your refrigerator operates efficiently, ultimately saving you money on energy costs and extending its lifespan.

Understanding Warranty and Service Information

When considering using compressed air to clean refrigerator coils, it’s essential to understand your warranty conditions. Many manufacturers require that maintenance be performed according to specific guidelines.

Key Points to Remember:

  • Warranty Coverage: Check if using compressed air to clean coils affects your warranty. Some warranties may become void if improper cleaning methods are used.
  • Service Information: Refer to your refrigerator’s manual for recommended maintenance practices. This can include details on cleaning methods and any necessary precautions.
  • Privacy Policy: When you consult service providers for advice or assistance, review their privacy policy. Understand how they will handle your personal information.

Considerations for Maintenance:

  • Use Certified Technicians: If you’re uncertain, hiring professionals who understand warranty requirements can prevent issues.
  • Scheduled Services: Regular preventive maintenance from services like Totally Maintained can help extend the lifespan of your appliance.
  • Links for Further Information: Make use of manufacturer websites and trusted service providers for more detailed service guidelines.

Maintaining your refrigerator properly not only keeps it running efficiently but also ensures your warranty remains intact.

Frequently Asked Questions

When cleaning refrigerator coils, various methods and tools can be used effectively. Understanding safety precautions and the location of the condenser coils can help ensure the job is done correctly and efficiently.

What is the best method to clean refrigerator coils?

The best method typically involves using a vacuum cleaner with a brush attachment or compressed air. Air compressors are particularly effective because they can blow dust and debris out of tight spaces. For optimal cleanliness, ensure the refrigerator is unplugged before cleaning.

Is it safe to use a vacuum to clean fridge coils?

Yes, using a vacuum to clean fridge coils is safe as long as you use the appropriate attachments. A brush attachment can aid in removing dust without damaging the coils. Avoid using a vacuum with a direct hose attachment, as this may cause harm.

Where can I find the condenser coils on my refrigerator?

Condenser coils are usually located at the back or bottom of the refrigerator. If you have trouble locating them, consult your appliance’s user manual for specific guidance. Checking behind or underneath the unit will often reveal the coils.

What alternatives are there to using a brush for cleaning refrigerator coils?

If a brush isn’t available, you can use compressed air or a microfiber cloth to clean the coils. Compressed air is effective in blowing away dirt that is hard to reach, while a cloth can help wipe down accessible areas.

What precautions should be taken when cleaning a refrigerator compressor?

Before beginning, unplug the refrigerator to ensure safety. Wear gloves to protect your hands from sharp edges. Be cautious not to damage any components while cleaning the compressor area, as this can lead to ineffective operation.

Can homemade cleaners be effective for refrigerator coil maintenance?

Homemade cleaners can be effective for regular maintenance but should be used cautiously. A simple solution of vinegar and water may help remove grime. Always wipe off any residue with a damp cloth to avoid attracting more dirt.