(248) 297-3485

(248) 297-3485

Who Provides the Best Water Heater Maintenance: Key Factors to Consider

Who Provides the Best Water Heater Maintenance | Totally Maintained

Maintaining your water heater is essential for ensuring its efficiency and longevity. For the best water heater maintenance, consider providers like Totally Maintained, which focus on preventive care rather than just repair. Their comprehensive services are designed to keep your home systems running smoothly, saving you money over time.

When you choose a dedicated maintenance provider, you benefit from a one-stop solution for multiple home care tasks. This approach not only simplifies scheduling but also helps maintain various systems, including your water heater, in optimal condition. By investing in regular maintenance, you can extend the lifespan of your appliances and avoid costly repairs.

Don’t overlook the importance of proper care for your water heater. Engaging with knowledgeable service providers who prioritize preventive maintenance can significantly impact your home’s efficiency and comfort.

Understanding Water Heater Types

Choosing the right water heater for your home involves understanding the different types available. This decision impacts efficiency, cost, and maintenance needs.

Traditional Water Heaters

Traditional water heaters, often called tank water heaters, store hot water in a tank, typically ranging from 20 to 80 gallons. They can operate on electricity or gas.

Key Features:

  • Energy Source: Electric or gas options are available.
  • Recovery Rate: Heats water at a fixed rate; you may run out during high demand.
  • Installation Cost: Generally lower than tankless models.
  • Lifespan: Typically lasts 10-15 years with proper maintenance.

For energy efficiency, choose an Energy Star-rated model. Regular maintenance includes checking the pressure relief valve and flushing the tank to remove sediment build-up.

Tankless Water Heaters

Tankless water heaters, also known as on-demand heaters, provide hot water only as needed. They heat water directly without a storage tank, making them more energy-efficient.

Key Features:

  • Instant Hot Water: Eliminates waiting time for hot water.
  • Space-saving: Smaller than traditional units, suitable for compact homes.
  • Longevity: Can last longer, up to 20 years, with proper care.
  • Energy Source: Often powered by gas, though electric tankless models are available.

Installation can be more complex and costly upfront. Routine maintenance involves descaling the unit to prevent mineral build-up, especially in areas with hard water.

Understanding these types helps you make an informed choice that meets your hot water needs effectively.

Key Considerations for Water Heater Maintenance

Maintaining your water heater is essential for efficiency and longevity. Key aspects to focus on include safety features that protect you, regular anode rod inspections to prevent corrosion, and proper thermostat adjustments for optimal performance.

Safety Features

Water heaters come equipped with several safety features you should understand. One crucial element is the temperature-and-pressure relief valve (T&P valve), which prevents excess pressure buildup in the tank. Ensure this valve is functioning properly by testing it periodically.

Additional safety measures include:

  • Temperature settings: Keep the thermostat set to 120°F to reduce scalding risks.
  • Proper venting: Ensure gas-powered heaters are vented correctly to prevent carbon monoxide buildup.
  • Leak detection: Monitor your water heater for leaks, as even small leaks can lead to significant damage over time.

Anode Rod Inspection

The anode rod is vital to protecting your water heater from rust and corrosion. It attracts corrosive elements in the water, thus preserving the tank’s interior. Regular inspection of the anode rod is crucial.

You should check it at least once a year and replace it every 3 to 5 years, depending on water quality. Signs of damage or corrosion include:

  • Exposed wires or severe corrosion.
  • Reduced water heater efficiency.

Taking timely action on anode rod maintenance helps extend the lifespan of your unit significantly.

Thermostat Adjustment

Proper thermostat adjustment ensures that your water heater operates efficiently. Often, water heaters come preset at high temperatures.

You may consider lowering the thermostat to 120°F to save energy and reduce the risk of scalding. Regularly check for proper calibration as well; thermostats can drift over time.

Here are steps to ensure accurate settings:

  1. Use a thermometer: Place a thermometer at the tap closest to the water heater.
  2. Adjust where needed: If the temperature differs from your setting, recalibrate the thermostat following the manufacturer’s instructions.

With these adjustments, you can enhance both safety and energy efficiency.

Common Water Heater Problems and Solutions

Understanding common water heater problems can prevent costly repairs and ensure your system runs efficiently. Issues such as noises, leaks, and water quality can affect performance and safety. Here’s a look at these common problems and solutions.

Noises and Leaks

If you hear strange noises coming from your water heater, such as popping, rumbling, or hissing, it typically indicates sediment build-up. This accumulation can cause overheating and may necessitate flushing the tank to remove the debris.

Water leaks are another significant concern. Look for moisture around the base of the heater or pooling in the area. Leaks may result from loose fittings, corroded tanks, or faulty valves. Tightening connections or inspecting the anode rod can help you address minor issues. If leaks persist, contacting a professional is advisable.

Temperature Issues

If your water heater isn’t providing hot water, it might be set to a low temperature, or there could be a problem with the thermostat. Check the setting; it should generally be between 120°F to 140°F for optimal performance.

Another temperature-related problem is inconsistent water temperature. This may indicate a malfunctioning heating element or a failing thermostat. Inspect the elements for signs of damage and consider replacing them if necessary.

Water Discoloration and Odors

Brown or rusty-colored water can signal corrosion within the tank or pipes. This often happens when the anode rod, which prevents tank corrosion, is depleted. Regular inspection and replacement of the anode rod are essential for maintaining water quality.

If you notice a rotten odor in your hot water, it’s likely due to bacteria growth. This can occur when water sits in the tank for extended periods. Flushing the tank and treating it with hydrogen peroxide can mitigate this issue. Regular maintenance, such as tank flushing, will help you avoid these unpleasant problems.

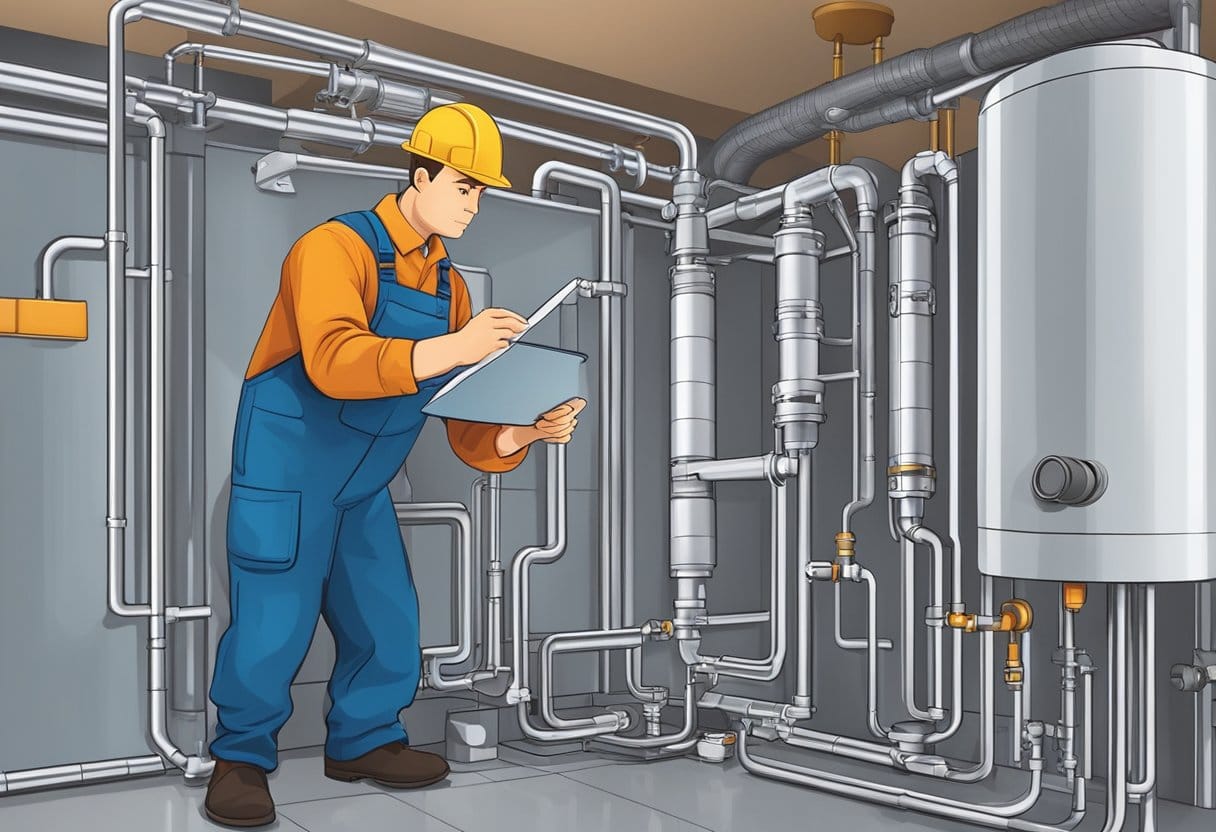
Professional Water Heater Services

When considering water heater maintenance, focusing on professional services is crucial for ensuring efficiency and reliability. Qualified technicians can offer extensive support for installation, replacement, and emergency repairs as needed.

Installation and Replacement

Choosing the right water heater for your home begins with professional installation. Whether you opt for a traditional or tankless system, experienced plumbers ensure proper setup for optimal performance. They assess your needs, guide you in selecting the right unit, and provide efficient installation.

Professional help during replacement is equally vital. Correct installation of a new water heater can significantly enhance energy efficiency and reduce utility costs. Companies like Aksarben ARS specialize in both water heater installation and replacement services in Omaha, providing tailored solutions for residential and commercial properties.

Repair and Emergency Services

Water heater repairs can arise unexpectedly, making access to emergency plumbing services essential. Professionals are available to address issues like leaks, inconsistent heating, or complete breakdowns. They can conduct diagnostics and provide immediate solutions, ensuring minimal disruption to your daily routines.

For tankless water heater repair, specialized training is necessary. Technicians knowledgeable in tankless systems can quickly identify problems and recommend effective repairs. Regular maintenance services can further extend the lifespan of your water heater, helping you avoid costly replacements down the line.

By relying on expert services, you protect your investment and maintain a consistent supply of hot water in your home.

Choosing the Right Plumbing Professional

Selecting the right plumbing professional is crucial for effective water heater maintenance. Here are key factors to consider:

  • Experience and Licensing: Ensure the plumber is licensed and has experience with various brands like Rheem and A. O. Smith. A skilled plumber will understand the specific needs of your water heater.
  • Local Options: Search for “plumber near me” or “plumbers near me” to find professionals in your area. Local companies often provide quicker response times and personalized service.
  • Customer Service: Good customer service is essential. Look for plumbers who are responsive, answer questions clearly, and provide estimates upfront.
  • Range of Services: Opt for plumbing companies that offer comprehensive maintenance services, not just repairs. Regular maintenance can prevent costly future problems.
  • Reviews and Recommendations: Check online reviews and ask for recommendations from friends or family. Feedback from previous customers gives insight into a plumber’s reliability and quality of work.
  • Cost Transparency: Ensure the plumber provides clear pricing and explains what is included. This can help you avoid unexpected charges.

Taking the time to choose the right plumbing professional will lead to better maintenance and longer-lasting performance of your water heater.

Frequently Asked Questions

Understanding common questions about water heater maintenance can help you make informed decisions. This section addresses crucial aspects, including maintenance practices, signs of necessary repairs, and how to choose the right service providers.

What is the best preventive maintenance for a hot water heater?

The best preventive maintenance includes regular flushing of the tank to remove sediment buildup. You should also inspect the anode rod every few years and replace it if it’s heavily corroded. Additionally, checking the temperature settings and maintaining proper insulation can enhance efficiency and longevity.

Who should I contact for professional water heater repair services?

You should contact licensed plumbers or specialized water heater service providers. Look for companies with positive reviews and a solid reputation in your area. Experience in handling your specific type of water heater is also crucial for effective repairs.

What are the signs that my water heater needs repair or maintenance?

Signs that your water heater needs attention include inconsistent water temperatures, unusual noises, and leaks around the unit. If you notice rusty or discolored water, or if your energy bills are unexpectedly high, these may also indicate a problem that requires maintenance.

How do I select a reliable water heater maintenance provider?

To select a reliable provider, check for certifications and licensing to ensure they meet industry standards. Read customer reviews and ask for recommendations from friends or family. It’s also wise to inquire about warranties and service guarantees for added peace of mind.

Which local companies offer 24-hour emergency water heater repair services?

You can search online for plumbing services in your area that advertise 24-hour emergency support. Local directories or review sites often list companies with emergency services, allowing you to compare options before selecting a provider.

When is it time to consider replacing rather than repairing a water heater?

Consider replacing your water heater if it is over 10-15 years old and requires frequent repairs. If the cost of repairs approaches 50% of the price of a new unit, replacement may be more cost-effective. Additionally, if you notice signs of severe rust or damage, replacement is likely the best option.

Extractor Fan Servicing: Essential Maintenance Tips for Optimal Performance

Extractor Fan Servicing | Totally Maintained

Maintaining your extractor fan is crucial for ensuring proper ventilation and air quality in your home. Regular servicing not only improves the fan’s efficiency but also extends its lifespan, preventing costly repairs in the future. Neglecting this vital appliance can lead to reduced performance and potential health hazards due to dust and grease buildup.

You might wonder what the servicing process entails. It typically includes cleaning the fan blades, checking electrical connections, and ensuring that the unit is free from obstructions. These simple steps can make a significant difference in how effectively your extractor fan operates, ultimately contributing to a healthier living environment.

Regular maintenance helps you avoid unexpected breakdowns and costly repairs. By prioritizing extractor fan servicing, you invest in the long-term well-being of your ventilation system and your home as a whole.

Understanding Extractor Fans

Extractor fans are essential for maintaining air quality and comfort in your home. They help manage moisture, odors, and pollutants, making them crucial in spaces like kitchens and bathrooms. This section will delve into the types of extractor fans and the significance of quiet operation.

Types of Extractor Fans

Extractor fans come in several types, each suited for specific needs and environments. The most common types include:

  • Wall-mounted fans: These are installed on exterior walls and are ideal for areas with direct access to an outside wall.
  • Ceiling-mounted fans: Suitable for spaces such as bathrooms, they can efficiently remove humidity and odors from overhead.
  • Inline fans: Often used in ducted systems, these fans are ideal for larger homes or commercial settings as they can be placed away from the source of air extraction.

Choosing the right type of extractor fan is crucial for maximizing efficiency and ensuring it meets the specific ventilation requirements of your space.

Importance of Quiet Operation

Quiet operation is a key consideration when selecting an extractor fan. Too much noise can be disruptive in areas where you want tranquility, such as bedrooms or living rooms.

Look for models that feature:

  • Noise ratings: Measured in decibels (dB), a lower number indicates a quieter operation. Aim for fans with ratings below 40dB for a peaceful environment.
  • DC motors: These motors often provide quieter operation compared to standard AC motors, allowing for more energy-efficient and less intrusive use.

A fan that operates quietly helps maintain a relaxing atmosphere and makes it easier to focus on daily activities in your home.

Extractor Fan Installation

Installing an extractor fan is essential for maintaining proper air quality and reducing moisture in your home. It’s important to follow the right steps for a successful installation to ensure optimal performance and longevity.

Pre-Installation Checklist

Before starting the installation process, ensure that you have all the necessary tools and equipment.

Tools and Materials Needed:

  • Screwdriver
  • Drill and drill bits
  • Duct tape
  • Measuring tape
  • Safety goggles
  • New extractor fan unit

Steps to Prepare:

  1. Choose the Location: Select a suitable position on the wall or ceiling, ideally near a window or external wall.
  2. Check for Wiring: Ensure that your electrical connections support the installation. It may be beneficial to consult a professional if you are unsure.
  3. Confirm Ducting Needs: Make sure you have the right ductwork to vent air outside. This is crucial for effective operation.

Taking these steps will save you time and ensure a smoother installation process.

Step-by-Step Installation Guide

  1. Turn Off Power: Begin by turning off the power supply to the area where you’ll work to ensure safety.
  2. Cut the Duct Hole: Use your measuring tape to mark and cut an opening for the duct. Ensure that it’s the right size for your extractor fan.
  3. Install the Duct Connector: Secure the duct connector to the opening, making sure it’s properly aligned with the fan housing.
  4. Mount the Extractor Fan: Position the extractor fan against the wall or ceiling and use screws to attach it securely. Confirm that it is level and flush with the surface.
  5. Connect Wiring: Follow the manufacturer’s instructions to connect the electrical wiring, ensuring that all connections are tight and insulated.
  6. Seal Ducts: Use duct tape to secure the connections and seal any gaps. This prevents air leaks and ensures efficiency.
  7. Test the Fan: Finally, turn the power back on and test the fan to ensure it’s working properly. Check for any unusual noises or vibration.

By following these steps, you can effectively install your extractor fan, improving ventilation and air quality in your home.

Maintaining Your Extractor Fan

Proper maintenance of your extractor fan is essential for ensuring its efficiency and longevity. Regular care not only prevents issues but also maximizes airflow and performance in your home.

Regular Maintenance Tips

To keep your extractor fan functioning optimally, start with routine inspections. Every month, check for dust accumulation on the fan blades and grilles. Use a soft brush or a vacuum with a brush attachment to remove debris gently.

Every six months, clean the fan’s components more thoroughly. Remove the grille and wash it with a mild detergent, then dry it completely. Inspect the fan motor for wear or damage; lubricate it as needed according to the manufacturer’s instructions.

Ensure that the ductwork is also clean and free of blockages. This will enhance airflow and reduce strain on the fan motor. Regular light maintenance can significantly prolong the lifespan of your extractor fan.

Troubleshooting Common Issues

If your extractor fan becomes noisy or inefficient, conduct a simple check. First, verify that there are no obstructions around the blades. Objects or excessive dust can hinder performance.

If the fan is still underperforming, examine the power supply. Ensure that the wiring is secure and that there are no blown fuses. A faulty fan motor might also be the cause. If you suspect this, consider professional help for a thorough inspection.

In cases of persistent issues, take note of any unusual sounds or vibrations. These could indicate mechanical problems that may require replacement parts. Keeping a log of these symptoms can assist technicians in diagnosing the problem effectively.

Servicing the Fan Motor

Maintaining your fan motor is essential for optimal performance and longevity. Regular servicing can prevent common issues, ensuring your fan operates smoothly and efficiently.

When to Service Your Fan Motor

You should consider servicing your fan motor if you notice unusual noises, diminished airflow, or frequent overheating. If the motor hums but fails to spin, this indicates a problem that requires attention.

Additionally, if you see visible dust or debris buildup, it’s time to clean the motor. Routine maintenance every six months is recommended to prevent major failures. Checking connections for wear or corrosion during servicing can also help identify potential issues early.

Keeping track of your fan’s performance can help you stay proactive in maintenance efforts, reducing the risk of unexpected breakdowns.

How to Service the Fan Motor

To service your fan motor, begin by turning off the power supply to the unit. Disassemble the fan from the motor carefully. You can clean the fan blades with warm, soapy water and a soft brush. Ensure all dirt and grime are removed before rinsing thoroughly.

Next, inspect the motor for debris or dust accumulation. Use compressed air to blow out any particles, ensuring all vents are clear. Reassemble the fan, making sure all screws are tightened securely.

If you detect any damage or wear, consider replacement. For more complex issues, you may want to consult a professional to assess and repair the motor, ensuring effective operation. Regular maintenance prevents extensive repairs down the line.

Enhancing Customer Satisfaction

To effectively enhance customer satisfaction in extractor fan servicing, it is crucial to implement best practices and foster long-term relationships. Focus on specific actions that meet customer needs and expectations.

Best Practices for Service Professionals

To elevate customer satisfaction, ensure prompt and thorough service. Communicate effectively with clients about the service process, explaining what to expect. This transparency builds trust.

Regularly maintain extractor fans to prevent issues before they arise. Implement a maintenance schedule that clients can rely on. Providing preventive care not only enhances performance but also saves costs over time.

Listening to customer feedback is vital. Address concerns swiftly and tailor your services based on their input. Ensuring a clean work area after servicing can also leave a positive impression, reinforcing professionalism.

Offering bundled services helps streamline the maintenance process. Consider providing packages that include tasks like dryer vent cleaning and window cleaning. This not only maximizes efficiency but also adds value to the customer experience.

Ensuring Long-Term Client Relationships

Building lasting relationships with clients is essential for ongoing success. Foster trust by being consistent in quality and reliability. Schedule regular check-ins to remind customers of necessary maintenance.

Utilize a customer relationship management (CRM) system to keep track of service history and preferences. This personalized approach can enhance your ability to cater to specific needs.

Reward loyalty with discounts or exclusive offers. Recognizing clients’ commitment encourages repeat business. It also lays the groundwork for referrals, which are invaluable.

Provide educational resources about the importance of maintenance. When clients understand how regular service can extend the lifespan of their systems, they are more likely to prioritize it.

By focusing on these practices, you create a reliable framework that enhances customer satisfaction and loyalty over time.

Frequently Asked Questions

When it comes to servicing extractor fans, homeowners often have specific concerns regarding maintenance frequency, costs, and the required expertise. Understanding these points can help ensure proper functioning and longevity of your extractor fans.

How often should extractor fans be professionally serviced?

You should have your extractor fans professionally serviced at least once a year. This regular maintenance helps to keep the fan operating efficiently and can prevent major issues down the line.

What is the expected cost range for servicing an extractor fan?

The cost for servicing an extractor fan typically ranges from $75 to $150, depending on the complexity of the service and the location. Some companies may offer package deals for multiple fans which can save you money.

Can an electrician service my kitchen or bathroom extractor fan?

Yes, an electrician can service your kitchen or bathroom extractor fan. They have the necessary training to handle electrical components safely, ensuring your fan is both functional and secure.

What steps are involved in servicing an extractor fan?

Servicing an extractor fan generally includes disconnecting the power, cleaning the fan and filters, checking for any blockages, and testing the fan’s operation. It’s also good practice to inspect the ductwork for any issues.

How can I clean an exhaust fan in the kitchen or bathroom without removing it?

To clean an exhaust fan without removing it, turn off the power first. Use a vacuum with a brush attachment or a damp cloth to gently wipe down the fan blades and cover. This will remove dust and debris without disassembling the unit.

Are there specific maintenance tasks to perform on extractor fans with lights?

For extractor fans with lights, it’s important to regularly check the functionality of the bulbs and clean any light covers. Dust can accumulate on the covers and affect light output, so keeping them clean will enhance visibility while the fan is in use.

Home Upkeep Solutions: Essential Tips for Maintaining Your Property

Home Upkeep Solutions | Totally Maintained

Maintaining your home can feel overwhelming, but having a reliable strategy makes it manageable. Preventive maintenance is crucial for extending the lifespan of your home systems and appliances, saving you money on costly repairs. By focusing on tasks such as dryer vent cleaning, pressure washing, and window cleaning, you can ensure your home remains in top shape without the hassle of juggling multiple service providers.

Engaging in regular upkeep not only enhances the appearance of your home but also promotes safety and efficiency. A dedicated home maintenance solution provides a convenient way to schedule various services in one visit, streamlining the process and giving you peace of mind. You’ll find that investing in routine maintenance pays off in both the short and long term.

With the right approach to home upkeep, you can create a welcoming environment while protecting your investment. Explore innovative solutions that prioritize preventive care, ensuring that your home remains a comfortable and healthy space for you and your family.

Importance of Home Safety and Security

Home safety and security are essential aspects of maintaining a secure living environment. By implementing effective measures, you can protect your household from potential threats while ensuring a safe space for your family.

Understanding Criminal Background Checks

Conducting criminal background checks is crucial when hiring any service professionals for your home. This process helps you identify any serious criminal records, such as felony arrests, sex offenses, or misdemeanors, which may pose a risk to your safety.

You can utilize resources like the national criminal database to access extensive criminal records searches. This can include information on dismissed charges, lewd and lascivious behavior, and more. Services like HomeAdvisor provide background checks on potential employees, ensuring a more secure choice for your home maintenance needs.

By being diligent, you can make informed decisions about whom you invite into your home, significantly reducing the risk of exposure to potential harm.

Evaluating Service Professionals

When looking to hire service professionals, evaluate their background thoroughly. Verify their employee background check policies to ensure they comply with legal standards. Reliable companies typically have clear procedures for vetting their staff.

Check online reviews and feedback from previous clients to gauge their reliability and professionalism. Look for any red flags in reviews mentioning criminal history or questionable behavior. Ensuring that the professionals you choose have a clean record empowers you to maintain a safer home environment.

By employing these evaluative measures, you contribute to the overall security and peace of mind for your household, minimizing potential risks associated with home upkeep services.

Home Care and Maintenance Essentials

Effective home maintenance requires a structured routine and the right tools. By understanding how to optimize your care routines and select quality products, you can enhance the performance of your home systems and maintain a clean living environment.

Optimizing Home Care Routines

Establishing regular home care routines is crucial for keeping your living space functional. Focus on specific tasks to maintain hygiene and safety. Consider the following checklist:

  • Monthly: Check smoke alarms and replace batteries.
  • Seasonal: Clean gutters to prevent water damage.
  • Bi-annual: Schedule dryer vent cleaning to reduce fire risks.

Implementing these tasks at regular intervals helps you stay ahead of potential issues. Utilizing innovative home care products can simplify these chores. Products designed for efficiency ensure that you’re maximizing your time and effort while achieving optimal results.

Selecting Home Upkeep Tools and Products

Choosing the right tools and household cleaners can significantly impact your home maintenance efforts. Look for innovative home care products that offer performance and ease of use. Prioritize:

  • Multi-purpose cleaners: These save space and tackle multiple surfaces.
  • Eco-friendly options: Environmentally safe cleaners protect your family and reduce waste.

Investing in high-quality tools, such as microfiber cloths and scrub brushes, enhances your efficiency. Assess your needs and select tools that can perform specific tasks effectively, like window cleaning or pressure washing. The right choices can extend the life of appliances and surfaces while ensuring your home remains in top condition.

Health and Environmental Considerations

Maintaining a healthy and environmentally friendly home involves innovative cleaning methods and a balanced approach to care. Focus on eco-friendly options can greatly affect both your health and the environment.

Innovations in Eco-Friendly Cleaning

Recent advancements in eco-friendly cleaning products have revolutionized home upkeep. Many of these products prioritize non-toxic ingredients that reduce exposure to harmful chemicals.

For instance, look for cleaning agents that carry ecolabels, ensuring they meet strict environmental and health standards. Products that are biodegradable or derived from plant-based sources can significantly lower indoor air pollutants.

Additionally, innovations like steam cleaning reduce the need for chemicals and ensure sanitation. Using such methods not only fosters a healthier indoor environment but also diminishes your ecological footprint.

Balancing Health and Home Care

Balancing health with home care requires a proactive approach to maintenance. Regular cleaning and upkeep of systems like your HVAC or dryer vents are essential. For example, neglecting your dryer vent can lead to fire hazards and air quality issues.

Moreover, incorporating sustainable practices like recycling old cleaning products can maximize positive environmental impacts. Your relationships can also benefit when you prioritize a clean living space, reducing allergens that affect family health.

Consider scheduling comprehensive services, such as those provided by Totally Maintained, to handle multiple tasks in one visit. This prevents over-reliance on various service providers and ensures all needs are met efficiently. Emphasizing preventive care can extend the lifespan of your home systems while fostering a healthier living space.

Leveraging Location for Optimized Home Upkeep

Your location plays a critical role in determining the best home upkeep strategies. Consider climate-specific maintenance tasks that can enhance the longevity of your home systems.

Tips for Location-Based Maintenance:

    • Weather Considerations:
      • In humid areas, schedule frequent dryer vent cleaning to prevent mold.
      • For sunny climates, regular pressure washing helps maintain your home’s exterior.


    • Local Regulations:
        • Familiarize yourself with local codes regarding maintenance tasks. This ensures compliance and protects your investment.


    • Community Resources:
        • Utilize local services like Totally Maintained, which offer a range of preventive maintenance solutions tailored to your environment.


Scheduled Services:
Plan maintenance tasks according to seasonal changes. For example, clear gutters in early fall to prevent clogs during winter.

Proximity to Providers:
Choosing a home maintenance service that is local can reduce response times for urgent maintenance needs. It also allows you to easily verify their reputation within the community.

By leveraging your location, you can implement effective upkeep solutions that keep your home in prime condition. Focus on preventive care to extend the lifespan of your home systems and appliances, saving you money over time.

Trends in Home Care Industry

Significant shifts are occurring within the home care industry, particularly with the emergence of smart technologies and evolving cleaning practices. These trends not only emphasize efficiency but also enhance the overall living experience in your home.

The Rise of Smart Home Solutions

Smart home technologies are revolutionizing how you manage your home. Devices such as smart thermostats, smart lighting, and security systems allow for remote control and automation. This technology contributes to energy savings and increased security, making your home more comfortable and efficient.

Furthermore, innovative home care products are now equipped with smart features. Robotic vacuum cleaners, for instance, save you time and effort in maintaining cleanliness. These devices use sensors to navigate your home, ensuring thorough cleaning without your intervention. Service professionals are increasingly trained to install and maintain these systems, enhancing their value and functionality in your daily life.

Revolution in Institutional and Residential Cleaning

The cleaning sector is undergoing a transformation, driven by new products and techniques. Eco-friendly cleaning solutions are becoming mainstream, promoting healthier indoor environments. Many service professionals now utilize these green products, which are safer for your family and pets.

Additionally, advancements in cleaning technology, like steam cleaners and UV sanitization tools, improve the effectiveness of cleaning routines. These innovative tools not only eliminate dirt but also disinfect surfaces, making your home safer. Regular maintenance services, such as window cleaning and dryer vent cleaning, can help prevent buildup and extend the lifespan of your home systems. Emphasizing preventive care can save you money and enhance your home’s overall condition.

Frequently Asked Questions

Understanding home upkeep solutions can help you make informed decisions about your property’s maintenance. Here are critical insights related to the need for services, optimal scheduling, cost factors, and more.

What are the signs that a house needs professional upkeep services?

Look for signs like peeling paint, mildew, or leaks that indicate wear. Increased energy bills may suggest insulation issues or inefficient systems. Cracked walls or ceilings can also be signs that foundational issues require professional evaluation.

How often should home maintenance services be scheduled for optimal upkeep?

Scheduling maintenance services every six months is typically recommended. Key tasks like gutter cleaning and HVAC servicing should occur at least once a year. This regularity helps in identifying issues early, preventing costly repairs later.

What factors influence the cost of home upkeep services?

Costs can vary based on service type, house size, and location. Specialized tasks, such as pressure washing or window cleaning, may have different pricing structures. Additionally, accessibility and the extent of required work can affect overall costs.

How do I choose the best home maintenance service provider in my area?

Research local providers by checking reviews and testimonials online. Look for companies that focus on preventive maintenance, as this approach extends the life of your home systems. Ensure they offer comprehensive services to avoid hiring multiple providers.

What are the most effective preventative home maintenance strategies?

Regular inspections and maintenance of plumbing, electrical systems, and HVAC can greatly enhance home longevity. Tasks like dryer vent cleaning and window washing should be prioritized. Implementing a seasonal checklist can help in staying organized and proactive.

Are there any home maintenance services that specialize in eco-friendly practices?

Many companies are now offering eco-friendly maintenance solutions. These can include using biodegradable cleaning products and energy-efficient equipment. Research local providers who advertise sustainable practices to support a greener approach to home upkeep.

What Happens If Dryer Vents Are Not Maintained: The Risks and Consequences for Your Home

What Happens If Dryer Vents Are Not Maintained | Totally Maintained

Neglecting your dryer vent maintenance can lead to serious consequences that extend beyond mere inconvenience. A clogged or improperly maintained dryer vent can pose significant fire hazards, increase drying times, and even lead to mold growth within your home. As lint accumulates in the vent, it restricts airflow, causing your dryer to work harder and raising the risk of overheating.

In addition to fire risks, failing to maintain your dryer vent can affect indoor air quality. Excessive moisture from a blocked vent can create a breeding ground for mold and mildew, resulting in potential health complications for you and your family. Regular cleaning and maintenance of your dryer vent not only ensures safe operation but also contributes to a healthier living environment.

By staying proactive with dryer vent maintenance, you can save yourself time, money, and the stress of preventable issues. Investing in routine services not only extends the lifespan of your appliances but also provides peace of mind that your home remains safe and efficient.

Importance of Dryer Vent Maintenance

Maintaining your dryer vents is crucial for both safety and efficiency. Proper maintenance prevents hazards, enhances the appliance’s performance, and promotes healthier indoor air quality. Neglecting this aspect can lead to significant problems, highlighting the importance of regular care.

Preventing Fire Hazards

Lint buildup in dryer vents is a major fire hazard. When lint accumulates, airflow gets restricted, causing the dryer to overheat. This overheating can ignite lint and cause a fire, posing severe risks to your home and family.

Statistics indicate that nearly 2,900 house fires each year are attributed to clogged dryer vents. Regular cleaning reduces this risk. Schedule routine vent cleaning to ensure safety. The National Fire Protection Association emphasizes this, urging homeowners to keep vents clear.

Ensuring Efficient Dryer Operation

A well-maintained dryer operates more efficiently, saving you time and energy costs. Clogged vents lead to longer drying times, which forces the dryer to work harder. This increased workload not only drives up energy bills but can also shorten the dryer’s lifespan.

Cleaning the vent regularly ensures that your convenience is not compromised. It allows for optimal airflow, enabling your dryer to function properly. The result is quicker drying cycles and reduced wear on the appliance.

Improving Air Quality and Reducing Health Concerns

Blocked dryer vents can lead to poor indoor air quality. As moisture gets trapped, it creates an environment conducive to mold and mildew growth. These fungi can exacerbate allergies and respiratory issues.

By keeping your vents clear, you not only help the dryer but also maintain a healthier home environment. Routine maintenance prevents moisture buildup that affects air quality, ensuring your home remains safe for you and your family. Regular care is essential to prevent health-related problems linked to poor air quality.

Common Issues in Unmaintained Dryer Vents

Failing to maintain your dryer vent can lead to serious consequences. Key issues like lint accumulation, obstructions, and pest infestations can not only impact the efficiency of your dryer but also pose safety risks.

Lint Accumulation

Lint is a significant byproduct of drying clothes. When not properly vented, it builds up in your dryer vent system. This accumulation is highly flammable and can create a fire hazard if not removed regularly.

To mitigate this risk, you should clean your dryer vent at least once a year. Use a lint brush or consider professional cleaning to ensure that all lint is effectively removed. Keeping the vent clean optimizes airflow and enhances energy efficiency, saving you money on utility bills.

Obstructions and Clogs

Obstructions in your dryer vent can significantly decrease its performance. Items such as accumulated lint, dust, or even small clothing articles can block airflow. This blockage can lead to longer drying times and increased energy consumption.

When airflow is restricted, your dryer works harder, which may lead to wear and tear on the appliance. In some cases, persistent clogs can also cause overheating, leading to potential breakdowns. Regular maintenance can help prevent these issues by ensuring that your vent is clear and functioning properly.

Pest Infestations

If your dryer vent is not maintained, it can become an attractive entry point for pests like rodents and insects. These pests are often drawn to the warmth and moisture that accumulate in the vent.

Not only can this lead to possible infestations within your home, but pests can also cause significant damage to your vent system. Sealing vents properly and maintaining them regularly will deter pests from making a home there. Consider installing screens to reduce the risk of infestation while facilitating proper airflow.

Instructions for Regular Dryer Vent Maintenance

Regular dryer vent maintenance is crucial for ensuring safety and efficiency in your laundry routine. You should focus on cleaning essential components and checking for any obstructions that could hinder airflow.

How to Clean the Lint Trap

Before each use, always remove and clean the lint screen. Simply pull it out, and use your fingers or a soft brush to wipe off any lint. Doing this prevents lint buildup, which can reduce drying efficiency and pose a fire hazard.

Periodically, wash the lint trap with warm, soapy water to eliminate any residue. Ensure it is completely dry before reinstalling it. Cleaning the lint trap regularly not only aids in airflow but also extends the life of your dryer.

Checking for Vent Obstructions

Inspect the entire length of your dryer vent for any signs of blockages. This includes areas where the vent connects to the dryer, as well as sections leading outside. A blocked vent can reduce dryer efficiency and may even lead to a fire if lint accumulates.

Make sure to disconnect the dryer before checking the vent. Use a vacuum or a specialized dryer vent cleaning brush to remove lint and debris. If you notice any persistent obstructions, consider scheduling professional dryer vent cleaning to ensure thorough maintenance.

Assessing External Exhaust Vent

The external vent should be easily accessible for routine inspection. Check that the flap opens freely when the dryer operates. If it’s stuck, this may signify an obstruction or mechanical failure affecting airflow.

Periodically clean the exhaust vent to ensure it’s free of debris and functioning properly. Look for signs of damage, such as cracks or corrosion, which might need attention. Maintaining the external vent helps ensure the dryer operates efficiently and safely.

Professional Dryer Vent Cleaning

Maintaining your dryer vents is crucial for ensuring safety and efficiency. Professional dryer vent cleaning helps prevent hazards like fires and ensures your appliance operates effectively. Here’s what you need to know about when to seek help and the role of chimney sweeps.

When to Call a Professional

You should consider calling a professional for dryer vent cleaning if you notice any signs of issues. Key indicators include longer drying times, clothes that are unusually hot after a cycle, or a burning smell coming from the dryer. These can indicate a clogged vent, which can pose a serious fire hazard.

Regular maintenance is recommended at least once a year, depending on your dryer usage and lint buildup. If you have pets or frequently dry heavy fabrics, more frequent cleaning may be necessary. A professional can provide the thorough cleaning needed to eliminate lint and debris that builds up in the vent system.

The Role of Chimney Sweeps in Vent Cleaning

While chimney sweeps traditionally focus on fireplaces, many are also qualified to clean dryer vents. Their expertise in handling specialized equipment ensures a thorough cleaning process. They understand the potential fire risks associated with lint accumulation, allowing them to address the problem effectively.

Chimney sweeps can assess the entire venting system, checking for damage or blockages that may require attention. Their service includes cleaning out lint traps and ducts, which can enhance airflow and efficiency. Hiring a qualified chimney sweep prevents hazards and prolongs the life of your dryer, ultimately saving you money.

Adherence to Building Codes and Best Practices

Maintaining proper dryer vent systems is essential for safety and efficiency. Adhering to building codes and best practices ensures optimal airflow and reduces the risk of fire hazards associated with lint buildup.

Understanding Building Code Regulations

Building codes are essential guidelines that promote safety and efficiency in residential properties. They dictate specific requirements for dryer vent systems, including materials, installation methods, and maximum vent lengths.

For instance, many codes specify that dryer vents should not exceed a length of 15 feet with a maximum of two elbows. Violating these regulations can lead to dangerous conditions, including increased fire risks.

It’s crucial to consult your local building department and ensure compliance with current regulations. Regular inspections help identify any potential violations and address them promptly.

Proper Installation and Maintenance

Proper installation and regular maintenance of your dryer vent system are critical for performance. Start by ensuring your dryer vent has a smooth path with minimal bends to facilitate airflow.

Avoid installing vents with sharp bends, as this can obstruct airflow and contribute to lint accumulation. Use rigid metal ducting rather than plastic or vinyl for superior durability and safety.

Regular maintenance is essential. Schedule professional cleaning at least twice a year to prevent lint buildup. Services like those offered by Totally Maintained help ensure your dryer vent remains in optimal condition, balancing convenience and effectiveness. This proactive approach extends the lifespan of your dryer and enhances home safety.

Frequently Asked Questions

Maintaining your dryer vent is crucial for safety and efficiency. Several common concerns arise regarding the impact of neglecting dryer vent care, from fire hazards to health risks.

Can a clogged dryer vent be a fire hazard?

Yes, a clogged dryer vent can pose a significant fire hazard. Lint and debris accumulate in the vent, causing the dryer to overheat. This increased heat can ignite the lint, leading to a potential fire in your home.

What are the signs that indicate a dryer vent needs to be cleaned?

If your clothes take longer than usual to dry or are still damp after a complete cycle, this may indicate a clogged vent. Other signs include a burning smell, excessive lint buildup around the dryer, and the dryer exterior feeling unusually hot during operation.

How frequently should a dryer vent be cleaned in residential properties?

For most residential properties, it is recommended to clean your dryer vent at least once or twice a year. However, if you use your dryer frequently or notice any symptoms of blockage, more frequent cleaning may be necessary.

What are the potential consequences of running a dryer without proper venting?

Running a dryer without proper venting can lead to increased energy costs due to inefficiency. It also risks overheating and can result in damage to the dryer itself, decreasing its lifespan and performance.

Are there any health risks associated with poor dryer vent maintenance?

Yes, poor dryer vent maintenance can lead to health risks. If lint buildup causes carbon monoxide to accumulate, it may pose serious health dangers. Additionally, trapped humidity can encourage mold growth, affecting indoor air quality.

How long is it safe to operate a dryer with an unclean vent before servicing is required?

It’s advisable to stop using your dryer as soon as you notice signs of a clogged vent. Continuing to operate an unclean dryer vent can exacerbate issues, leading to more severe blockages and potential safety hazards. Regular checks and maintenance are essential to ensure safe operation.

Heating System Servicing: Ensuring Efficiency and Longevity

Heating System Servicing | Totally Maintained | Oakland County, MI

Maintaining your heating system is crucial for ensuring comfort and efficiency in your home. Regular servicing not only enhances the longevity of your heating system but also improves its performance, leading to lower energy bills. Neglecting this important task can result in costly repairs and unexpected breakdowns, particularly during the colder months.

You might wonder how often you should service your heating system. It is generally recommended to have it serviced at least once a year, ideally before the heating season begins. This proactive approach allows technicians to check essential components such as the pilot light and gas pressure, ensuring everything is functioning according to the manufacturer’s specifications.

Investing time in regular heating system servicing not only keeps your home comfortable but also protects your investment. By prioritizing maintenance, you enhance the efficiency of your heating system and ultimately save money over time.

Understanding Heating Systems

Heating systems play a crucial role in maintaining comfort within your home during colder months. Familiarizing yourself with the types and components of these systems can enhance your ability to select and maintain the right one for your needs.

Types of Heating Systems

There are several primary types of heating systems that serve different purposes:

  • Furnaces: These heat air and distribute it through ductwork. They can be powered by gas, electricity, or oil, and are known for their efficiency.
  • Boilers: Boilers heat water and provide either hot water or steam to heat your home. They are commonly used in radiators or underfloor heating systems.
  • Heat Pumps: These systems transfer heat rather than generate it. In winter, they pull heat from the outside air and bring it indoors, offering energy efficiency and versatility.

Understanding these types helps you identify which system may be best for your home’s heating needs.

Components and Functionality

Each heating system comprises key components that work together to deliver warmth effectively:

  • Thermostat: Acts as the control center, allowing you to set and maintain your desired temperature.
  • Heat Exchanger: Found in furnaces and boilers, this crucial part transfers heat to the air or water without mixing with combustion gases.
  • Ducts or Radiators: Furnaces use ducts to distribute warm air, while boilers may use radiators or pipes for hot water.
  • Fuel Supply: Depending on the system, the heat may derive from natural gas, electricity, or oil.

Understanding these components ensures effective system operation and informs you about necessary maintenance practices. Regular servicing can prolong the lifespan of your heating system and improve efficiency.

Importance of Regular Maintenance

Regular maintenance of your heating system is crucial for maximizing its performance and ensuring safety. It plays a significant role in prolonging the lifespan of your equipment, enhancing efficiency, and minimizing potential risks.

Extending Lifespan

Performing routine maintenance on your heating system significantly prolongs its lifespan. Systems that receive regular attention are less prone to breakdowns and costly repairs.

Common maintenance tasks include:

  • Cleaning or replacing filters
  • Inspecting and cleaning fans and coils
  • Checking for leaks in ductwork

Each of these tasks contributes to optimal operation, reducing wear and tear on system components. By keeping your system in top shape, you can expect many years of service, saving you from the hassle and expense of premature replacements.

Efficiency and Cost Savings

Regular maintenance also leads to improved efficiency. A well-maintained heating system operates more effectively, translating to lower energy costs.

Factors that contribute to efficiency include:

  • Properly calibrated thermostats
  • Clean burners and heat exchangers
  • Sealed ducts

These enhancements can result in reduced heating costs during colder months. You may notice a decrease in monthly utility bills after maintenance, allowing for savings that can be used elsewhere in your budget.

Safety and Carbon Monoxide Risks

Safety is a paramount concern when it comes to heating systems. Regular maintenance checks help detect potential hazards, particularly with carbon monoxide, which can be a silent and deadly threat.

Essential safety measures include:

  • Inspecting carbon monoxide detectors
  • Ensuring proper venting of exhaust gases
  • Checking gas connections for leaks

By addressing these issues proactively, you greatly reduce the risk of carbon monoxide poisoning and create a safer living environment. Regular maintenance not only protects your home but also offers peace of mind.

Servicing Your Heating System

Regular servicing of your heating system is crucial for efficient performance and longevity. Proper inspection and maintenance help prevent issues and can save costs by avoiding major repairs.

Inspection and Maintenance Checklist

To ensure your heating system operates efficiently, follow this checklist:

  • Filter inspection and replacement: Check filters monthly and replace them as needed. Clogged filters restrict airflow and can damage your system.
  • Thermostat settings: Verify that your thermostat is functioning correctly. An improperly calibrated thermostat can lead to inconsistent heating.
  • Inspect for leaks: Look for any signs of gas or water leaks around your furnace or boiler. Addressing leaks promptly prevents safety hazards.
  • Electrical connections: Tighten all electrical connections to avoid overheating.
  • Lubricate moving parts: Regular lubrication reduces wear and tear, enhancing the system’s lifespan.

This checklist should be performed annually to maintain optimal functionality.

Identifying Common Issues

Familiarizing yourself with common heating system issues can facilitate quicker resolutions.

  • Inconsistent heating: This often points to issues with the thermostat or ductwork. Inspect both to ensure proper airflow and calibration.
  • Unusual noises: Sounds like banging or rattling may indicate loose components or debris in the system. Investigate and address these noises promptly.
  • Increased energy bills: A sudden spike in your energy bills may indicate inefficient system performance. Schedule a maintenance check to identify any underlying issues.
  • System not starting: If your heater won’t turn on, check the thermostat settings and ensure power supply to the unit.

Being proactive in identifying these problems can lead to timely servicing and preserve your heating system’s efficiency.

Repairing Your Heating System

Knowing when to seek professional help for your heating system is crucial. Understanding specific signs can ensure your home stays warm and comfortable during colder months. Additionally, recognizing safe practices for DIY repairs can help you manage minor issues without compromising safety.

When to Call a Professional

If your heating system exhibits inconsistent temperatures, unusual noises, or frequent cycling, it’s time to call a professional. These symptoms often indicate underlying problems that require expert attention.

licensed contractor can assess the situation thoroughly. They have the training to identify issues such as a malfunctioning safety valve or inadequate airflow. If your energy bills spike unexpectedly, that also signals the need for repairs.

It’s also wise to schedule an annual inspection. Professional servicing not only addresses potential repairs but also extends the life of your heater.

DIY Repairs and Safety

While some minor heater repairs may be manageable, safety should always be your priority. Before attempting any DIY fixes, ensure you understand the system’s components. Always turn off the power to the heating unit to prevent injury.

Employ basic tools and follow the manufacturer’s guidelines. Inspect components like filters and thermostats for easy replacements.

If you encounter more complex issues, such as gas leaks or electrical problems, stop immediately. Contact a professional. It’s safer—and often more cost-effective—to hire an expert than risk injury or further damage.

Protecting Your Investment

Regular servicing of your heating system is essential for maintaining efficiency and longevity. By understanding how warranties and service plans work, along with choosing a reliable service provider, you can effectively protect your investment in home heating.

Warranty and Service Plans

When you purchase a heating system, it often comes with a warranty that covers specific repairs and replacements. Familiarizing yourself with the terms of this warranty is crucial. Many warranties require you to use a licensed contractor for service to avoid voiding your coverage.

Investing in a service plan can also be beneficial. These plans usually include regular preventative maintenance, helping you identify issues before they escalate. Look for plans that offer annual inspections, discounts on repairs, and priority service. This proactive approach not only ensures your heating system runs efficiently but also extends its lifespan.

Choosing a Service Provider

Selecting the right service provider requires careful consideration. Start by looking for a licensed contractor with a strong reputation in your area. Check online reviews and ask for recommendations from friends or family.

Ensure the contractor emphasizes preventative maintenance over repair services. A provider focused on maintenance will help you save money in the long term by preventing costly repairs. Additionally, confirm that they are experienced with your specific heating system brand. Evaluate their service plans, and inquire about what’s included, such as warranties on parts and labor. This will help you make an informed decision that aligns with your needs.

Frequently Asked Questions

Maintaining your heating system is essential for optimal performance and efficiency. Here are some common questions regarding servicing to help you understand the importance and process involved.

How often should a heating system be serviced?

You should plan to have your heating system professionally serviced at least once a year. Ideally, schedule the service before the start of the heating season. This ensures that your system operates efficiently when you need it most.

Who is qualified to perform heating system maintenance?

Look for licensed HVAC technicians who have experience with your specific heating system type. Certifications from organizations like NATE (North American Technician Excellence) can indicate a technician’s expertise and knowledge in the field.

What are typical costs associated with heating system servicing?

The cost of heating system maintenance can vary widely. On average, homeowners can expect to pay between $100 to $300 for a routine service visit. Factors such as your location, the complexity of your system, and any additional services can influence the final price.

Can homeowners perform any heating system maintenance themselves?

Yes, certain maintenance tasks can be performed by homeowners. You can regularly check and replace air filters, clear debris from around the furnace, and ensure vents are unobstructed. Always consult your user manual for specific guidelines.

What is involved in a professional furnace tune-up?

A professional furnace tune-up generally includes several services. Technicians will check and clean critical components, inspect filters, test for gas leaks, and calibrate the thermostat. This thorough process helps enhance efficiency and safety.

What should be expected from an HVAC maintenance check?

During an HVAC maintenance check, you should expect a technician to conduct a comprehensive assessment of your system. This includes inspecting components, checking for leaks, and ensuring proper airflow. You will also receive recommendations for any necessary repairs or upgrades.

Property Maintenance Hire: Essential Services for Property Owners

Property Maintenance Hire | Totally Maintained

Property maintenance hire is essential for anyone managing rental properties or simply looking to keep their home in excellent condition. By selecting the right property maintenance service, you can ensure that your rental property remains attractive, functional, and well-maintained, ultimately enhancing its value. Many property owners overlook the importance of regular upkeep, which can lead to costly repairs down the line.

Comprehensive maintenance services focus on preventive care rather than reactive repairs. When you invest in property maintenance, you are not only protecting your investment but also improving the living experience for your tenants. This proactive approach can involve tasks like pressure washing, window cleaning, and dryer vent cleaning, which all contribute to the longevity of your property’s systems.

In a competitive rental market, having a well-maintained property can make all the difference. Regular maintenance not only attracts quality tenants but also helps retain them, ensuring steady rental income. By hiring property maintenance professionals, you can simplify your responsibilities and focus on maximizing your investment’s potential.

The Importance of Property Maintenance

Effective property maintenance is essential for preserving the condition of your investment and ensuring the comfort and safety of your tenants. By prioritizing regular upkeep, you can significantly enhance the value of your property and minimize potential repair costs.

Maintaining Property Value

Regular property maintenance plays a critical role in maintaining your property’s value. Tasks such as pressure washing, window cleaning, and dryer vent cleaning prevent deterioration and keep your home looking its best.

When you invest in preventive maintenance, you avoid the pitfalls of neglect. Properties that are well-kept attract higher-quality tenants and can command better rental rates. This not only improves your cash flow but also ensures a more stable tenancy, as satisfied tenants are likely to stay longer.

In addition, a well-maintained property is more appealing to potential buyers. When it comes time to sell, you’ll find that your investment has appreciated rather than depreciated due to lack of care.

Avoiding Costly Repairs

Preventive maintenance is your first line of defense against costly repairs. Identifying issues early through routine inspections can save you significant money down the line. For instance, cleaning gutters regularly can prevent water damage that may necessitate expensive repairs.

Moreover, by utilizing a comprehensive home maintenance service, you can streamline your upkeep efforts. Services such as those offered by Totally Maintained help ensure that your property is consistently cared for, minimizing the risk of sudden breakdowns.

Proactive measures extend the lifespan of your home systems and appliances. This means fewer emergencies and lower long-term costs, allowing you to allocate resources more effectively. Regular upkeep not only saves money but also provides peace of mind knowing your property is in excellent condition.

Hiring a Property Maintenance Service

When considering property maintenance, selecting the right service can significantly impact the upkeep of your home. A robust property maintenance plan ensures that all aspects of your property are well cared for, often saving you both time and money. Here are key factors to consider.

Property Management Companies

Hiring a property management company can simplify the maintenance process. These companies often offer comprehensive services tailored to property owners. They handle everything from routine upkeep to emergency repairs, ensuring your property remains in superb condition.

When evaluating options, look into their range of services. Many property management companies also provide specialized maintenance like pressure washing and window cleaning. This inclusive approach means fewer vendors and more consistent quality in service.

Before hiring, check reviews and ask for references. A very good company should demonstrate reliability and effective communication. Confirm that they focus on preventive maintenance, which can extend the life of your property’s systems and appliances.

Assessing Quality of Service

To ensure you are choosing the right property maintenance service, consider evaluating their quality of service. Begin by verifying their certifications and insurance. This protects you in the event of mishaps during maintenance tasks.

Next, ask about their preventive maintenance programs. Services aimed at maintenance rather than repairs often lead to significant savings. Companies like Totally Maintained emphasize this approach, providing tasks such as dryer vent cleaning, which can prevent larger issues later.

Additionally, observe response times and customer service. A responsive, knowledgeable team indicates a commitment to excellent service. Lastly, review contracts carefully for details about service frequency and scope to avoid misunderstandings.

Frequently Asked Questions

When hiring a property maintenance company, various factors need to be considered to ensure you choose the right provider for your needs. From understanding costs to identifying qualifications, each aspect plays a crucial role in making an informed decision.

What should I consider when hiring a property maintenance company?

You should evaluate the company’s reputation, experience, and customer reviews. It’s also important to confirm what services they offer—ensure they align with your specific maintenance needs.

Look into their availability for ongoing maintenance tasks. Companies with flexible scheduling can better meet your requirements.

How much does it typically cost to hire property maintenance services?

Costs for property maintenance services can vary based on the type and frequency of services. Typically, you may expect to pay a flat monthly rate or hourly rates for specific tasks.

Always request estimates from multiple providers to compare pricing. Be wary of significantly lower prices, as they might indicate lower quality service.

What qualifications should I look for in a property maintenance professional?

Seek professionals who have relevant certifications and experience in the field. Knowledge in preventive maintenance tasks is particularly valuable.

Checking references and previous work should also be part of your evaluation process. A well-rounded professional will have skills in various maintenance areas.

How can I find a reliable property maintenance provider in my area?

Start by asking for recommendations from friends or family who have used similar services. Online reviews can also provide insights into the performance of local providers.

Utilizing resources like local directories or property management associations can help verify the credentials of potential candidates.

What are the typical responsibilities of a property maintenance manager?

A property maintenance manager typically oversees routine maintenance tasks and ensures that the property is functioning smoothly. Responsibilities include scheduling repairs, conducting inspections, and coordinating with service providers.

They also manage budgets for maintenance and address tenant concerns promptly to maintain satisfaction.

Can I hire a part-time maintenance person for my property, or should they be full-time?

Hiring a part-time maintenance person can be effective for smaller properties or when your maintenance needs are not extensive.

For larger properties or more complex needs, a full-time maintenance professional may provide more comprehensive and timely service, ensuring all tasks are handled effectively.

When Should Refrigerator Coils Be Serviced to Ensure Optimal Performance?

When Should Refrigerator Coils Be Serviced to Ensure Optimal Performance? | Totally Maintained

Maintaining your refrigerator is crucial for its efficiency and longevity. You should service your refrigerator coils every six months to a year, especially if you have pets that shed frequently. Neglecting this maintenance can lead to decreased performance and higher energy bills.

Understanding when to clean or check your coils can greatly impact the functionality of your fridge. Regular cleaning helps prevent dust and debris buildup, which can cause the appliance to overheat and work harder than necessary. Keeping it in optimal condition not only extends its lifespan but also ensures your food stays fresh for longer.

By being proactive about your refrigerator maintenance, you can save money and avoid inconvenient breakdowns. Knowing the right timeline for servicing your coils sets you up for success in keeping your appliance running smoothly.

Understanding Refrigerator Coils

Refrigerator coils play a crucial role in the cooling process of your appliance. By grasping their function and recognizing signs of dirt accumulation, you can ensure your refrigerator operates efficiently.

Function of Condenser Coils

Condenser coils are essential for removing heat from the refrigerant inside your refrigerator. Located either at the back or underneath the unit, these coils release heat into the air. As the refrigerant circulates, it absorbs heat from the interior and passes through the condenser coils, which allows this heat to dissipate outside.

When functioning properly, the coils help maintain a consistent temperature inside the refrigerator. Dirt and dust can accumulate on the coils, hindering their effectiveness. This can lead to inefficient cooling, causing your appliance to work harder, potentially increasing your energy bills and shortening its lifespan.

Signs of Dirty Condenser Coils

Identifying dirty condenser coils early can save you from costly repairs. Here are key indicators to look out for:

  • Increased Energy Bills: If your bills spike unexpectedly, it might be a sign that your coils are dirty.
  • Unusual Noise: A refrigerator that makes excessive noise could indicate that the compressor is overworking due to dirty coils.
  • Frost Buildup: Find frost on the coils or surrounding areas? This can interfere with heat exchange and signal that cleaning is needed.
  • Warm Food: If your food is not cooling effectively, check the coils for dirt buildup.

Regular inspections of your condenser coils can prevent these problems, ensuring your refrigerator remains efficient and reliable.

Maintenance Schedule for Refrigerator Coils

Maintaining the condenser coils of your refrigerator is essential for optimal performance and energy efficiency. Regular servicing will prevent potential issues and prolong the life of your appliance. Understanding the ideal maintenance schedule is crucial for achieving these benefits.

Regular Service Intervals

You should clean your refrigerator coils at least once or twice a year. This frequency may need to increase depending on certain factors. If your home environment is particularly dusty or greasy, or if you have pets, consider cleaning the coils every 2 to 3 months.

When performing maintenance, follow these steps:

  1. Disconnect the refrigerator or unplug it for safety.
  2. Use a vacuum cleaner with a brush attachment to remove dust and debris.
  3. Wipe down the coils with a damp cloth to eliminate any remaining residue.

Regular cleaning contributes to better energy efficiency, which can lower your utility bills.

Impact of Use and Environment

The need for cleaning coils can be significantly influenced by your living environment. For instance, homes with heavy pet traffic may encounter fur and dander accumulation on coils more rapidly. Similarly, kitchens that produce a lot of grease could lead to faster buildup on the condenser coils.

Perform a visual inspection monthly to check for dust or debris. If you notice any buildup, clean the coils immediately. Regular maintenance not only improves performance but also reduces wear and tear on the appliance, translating into longer lifespan and lower repair costs.

How to Service Refrigerator Coils

Keeping your refrigerator coils clean is essential for optimal performance and energy efficiency. The service process involves preparation, careful cleaning, and reassembly to ensure proper function.

Preparing for Cleaning

Before you start, gather the necessary tools: a vacuum cleaner with a hose attachment, a coil brush, and a screwdriver. Turn off and unplug your refrigerator to ensure safety. If your fridge has an exterior access panel, locate it; removing it can simplify coil access.

Clear the area around the refrigerator to avoid any obstacles. This step is crucial as it allows you to work efficiently without hindrance. It’s beneficial to familiarize yourself with the coil locations, which are usually at the back or beneath the appliance.

Cleaning Process

Using your coil brush, gently sweep the coils to remove dust and debris. Start from the top and work your way down, using long strokes to effectively eliminate buildup. For stubborn dirt, a bit of pressure may be required, but be careful not to damage the coils.

Next, use a vacuum cleaner to remove any remaining dust. The hose attachment can reach into tight spaces effectively. If you notice excessive grime, consider using a damp cloth for a more thorough cleaning. Always allow any damp areas to dry completely before reassembling.

Reassembling After Service

Once the coils are clean and dry, it’s time to reassemble your refrigerator. If you removed an access panel, replace it and ensure it’s secured with screws. Make sure everything is in its proper place, and there are no tools left behind.

Plug the refrigerator back in and check that it’s functioning correctly. Verify that the temperature settings are accurate and observe if the appliance runs smoothly. Regularly servicing your refrigerator coils helps maintain efficiency and prolongs the appliance’s life.

Best Practices for Coil Maintenance

Maintaining your refrigerator coils is essential for optimal performance and energy efficiency. Here are some best practices to follow:

  1. Regular Cleaning
    Clean your refrigerator coils at least once or twice a year. If you have pets or live in a dusty environment, aim for every 2 to 3 months. This prevents dust buildup that can affect cooling efficiency.
  2. Visual Inspections
    Conduct quick visual inspections monthly. Look for dust or debris on the coils. If you notice buildup, clean it immediately.
  3. Use the Right Tools
    Use a coil cleaning brush or a vacuum with a brush attachment to safely clean the coils. Avoid sharp objects that could damage the coils.
  4. Turn Off Power
    Before cleaning, unplug the refrigerator to ensure safety. Let the appliance cool down if it’s been running for a while.
  5. Check Coil Placement
    Ensure there is adequate space around the refrigerator for proper airflow. Position it away from heat sources like ovens or direct sunlight.
  6. Professional Maintenance
    Consider scheduling professional maintenance. Experts can address any underlying issues you might overlook.

By following these practices, you can ensure your refrigerator operates efficiently, reducing energy costs and extending its lifespan.

Professional Versus DIY Coil Servicing

Deciding between professional servicing or a DIY approach for refrigerator coils requires understanding the complexities involved. Knowing the right time to call in experts versus managing the task yourself can significantly affect the efficiency of your refrigerator.

When to Call a Professional

If you notice persistent temperature issues or unusual noises from your refrigerator, it’s time to consult a professional. They can diagnose problems that may not be visible or easily identifiable.

Additionally, if your refrigerator coils are in hard-to-reach areas or you feel uncomfortable with electrical components, professional help is advisable. Technicians utilize specialized tools and have the expertise to handle any underlying issues safely.

An expert can also provide routine maintenance to prevent future problems, which is essential for extending the lifespan of your appliance.

DIY Servicing Guidelines

For those who prefer a hands-on approach, DIY servicing can be efficient for maintaining refrigerator coils. Gather your tools, including a screwdriver and a vacuum cleaner, to remove dust and debris. Make sure to unplug the refrigerator before starting your work.

Begin by locating the coils, often found at the back or beneath the unit. Carefully use a screwdriver to access areas that are typically covered.

Once exposed, utilize a brush attachment on your vacuum to clean the coils without damage. This routine task should be done at least once a year, or more frequently if you have pets or a dusty environment.

Be cautious not to force any components that seem stuck, as this can lead to further complications. If in doubt, don’t hesitate to seek professional assistance.

Frequently Asked Questions

Maintaining your refrigerator coils is crucial for efficiency and longevity. Here are specific questions and answers to help you understand the best practices for coil maintenance.

How often should one clean the coils on a refrigerator?

You should clean the coils on your refrigerator at least once a year. If your kitchen has a lot of dust or pet dander, consider cleaning them every 2 to 3 months. Regular cleaning helps improve the refrigerator’s efficiency and extends its lifespan.

What are the consequences of not cleaning refrigerator coils?

Neglecting to clean your refrigerator coils can lead to reduced efficiency. A buildup of dust and debris makes the compressor work harder, which can cause overheating and shorten the appliance’s lifespan. Additionally, it may result in higher energy bills.

How can you determine if your refrigerator coils need to be cleaned?

Indications that your coils need cleaning include a noticeable increase in temperature in the fridge or freezer and higher energy bills. If the coils feel excessively hot to the touch, it’s also a sign that they are likely dirty and require cleaning.

Is it possible to clean refrigerator coils using compressed air?

Using compressed air can be effective for cleaning refrigerator coils. It helps blow away dust and debris from hard-to-reach areas. However, ensure that you do this carefully to avoid damaging any components.

Where can you typically find the condenser coils on a Whirlpool refrigerator?

On a Whirlpool refrigerator, the condenser coils are usually located at the back or beneath the appliance. Check your refrigerator’s manual for specific locations, as designs may vary by model.

What is the recommended method for cleaning refrigerator coils without a specialized brush?

You can use a vacuum cleaner with a brush attachment to clean the refrigerator coils effectively. Alternatively, using a cloth dampened with soapy water can help wipe off any stubborn grime. Regular maintenance makes a significant difference in the performance of your appliance.

Tankless Heater Maintenance: Essential Tips for Optimal Performance

Tankless Heater Maintenance | Totally Maintained

Maintaining your tankless water heater is crucial for optimizing its energy efficiency and ensuring a constant supply of on-demand hot water. Regular maintenance not only extends the lifespan of your system, but it also helps prevent costly repairs down the line. With straightforward tasks such as flushing the system annually and cleaning the inlet water filter, you can keep your heater running smoothly.

By performing these simple maintenance routines, you can enjoy the benefits of hot water whenever you need it while also reducing energy costs. Staying proactive about care allows you to avoid issues like sediment buildup that can compromise performance. As a homeowner, understanding these maintenance steps is essential for maximizing the effectiveness of your tankless water heater.

Investing a little time in your heater’s upkeep leads to significant savings and hassle-free hot water access in the future. Don’t wait until problems arise; take charge of your maintenance routine today to ensure your system operates at its best.

Understanding Tankless Water Heater Maintenance

Proper maintenance of your tankless water heater is essential for optimal performance and longevity. Regular upkeep helps prevent costly repairs and ensures the system operates efficiently.

Importance of Maintenance

Maintaining your tankless water heater involves several key tasks that can enhance performance. Regular descaling is crucial, particularly if you live in an area with hard water. This process helps eliminate mineral buildup, preventing damage and maintaining efficiency.

Cleaning the water inlet filter every few months also plays a significant role. A clean filter prevents clogs that can hinder water flow or lead to system failure.

Skipping maintenance can greatly reduce the lifespan of your unit. Annual check-ups and servicing can help you identify potential issues early on, saving you money in the long run. By dedicating time to maintenance, you protect your investment and ensure a consistent supply of hot water.

Comparison to Traditional Water Heaters

Tankless water heaters differ significantly from traditional units in terms of maintenance needs. Traditional water heaters often require periodic tank flushing to remove sediment buildup, which can be labor-intensive.

In contrast, tankless systems demand less frequent intervention but require specific maintenance to function effectively. Without proper care, tankless models may experience reduced efficiency and increased energy bills.

Moreover, tankless units generally have a longer lifespan than traditional models, often exceeding 20 years, provided they are well-maintained. Regular maintenance not only enhances performance but also maximizes the long-term savings associated with tankless systems compared to their tanked counterparts.

Routine Maintenance Tasks

Regular maintenance is crucial for the efficient operation of your tankless water heater. Performing routine tasks can prevent major issues and extend the lifespan of the unit. Below are key maintenance tasks you should conduct regularly.

Checking for Leaks

Inspect your tankless water heater for any signs of leaks. Look around the unit for water pooling or damp areas. Pay attention to connections and fittings, as these are common leak points. If you find any leaks, it’s essential to tighten connections or replace defective components promptly.

Create a maintenance schedule to check for leaks every few months. Early detection can save you from costly repairs and water damage. Remember, a leak may signal deeper issues, such as corrosion or improper installation, that need addressing.

Inspecting the Inlet Filter

The inlet filter is critical for ensuring clean water enters your tankless heater. Over time, the filter can accumulate debris and mineral buildup, affecting your unit’s efficiency. It’s recommended to check and clean the inlet filter at least once a year.

To clean the filter, turn off the water supply and remove the filter from its housing. Rinse it under running water to remove buildup. Ensure it’s completely dry before reinstalling it. A clean inlet filter prevents clogs and allows your heater to function optimally.

Examining the Pressure Relief Valve

The pressure relief valve is a safety feature that prevents excess pressure buildup within your tankless water heater. Regularly test this valve to ensure it’s working correctly. To test, simply lift the lever and allow some water to flow out.

After testing, check for any leaks around the valve. If the valve doesn’t release water or shows signs of corrosion, it should be replaced. A functioning pressure relief valve is vital for preventing potential hazards and ensuring your system operates safely.

Descaling and Flushing the Heat Exchanger

Maintaining your tankless water heater through descaling and flushing is essential for optimal performance. These processes help manage the buildup of mineral deposits, especially in areas with hard water, ensuring efficiency and longevity.

Significance of Descale

Descaling is a crucial maintenance task for your heat exchanger. Over time, minerals from hard water accumulate, leading to scale buildup that obstructs water flow and reduces heating efficiency. This not only impacts the performance of your heater but can also shorten its lifespan. Regular descaling prevents costly repairs and keeps your water heater functioning efficiently.

Using a solution such as white vinegar is an effective way to dissolve these mineral deposits. Vinegar is readily available and environmentally friendly. Incorporating descaling into your maintenance schedule can significantly enhance your system’s reliability.

Flushing Techniques

Flushing your tankless water heater involves removing sediment and scale through a systematic process. It is generally recommended to flush the system every 6 to 12 months, depending on water hardness. This procedure can significantly enhance your unit’s efficiency.

To flush your heater, prepare a solution of descaling agent, such as white vinegar or a commercial descaler. Connect a submersible pump to circulate the solution through your heater’s heat exchanger. Ensure you have the correct hoses and a five-gallon bucket to contain the solution during the process.

Using a Submersible Pump

A submersible pump is a vital tool for efficiently flushing your water heater. It allows you to circulate the descaling solution through the heat exchanger, effectively removing mineral buildup.

To use a submersible pump, first, turn off the power and water supply to the heater. Then, connect the pump to a bucket filled with the descaling solution. Place a discharge hose from the pump back into the heater’s inlet. Run the pump for approximately 30 to 60 minutes to ensure thorough descaling.

After flushing, it’s important to run clean water through the system to remove any residual descaler. This ensures that your heater is clean and ready for use.

Dealing with Hard Water and Scaling

Hard water can significantly impact the performance and efficiency of your tankless water heater. Understanding how it affects your system and applying effective maintenance strategies is essential for longevity and optimal function.

Effects of Hard Water on Efficiency

Hard water contains high levels of minerals such as calcium and magnesium. Over time, these minerals accumulate within your tankless water heater, leading to scaling. This buildup can restrict water flow and decrease heat transfer efficiency.

As scaling increases, your heater may have to work harder, resulting in higher energy consumption. You may notice fluctuations in water temperature and longer heating times. If left unaddressed, this can lead to more extensive repairs or even a complete system failure. Regular monitoring of water quality is crucial to mitigating these effects.

Methods to Address Mineral Deposits

To effectively combat the effects of scaling, regular maintenance is critical. Descaling and flushing your tankless water heater at least once a year helps remove accumulated mineral deposits. You can use a commercial descaling solution or a vinegar solution to facilitate this process.

Follow the manufacturer’s guidelines for flushing procedures. Use the appropriate tools to ensure a thorough cleaning. Performing these tasks not only improves efficiency but also extends the lifespan of your unit. Consistent maintenance will ensure that you avoid costly repairs in the long run.

Water Softener Integration

Installing a water softener can help mitigate the adverse effects of hard water on your tankless water heater. A water softener works by removing minerals that contribute to scaling, providing softer water for your household needs.

Integrating a water softener with your tankless water heater creates a protective barrier against mineral buildup. It can significantly reduce the frequency of descaling needed, maintaining optimal performance. Additionally, softened water can improve the efficiency of other home appliances, enhancing overall system performance.

Consider consulting with a professional to select a suitable water softening system that meets your needs. Proper installation and use will contribute to a healthier water quality and a longer-lasting heating system.

DIY Maintenance Versus Professional Services

Determining whether to undertake maintenance on your tankless water heater yourself or hire a professional can significantly impact both cost and efficiency. Understanding the circumstances that favor each option will help you make an informed decision.

When to DIY

You may choose to handle maintenance tasks yourself if you have basic plumbing skills and the necessary tools. Routine tasks like descaling the unit can often be performed using household items such as vinegar.

Consider DIY if:

  • You have experience with simple plumbing tasks.
  • The maintenance involves basic cleaning or filter replacement.
  • You want to save on service fees.

DIY maintenance can provide significant cost savings, but it’s important to follow manufacturer guidelines carefully. Mistakes can lead to more costly damage in the long run.

When to Call a Professional

While DIY can be a viable option, some situations call for the expertise of a professional. Complex repairs or installations in your tankless water heater may require specialized knowledge and tools.

Situations to consider professional services:

  • Your heater has persistent or complex issues.
  • You’re unsure about the proper maintenance procedures.
  • You lack the time or equipment for safe DIY repairs.

Hiring a professional can ensure thorough and safe maintenance, ultimately protecting your investment. Though this may involve greater costs, the peace of mind and potential long-term savings can outweigh the initial expense.

Frequently Asked Questions

Understanding the common queries surrounding tankless water heater maintenance can help you stay informed. Knowing maintenance costs, recommended frequency for flushing, and signs of needed service are crucial for optimal performance.

What is the typical maintenance cost for a tankless water heater?

The maintenance cost for a tankless water heater typically ranges from $100 to $300 annually. This cost can vary based on the specific services performed and whether the work is carried out by a professional or completed by the homeowner.

How often should a tankless water heater be flushed?

A tankless water heater should be flushed at least once a year. Flushing helps remove mineral buildup that can affect the efficiency and lifespan of the unit, especially in areas with hard water.

What does a typical maintenance checklist for a tankless water heater include?

A typical maintenance checklist includes inspecting and flushing the system to remove mineral deposits, checking for leaks, cleaning or replacing filters, and testing gas pressures and flue systems for proper operation.

Are maintenance procedures different for electric and gas tankless water heaters?

Yes, maintenance procedures can differ between electric and gas units. Gas models require checks of the venting system and burner, while electric models focus on electrical connections and heating elements.

Can homeowners perform tankless water heater maintenance, or should it be serviced by a professional?

Homeowners can perform some maintenance tasks, such as flushing the system and cleaning filters. However, for comprehensive inspections or repairs, it is recommended to hire a professional to ensure safety and compliance with local codes.

What are the signs that a tankless water heater needs maintenance?

Signs that your tankless water heater may need maintenance include inconsistent water temperatures, reduced water flow, unusual noises during operation, or error codes displayed on the unit. Addressing these issues promptly can help maintain performance and efficiency.

Dryer Vent Service Provider: Ensuring Safe and Efficient Ventilation Systems

Dryer Vent Service Provider | Totally Maintained

When it comes to maintaining your home, finding the right dryer vent service provider is essential. Regular dryer vent cleaning ensures your appliance operates efficiently and reduces the risk of fire hazards. Choosing a service that specializes in comprehensive home maintenance can save you time and hassle while ensuring your systems stay in optimal condition.

Opting for a professional service that focuses on preventive maintenance can extend the lifespan of your dryer and other home systems. By addressing maintenance tasks like dryer vent cleaning, you can avoid costly repairs and increase the safety of your home. This proactive approach allows you to keep your appliance working effectively while safeguarding your family.

In a busy world, a one-stop solution for home maintenance makes it easier to schedule necessary services without juggling multiple providers. By prioritizing preventive care, you not only enhance the functionality of your dryer but also enjoy peace of mind knowing your home is well taken care of.

Understanding Dryer Vent Services

Dryer vent services play a crucial role in ensuring the safety and efficiency of your laundry appliances. Proper understanding of these services can help you maintain your dryer system effectively, preventing potential hazards and improving performance.

Importance of Dryer Vent Cleaning

Cleaning your dryer vent is essential for several reasons. A clogged dryer vent can lead to reduced efficiency, causing your dryer to work harder and potentially increasing energy bills.

Furthermore, lint and debris accumulation poses a fire risk. According to statistics, a significant number of dryer fires are caused by unclean vents. Regular cleaning mitigates this danger, ensuring a safer home environment.

Scheduling professional dryer vent cleaning helps remove stubborn blockages that DIY methods often miss. This preventive maintenance is a proactive measure that extends the life of your dryer, allowing it to function optimally and efficiently.

Components of a Dryer Vent System

Understanding the components of your dryer vent system is vital. Key parts include the dryer, vent duct, and exterior vent hood.

  • Dryer: The appliance where clothes are dried.
  • Vent Duct: The pipe that transports moist air and lint from the dryer to the outside.

The vent duct must be made of non-flammable material, ideally using rigid or semi-rigid metal, which prevents fire hazards. A well-functioning exterior vent hood allows airflow while preventing animals or debris from entering the duct.

Keeping these components clear of obstructions, such as lint, is imperative for optimal performance. Effective dryer vent cleaning ensures that every part of this system functions correctly and safely.

Professional Dryer Vent Cleaning Process

Understanding the professional dryer vent cleaning process is essential to ensuring safety and efficiency in your home. This process involves thorough inspection, effective cleaning methodologies, and specialized duct cleaning techniques.

Inspection and Assessment

Before any cleaning begins, a detailed inspection of your dryer vent system is critical. Technicians evaluate the vent’s condition, identifying potential blockages like lint buildup or structural issues. This step often includes checking the lint trap for clogs and examining the duct’s length and configuration.

Using specialized tools, the technician may use cameras to assess hard-to-reach areas. You receive a report of the vent condition, allowing you to make informed decisions. An accurate assessment sets the stage for effective cleaning, ensuring that every aspect of the venting system is addressed.

Cleaning Methodology

The cleaning methodology employed by professionals typically involves several phases to ensure optimal results. Initially, the technician may disconnect your dryer from the power source. This step is crucial for safety.

Next, a high-powered vacuum is often used to remove loose lint and debris from the vent. This vacuuming process may be accompanied by brushing to dislodge stubborn clogs. Professionals may employ rotary brushes for thorough cleaning of the duct walls.

Finally, a thorough inspection follows the cleaning processes to confirm that the vent is clear. This careful methodology enhances safety and improves your dryer’s efficiency, reducing energy costs.

Duct Cleaning Techniques

Various duct cleaning techniques ensure the effectiveness of the service provided. Air sweep cleaning utilizes a combination of compressed air and mechanical brushes, ensuring a deep clean.

Vacuum cleaning is another common method, where a specially designed machine removes lint and obstructions from the duct. These specialized vacuums prevent the dispersion of dust and allergens.

Some companies utilize camera systems to visually inspect after cleaning, clarifying whether the job is complete. By combining these techniques, professionals ensure that your cleaning service provides long-lasting results for your dryer vent system.

Preventive Measures and Routine Maintenance

Maintaining your dryer vent is crucial for safety and efficiency. By implementing preventive measures and scheduling routine maintenance, you can significantly reduce the risk of lint buildup and ensure your dryer operates effectively.

Preventing Lint Buildup

Lint buildup is a leading cause of dryer fires and can also reduce efficiency. To prevent this, always clean the lint trap after each load. This simple task ensures that airflow remains unrestricted.

Additionally, consider using a lint brush to clean the vent hose and duct periodically. This will help eliminate any hidden lint that may have escaped the trap. You should also inspect the vent for any kinks or damage that could impede airflow, as these can exacerbate lint accumulation.

Regularly checking and cleaning the outside vent opening is important as well. Make sure it’s free of obstructions like leaves or nests. Implementing these practices helps maintain a safer environment and keeps your dryer running smoothly.

Scheduling Regular Cleaning

Establishing a routine cleaning schedule is essential for dryer vent maintenance. Aim to have your dryer vent professionally cleaned at least once a year. This service can remove accumulated lint and ensure that your system operates efficiently.

When choosing a service provider, look for experts specializing in dryer vent cleaning, such as those offered by Totally Maintained. They provide comprehensive maintenance services focused on preventive care, ensuring your home systems are well-maintained.

You should also consider seasonal cleaning. Scheduling maintenance at the start of each season can help maintain optimal performance and prevent unexpected issues. Making these practices a regular part of your home upkeep will pay dividends in safety and efficiency.

Cost Considerations for Dryer Vent Services

Understanding the costs involved in dryer vent services can help you make informed decisions. Factors like service charges and the availability of free estimates play significant roles in budgeting for dryer vent cleaning.

Understanding Service Charges

Service charges for dryer vent cleaning typically range from $100 to $200, depending on several factors. These factors include your location, the length of the duct, and the complexity of the service.

Technicians may have different pricing structures. For instance, some may charge a flat rate, while others calculate based on the square footage or estimated time required.

  • Location: Urban areas might have higher rates due to increased demand.
  • Duct Length: Longer ducts may require more effort and time to clean, affecting the price.
  • Additional Services: If you combine dryer vent cleaning with other maintenance tasks, you may benefit from bundled pricing, offering savings on your total service cost.

How to Get a Free Estimate

Many service providers offer free estimates for dryer vent cleaning, allowing you to gauge potential costs without obligation. To obtain a free estimate, contact companies directly and request a quote based on your specific needs.

  • Provide Specifics: Share information such as your home type and duct length.
  • Ask About Promotions: Sometimes, companies offer limited-time discounts for first-time customers.
  • Compare Estimates: Collect quotes from multiple providers to find the best deal.

Using these strategies will help you understand your options and choose a service that fits your budget while ensuring your dryer vent is maintained properly.

The Impact of Neglected Dryer Vents on Safety and Efficiency

Neglected dryer vents can lead to serious safety hazards and reduced efficiency in your home. Understanding the consequences of clogged vents is crucial for protecting your property and ensuring that your appliances work optimally.

Reducing Risk of Property Loss

Clogged dryer vents significantly increase the risk of fire hazards. Lint buildup is highly flammable and can ignite if the dryer overheats. Regularly cleaning your dryer vents can greatly reduce this risk.

Key Statistics:

  • According to the U.S. Fire Administration, nearly 3,000 home fires occur annually due to clothes dryers.
  • Prevention method: Schedule routine maintenance to keep vents clear.

Additionally, neglecting dryer vents can lead to more extensive damage to your property, resulting in costly repairs. Investing in preventive maintenance protects your home and your finances.

Enhancing Dryer Performance

When vents are obstructed, your dryer works harder to expel hot air, leading to decreased efficiency. A clogged vent can cause longer drying cycles and higher energy consumption, resulting in inflated utility bills.

Efficiency Tips:

  • Regular cleaning: Schedule dryer vent cleaning to improve airflow.
  • Monitor performance: If your clothes take longer to dry, it may indicate a blockage.

By maintaining clean and functional dryer vents, you not only enhance performance but also extend the lifespan of your dryer. Preventive maintenance allows your appliances to operate effectively, saving you money in the long run.

Frequently Asked Questions

When considering dryer vent services, it’s important to understand how to choose a reliable provider, recognize signs that your vent needs cleaning, and know what to expect in terms of costs and qualifications. Here are some common questions.

How can I find a reputable dryer vent service provider in my area?

Start by asking friends and family for recommendations. Online reviews can also provide insights into the quality of service. Look for companies with strong credentials and good customer feedback to ensure a positive experience.

What are the indicators that my dryer vent needs professional cleaning?

You may notice longer drying times, excessive lint buildup around the dryer, or a burning smell. If your clothes are still damp after a full drying cycle, it’s a strong sign that your vent requires professional attention.

How often should I have my dryer vent inspected and serviced?

For households with 1-2 people, an inspection every two years is sufficient. If you have a larger family, consider having it serviced annually to prevent fire hazards and ensure efficient dryer operation.

Are there any risks associated with neglecting dryer vent maintenance?

Neglecting maintenance can lead to lint buildup, which is a major fire hazard. It can also cause your dryer to work less efficiently, increasing energy costs and potentially leading to costly repairs.

What should I expect to pay for a professional dryer vent cleaning service?

Typical costs for dryer vent cleaning range from $100 to $200. Factors like your location and the extent of the service can influence the overall price, so it’s wise to get quotes from multiple providers.

What qualifications should a dryer vent service provider have to ensure safe and effective cleaning?

Look for providers who are certified by the National Air Duct Cleaners Association (NADCA) or have similar credentials. Experience and proper insurance coverage are also important to ensure you’re hiring a qualified professional.

Home Air Quality Maintenance: Essential Tips for a Healthier Living Environment

Home Air Quality Maintenance | Totally Maintained

Maintaining good indoor air quality is essential for creating a healthy home environment. The air you breathe indoors can significantly impact your well-being, with potential health effects ranging from allergies to more severe respiratory issues. Regular home air quality maintenance, such as identifying and controlling indoor pollutants, can enhance your overall health and comfort.

To achieve optimal air quality, it’s important to consider the sources of indoor pollution, such as dust, mold, and volatile organic compounds. Implementing simple strategies, like proper ventilation and regular cleaning, can significantly reduce these contaminants. By prioritizing air quality maintenance, you not only improve your indoor environment but also ensure a safer space for you and your family.

Professional home maintenance services can assist in these efforts by providing essential tasks like dryer vent cleaning and window cleaning. These services focus on preventive care rather than repairs, helping you maintain systems that contribute to better air quality. Investing in these maintenance practices can extend the lifespan of your home’s systems and lead to cost savings over time.

Understanding Indoor Air Quality

Indoor air quality significantly affects your health and comfort. By knowing the common pollutants, their sources, and the potential health implications, you can take proactive steps to ensure a healthier living environment.

Common Indoor Air Pollutants

Indoor air is often more polluted than outdoor air. Typical indoor air pollutants include volatile organic compounds (VOCs), which emit gases from products like paints and cleaning supplies. Other common contaminants are dustmold, and allergens such as pollen and pet dander.

Gases like carbon monoxide and radon are also crucial to monitor. Carbon monoxide can come from malfunctioning appliances, while radon seeps from the ground into homes. Regularly evaluating these pollutants can help maintain better air quality.

Sources of Indoor Air Pollution

Understanding the sources of indoor air pollution is essential for effective management. Many household products release VOCs, particularly during use. This includes various cleaning agents, air fresheners, and even furniture.

Mold thrives in damp areas, so bathrooms and kitchens can be hotspots. Leaking faucets or condensation contribute to its growth. Dust accumulates from everyday activities, including human and pet movement, along with indoor plants.

Carbon monoxide typically arises from gas ranges and heaters, while radon often accumulates in basements or ground-level areas. Addressing these specific sources can greatly improve indoor air conditions.

Health Implications of Poor Air Quality

Poor indoor air quality can lead to numerous health problems. Exposure to VOCs can cause headaches, dizziness, and respiratory issues. Dust and other allergens can trigger asthma and allergy symptoms, affecting your overall well-being.

Mold exposure may lead to coughing, sneezing, and serious respiratory conditions, particularly for those with compromised immune systems. Additionally, carbon monoxide is a colorless, odorless gas that can be fatal in high concentrations, causing confusion or loss of consciousness.

To protect your health, regularly monitor and manage indoor air quality. Using dehumidifiers and ensuring proper ventilation can significantly mitigate these risks.

Improving Ventilation and Air Circulation

Proper ventilation and air circulation are essential for maintaining healthy indoor air quality. By ensuring that stale air is replaced with fresh outdoor air, you can significantly reduce pollutants and enhance overall comfort in your home.

Role of HVAC Systems

Your HVAC system plays a crucial role in regulating indoor air quality. It manages temperature and humidity levels while filtering out dust, allergens, and other airborne particles. Regular maintenance of your HVAC system is necessary to ensure optimal performance.

Consider changing filters every 1-3 months to improve air flow and filtration efficiency. Scheduling professional tune-ups can help identify potential issues before they escalate, ensuring your system operates effectively year-round.

Utilizing a programmable thermostat can also enhance air circulation by optimizing heating and cooling schedules based on your lifestyle.

Importance of Outdoor Air Ventilation

Introducing outdoor air into your home is vital for diluting indoor pollutants. Open windows, vents, and doors whenever possible to promote fresh air exchange. Engaging in this practice, even on colder days, can help improve your indoor environment.

During warmer months, employing cross-ventilation can enhance airflow. This method involves opening windows on opposite sides of your home to create a natural breeze. Installing air exchange systems, such as energy recovery ventilators, can also facilitate outdoor air ventilation without compromising energy efficiency.

Using Kitchen Fans and Other Exhaust Systems

Kitchen fans and exhaust systems are essential for removing cooking odors, smoke, and moisture. Using these systems while cooking helps maintain air quality by preventing the buildup of pollutants.

Make sure your kitchen exhaust fan is appropriately rated for the size of your kitchen. Use it to expel heat, steam, and airborne particles generated during cooking.

In addition, consider installing bath fans in bathrooms to eliminate excess humidity, which can lead to mold growth. Combining these ventilation methods will significantly enhance air circulation in your home and contribute to a healthier living environment.

Air Cleaning and Filtration Strategies

Maintaining good air quality in your home involves effectively selecting and using air cleaners, purifiers, and filtration systems. Understanding these technologies can help ensure you breathe clean air and reduce contaminants.

Choosing the Right Air Cleaners and Purifiers

When selecting air cleaners or purifiers, consider the type of pollutants you want to address. Common options include HEPA filters, which capture small particles, and activated carbon filters, effective for odors and gases.

Look for portable air cleaners if you need mobility. The size of the unit matters; ensure it’s suitable for the room’s dimensions. For optimal efficiency, check the Clean Air Delivery Rate (CADR) ratings.

Additionally, consider special features. Some models incorporate UV light or ionization, which can further enhance purification. Choose a reputable brand with good reviews to ensure reliability.

Effective Use of Air Filters and Filtration Systems

To maximize the effectiveness of air filters, ensure you replace them regularly. Most HVAC systems have filters that should be changed every 1-3 months, depending on usage and the type of filter.

Using a medium to high-efficiency air filter can significantly improve your home’s air quality. Look for MERV ratings between 8-13 for residential use.

Consider upgrading your filtration system if you suffer from allergies or asthma. A whole-home filtration system can provide extensive coverage and reduce allergens, while portable systems can target specific areas.

Implementing these strategies can help maintain a healthier indoor environment, providing you with peace of mind.

Controlling Moisture and Mold

Maintaining optimal moisture levels in your home is crucial for preventing mold and mildew growth. These fungi thrive in damp environments, which can lead to health issues and structural damage. Here’s how to effectively control moisture and keep your indoor air quality high.

Addressing Humidity and Condensation

To manage humidity, you should aim to keep indoor levels below 50%. Utilizing a dehumidifier can help regulate moisture, particularly in basements or bathrooms where humidity often peaks.

Regular ventilation is essential. Open windows when weather permits and use exhaust fans during cooking or showering to diminish water vapor.

If you notice condensation on windows or walls, it’s vital to act quickly. Address leaks in plumbing or roofing that allow moisture to linger, as these can create breeding grounds for mold.

Preventing Mold and Mildew Growth

To prevent mold, regularly inspect areas prone to dampness. Focus on bathrooms, kitchens, and laundry rooms.

Here are proactive steps you can take:

  • Fix water leaks immediately.
  • Clean and dry wet surfaces promptly.
  • Ensure proper air circulation throughout your home.

Using mold-resistant paints and materials in construction can also prove beneficial. Additionally, regularly removing dust and debris can limit places where mold spores might settle, further enhancing air quality. Keeping your home dry helps maintain a healthier environment for you and your family.

Household Tips for Better Indoor Air

Maintaining good indoor air quality requires consistent effort. You can reduce dust and pet dander, keep your home surfaces clean, and even use houseplants to enhance the air you breathe. Here’s how to achieve a healthier indoor environment.

Reducing Dust and Pet Dander

To effectively reduce dust in your home, consider implementing a regular cleaning routine. Use a vacuum cleaner equipped with a HEPA filter, which captures fine particles that regular vacuums might miss. Aim to vacuum your carpets and rugs at least once a week.

When it comes to pet dander, brushing your pets regularly can significantly reduce the amount of hair and dander they shed. Ensure that you wash their bedding frequently and consider keeping pets out of certain areas, like bedrooms, to limit allergens.

Consider dust-mite-proof covers for pillows and mattresses. These simple steps can drastically improve indoor air quality by minimizing dust and pet dander.

Maintaining Clean Indoor Surfaces

Regularly cleaning indoor surfaces is crucial to ensure a healthy living environment. Use damp cloths to wipe down surfaces, which will trap dust instead of spreading it. Don’t forget often-overlooked areas, such as ceiling fans, baseboards, and light fixtures.

Change your air filters every 1-3 months to improve air circulation and filter out airborne particles. This process not only enhances air quality but also helps your HVAC system run more efficiently.

Incorporate deep cleaning routines, such as steam cleaning carpets and upholstery, to remove embedded allergens. A clean home not only looks better but also promotes healthier air.

Leveraging Houseplants for Air Quality

Houseplants can be powerful allies in improving indoor air quality. Certain plants, like spider plants, snake plants, and peace lilies, are known to filter out harmful toxins and release oxygen.

Place these houseplants in various rooms to maximize their air-cleaning benefits. Remember to keep the plants well-watered and groomed to ensure they thrive and remain effective.

Additionally, houseplants can increase humidity levels in your home, which can alleviate dry air and reduce respiratory issues. By strategically choosing and caring for houseplants, you can enhance both the aesthetics and air quality of your living space.

Technical Measures and Home Modifications

Maintaining good air quality in your home involves effective technical measures and modifications. By focusing on insulation and energy efficiency as well as ensuring proper assessments for impurities like radon, you can create a healthier living environment.

Home Insulation and Energy Efficiency

Proper home insulation significantly impacts indoor air quality and energy efficiency. Insulation helps control the temperature in your home, reducing the need for heating and cooling systems, thus minimizing the emissions and pollutants generated by these systems.

Consider using materials with low volatile organic compounds (VOCs) to prevent indoor air pollution. Air sealing is also essential; check for gaps around windows, doors, and ductwork. By ensuring your home is well-insulated, you enhance energy efficiency, saving on utility costs, and improve overall indoor air quality.

Regular maintenance, such as checking insulation in the attic and basement, keeps your home airtight. This prevents outdoor pollutants from entering while maintaining consistent indoor temperatures.

Professional Assessments and Radon Testing

Radon is a colorless, odorless gas that can pose serious health risks. Conduct professional radon testing to identify levels in your home. The EPA recommends testing every two years or after significant home modifications.

If high radon levels are found, mitigation strategies must be employed, such as venting systems that release radon outdoors. Additionally, professional assessments can evaluate ventilation systems to enhance air circulation.

Incorporate source control strategies to minimize the release of indoor pollutants. This includes regular inspection of heating and cooling systems. With thorough assessments and timely radon testing, you ensure a safe and healthy indoor environment.

Frequently Asked Questions

Maintaining good air quality in your home involves understanding various strategies and methods. This section provides insights into enhancing air quality through natural methods, effective strategies for specific rooms, and practical measures for different seasons.

What are natural methods to enhance air quality within homes?

You can improve indoor air quality using several natural methods. Consider adding houseplants like snake plants and peace lilies, which can help filter pollutants.

Also, ensure proper ventilation by opening windows when weather permits. Using natural air purifiers, such as baking soda and essential oils, can further contribute to fresher air.

What strategies are effective for improving air quality in the bedroom?

To enhance air quality in the bedroom, focus on maintaining low humidity levels. Use a dehumidifier to prevent mold growth, which thrives in damp conditions.

You should also regularly wash bedding in hot water and choose hypoallergenic materials to minimize dust mites. Consider using an air purifier to filter airborne particles effectively.

What measures can be taken to ensure good indoor air quality during winter?

During winter months, keep indoor air quality in check by using exhaust fans while cooking and bathing. Sealing windows and doors can prevent drafts and maintain consistent indoor temperatures, but be mindful of reduced ventilation.

You can introduce fresh air periodically to combat stale air. Running a humidifier can help maintain optimal humidity levels, balancing dryness from heating systems.

How can indoor air quality be monitored and assessed?

You can monitor indoor air quality using portable air quality meters, which measure levels of pollutants like VOCs and particulate matter.

Regular inspections can also help identify common issues such as mold or excessive humidity. Some smart home devices offer continuous monitoring and alert you to changes in air quality.

What are some common practices to reduce pollution inside homes?

To reduce indoor pollution, start by avoiding tobacco products indoors. Limiting the use of chemical cleaners and opting for natural alternatives can significantly help.

Regularly changing air filters in HVAC systems is essential. Vacuuming with a HEPA filter can address dust and allergens effectively.

What is the typical cost associated with a professional home air quality inspection?

The cost of a professional home air quality inspection typically ranges from $200 to $600. Prices can vary based on the size of your home and the specific tests conducted.

It’s wise to seek a detailed quote from providers to understand the services included in the inspection. Regular inspections can ensure that you maintain a healthy indoor environment.