

Keeping your kitchen fresh and safe starts with clean extractor fan filters. The best way to clean these filters is to regularly soak them in hot soapy water or run them through the dishwasher, depending on the manufacturer’s guidelines. Neglecting this task can lead to grease buildup, which not only affects the performance of your cooker hood but can also pose a fire hazard.
In addition to ensuring the efficiency of your kitchen extractor fan, regular maintenance of your filters prolongs their lifespan, saving you money over time. Every one to two months is the recommended frequency for cleaning, depending on how often you cook. By prioritizing this simple task, you can maintain a clean cooking environment and enhance the overall performance of your kitchen appliances.
Understanding Extractor Fans and Filters
Extractor fans play a vital role in maintaining air quality in your kitchen by removing smoke, odors, and moisture. The filters within these fans are designed to trap grease and particles, ensuring efficient operation and a cleaner environment.
Types of Extractor Fan Filters
There are several types of filters used in kitchen extractor fans, each serving a specific purpose. The metal grease filter is common in many households. It captures grease particles and is usually made from stainless steel. These filters are washable and reusable, making them economical.
Another type is the charcoal filter, which is often found in recirculating extractor hoods. Charcoal filters absorb odors and improve air quality but need to be replaced periodically. Understanding these filters helps you choose the right maintenance approach for your specific extractor fan system.
Importance of Regular Cleaning
Regular cleaning of extractor fan filters is essential for optimal performance. When filters become clogged with grease and grime, they can impede airflow and reduce the efficiency of the extractor fan.
This buildup can also pose a fire hazard, making cleaning even more critical. Depending on the type, metal grease filters should be cleaned at least once a month, while charcoal filters may need replacement every 3 to 6 months. By maintaining a cleaning schedule, you ensure that your kitchen extractor fan operates effectively, providing a purer cooking environment and extending the lifespan of the appliance.
Preparation for Cleaning
Before you start cleaning your extractor fan filters, it’s essential to ensure that you are ready. This preparation involves safety measures and gathering the right materials to make the task efficient and effective.
Safety First
Begin by turning off the power to your extractor fan. Unplugging it or switching off the circuit breaker can help prevent accidents while cleaning. Always allow the filters to cool if they’ve been in use; hot filters can cause burns.
Wear appropriate safety gear such as gloves and goggles. Gloves protect your hands from grease and cleaning agents, while goggles shield your eyes from splashes. If you are using any harsh cleaning solutions, consider wearing a mask to avoid inhaling fumes. Ensuring proper ventilation in your kitchen will also help in dispersing any strong odors or hazardous vapors released during cleaning.
Gathering Materials
To clean your extractor fan filters effectively, gather the following materials: a bucket, dish soap or washing up liquid, and bicarbonate of soda (baking soda).
- Bucket: Use it for mixing your cleaning solution.
- Dish Soap: This helps break down grease build-up on the filters.
- Bicarbonate of Soda: This works as an additional cleaning agent, tackling stubborn residues.
Start by filling the bucket with warm water and add a generous amount of dish soap along with a few tablespoons of bicarbonate of soda. This solution will help lift the grease and grime from the filters. Keep a sponge or soft brush handy to assist with scrubbing. With these preparations, you will be well-equipped to clean your extractor fan filters effectively.
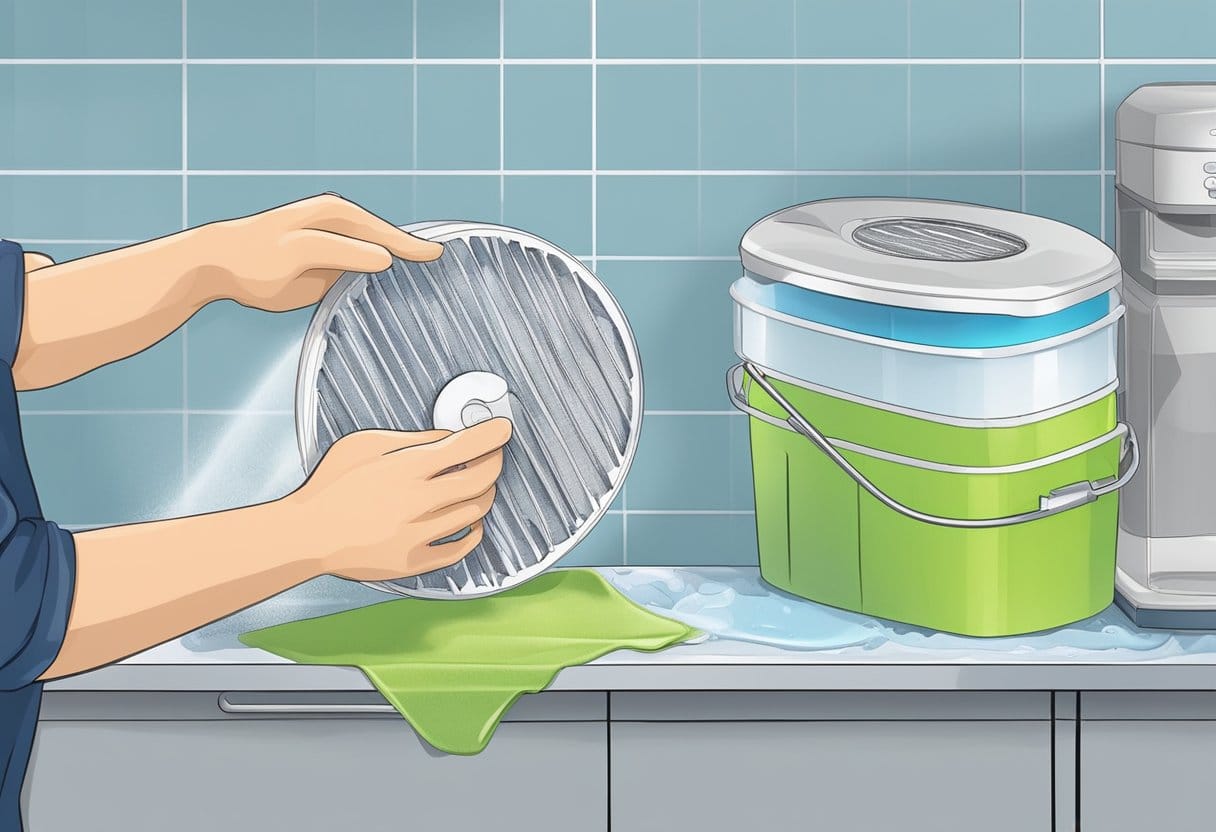
The Cleaning Process
Cleaning your extractor fan filters effectively is essential for optimal performance and longevity. Follow these steps to ensure a thorough cleaning that addresses grease buildup while maintaining the integrity of the filters.
Removing Filters
Begin by safely removing the filters from your extractor fan. Most filters can be unclipped or unscrewed, depending on your model. Consult your manufacturer’s instructions if you’re unsure how to proceed. Take care while removing the filters to avoid damage.
Once detached, inspect the filters for any significant buildup of grease and grime. This preliminary check will help you understand the extent of the cleaning required. Have a designated space ready where you can clean the filters without making a mess.
Applying Cleaning Solutions
Fill a sink or bucket with hot water and mix in a suitable cleaning solution, such as dish soap or a degreaser. The hot water will help dissolve grease buildup more effectively. Ensure that the cleaning solution is safe for the type of filter you are using.
Soak the filters in the solution for about 15-30 minutes. This soaking process allows the cleaner to penetrate the material, loosening any stuck grime. Avoid using harsh chemicals that could damage the filters or leave residues.
Scrubbing and Rinsing
After soaking, use a non-abrasive sponge or soft brush to scrub the filters gently. Focus on areas with heavy grease build-up, applying more pressure as necessary. Be thorough, as any remaining residue can hinder the filter’s performance.
Once satisfied with the scrubbing, rinse the filters under running water to wash away any remaining cleaning solution and debris. Ensure that all soap is removed to prevent future filtering issues. Shake off excess water before moving on to drying.
Drying and Reinstalling
After rinsing, allow the filters to air dry completely. Depending on the ambient temperature, this can take a few hours. Ensure they are entirely dry to prevent moisture from building up in your extractor fan.
Once dry, carefully reinstall the filters back into the extractor fan. Ensure they fit snugly to avoid any air leaks. Following these steps will help maintain clean extractor fan filters and enhance the efficacy of your kitchen’s ventilation system.
Maintaining Your Extractor Fan
Proper maintenance of your extractor fan is essential for its efficiency and longevity. Regular cleaning and implementing preventative measures can significantly enhance its performance and reduce potential hazards in your kitchen.
Regular Cleaning Schedule
To keep your extractor fan functioning optimally, establish a regular cleaning routine. Ideally, you should clean the fan filters every 2-3 months. This helps remove grease build-up and prevents clogs.
Begin by unplugging the unit and removing the filters. You can soak them in hot soapy water or place them in the dishwasher on a high-temperature cycle for thorough cleaning. Ensure all components are completely dry before reassembling.
In addition, wipe down the exterior of the fan with a damp cloth to remove dust and grime. A consistent cleaning schedule not only enhances performance but also prolongs the lifespan of your extractor fan.
Preventative Measures
Incorporate preventative measures to minimize the frequency of deep cleaning. Using a splatter guard while cooking can help reduce grease accumulation. This simple addition can significantly decrease the amount of residue that settles on your extractor fan.
Another effective tip is to ensure proper ventilation during cooking. Opening windows or using additional fans can help disperse heat and moisture, reducing the burden on your extractor fan.
Consider creating a kitchen cleaning checklist to remind yourself of cleaning tasks, including fan maintenance. Regular inspections also help you identify potential issues early, preventing costly repairs and extending the life of your kitchen appliances.
Troubleshooting Common Issues
When confronted with problems related to your extractor fan, understanding how to tackle specific concerns can enhance kitchen hygiene and safety. Whether it’s stubborn grease buildup, unpleasant odors, or poor ventilation, each issue requires a focused approach to ensure your extractor fan operates effectively.
Dealing with Stubborn Grease
Grease can accumulate over time, making it difficult to maintain a clean extractor fan. Start by removing the filters and soaking them in hot, soapy water for 30 minutes. If the grease persists, use a mixture of household glass cleaner and a soft-bristle toothbrush to scrub the filters gently.
For metal filters, a more thorough clean can be achieved by using a degreaser. Spray it onto the surface, allowing it to sit before wiping it off. Avoid abrasive materials to prevent damage. Remember to rinse thoroughly to eliminate any cleaner residue.
Eliminating Odors
Unpleasant odors can signal a buildup of grease or food particles within the extractor fan. Start by inspecting the filters. If they are clogged with grime, clean them as described above.
For deeper odors, you can place a bowl of vinegar in the kitchen while the fan operates to neutralize unwanted smells. You could also use baking soda for absorption. Regular cleaning routines are essential to prevent the return of these odors, ensuring your kitchen remains fresh.
Addressing Poor Ventilation
If you experience reduced airflow from your extractor fan, check for blockages in the vents. Make sure the ductwork is clear of debris or grease. If the fan is struggling, it may require a thorough cleaning or filter replacement.
Inspect the extraction technology in use; if it’s a recirculating model, replacing carbon filters regularly is critical. Lastly, ensure that the fan is set at the appropriate speed for the volume of cooking. Regular maintenance will enhance airflow and significantly improve kitchen hygiene.
Frequently Asked Questions
Cleaning extractor fan filters is essential for maintaining kitchen hygiene and efficiency. Here are some specific methods and tips for effective cleaning, along with answers to common questions.
How can vinegar be used to clean metal mesh cooker hood filters?
Vinegar is an effective cleaning agent for metal mesh filters due to its acidity, which can break down grease. Soak the filters in a mixture of equal parts vinegar and warm water for about 30 minutes. Scrub gently with a soft brush, then rinse thoroughly before reinstalling them.
What is the most effective method to clean grease from hood fan filters?
The most effective method involves using a degreaser specifically designed for kitchen use. Apply the degreaser on the filter and let it sit for the recommended time. Following this, scrub with a brush to remove any remaining grease, and rinse thoroughly to ensure no product residue remains.
Is it possible to clean an exhaust fan filter with baking soda, and how?
Yes, baking soda can be used to clean exhaust fan filters. Make a paste of baking soda and water, apply it to the filter, and let it sit for about 15-20 minutes. Afterward, scrub the filter gently and rinse it off with warm water to remove the baking soda residue.
Can dishwasher tablets be used for cleaning extractor fan filters, and what is the process?
Dishwasher tablets can effectively clean extractor fan filters. Place the filters in a basin filled with hot water and dissolve a dishwasher tablet in the water. Let the filters soak for 15-30 minutes, then scrub with a brush before rinsing with clean water.
What are the steps to clean an extractor fan grease filter?
Begin by removing the filter according to the manufacturer’s instructions. Soak the filter in a mixture of hot water and a degreasing agent for about 30 minutes. Scrub away any stubborn grease, rinse thoroughly, and let the filter dry completely before reinstalling it.
What strategies can be employed to maintain and clean metal mesh filters regularly?
Regular maintenance can involve establishing a cleaning schedule every 1-3 months. During each cleaning, use vinegar or a degreaser to prevent buildup. Additionally, regularly check the filters for any signs of grease accumulation, addressing them promptly to prolong the lifespan of the filters.
