(248) 297-3485

(248) 297-3485

Cost of Maintaining a Home: Understanding Expenses and Budgeting Strategies

Cost of Maintaining a Home | Totally Maintained

Owning a home comes with many responsibilities, and understanding the cost of maintaining it is crucial for effective budgeting. On average, homeowners should allocate about 1% to 4% of their home’s value annually for maintenance expenses. This range can help you prepare for regular upkeep and unexpected repairs alike, ensuring your living environment remains safe and functional.

Regular maintenance not only protects your investment but can also extend the lifespan of essential home systems and appliances. By prioritizing preventive care, you can save money in the long run and enhance your home’s overall value. Knowing the financial commitment involved helps you make informed decisions about how to manage your property effectively.

In this blog post, you will discover various aspects of home maintenance costs, including specific services that can help you stay on top of your responsibilities and avoid costly surprises. Understanding these costs is the first step toward a well-maintained home that serves you and your family for years to come.

Understanding the Costs of Homeownership

Homeownership involves various financial commitments beyond the initial purchase price. It’s crucial to recognize these expenses, which can significantly impact your budget. Key considerations include the costs incurred during the initial home purchase and ongoing mortgage payment obligations.

Initial Home Purchase Costs

The initial costs of buying a home include several significant components.

  1. Down Payment: Generally, you should expect to pay between 3% to 20% of the home’s purchase price upfront. A larger down payment can reduce monthly mortgage payments but requires more significant initial savings.
  2. Closing Costs: These can range from 2% to 5% of the loan amount and cover fees for inspections, appraisals, and other necessary services.
  3. Home Inspection: This service typically costs around $300 to $500 and ensures that the property is structurally sound.

Understanding these costs will help you better prepare for homeownership.

Mortgage Payments Breakdown

Your monthly mortgage payment consists of several key elements that contribute to its overall cost.

  1. Principal: This is the loan amount borrowed, excluding interest.
  2. Interest: The fee charged by the lender, typically expressed as an annual percentage rate (APR).
  3. Property Taxes: These are assessed by local municipalities and can vary widely based on location.
  4. Homeowners Insurance: This protects your home against damages, and premiums can range from $500 to $1,500 annually.
  5. PMI: If your down payment is less than 20%, you might pay private mortgage insurance, which adds to your monthly costs.

Focusing on these breakdowns ensures you budget accurately and maintain financial stability throughout your homeownership journey.

Routine Home Maintenance and Care

Regular maintenance is essential for preserving the value and functionality of your home. By attending to specific tasks, you can prevent larger issues down the line and enhance the longevity of your property.

Maintenance for Older Homes

If you own an older home, routine maintenance is even more critical. Various factors such as outdated materials and wear over time can require more frequent inspections. Here are some key aspects to focus on:

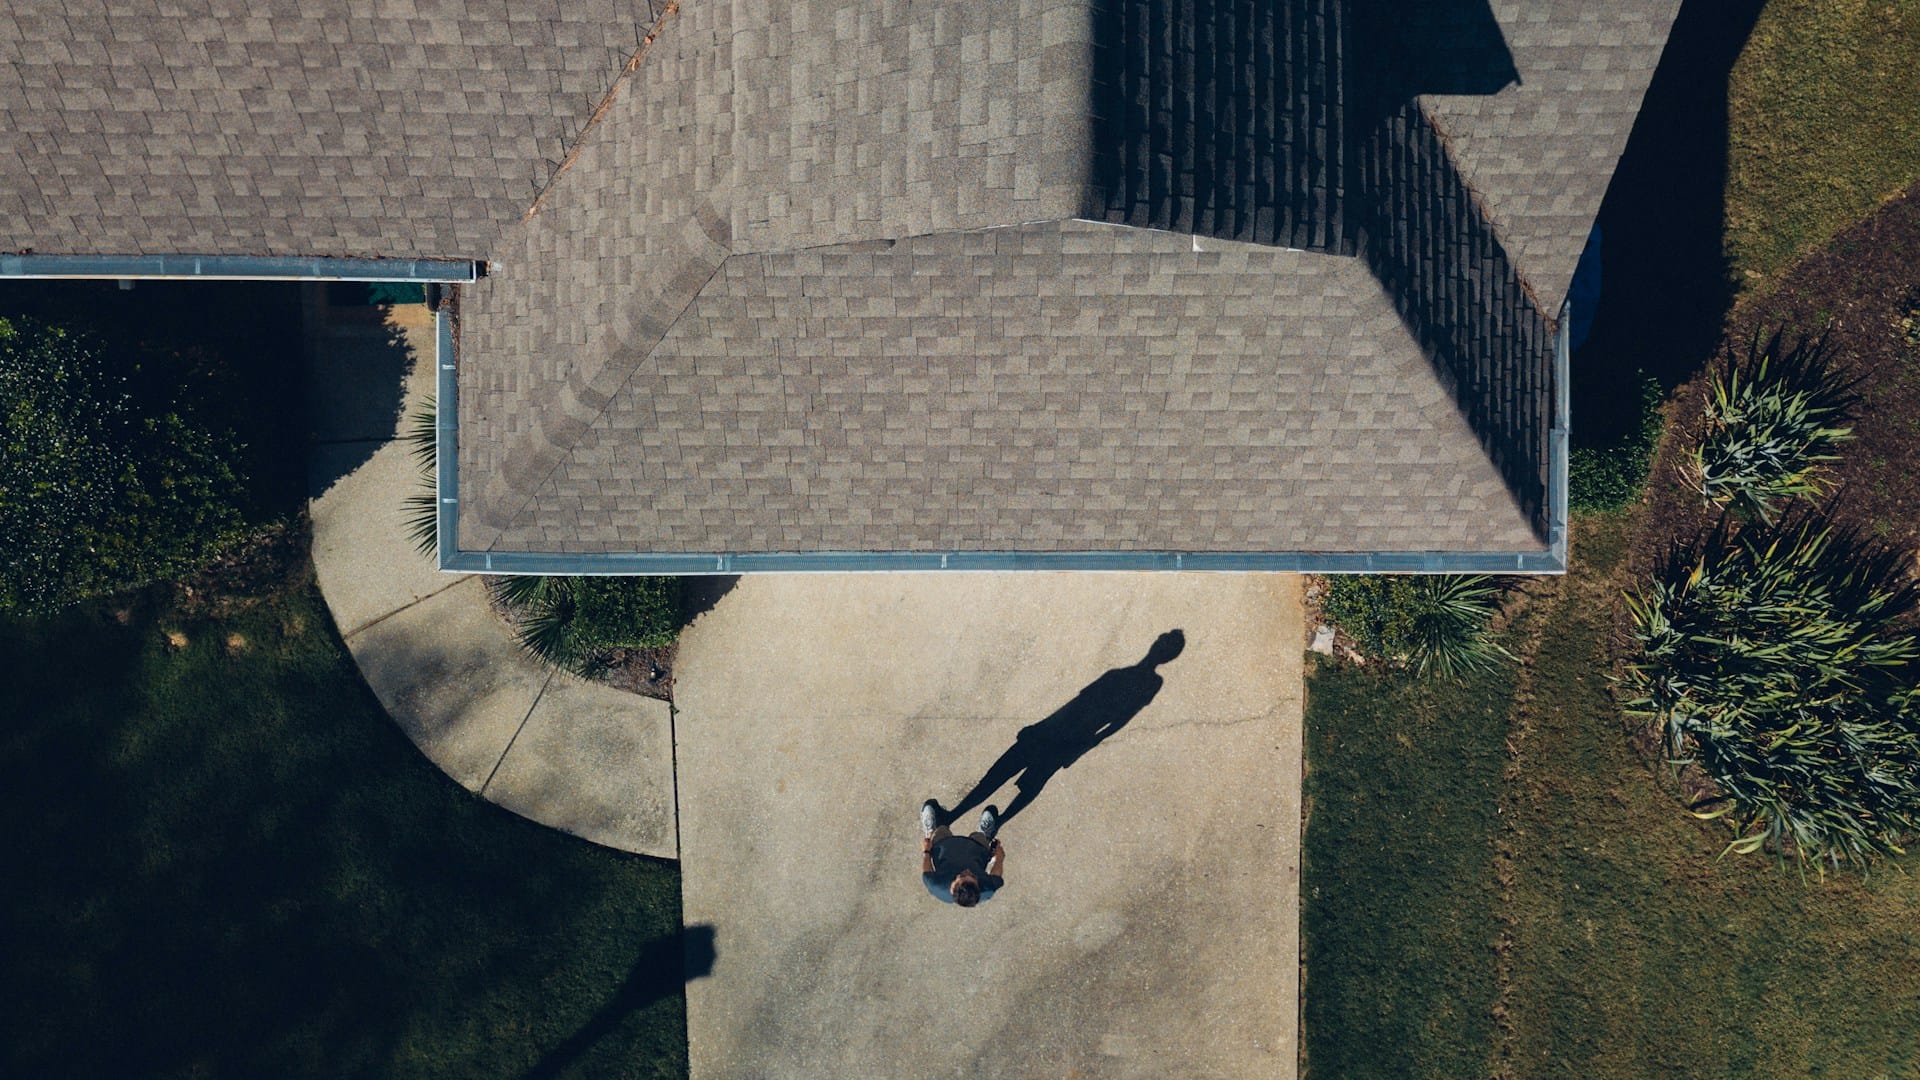
  • Roof and Gutters: Inspect these areas regularly for signs of damage. Clogged gutters can lead to water damage.
  • Plumbing: Examine pipes for corrosion. Older homes may have lead pipes, which should be replaced to ensure safety.
  • Electrical Systems: Check for outdated wiring. An electrical inspection can prevent potential hazards.

Set aside a budget for repairs and upgrades, as older homes often need more care than newer constructions.

The Importance of Routine Maintenance

Routine maintenance helps safeguard your home against costly repairs. When you prioritize regular upkeep, you can:

  • Extend Lifespan: Regular tasks like HVAC servicing can prolong the lifespan of systems.
  • Prevent Major Repairs: Early inspections catch issues before they escalate, saving you money.
  • Enhance Comfort: A well-maintained home provides a healthier and more comfortable living environment.

Allocating a maintenance budget of 1% to 4% of your home’s value each year is a good guideline. For a home valued at $250,000, that’s around $2,500 to $10,000 annually.

Lawn Care and Exterior Upkeep

Your home’s exterior sets the tone for its overall appearance. Lawn care and exterior maintenance are crucial components:

  • Regular Mowing: Keep your lawn neatly trimmed to enhance curb appeal.
  • Weed Control: Introduce barriers or mulching to reduce weed growth.
  • Pressure Washing: Remove dirt and mildew from siding and walkways. This is often best handled by professional services.

Consider scheduling routine tasks such as window cleaning and dryer vent cleaning to keep everything in optimal condition. Investing in these services helps maintain both beauty and functionality while preventing deterioration.

Maintaining your property through these methods not only boosts its market value but creates a welcoming atmosphere for you and your guests.

Ongoing Financial Commitments

Owning a home involves several ongoing financial commitments that go beyond your mortgage payments. Understanding these costs can help you budget effectively and manage your resources wisely.

Property Taxes and Real Estate Taxes

Property taxes are a significant recurring expense for homeowners. These taxes are typically based on your home’s assessed value and can vary by location. Rates can change annually, reflecting local government funding needs.

You should anticipate paying anywhere from 0.5% to 2.5% of your home’s value each year in property taxes. Some regions offer exemptions or discounts for seniors or veterans, which could help reduce your burden. To avoid surprises, it’s wise to check your local tax laws and appeal your assessment if you believe it is incorrect.

Homeowners Insurance Costs

Homeowners insurance is another essential expense that protects your home and belongings. This coverage typically includes protection against hazards like fire, theft, and natural disasters. On average, you can expect to pay between $800 and $2,000 annually, depending on your home’s value and location.

Policies often include liability coverage that protects you in case someone is injured on your property. It’s important to read the policy details carefully to understand what’s covered and consider additional coverage for valuable items or specific risks. Regularly reviewing your insurance can ensure you have adequate protection without overpaying.

Monthly Utilities Management

Utilities are another ongoing financial commitment you need to manage. These include expenses for electricity, water, gas, sewage, and trash service. Monthly costs can vary greatly based on your home size, location, and usage habits.

On average, homeowners may spend $150 to $400 monthly on utilities, depending on consumption and seasonal variations. To reduce these costs, consider energy-efficient appliances and practices, such as using LED lighting and maintaining your HVAC system. Regularly monitoring your utility bills can help you identify trends and opportunities for cost savings.

Planning for Future Costs

Anticipating future home maintenance costs is essential for long-term financial health. Establishing a savings strategy and understanding how to maintain or boost your home’s value can prevent unexpected expenses and enhance your investment.

Establishing Savings for Home Repairs

To effectively manage home maintenance costs, consider setting up a dedicated savings account. A standard recommendation is to save 1% to 4% of your home’s value annually. This approach helps you prepare for both routine maintenance and unexpected repairs.

You might create a detailed budget outlining potential repairs, such as roof replacement or HVAC servicing. Allocating funds monthly makes it easier to build a reserve for these expenses. Regular contributions can prevent financial strain when costly repairs arise, ensuring you are financially ready when issues occur.

Protecting and Increasing Home Value

Maintaining and improving your home’s value requires proactive measures. Engaging in regular preventive maintenance can significantly enhance the lifespan of vital systems. Tasks like pressure washing and window cleaning not only keep your home looking attractive but also prevent damage that could lead to costly fixes later.

Consider integrating maintenance services that focus on preventive care. This strategy not only preserves your home’s appeal but can also increase its resale value. Well-maintained homes tend to attract better offers in the market, providing you with a financial advantage when you’re ready to sell.

When to Consider Renting Vs. Homeownership

Deciding between renting and homeownership involves evaluating financial responsibilities and life circumstances. You need to understand how costs can accumulate over time and what that means for your budget.

Comparing Lifetime Costs

When comparing renting to homeownership, consider both immediate and long-term expenses. Renters typically face monthly payments without additional financial burdens like property taxes or maintenance costs. While rent can increase yearly, homeowners must budget for costs associated with repairs, maintenance, and unforeseen expenses.

Homeownership involves costs like mortgage payments, property taxes, insurance, and maintenance. You may find that while home payments seem manageable, additional costs can significantly raise your overall financial commitment.

Key Expenses for Homeowners:

  • Mortgage payments
  • Property taxes
  • Homeowners insurance
  • Repair and maintenance costs

Renters may enjoy immediate financial flexibility, whereas homeowners invest in growing equity over time. Understanding these factors can help you determine which option aligns better with your financial goals and lifestyle.

Frequently Asked Questions

Homeownership comes with numerous responsibilities, and understanding the costs associated with maintenance is crucial. The following answers will provide clarity on common inquiries regarding maintenance expenses, budgeting, and potential deductions related to home upkeep.

What is the typical annual expenditure for home upkeep?

Generally, homeowners can expect to spend about 1% of their home’s current market value on maintenance each year. For example, if your home is valued at $300,000, you should budget around $3,000 annually for upkeep. Additionally, some experts recommend setting aside 10% of your monthly housing expenses for these costs.

How does the size and age of a house affect maintenance costs?

Larger homes typically incur higher maintenance costs due to more square footage, which requires more resources and time for upkeep. Additionally, older homes may have more wear and tear, leading to increased maintenance compared to newer constructions. Every home is unique, and its condition will influence the specific costs involved.

Are there regional factors that significantly impact home maintenance expenses?

Yes, the geographic location of your home can greatly affect maintenance costs. Areas with extreme weather may require more frequent maintenance, such as replacing roofing or HVAC systems. Moreover, local labor rates and supplies can vary, impacting overall expenses.

What are some common unexpected home maintenance costs homeowners should plan for?

Homeowners should be prepared for unforeseen expenses such as roof repairs after severe weather, plumbing issues, or pest infestations. Other commonly overlooked costs include replacing aging appliances and dealing with foundation problems. Setting aside an emergency fund specifically for these situations can be beneficial.

How can homeowners budget effectively for ongoing home maintenance?

To budget effectively, create a dedicated maintenance fund based on your home’s value and condition. Regularly assess your home’s requirements and factor in seasonal maintenance tasks. Establishing a monthly savings plan can help accumulate the funds needed to cover these anticipated expenses.

Can home maintenance costs be deducted for tax purposes and how does that work?

Home maintenance costs are generally not deductible for tax purposes unless they are part of a home office expense or related to rental properties. For rental properties, you can deduct necessary repairs and maintenance, which can help lower your taxable income. Always consult a tax professional for guidance specific to your situation.

How to Clear Sediment from Water Heater: A Step-by-Step Guide for Homeowners

How Often Should I Flush My Tankless Water Heater for Optimal Performance? | Totally Maintained

Sediment buildup in your water heater can lead to reduced efficiency and a shorter lifespan for the unit. Flushing your water heater regularly is a straightforward process that can significantly enhance its performance and save you money on energy costs. Over time, minerals from hard water accumulate at the bottom of the tank, making it essential to remove this debris to maintain optimal functionality.

By taking a few simple steps, you can clear out sediment and improve your water heater’s heating efficiency. Knowing how to effectively clear sediment will help you ensure hot water availability while reducing wear on the appliance. Your water heater is a crucial system in your home, and understanding how to maintain it can lead to lasting benefits.

In this article, you will learn practical methods for sediment removal, making it easy to keep your water heater running smoothly. You’ll discover proactive maintenance tips that can prevent costly repairs down the road, ensuring your home remains a comfortable haven.

Understanding Sediment Build-Up in Water Heaters

Sediment build-up in water heaters is a common issue that can impact performance and efficiency. Understanding its causes, effects, and how to identify the type of sediment can help you maintain your water heater effectively.

Causes of Sediment Accumulation

Sediment typically accumulates due to hard water, which is high in minerals such as calcium and magnesium. When water is heated, these minerals can precipitate out, forming deposits at the bottom of the tank.

Another contributing factor is the temperature settings on your water heater. Higher temperatures may speed up sediment formation. Additionally, if you live in an area with soft water, the presence of silt or dirt can also lead to build-up.

Regular flushing of the tank can help reduce the accumulation of these deposits and improve the water quality.

Effects on Water Heater Performance and Efficiency

Sediment build-up can significantly affect your water heater’s performance. As sediment accumulates, it creates insulation at the bottom of the tank, making it harder for the burner to heat the water efficiently.

This can lead to longer heating times and increased energy bills. In severe cases, excessive sediment can cause overheating, leading to premature failure of the heating elements.

You may also notice fluctuating water temperatures, as the heater struggles to maintain consistent heating levels. Regular maintenance helps to minimize these issues and extends the lifespan of the water heater.

Identifying the Type of Sediment

Identifying the type of sediment in your water heater is essential for effective management. Common types include mineral deposits from hard water, which are often white or tan in color. You might also find rust or corrosion, especially in older heaters.

To identify sediment, check the appearance of the water when draining it. If it appears cloudy or discolored, you likely have sediment issues. Additionally, measuring the age of your heater can help—older models are more prone to rust and mineral accumulation.

Understanding the type and extent of the sediment can guide you in deciding whether to flush the tank or seek professional assistance for more severe issues.

Preparatory Steps Before Flushing the Water Heater

Before starting the process of flushing your water heater, it is essential to take necessary precautions and gather the right tools. Proper preparation ensures safety and efficiency, making the entire process smoother.

Safety Measures

Safety is paramount when working with a water heater. First, ensure you have the proper protective gear. Wear long sleeves and safety goggles to guard against any splashes that may occur.

Important Steps:

  • Turn Off Power: If you have an electric water heater, switch off the circuit breaker. For gas heaters, turn off the gas supply.
  • Release Pressure: Locate the pressure relief valve on your unit. This valve should be pulled slightly to release any built-up pressure.

Always check for any leaks or malfunctioning components before beginning work. This will prevent accidents and damage during the flushing process.

Tools and Materials Needed

Gathering the correct tools and materials beforehand can alleviate complications. Here’s a list of essential items you’ll need:

  • Garden Hose: A standard garden hose is crucial for directing water outside your home during the flushing process.
  • Bucket: As an alternative to a hose, a bucket can collect water if you don’t have outdoor drainage.
  • Wrench: To turn off the water supply and disconnect hoses if necessary.

Having these tools ready will keep your work area organized and help to streamline the process. Additionally, you may want to keep towels nearby for any spills.

Shutting Off the Water Supply

Before beginning, it’s critical to shut off the water supply to your water heater. This ensures no further water enters the tank during the flushing process.

To do this:

  • Locate the cold water supply valve, typically at the top of the heater.
  • Turn the valve clockwise until it is fully shut.

Once the water supply is off, open a hot water faucet elsewhere in your home to relieve any remaining pressure. This step is essential for safely draining the tank without overflowing, making the flushing process more manageable.

The Step-by-Step Flushing Process

Flushing your water heater is essential for removing sediment buildup, which can reduce efficiency and lifespan. This process involves draining the tank, clearing out deposits, and rinsing before refilling the unit. Follow these steps to ensure a thorough cleaning.

Draining the Tank

Start by turning off the power or gas supply to your water heater. This ensures safety during the flushing. Next, connect a garden hose to the drain valve located at the bottom of the tank. Place the other end of the hose in a suitable drainage area.

Open the drain valve and let the water flow out. Doing this while the cold water supply valve remains open helps maintain water flow and pressure. Allow the tank to empty completely, as this will help in displacing sediment accumulations at the bottom. If the water heater has a dip tube, it can assist in draining water more efficiently.

Clearing the Sediment

Once the tank is drained, it’s time to clear the sediment. Close the drain valve, then briefly turn on the cold water supply to stir up any remaining sediment in the tank. This process can be repeated a few times.

You can also use a DIY method by attaching a long object to reach further into the tank. If you have hard water, sediment buildup is likely heavier, requiring a more thorough clearing process. Ensure that the water coming out of the hose runs clear, indicating that most sediment has been removed.

Rinse and Refill the Water Heater

After clearing the sediment, it’s essential to rinse the tank. Ensure the drain valve is closed before removing the garden hose. Turn on the cold water supply again and allow the tank to fill.

Keep an eye on the output from the drain valve for any remaining sediment. Once the water runs clear from the drain, shut the valve again. Finally, turn the power or gas supply back on to restore heating. Your water heater is now clean and should operate more efficiently.

Post-Flushing Actions

After flushing your water heater, you need to ensure everything is in proper working order before reactivation. This involves inspecting vital components and safely reactivating the unit.

Inspecting the Water Heater Components

Start by examining the pressure relief valve. This component is crucial for safety, as it releases excess pressure to prevent tank rupture. Lift the lever on the valve to ensure it operates smoothly and check for any water leaks underneath.

Next, inspect the tank itself for signs of corrosion or residual sediment. Any visible damage may indicate that you should consider a replacement.

Finally, check the connections for any signs of leakage, particularly around pipes and fittings. Tightening connections can prevent future issues.

Pay close attention to the heat transfer surfaces within the tank. Ensure they are free from scale buildup, as this impacts heating efficiency. Regular inspections can help maintain optimal performance.

Reactivating the Water Heater

Once inspections are complete, you can safely reactivate the water heater. First, close the drain valve and fully open the cold water supply valve. This allows the tank to fill with water.

Turn on a hot water faucet in your home to release air trapped in the system. This helps maintain proper pressure.

After filling the tank, check for any leaks again around the valves and fittings. If everything looks good, power on the water heater. Adjust the thermostat to your desired temperature, typically between 120°F and 140°F for efficiency.

Wait for the system to reach the set temperature before using hot water. Regular recalibration can enhance performance and sustain long-term effectiveness.

Preventive Measures and Maintenance Tips

To prevent sediment build-up in your water heater, consider installing a water softener. This device helps reduce mineral deposits by treating hard water, thereby lessening the chances of sediment accumulation.

Regularly flushing your water heater is essential. You should aim to do this at least once a year. Flushing removes any lingering sediment and ensures efficient operation.

Monitor the temperature settings of your water heater. Keeping the temperature around 120°F can enhance energy efficiency while also minimizing mineral deposit formation.

Consider a sediment filter. Installing one can prevent particles from entering the water heater, effectively reducing sediment issues.

Maintain awareness of the signs of sediment accumulation, such as unusual noises or fluctuating water temperatures. Addressing these signs promptly can help you avoid larger issues in the future.

Performing annual maintenance checks with professionals can also be beneficial. Many maintenance services can encompass various tasks that help extend the life of your water heater.

Taking these preventive measures will save you both time and money. Regular maintenance not only enhances efficiency but also prolongs the lifespan of your appliances.

Frequently Asked Questions

Many homeowners encounter sediment buildup in their water heaters, leading to inefficiencies and potential damage. Below are specific questions and answers that can guide you through understanding and managing sediment in your hot water heater.

How can one effectively remove sediment from a water heater using a specialized tool?

Using a specialized tool, such as a sediment flush kit, can enhance the cleaning process. Attach the kit to the drain valve, allowing for a high-pressure water flow that dislodges sediment. This method is effective in restoring efficiency to your water heater.

What signs indicate the presence of sediment in a hot water heater?

Common signs of sediment buildup include popping or rumbling noises from the tank, fluctuating water temperatures, and reduced hot water supply. Additionally, discoloration of hot water may also suggest sediment accumulation.

What steps are involved in flushing an electric water heater?

To flush an electric water heater, follow these steps:

  1. Turn off the power supply to the heater.
  2. Connect a garden hose to the drain valve.
  3. Open the valve to let sediment and water out, ensuring it’s draining into a suitable location.
  4. Once the tank is drained, close the valve and remove the hose.
  5. Refill the tank and turn the power back on.

What methods are available to prevent the accumulation of sediment in a water heater?

Preventative measures include regularly flushing the tank at least once a year, using a water softener, and maintaining proper temperature settings. These actions help reduce mineral buildup, ensuring optimal performance.

What risks does sediment pose when present in a hot water tank?

Sediment can lead to reduced water heating efficiency and increased energy costs. In severe cases, it may cause damage to the heating elements or tank, potentially leading to leaks or HVAC system failure.

Can vinegar be used to clean sediment from a hot water heater and what are the steps?

Vinegar can be effective in dissolving sediment. First, turn off the water heater and drain about a quarter of the tank. Then, pour vinegar into the tank through the drain valve. Let it sit for a few hours. Finally, flush the tank with water to remove dissolved sediment and vinegar.

How to Clean Gutter Exterior: Essential Steps for Optimal Maintenance

How to Clean Gutter Exterior | Totally Maintained

Cleaning the exterior of your gutters is an essential home maintenance task that can prevent costly damage in the long run. To effectively clean the outside of gutters, you can use a pressure washer or a simple hand method with a ladder and basic tools. By regularly cleaning gutters, you not only enhance your home’s curb appeal but also ensure that water flows freely, reducing the risk of water damage to your property.

It’s important to recognize when your gutters need attention. If you notice dirt, leaves, or mildew accumulating, it’s time to take action. Keeping your gutters clean is straightforward, and you can easily do it yourself or seek professional help if needed. With the right approach, you can maintain your gutters and extend their lifespan, ultimately saving you money on repairs in the future.

Prioritizing gutter cleaning as part of your regular home maintenance can make a significant difference. Not only will it help keep your home looking its best, but it also protects your investment and ensures the effectiveness of your drainage system.

Importance of Gutter Maintenance

Maintaining your gutters is crucial for protecting your home from water damage and pests. Regular cleaning ensures your gutters function correctly, enhancing both safety and curb appeal. Here are the key reasons why you should prioritize gutter maintenance.

Preventing Water Damage

Clogged gutters can lead to significant water damage. When water accumulates in your gutters, it can overflow and seep into your home’s foundation and walls. This can result in mold growth, wood rot, and structural damage that can be costly to repair.

To prevent this, you should clean your gutters at least twice a year, ideally in spring and fall. Consider installing gutter guards to minimize debris accumulation and keep your gutters functioning properly. Regular inspections also help you identify potential issues early on, safeguarding your property from costly repairs.

Preventing Pest Infestation

Gutters filled with debris create an ideal environment for pests. Insects such as mosquitoes, wasps, and even rodents are attracted to stagnant water and organic matter. If your gutters are not maintained, you may find these pests making a home near or even inside your residence.

By keeping your gutters clean, you eliminate their nesting and breeding grounds. You can also implement preventive measures, such as sealing any gaps or cracks in your gutters. This not only protects your home from unwanted critters but also diminishes health risks associated with pest infestations.

Home Maintenance and Curb Appeal

Clean gutters not only function well but also enhance your home’s appearance. Clogged gutters can cause unsightly stains on your exterior walls and create the impression of neglect. This can lower your home’s curb appeal, which is important if you plan to sell in the future.

Regularly maintaining your gutters contributes to overall home maintenance. It reflects your care for the property, making it more inviting for guests and potential buyers. A proactive approach to gutter cleanliness helps ensure your home remains a source of pride and enjoyment for years to come.

Safety Considerations for Gutter Cleaning

When cleaning the exterior of gutters, safety is paramount. Proper techniques and protective equipment can significantly reduce the risk of accidents and injuries. Here are crucial safety considerations to keep in mind.

Using Ladders Safely

Ladders are essential for accessing gutters, but using them safely is critical. Ensure your ladder is stable and positioned on a flat surface. Always extend the ladder at least three feet above the roofline for better reach and stability.

When climbing, keep your body centered within the ladder’s side rails. Avoid overreaching; if you can’t reach, climb down and reposition the ladder. It’s advisable to have someone hold the base of the ladder for added support, especially when working at heights. Following these tips can help prevent falls and injuries.

Appropriate Safety Gear

Wearing appropriate safety gear is vital when cleaning gutters. Start with safety glasses to protect your eyes from debris. It’s also important to use rubber gloves to shield your hands from sharp objects or harmful substances like mold.

Old clothes can help prevent damage from any potential spills or messes. Consider a hard hat if there’s a risk of falling debris from higher areas. Keeping your body shielded will not only make you more comfortable but also significantly reduce injury risks.

Gutter Cleaning from the Ground

Cleaning gutters from the ground is highly recommended to minimize safety hazards. There are various tools available, such as a gutter cleaning wand that attaches to your garden hose, allowing you to clear debris without climbing. This technique reduces the risk of falls and accidents.

If your gutters are particularly high, consider using a telescoping pole with a brush attachment. These tools can help you reach the gutters safely and effectively. Always prioritize safety by maintaining a safe distance when using equipment and avoiding any risky maneuvers.

Tools and Solutions for Cleaning the Exterior of Gutters

When cleaning the exterior of your gutters, having the right tools and solutions is essential for effective results. You can choose from standard tools and homemade solutions or opt for professional-grade equipment. Each option serves specific needs that cater to different cleaning scenarios.

Standard Cleaning Tools

Using standard cleaning tools can simplify the task of cleaning your gutters. A garden hose equipped with a spray nozzle allows you to rinse the gutter surfaces effectively. This is important for removing loose debris and dirt.

Gutter cleaning tools, such as extension brushes and scoops, help you reach difficult areas without needing a ladder. These tools allow you to collect debris while minimizing the mess. A wet/dry vacuum can also be beneficial for suctioning out leaves and other blockages, particularly in tricky spots.

Make sure to have an all-purpose cleaner on hand to address any stubborn stains or grime. Opting for tools that provide versatility and ease of use will enhance your cleaning process significantly.

Homemade Solutions

Creating homemade gutter cleaning solutions is both economical and eco-friendly. A simple mix of dish soap and water is effective for tackling grime. Combine approximately one cup of dish soap with a gallon of warm water to form a cleaning solution.

Another option is a vinegar solution. Mix equal parts vinegar and water in a spray bottle. This can help in breaking down tough stains while being safe for most surfaces.

Using these solutions in combination with your standard cleaning tools can lead to efficient results. Remember to test any homemade cleaner on a small area first to ensure it does not damage your gutters.

Professional Grade Equipment

If you prefer to leave the job to experts, consider using professional-grade equipment. Professional gutter cleaning services often use high-powered pressure washers to remove tough stains and debris effectively.

These services come equipped with telescoping wands and specialized nozzles designed for gutter cleaning. While this option may involve a higher cost, the results often reflect the investment, leaving your gutters sparkling clean.

Choosing professionals not only saves time but provides peace of mind knowing that the cleaning is done safely and thoroughly. It’s a practical option for those who may not have the time or ability to clean gutters themselves.

Step-By-Step Cleaning Process

Cleaning the exterior of your gutters effectively involves a structured approach. By following a few essential steps, you can ensure that your gutters are free from debris and functioning properly, preventing potential damage to your home.

Removing Debris

Start by inspecting your gutters for any visible debris, such as leaves, twigs, and dirt. Use a gutter scoop to remove larger clumps, taking care not to damage the gutter material.

If debris is stubborn, consider using a leaf blower to clear out waste easily. This tool helps you remove debris quickly without the need to climb too high.

Always wear safety gear, including gloves and goggles, to protect yourself during this process. Ensure your ladder is secure and stable when accessing higher areas. If you’re unable to manage debris alone, reaching out to a professional can ensure safety and proper removal.

Washing the Gutters

Once debris is cleared, it’s time to wash the gutters. For a thorough clean, a pressure washer or power washer is highly effective. Adjust the nozzle to a wide spray pattern to avoid damaging your gutters.

Start from the farthest corner and work your way toward the downspout, ensuring all dirt and grime are washed away. As you go along, pay attention to any areas that may have accumulated residue or stains.

If your gutters are especially dirty, you might want to use a mild cleaning solution to tackle tough spots. Rinse thoroughly, making sure there’s no residue left behind, as this can lead to further build-up.

Finishing Touches

After washing, inspect your gutters for any signs of damage or wear. Check for clogs in the downspouts, as this can lead to water overflow. You may need to use a garden hose to clear any remaining obstructions.

It’s also advisable to apply a protective treatment to the exterior of the gutters to prevent future build-up. Regular gutter maintenance will extend their lifespan and keep them functioning efficiently.

Taking these final steps will ensure your gutters are not only clean but also well-maintained, safeguarding your home from potential water damage.

Enhancing Gutter Longevity

To increase the lifespan of your gutters, regular upkeep and preventive measures are essential. By focusing on routine inspections, timely repairs, and effective installations, you can significantly enhance the durability and functionality of your gutter system.

Routine Inspections

Conducting routine inspections is crucial for maintaining clean gutters. Schedule checks at least twice a year, preferably in the spring and fall. Look for signs of wear, rust, or blockages caused by debris.

During inspections, pay attention to the seams and connections where leaks typically develop. Ensure that downspouts are directing water away from the foundation of your home. Identifying issues early helps prevent more significant water damage and costly repairs.

Repair and Sealant Application

Prompt repairs can extend your gutters’ lifespan remarkably. If you notice any leaks or damages, use a high-quality gutter sealant to fill cracks and seams. This prevents water from escaping, which can lead to rot and damage to your home.

When applying sealant, clean the area thoroughly to ensure proper adhesion. Inspect for sections that may need replacing and manage any rust effectively. Regular maintenance of these repairs will ensure your gutters continue to function efficiently.

Gutter Guard Installation

Installing gutter guards can significantly reduce the amount of debris that enters your gutter system. This proactive measure helps maintain clean gutters and minimizes the frequency of cleaning.

Choose guards that fit your gutter size and style to ensure maximum effectiveness. Proper installation means that leaves and larger debris will be filtered out, allowing for smooth water flow and reducing the risk of clogs. This extends the overall gutter lifespan while mitigating potential water damage to your home.

Frequently Asked Questions

This section addresses common inquiries regarding the cleaning of gutter exteriors. You will find specific information about methods, tools, and techniques to maintain the cleanliness and appearance of your gutters.

What is the best method to clean the exterior of aluminum gutters?

For aluminum gutters, a gentle approach is recommended. Start with a mixture of warm water and mild detergent. Use a soft cloth or sponge to scrub the surface, ensuring not to scratch the aluminum. Rinsing with a garden hose will help remove any soap residue.

How can I restore the whiteness of my gutters?

To restore the whiteness of your gutters, a combination of baking soda and vinegar can be effective. Sprinkle baking soda on stained areas, then spray vinegar on top. Allow it to fizz for a few minutes, then scrub with a soft brush before rinsing.

Which tools are recommended for cleaning the outer part of gutters?

For cleaning the outer part of gutters, you should use tools like a soft brush, a sponge, and a bucket for cleaning solution. A hose with a spray nozzle can help rinse off soap and debris efficiently. Additionally, a non-abrasive cleaner designed for metal can enhance results.

Is there an effective technique for removing stains from gutter exteriors?

To remove stains, consider using a mixture of oxygen bleach and water. This solution can be applied with a spray bottle or a soft cloth. Let it sit for a few minutes before scrubbing and rinsing thoroughly to remove stubborn stains effectively.

Can pressure washers be safely used to clean the outside of gutters?

Pressure washers can be used but should be employed with caution. Use a low-pressure setting to prevent damage to the gutters. Keep the nozzle at a safe distance to avoid denting or damaging the aluminum.

How can the exterior of gutters be cleaned safely without using a ladder?

If you prefer not to use a ladder, consider using a cleaning extension tool designed for gutters. These tools often come with long handles and sprayers that allow you to reach the gutters from the ground. Alternatively, a telescoping pole with a sponge attachment can also be effective.


Range Hood Maintenance: Essential Tips for Longevity and Performance

Range Hood Maintenance | Totally Maintained

Maintaining your range hood is essential for its efficiency and the overall air quality in your kitchen. Regular maintenance helps prevent grease buildup, ensures proper ventilation, and prolongs the lifespan of the appliance. Failure to keep your range hood in good condition can lead to unpleasant odors and even fire hazards, making it crucial to stay on top of cleaning tasks.

You can easily keep your range hood functioning well with a few straightforward practices. Cleaning the filters, wiping down surfaces, and checking for any mechanical issues should be part of your routine. Using simple ingredients like hot water and mild soap can make the cleaning process effective without requiring excessive effort.

By prioritizing range hood maintenance, you not only enhance your cooking environment but also save money on potential repairs and replacements down the line. Your kitchen deserves a clean, safe atmosphere, and a well-maintained range hood plays a vital role in achieving that.

Understanding Your Range Hood

A range hood is essential in maintaining a clean and safe kitchen environment. By understanding its types and components, you can ensure optimal performance and longevity.

Types and Styles

Range hoods come in various types and styles, each designed for specific kitchen layouts and cooking needs. Here are the most common options:

  • Wall-Mounted: Attached to the wall above the cooktop, providing a sleek appearance.
  • Under-Cabinet: Installed beneath cabinets, saving space while effectively ventilating cooking odors.
  • Island Hoods: Designed for kitchens with a freestanding cooktop on an island. They hang from the ceiling and provide powerful ventilation.
  • Ductless Models: Utilize charcoal filters to recirculate air, ideal for kitchens without ductwork.

Each model combines functionality with aesthetics, often featuring stainless steel finishes that blend seamlessly with modern kitchen designs. Choosing the right type is crucial for effective odor and smoke management.

Key Components

To ensure your range hood operates efficiently, it’s essential to understand its key components.

  1. Fan/Blower: This is the heart of your range hood, responsible for sucking up smoke and odors. Different models offer varying fan speeds for customizable ventilation.
  2. Filters: Range hoods usually include grease filters and, in ductless models, charcoal filters. Regular cleaning or replacement of these filters is vital to maintain airflow and performance.
  3. Ductwork: For ducted hoods, proper installation of ductwork directs air outside, minimizing indoor air contamination.
  4. Controls: Most range hoods feature easy-to-use controls for adjusting fan speed and lighting, enhancing user experience.

Familiarizing yourself with these components will help you maintain your range hood effectively, ensuring a fresher kitchen environment.

Basic Maintenance for Longevity

Maintaining your range hood ensures it operates efficiently and lasts longer, contributing to a cleaner kitchen environment. Focus on implementing a consistent cleaning routine and taking proper care of the filters to maximize performance.

Routine Cleaning Schedule

Establish a routine cleaning schedule for your range hood to prevent grease buildup and ensure optimal function. Clean the exterior of the hood weekly. Use a mild degreaser on a soft cloth; this will keep surfaces shiny and free from residue.

Every one to two months, focus on the inside. Remove any debris that might accumulate in the vent system. This will help maintain airflow and efficiency. During your cleaning sessions, check for any signs of wear or damage that may need attention.

Filter Care and Replacement

Filters are crucial for trapping grease and maintaining air quality. Depending on the type, clean your metal grease filters every 1-2 months. A simple wash in warm, soapy water typically suffices. For charcoal filters, plan for replacement every 1-3 months as they can’t be cleaned.

To remove a filter, check your model’s instructions. Properly cleaning or replacing filters prevents buildup that could affect airflow. A well-maintained filter enhances the range hood’s performance and prolongs its lifespan, ensuring your kitchen remains free of smoke and odors.

Deep Cleaning Techniques

Maintaining your range hood requires deep cleaning to ensure efficient operation and a grease-free kitchen. Effective techniques focus on degreasing the range hood and cleaning the ventilation ducts.

Degreasing the Range Hood

Start by removing any metal grates and filters from the range hood. Soak these in a mixture of hot water, dish soap, and baking soda for about 15-20 minutes. This helps break down stubborn grease.

For the exterior, use a commercial degreasing solution or a homemade mix of vinegar and water. Apply it with a cleaning spray bottle and let it sit for a few minutes. Wipe with a soft cloth to remove residues. For tough grime, consider using ammonia-dampened paper towels on the affected areas.

Always rinse the filters thoroughly with warm water before reinstalling them. This ensures that no cleaning agents remain that could affect food safety. Regularly repeating this process will keep your range hood in top condition.

Cleaning the Ventilation Ducts

Cleaning ductwork is essential for optimal airflow and grease management. Start by turning off the power to your range hood for safety. Remove any accessible duct sections and clean them using a damp cloth and soapy water.

For stubborn grease buildup, a degreaser can be effective. Spray it generously in the ducts, allowing it to sit for a few minutes before wiping it clean. Make use of a long brush to reach deeper areas of the ducts.

Inspect the ventilation system for any clogs or obstructions. If necessary, use a vacuum to remove debris throughout the ductwork. Regular duct cleaning not only improves efficiency but reduces fire hazards associated with grease buildup.

Troubleshooting Common Problems

When facing issues with your range hood, two primary areas to consider are electrical and mechanical problems. Identifying these issues can help you address them effectively and ensure your range hood operates efficiently.

Electrical Issues

Electrical problems are often the root cause of range hood malfunctions. Start by checking the power supply; ensure the unit is plugged in and the outlet is functioning. If the lights aren’t working, it’s likely due to a burned-out light bulb.

Replace the bulb with a compatible type.

Inspect wiring for any visible damage or loose connections. Damaged wiring could lead to shorts and dangerous conditions.

If you suspect issues with the fan motor or other electrical components, it’s essential to conduct careful troubleshooting. Use a multimeter to test the motor; if it shows no continuity, it may need replacing.

Mechanical Concerns

Mechanical issues can significantly affect performance, often stemming from fan-related components. Start by inspecting the fan blades and bearings. Accumulated grease can cause imbalances, leading to noise and reduced airflow.

Clean the fan blades regularly and ensure they turn freely.

Check the blower for any obstructions or blockages; this can prevent proper air circulation. Loud noises may indicate a failing motor that requires attention.

Listen for unusual sounds during operation, as this can signal mechanical failure. If the fan motor appears to be struggling, it may need repair or replacement.

Addressing these mechanical concerns promptly can prolong the life of your range hood.

Advanced Care and Replacement

Maintaining your range hood ensures optimal performance and longevity. With proper care, you can enhance its efficiency and know when it’s time to replace parts or seek professional assistance.

Upgrading Components

Upgrading components of your range hood can significantly improve its performance. Start by checking the motor and filters. High-performance parts, like a more powerful motor or specialized filters, can enhance airflow and capture more grease. Refer to your owner’s manual for compatible upgrades.

Consider upgrading the lighting as well. Energy-efficient LED lights provide better visibility while consuming less energy. Installing a new control panel or digital interface can simplify operation and monitoring.

Lastly, you might opt for advanced ventilation systems that reduce noise levels during operation. Regular upgrades will ensure your range hood operates efficiently and effectively, extending its lifespan and functionality.

When to Call a Professional

There are times when professional help becomes essential for maintaining your range hood. If you notice persistent noises, reduced airflow, or strange odors, these may indicate underlying issues requiring expertise.

When replacing major components, such as the motor or ventilation systems, it’s advisable to consult professionals or refer to your operation manual for specifications.

Additionally, a qualified technician can perform thorough cleaning and maintenance, which are crucial for maintaining performance and safety. Regular inspections can prevent further damage and ensure your range hood remains an effective appliance in your kitchen.

Frequently Asked Questions

Understanding the maintenance of your range hood is crucial for ensuring its efficiency and longevity. The following information addresses common questions related to filter cleaning, vent system maintenance, and best practices for both residential and commercial kitchens.

How often should range hood filters be cleaned for optimal performance?

You should clean range hood filters every month if you cook regularly. For occasional use, every three months is sufficient. Cleaning keeps the filters effective and prevents grease buildup, ensuring your range hood operates efficiently.

What is the best method for cleaning a range hood’s vent system?

The best method involves disassembling the vent cover and using a vacuum to remove loose debris. Follow this by applying a degreaser and scrubbing with a soft brush. Rinse thoroughly to avoid residue, ensuring the vent system remains clear for optimal airflow.

Can professional cleaning services prolong the life of a range hood?

Yes, professional cleaning services can help maintain your range hood effectively. Regular deep cleaning by experienced technicians can significantly extend its lifespan by removing tough grease and buildup that you may miss during routine cleaning.

What are the steps in a typical range hood maintenance routine?

A typical maintenance routine includes cleaning the filters, inspecting the vent system, checking for any grease buildup, and ensuring that all components are functioning correctly. Regular checks can help identify issues before they become major problems.

What type of degreaser is most effective for removing kitchen hood grease?

A non-abrasive degreaser specifically designed for kitchen appliances is ideal. Look for products that are food-safe and formulated to cut through grease without damaging the metal surfaces of your range hood.

Are there any specific considerations for maintaining a commercial kitchen hood?

Yes, commercial kitchen hoods require more frequent maintenance due to higher cooking volumes. Regular inspections and cleanings, often every month or bi-monthly, are necessary to comply with health regulations and ensure the safety of your kitchen environment.

How to Unclog a Gutter: Effective Techniques for Maintenance

How to Unclog a Gutter | Totally Maintained

Clogged gutters can lead to serious issues for your home, including water damage and foundation problems. To effectively unclog a gutter, start by removing visible debris from the top, then use tools such as a plumber’s snake or a garden hose to clear out stubborn blockages. By addressing these clogs promptly, you can prevent costly repairs down the line.

Understanding the causes of gutter clogs is crucial. Leaves, twigs, and other debris often build up over time, especially in heavily wooded areas. Regular cleaning and maintenance can significantly reduce the frequency of clogs, keeping your gutters functioning properly.

In this article, you will discover practical methods for unclogging gutters, ensuring your home remains protected from potential water damage. Prepare to take charge of your home’s maintenance and keep your gutters clear and efficient.

Understanding Gutter Clogs

Gutter clogs can lead to significant issues for homeowners, from water overflow to potential structural damage. Recognizing the common causes of these clogs and understanding their impacts is crucial for maintaining a functional gutter system.

Common Causes of Clogs

One of the primary reasons for gutter clogs is the accumulation of leaves. As autumn approaches, fallen leaves can gather, creating blockages that restrict water flow.

Another contributor is dirt and debris that accumulates over time. This buildup can occur due to wind or rain, which carries particles into the gutter system. Additionally, the organic matter from plants attracts insects and can foster mold growth, worsening the clog.

If you don’t regularly clean your gutters, these materials can mix and solidify, making it difficult to remove. This situation can escalate quickly and lead to overflowing gutters during heavy rains, causing water damage to your home.

Impact of Neglected Gutters

Neglecting your gutters can have several negative consequences. Clogged gutters can cause water to overflow and pool around your home’s foundation, potentially leading to foundation issues.

Moreover, stagnant water in gutters can attract pests, such as mosquitoes, increasing the risk of infestations. These conditions not only create an unsightly mess but can also degrade your home’s curb appeal.

Water damage caused by overflowing gutters may impact your roof, leading to costly repairs. By performing routine maintenance, you can avoid these issues and ensure your gutters function effectively to protect your home.

Safety Preparations

Before starting the gutter unclogging process, it’s important to prioritize safety. Proper equipment, attire, and assessing your work area are essential steps to ensure a safe and effective experience.

Proper Equipment and Attire

Wearing the right attire is crucial for your safety while cleaning gutters. Opt for sturdy, non-slip shoes to prevent falls. Consider using gloves to protect your hands from sharp debris and potential contaminants. A safety helmet may also be wise, especially if you’re working under trees or where debris may fall.

Ensure you use a stable ladder rated for the weight it will bear, and always place it on a flat surface. For added safety, utilize a ladder stabilizer to prevent tipping. Using a roof harness can also enhance safety when working on slopes. Having a safety whistle is a practical addition; it can alert others in case of an emergency.

Assessing the Work Area

Before you begin, evaluate the area around your gutters for potential hazards. Check for loose branches, power lines, or slippery surfaces to minimize risks. If you notice overhanging limbs, trim them back to create a safer workspace. Also, inspect the ground for obstacles that could trip you during the task.

You should consider weather conditions as well. Working in dry conditions is safer than during wet or windy weather, which can increase the risk of accidents. Remove any debris from the ground below to create a clear landing area if you were to fall. Finally, ensure that children and pets stay away from the work area for their safety.

Manual Gutter Cleaning Techniques

For effective gutter cleaning, you can use hands-on methods that allow you to remove debris efficiently. Manual techniques are essential, especially for stubborn clogs.

Hand Clearing Method

The hand clearing method is a straightforward and effective way to clean your gutters. Start by wearing gloves to protect your hands from sharp objects and debris. Use a sturdy ladder to access the gutters safely.

Once you are in position, inspect the gutter for leaves, twigs, and other blockages. Remove the debris by hand, making sure to discard it in a bucket or bag for easy cleanup. Pay special attention to downspouts as clogs often form there.

After clearing, flush the gutter with water using a hose. This step ensures any remaining dirt is washed away. Regularly practicing this method can help maintain clear gutters.

Using a Gutter Scoop

A gutter scoop is a specialized tool designed to assist in cleaning your gutters. It helps you reach deep into the gutter to extract compacted debris effectively. When using a gutter scoop, start at the farthest end of the gutter and work toward the downspout.

Position the scoop at the base of the gutter’s curve to gather debris without spilling it. Move the scoop back and forth gently to detach stubborn clogs. Place the debris into a bucket for easy removal.

After you’ve cleared the gutters, use a hose to rinse any remaining dirt and ensure proper water flow. This tool enhances your efficiency and makes the cleaning process streamlined, allowing you to clean your gutter more thoroughly.

Advanced Gutter Cleaning Tools

When tackling clogged gutters, using advanced tools can make the process significantly easier and more efficient. Several specialized options can help you effectively clear away debris, ensuring your gutters remain functional and free-flowing.

Power Washer vs. Pressure Washer

Both power washers and pressure washers are effective for gutter cleaning, but they have distinct differences. A power washer uses heated water, making it suitable for removing tough buildup and grime. It’s particularly useful when you face stubborn dirt that hasn’t been cleared in a long time.

On the other hand, a pressure washer relies solely on high-pressure water jets. It is ideal for lighter cleaning tasks, like blasting away leaves and dirt. For optimal use, ensure the nozzle is adjusted correctly to avoid damaging gutters. Always maintain a safe distance, typically between 18 to 24 inches, to protect the gutter surfaces.

Effective Use of a Leaf Blower

A leaf blower is a versatile tool that can quickly clear debris from gutters. When using a leaf blower, choose one with a focused nozzle attachment for better efficiency.

Position yourself at a safe distance from the gutter edge to prevent damage. Angle the blower to direct debris toward an open area for easy cleanup. It’s effective for removing leaves, twigs, and small dirt particles. However, avoid using it in wet conditions as it may scatter mud and worsen the clog.

How to Operate a Shop Vac

Using a shop vac can be an effective method for clearing clogged gutters, especially for debris that’s accumulated over time. Start by attaching the appropriate nozzle for suctioning debris.

Position the shop vac at the base of the gutter. Use an extension wand if necessary to reach higher areas without climbing. After it’s set up, turn on the shop vac and slowly guide the nozzle along the gutter line, sucking up leaves and dirt.

For optimal results, consider adding a filter that can trap finer particles. Regular maintenance with a shop vac can prevent clogs from forming, keeping your gutters in good condition year-round.

Unclogging the Downspout

Maintaining the flow of water through your downspout is crucial for effective gutter performance. If it becomes clogged, two effective methods to consider are utilizing a drain snake and flushing with high water pressure.

Guidelines for Drain Snake Usage

Using a drain snake is an efficient way to clear clogs within your downspout. Begin by selecting a flexible plumbing snake that can navigate the bends of your downspout.

  1. Preparation: Ensure you have gloves and safety goggles to protect yourself.
  2. Insertion: Feed the snake into the downspout carefully. Make sure it reaches the clog.
  3. Operation: Crank the handle to break up debris. This typically includes leaves, dirt, or other obstructions.

Keep in mind: A drain snake with a corkscrew end can be particularly effective for pulling out tougher clogs. If resistance occurs, feel free to pull back slightly and reinsert to tackle the blockage from different angles.

Flushing with Water Pressure

Using water pressure is another reliable solution. This method effectively dislodges clogs without heavy tools.

  1. Equipment: Attach a hose to your outdoor water source capable of delivering a strong stream, typically with a pressure of at least 40-60 PSI.
  2. Flushing: Insert the hose directly into the downspout. Turn on the water and allow it to flow through the pipe. The force of the water will help to clear minor clogs.

Tip: If your downspout remains clogged, consider increasing the water pressure gradually, but avoid excessive force that could damage the system. Flush until you see clear water exiting at the bottom. This method is effective and minimizes cleanup efforts, ensuring optimal water flow through your gutter downspout.

Aftercare and Maintenance Advice

Maintaining your gutters is essential for proper drainage and preventing future clogs. Regular inspection and preventive measures will extend the life of your gutter system and reduce maintenance costs.

Routine Gutter Inspection

Inspect your gutters at least twice a year, ideally in the spring and fall. Look for signs of blockage, sagging, or rust. Pay attention to the downspouts, as they can easily become clogged with leaves and debris.

When performing your inspection, use a sturdy ladder and wear gloves for safety. Check for any leaks or damage to the seams and joints. Ensure that water flows freely through the downspouts during intense rain.

If you notice persistent issues, consider consulting a professional for advice. They can assess the condition of your gutters and recommend appropriate maintenance services.

Preventative Measures

Taking proactive steps will significantly reduce the risk of clogged gutters. Installing gutter guards can help keep debris out while allowing water to flow through. Regularly trimming nearby trees and shrubs will also minimize leaf buildup.

Consider scheduling routine professional maintenance. Services like gutter cleaning and inspection can catch potential problems early, ensuring your system functions well year-round.

Utilizing a comprehensive home maintenance service can simplify upkeep for all your home systems. This reduces the need for multiple providers and helps you focus on preventive care, extending the life of your gutter system.

By implementing these measures, you can effectively maintain healthy gutters and safeguard your home from water damage.

Frequently Asked Questions

When it comes to unclogging gutters, there are specific tools and techniques that can help. Understanding how to safely remove blockages and maintain your gutters is essential for preventing future issues. Here are some frequently asked questions that can guide you through the process.

What tools are necessary for safely clearing out gutter blockages?

To clear out gutter blockages, you will need a few essential tools. A sturdy ladder, gloves, a small trowel or scoop, and a bucket for debris collection are vital. You may also consider a garden hose or a pressure washer for additional cleaning power.

Can downspout blockages be effectively removed from the ground?

Yes, downspout blockages can often be removed from the ground. Using a hose with a special nozzle can send water directly into the downspout to dislodge clogs. Additionally, tapping or gently smacking the downspout may help loosen stubborn blockages.

What method can be used to clean an underground clogged gutter drain?

Cleaning an underground clogged gutter drain typically involves using a plumbing snake or auger to break up the clog. You can also use a high-pressure water jetting service to clear out debris effectively without damaging the pipes.

Who should be contacted for professional gutter clog removal?

If you encounter persistent clogs or are unable to clear them safely, it is best to contact a professional gutter cleaning service. They possess the right tools and expertise to handle difficult blockages effectively.

Is it safe to use chemical cleaners for gutter and downspout clogs?

While some chemical cleaners are available for unclogging gutters, they can be harmful to your roofing and the environment. It is advisable to rely on mechanical methods or eco-friendly alternatives to avoid potential damage.

How should one properly maintain gutters to prevent clogs?

To maintain gutters and prevent clogs, regular cleaning is essential. Aim to clean your gutters at least twice a year, especially after heavy storms or during the fall when leaves accumulate. Installing gutter guards can also reduce debris buildup and simplify maintenance.

Dryer Damaged During Condo Lint Trap Maintenance: Understanding Liability and Prevention

Dryer Damaged During Condo Lint Trap Maintenance | Totally Maintained

Regular maintenance of your dryer is crucial, especially when managing lint traps in condos. Failing to address lint buildup can lead to more than just performance issues; it can damage your dryer and present fire hazards. Proper lint trap maintenance not only enhances your dryer’s efficiency but also prevents costly repairs or replacements.

If you’ve noticed reduced drying performance or excessive heat, your lint trap might require attention. In condos, shared systems can lead to faster lint accumulation, making it vital to clean your dryer vents at least once a year. Effective cleaning ensures that your dryer operates optimally and helps avoid serious damage that can disrupt your daily routines.

Understanding how to maintain your lint trap and when to seek professional help can save you time and money. Preventive care plays a significant role in extending the lifespan of appliances, allowing you to enjoy stress-free laundry days.

Understanding Dryer Lint Traps and Vents

Proper maintenance of dryer lint traps and vents is crucial for the efficient operation of your dryer. An understanding of these components can help you avoid safety hazards and extend the life of your appliance.

Importance of Lint Trap Maintenance

The lint trap plays a vital role in your dryer’s functionality. It captures lint and debris from your clothing, which can otherwise cause blockages. When not regularly cleaned, the lint trap can become clogged, restricting airflow. This leads to increased drying times and can even cause the dryer to overheat, presenting a fire hazard.

Regularly checking and cleaning your lint trap after each load is essential. According to maintenance experts, neglect can lead to system failures and increased energy consumption. This not only affects performance but can also escalate your utility bills.

You should incorporate lint trap cleaning into your routine. This simple practice can help ensure safe dryer operation and enhance drying efficiency.

Different Types of Dryer Vents

Dryer vents come in various types, each designed for specific setups. Knowing which type you have can help you understand the maintenance needs better.

  1. Rigid Metal Vents: These are the most recommended due to their durability and effective airflow. They minimize lint buildup and offer strong protection against fire hazards.
  2. Flexible Plastic or Aluminum Vents: While easier to install, they can accumulate lint more quickly. This type is generally less advisable and may require more frequent inspection and cleaning.
  3. Semi-Rigid Vents: A compromise between rigid and flexible, these are more flexible than metal but still maintain good airflow.

Proper maintenance of your dryer vents, regardless of type, is crucial to prevent blockages. Regular cleaning not only promotes performance but also enhances safety.

Preventative Measures to Protect Your Dryer

To keep your dryer functioning efficiently and safely, focus on regular maintenance routines and being aware of potential fire hazards. Implementing these strategies will help minimize risks and extend the lifespan of your appliance.

Regular Cleaning and Maintenance

Cleaning your dryer and its components regularly is vital. Start with the lint screen; remove lint after every load to maintain airflow. Clogged screens can lead to overheating and reduced efficiency.

Schedule deeper cleaning of the dryer vents every six months. Use a professional service or a vacuum attachment designed for this purpose. This will help prevent lint build-up in the venting system, reducing fire hazards.

Consider investing in dryer maintenance services, like those offered by Totally Maintained, to ensure thorough inspections and cleaning. Regular upkeep not only promotes safety but can also prolong the life of your dryer.

Identifying Fire Hazards

Being proactive about fire safety is crucial. Regular inspection of your dryer and surrounding area is necessary to spot potential fire hazards. Check the venting system for any signs of blockage or damage.

Ensure that no flammable materials are stored near the dryer. Maintain clear pathways around the appliance to allow for proper airflow.

Make it a habit to educate yourself about the signs of problems, such as unusual noises or burning smells, as these may indicate a malfunction. By understanding these risks, you can take immediate action to safeguard your home against fires caused by dryer appliances.

Steps for Safe Lint Trap and Dryer Vent Cleaning

Cleaning the lint trap and dryer vent is essential for maintaining your appliance and preventing hazards. The following steps will guide you through using a dryer vent cleaning kit and the options for professional versus DIY cleaning.

Using a Dryer Vent Cleaning Kit

A dryer vent cleaning kit is a practical tool for maintaining airflow in your dryer system. The kit typically includes flexible rods and brushes designed to remove lint buildup from the vent.

  1. Preparation: Before starting, unplug the dryer and remove the lint trap. This ensures safety while you work.
  2. Assemble the kit: Connect the rods according to the manufacturer’s instructions. Ensure they are secure to prevent breakage during cleaning.
  3. Insert the brush: Feed the brush into the vent, moving it back and forth. This action loosens the lint and debris.
  4. Use the vacuum: If possible, attach a vacuum to the vent to suck out loose lint as you clean. This provides a more thorough clean.
  5. Caution: Be mindful of any sharp edges inside the vent and avoid pushing too forcefully to prevent damage.

Professional Versus DIY Cleaning

Choosing between DIY cleaning and hiring a professional depends on your comfort level and the extent of the lint buildup.

DIY Cleaning: This option is cost-effective and allows you to maintain your schedule. With a dryer vent cleaning kit, you can regularly check and clean your dryer vent. Ensure you follow safety guidelines.

Professional Cleaning: Hiring a professional offers expertise and thoroughness. They have specialized equipment that can reach deeper into the vent system, removing more accumulated lint. This can be particularly beneficial for condos or homes with long venting systems.

Ultimately, if you feel uncertain about the process, consider engaging a professional service to ensure thorough cleaning and safety.

Troubleshooting and Repair after Damage

When a dryer suffers damage during lint trap maintenance, it’s crucial to identify the specific issues and the best path for repair. Understanding how to assess damage and finding experienced professionals can save you significant time and costs.

Identifying Damage to Dryer and Motor

Start by unplugging your dryer for safety. Check the exterior for any visible signs of damage, such as cracks or dents. Next, inspect the lint trap area thoroughly. If you hear unusual noises, it may indicate a problem with the motor. Make sure to locate your dryer’s model number, as this information is vital for part replacements.

Open the dryer door and check the drum for any obstructions or disconnections. Inspect the motor for frayed wires or signs of overheating. If the dryer fails to start, the issue may be electrical or mechanical, necessitating further investigation.

Common symptoms to note include:

  • Unusual noises: Grinding or squealing sounds may signal motor issues.
  • Drum not turning: Indicates a possible motor malfunction.
  • Burning smell: Could indicate overheating components.

Taking detailed notes about the observed issues aids during the repair process.

Finding the Right Professional for Repairs

When selecting a repair professional, prioritize those with experience specifically related to your dryer model and type. Look for reviews or ask for references from neighbors or friends who have previously used their services.

Make sure to inquire about certifications and warranties on their work. A good technician will provide a clear explanation of the diagnosed issues, outline necessary repairs, and give estimates of costs involved.

Additionally, confirm that they understand the importance of preventive maintenance. This knowledge ensures your appliance receives care that prolongs its lifespan. Make use of professional services designed for comprehensive home maintenance when necessary, as they help avoid future damage and save time.

Enhancing Efficiency and Extending Dryer Lifespan

Regular maintenance is essential for optimizing dryer performance and prolonging its lifespan. Focusing on specific maintenance tasks can prevent issues that lead to longer drying times and costly repairs.

Impact of Maintenance on Drying Time

Cleaning the lint trap after every use is crucial for maintaining good airflow. A clogged lint trap can increase drying time and may even pose a fire hazard. You should also consider cleaning the dryer vent regularly. A clear vent allows moisture to escape efficiently.

Implementing a routine maintenance schedule can significantly reduce drying times. This includes checking for blockages and performing a thorough cleaning. Performing these simple tasks can result in very good efficiency and extend the life of your dryer while saving you on energy costs.

Gas Dryer Considerations

For gas dryers, ensuring proper ventilation is vital. You need to check the gas line and venting system regularly. Proper ventilation helps prevent overheating and carbon monoxide buildup, which can be dangerous.

Additionally, consider having a professional clean your dryer’s exhaust duct annually. This step helps maintain optimal performance and enhances efficiency. Regular checks will keep your gas dryer running smoothly and reduce the risk of unexpected breakdowns. Taking these precautions can significantly extend the lifespan of your appliance.

Frequently Asked Questions

This section addresses common concerns regarding dryer damage during lint trap maintenance in a condominium. You’ll find information on costs, insurance coverage, maintenance responsibilities, and proper cleaning procedures.

What are the potential costs of repairing a dryer damaged during lint trap maintenance?

Repair costs can vary significantly based on the extent of the damage. Minor repairs might range from $100 to $300, depending on the specific components that need fixing. Major issues that affect the motor or wiring can lead to expenses of $500 or more.

Can damage to a dryer during lint trap maintenance in a condo be covered by home insurance?

Typically, home insurance may cover damage if it results from a sudden accident or malfunction. Ensure you check with your policy details and contact your insurance provider for guidance on your specific situation. Documenting the damage and maintenance history can support your claim process.

What is the process for replacing a ceiling lint trap in a condominium?

Replacing a ceiling lint trap involves several steps. First, you should turn off the power and disconnect the dryer. Next, access the ceiling trap by removing the cover. Clean out any accumulated lint and replace the trap with a new unit, ensuring proper sealing to prevent air leaks.

Are condo owners responsible for cleaning their own dryer vents, or is this handled by building maintenance?

In many cases, condo owners are responsible for cleaning their own dryer vents. However, some buildings may offer maintenance services for this task. Refer to your condo association’s regulations to clarify your responsibilities regarding dryer vent cleaning.

How often should secondary dryer lint traps be maintained or replaced?

It is advisable to maintain and clean secondary lint traps at least once a year, particularly in condos where lint buildup can occur more rapidly. If you notice reduced efficiency or increased drying times, check and clean the trap more frequently.

What steps should be taken to properly clean a dryer vent in a condominium setting?

To clean a dryer vent effectively, first disconnect the dryer and clear surrounding areas. Use a vacuum or a specialized brush to remove lint from the vent pipe and the lint trap. It’s also essential to inspect the exterior vent cap for blockages, ensuring unobstructed airflow.

How to Clean the Condenser Coils on a Refrigerator for Optimal Performance

How to Clean the Condenser Coils on a Refrigerator for Optimal Performance | Totally Maintained

Cleaning the condenser coils on your refrigerator is a critical task that can significantly improve its energy efficiency. Regular maintenance helps prevent overheating and extends the lifespan of your appliance. Neglecting this important chore can lead to higher energy bills and potential breakdowns, making it essential to incorporate it into your home improvement routine.

By keeping your refrigerator coils clean, you ensure optimal performance and reduce the risk of costly repairs. This straightforward process involves a few simple steps that anyone can do, saving you the hassle of calling in a professional. Incorporating coil cleaning into your regular maintenance schedule not only promotes better energy efficiency but also keeps your refrigerator running smoothly for years to come.

In this guide, you’ll discover easy-to-follow tips for maintaining your refrigerator coils effectively. Whether you’re a seasoned DIYer or new to home maintenance, understanding how to clean your refrigerator coils will empower you to take care of this key appliance with confidence.

Understanding Your Refrigerator

A thorough understanding of your refrigerator can enhance its performance and lifespan. Knowing where to find the condenser coils and identifying your specific refrigerator model are crucial steps in maintaining your appliance effectively.

Locating the Condenser Coils

Condenser coils are essential for your refrigerator’s cooling process. They are typically located at the back or beneath the appliance.

To locate them:

  • Back Mount: If your refrigerator has coils at the back, you may see them exposed or covered by a grille.
  • Bottom Mount: For models with coils underneath, look for a grille at the base of the fridge.

Check your user manual for precise locations. Regular cleaning of these coils can improve efficiency and prolong the appliance’s life.

Identifying Refrigerator Model

Understanding your refrigerator’s model number helps you find specific maintenance information and replacement parts.

To identify your model:

  • Label Location: Look for a label usually found inside the fridge, either on the side wall or the door frame.
  • Information on the Label: The model number often consists of letters and numbers that indicate the brand and specifications.

Remember this model number when searching for cleaning instructions or replacement parts. Knowing your model ensures you access accurate and relevant information tailored for your refrigerator.

Preparation for Cleaning

Preparing to clean your refrigerator’s condenser coils is essential for efficiency and effectiveness. This section covers the necessary tools and important safety measures to take before beginning the cleaning process.

Gathering Cleaning Tools

Start by assembling all required tools to make the cleaning process smooth. You’ll need:

  • Coil Brush: This specialized brush helps reach tight spaces around the coils.
  • Cleaning Brush: A softer brush can be useful for dusting nearby areas.
  • Shop Vac: This tool is effective for removing large amounts of dust and debris.
  • Air Compressor: Use this for blowing out accumulated dust from hard-to-reach areas.
  • Screwdriver: If your refrigerator has cover panels, a screwdriver will help remove them.

Having everything on hand minimizes interruptions and helps you stay focused during the cleaning task. Ensure your tools are in good condition for the best results.

Safety Precautions and Preparation

Safety is paramount when working with appliances. Follow these steps to protect yourself:

  1. Unplug the Refrigerator: Always disconnect power before starting any maintenance work to prevent electric shock.
  2. Clear the Surrounding Area: Move any obstacles to create a safe workspace. This prevents tripping hazards.
  3. Wear Protective Gear: Consider wearing gloves and a dust mask to prevent any irritants from the dust.
  4. Consult Manufacturer’s Guidelines: Check your refrigerator’s manual for specific instructions regarding coil cleaning.

By taking these precautions, you can ensure a safe and effective cleaning experience. Proper preparation sets the stage for maintaining your refrigerator efficiently.

Step-by-Step Cleaning Process

Cleaning the condenser coils of your refrigerator is essential for its efficiency. Follow these steps to ensure a thorough and effective cleaning process.

Turning Off the Refrigerator

Before you begin, it’s crucial to disconnect the power supply. Locate the refrigerator’s power cord and unplug it from the wall to ensure safety during the cleaning process. This prevents any risk of electric shock while you’re working on the appliance. If your fridge is hardwired, locate the circuit breaker and turn it off. Wait a few minutes to let the system come to a complete stop.

Accessing the Coils

Next, you need to access the coils. Depending on your refrigerator model, the condenser coils may be located at the back or underneath. If they are at the back, carefully pull the refrigerator away from the wall to gain access. For coils located beneath, you’ll need to remove the kick plate. Use a screwdriver to detach it. Be gentle to avoid damaging any components.

Applying Cleaning Techniques

Once you have access to the coils, it’s time to clean. Start with a vacuum cleaner to remove loose dust and debris. Use the hose attachment to vacuum around the coils carefully, ensuring you reach all areas. After that, take a coil brush to scrub off any stubborn dirt or grime that the vacuum might have left behind. You can also use a damp cloth to wipe any remaining residues for a thorough clean.

Final Cleaning and Reassembly

After cleaning, give everything a final inspection. Ensure all debris is removed, and the coils are clean. If you used a damp cloth, let the coils dry thoroughly to prevent moisture build-up. Next, reattach the kick plate or push the refrigerator back into its original position. Finally, plug the refrigerator back in or turn on the circuit breaker. Wait a few minutes before checking that the appliance is running properly. Regularly checking and cleaning your refrigerator coils can help maintain efficiency and prolong its lifespan.

Maintenance and Tips for Longevity

Maintaining your refrigerator’s condenser coils is essential for optimal performance and energy efficiency. A few simple strategies can ensure longevity and reduce unexpected repair costs.

Regular Coil Cleaning Schedule

To keep your refrigerator running efficiently, establish a regular cleaning schedule for the condenser coils. Aim to clean the coils at least once every six months. If you have pets or live in a dusty environment, you may need to clean them more frequently.

Steps to Clean the Coils:

  1. Unplug the refrigerator to ensure safety.
  2. Use a soft brush or vacuum attachment to remove dust and debris.
  3. Clean hard-to-reach areas with a coil cleaning brush.

This regular maintenance not only improves energy efficiency but also extends the lifespan of your appliance. A clean coil allows your refrigerator to cool more effectively, reducing energy bills.

Preventing Coil Dust Build-Up

To minimize dust accumulation on your condenser coils, consider these proactive measures:

  • Location Matters: If possible, position your refrigerator away from heat sources and high-traffic areas to reduce exposure to dust.
  • Install Filters: Use air filters in your home to trap dust and particles before they settle on your refrigerator.
  • Routine Inspections: Regularly check the area around your refrigerator for dust and debris. Address build-up promptly to prevent it from affecting performance.

By implementing these strategies, you can maintain optimal energy efficiency and prolong the life of your refrigerator. Keeping the coils clean will help your refrigerator function effectively, saving you time and money in the long run.

Frequently Asked Questions

Cleaning the condenser coils on your refrigerator is essential for efficient operation. Below are specific questions and answers designed to clarify the process and importance of this maintenance task.

What is the recommended method for cleaning a refrigerator’s condenser coils?

The best method involves using a vacuum cleaner with a brush attachment. Gently vacuum the coils to remove dust and debris. You may also use a coil brush for stubborn dirt that the vacuum cannot reach.

How often should one clean the condenser coils of a refrigerator?

It is generally recommended to clean the condenser coils every six months. This prevents dust buildup, which can lead to inefficient cooling and increased energy consumption.

What can I use to clean the condenser coils beneath a refrigerator if I don’t have a brush?

If you don’t have a brush, you can use a vacuum cleaner with a narrow attachment. Alternatively, a soft cloth or a compressed air canister can help dislodge dust and dirt.

Where can I locate the condenser coils on my refrigerator?

Condenser coils are usually located at the back or beneath the refrigerator. Check your appliance’s manual for the exact location, as this can vary by model.

Are there any signs indicating that the condenser coils on my fridge need cleaning?

Yes, some signs include increased energy bills, unusual noises from the appliance, or the refrigerator not cooling properly. These issues often suggest that dust has accumulated on the coils.

Can refrigerator condenser coils be cleaned without using a vacuum cleaner?

Yes, while a vacuum is effective, you can clean the coils using a damp cloth to wipe off dust or a stiff brush if you have one. Compressed air can also help reach tight spaces.

How to Flush Water Heater with Vinegar: A Step-by-Step Guide to Maintain Efficiency

How to Flush Water Heater with Vinegar | Totally Maintained

Flushing your water heater with vinegar is an effective way to remove sediment buildup and improve its efficiency. This simple method not only cleans your tank but can also extend the lifespan of your water heater, particularly if you own a tankless model. Regular maintenance is essential to ensure your water heater runs smoothly and efficiently.

Using vinegar as a cleaning agent is straightforward and environmentally friendly. By allowing the vinegar to sit in the tank, you can break down stubborn deposits that accumulate over time, enhancing the performance of your unit. Whether you have a traditional tank or a tankless water heater, flushing with vinegar can be done easily by following a few simple steps.

It’s important to schedule this maintenance task regularly. Doing so will help prevent costly repairs and ensure that your water heater continues to function optimally. With just a few hours dedicated to this process, you’ll enjoy cleaner water and more efficient heating.

Understanding Your Water Heater

Knowing how your water heater works is essential for effective maintenance. Two key aspects are the role of the anode rod and the differences between tankless and conventional water heaters. This understanding will help you keep your system running efficiently.

The Role of the Anode Rod in Water Heater Maintenance

The anode rod is a vital component in preventing tank corrosion. Made of magnesium, aluminum, or zinc, this rod attracts corrosive elements in the water, extending the lifespan of your heater.

You should check the anode rod every few years, especially in areas with hard water. If it’s significantly corroded or depleted, it’s time to replace it. Replacing the anode rod periodically can save you from premature tank failure.

To check the anode rod:

  1. Turn off the electricity or gas supply to the heater.
  2. Drain some water from the tank to reduce pressure.
  3. Remove the anode rod using a socket wrench.

Differences Between Tankless and Conventional Water Heaters

Tankless water heaters heat water on demand, providing endless hot water without the need for a storage tank. These units are generally more energy-efficient since they only operate when hot water is needed.

In contrast, conventional water heaters store hot water in a tank and may use more energy to keep that water heated. They can run out of hot water during periods of high demand.

For maintenance:

  • Tankless heaters require periodic flushing to remove mineral buildup.
  • Conventional heaters need regular flushing to remove sediment.

Understanding these differences will guide you in choosing the right maintenance approach for your specific model.

Preparing for a Vinegar Flush

Before you begin the vinegar flush process for your water heater, it’s essential to prioritize safety and gather the necessary materials. This preparation will ensure a smooth and effective cleaning experience.

Safety First: What You Need To Do Before You Start

Safety is paramount when working with any appliance. Start by turning off the power supply to your water heater. For electric heaters, unplug the unit; for gas heaters, set the thermostat to the lowest setting.

Next, turn off the cold water inlet valve. This isolation prevents any fresh water from entering the tank during the flush. Open a hot water faucet in your home to relieve pressure and allow for efficient draining later on.

Always wear protective gear such as gloves and goggles. These safeguards protect you from potential splashes and spills. Once you have ensured these safety measures, you can confidently proceed with the flushing process.

Materials Required for a Vinegar Flush

Gathering the right materials will make your vinegar flush more efficient. You will need three gallons of white vinegar, which acts as a natural cleaning agent and effectively dissolves mineral buildup.

funnel is essential for pouring vinegar into the tank without spilling. You may also require a hose to facilitate draining water from the tank.

If your water heater has a drain valve, ensure you have a bucket or hose ready for collection. Additionally, having a screwdriver on hand will help you access any necessary parts easily. By preparing these materials ahead of time, you streamline the flushing process and reduce the risk of delays.

The Vinegar Flush Process

Flushing your water heater with vinegar is an effective way to remove sediment buildup and prolong its lifespan. The following steps will guide you through the process while emphasizing monitoring the flush and replacing the vinegar solution as needed.

Step-by-Step Guide to Flushing Your Water Heater

  1. Turn Off Power and Water Supply: Start by turning off the power to your water heater and shutting off the cold water supply using the isolation valve.
  2. Connect a Hose: Attach a garden hose to the drain valve at the bottom of the tank. Place the other end in a bucket or outside to direct the water flow.
  3. Drain the Tank: Open the pressure relief valve to allow air into the tank. Then, open the drain valve to empty any existing water.
  4. Add Vinegar: After draining, close the drain valve. Pour about four gallons of vinegar into the tank through the opening. This vinegar flush will help dissolve sediment.
  5. Let it Sit: Allow the vinegar to sit for at least 24 hours. This time lets the acidity work effectively on the buildup.

Monitoring the Flush and Vinegar Solution Replacement

During the flushing process, it’s essential to monitor how the vinegar is interacting with the sediment.

  • Visual Check: Examine the hose’s drainage. If you notice sediment, this indicates the flushing is effective.
  • Vinegar Replacement: If flushing continues for an extended period, consider replacing the vinegar solution to maximize cleaning efficiency. You may add fresh vinegar after the initial 24 hours.

After the vinegar has had time to work, you can drain it again and follow up with a fresh water rinse to clear out any remaining sediment and vinegar. This rinsing helps ensure your water heater is clean and ready for use.

Finishing Up and Water Heater Reconnection

After completing the vinegar descaling process, you need to properly rinse the water heater and restore the power or gas supply. This ensures that your water heater operates efficiently and effectively, extending its lifespan.

Rinsing the Water Heater

Begin by turning off the inlet valve to stop any new water from entering the tank. Then, attach a garden hose to the drainage valve at the bottom of the water heater and direct the other end into a bucket or outside. Open the drainage valve and allow the tank to empty completely.

Once drained, close the valve and disconnect the hose. Reopen the inlet valve to fill the tank with clean water. Allow it to run for a few minutes to flush out any remaining vinegar and sediment. This step is crucial to prevent any lingering acidity from affecting the inner components of the heater. Checking for leaks while the tank fills is also essential.

Restoring Power and Gas Supply

With the water heater rinsed, it’s time to restore the power or gas supply. If you have an electric model, turn the thermostat back on, ensuring it is set to your desired temperature. For gas models, relight the pilot light according to the manufacturer’s instructions.

Once restored, allow the heater to heat the water. This may take some time, so check the temperature before use. Monitor the water pressure in your system during this period. Proper reconnection eliminates issues related to inconsistent heating and optimizes your water heater’s performance. Regular flushing enhances its efficiency and extends its lifespan, making home maintenance simpler and more effective.

Water Heater Maintenance and Upkeep

Proper maintenance of your water heater is crucial for optimal performance and longevity. Keeping your system in good shape helps prevent issues such as scale build-up while ensuring your water heater operates efficiently.

Regular Maintenance to Prevent Scale Build-Up

Regular checks of your water heater can significantly reduce the risk of scale build-up caused by mineral deposits. Start by flushing the tank with vinegar to eliminate any accumulated sediment, which can affect heating efficiency.

You should also inspect and possibly replace the anode rod every couple of years. This rod prevents rust and extends the life of your tank. If you notice any wear, replacing it promptly can save you from costly repairs later.

Don’t forget to check the pressure valve occasionally. If it’s not functioning correctly, it may lead to excessive pressure build-up, which can damage your system. A proactive maintenance schedule will keep your water heater running smoothly and efficiently.

Recognizing When It’s Time to Call a Professional

While basic maintenance is manageable, some situations call for a professional’s expertise. If you notice unusual noises coming from the tank, such as rumbling or popping, this may indicate sediment build-up requiring a thorough inspection.

Leaking water around the heater is another sign that something is amiss. This could be related to a faulty temperature gauge, valve, or even the tank itself. If you have a tankless model like a Navien or Rinnai, regular servicing is recommended to avoid costly failures.

Finally, if you consistently have inadequate hot water, it’s time to consult with a professional. They can assess whether the problem lies with the heater’s capacity or other underlying issues.

Frequently Asked Questions

Flushing your water heater with vinegar is a common practice, and there are several aspects you may want to understand. This section addresses safety, the type of vinegar to use, duration of use, and proper procedures involved in the flushing process.

Is it safe to use vinegar to flush my water heater?

Yes, it is safe to use vinegar for flushing your water heater. Vinegar is a natural acidic substance that helps dissolve mineral buildup without causing damage. Just ensure that you’re following the correct procedure to avoid any issues with your water heater.

What type of vinegar is recommended for flushing a tankless water heater?

White distilled vinegar is recommended for flushing tankless water heaters. It has a high acidity level, which is effective in breaking down sediment. Avoid using apple cider vinegar or flavored vinegars, as they may leave residues that can affect the water quality.

How long should vinegar be left inside a water heater during the flushing process?

It’s advisable to leave vinegar inside your water heater for at least 24 hours. This duration allows the vinegar to effectively dissolve sediment and buildup. Make sure to check the manufacturer’s guidelines for any specific recommendations related to your model.

Can vinegar be used in combination with baking soda to flush a water heater?

Using vinegar with baking soda is not recommended for flushing a water heater. The chemical reaction between them produces carbon dioxide gas, which may cause pressure buildup. Stick to using vinegar alone for the flushing process to ensure safety and efficiency.

What is the proper procedure for flushing a hot water heater?

To flush your hot water heater with vinegar, start by turning off the power and water supply. Drain the tank completely, then add the vinegar through the cold water inlet. Let it sit for a full 24 hours before draining and rinsing the tank thoroughly.

Does vinegar effectively remove sediment from water heaters?

Vinegar is quite effective in removing sediment from water heaters. Its acidity helps break down mineral deposits, ensuring cleaner tank interiors. Regular flushing with vinegar can help maintain the efficiency and longevity of your water heater.

When Should I Clean My Gutters? Essential Tips for Home Maintenance

When Should I Clean My Gutters? | Totally Maintained

Cleaning your gutters is essential for maintaining the integrity of your home. You should aim to clean your gutters at least twice a year, ideally once in the spring and once in the fall. This routine maintenance helps prevent clogs caused by leaves and debris, which can lead to serious water damage around your property.

During heavy storms, it’s wise to inspect your gutters more frequently. Checking them after significant rain can help catch any blockages early, allowing you to avoid costly repairs down the line. Keeping your gutters clean not only protects your roof, siding, and foundation but also enhances the overall lifespan of your home systems.

Effective gutter maintenance ensures that water flows freely, reducing the risk of overflow and pooling around your house. By prioritizing this task, you are taking a proactive step in extending the durability of your home and safeguarding your investment.

Understanding the Importance of Gutter Cleaning

Regular gutter cleaning is crucial for maintaining your home. This process helps you avoid serious issues like water damage and structural problems. By taking proactive steps in gutter maintenance, you protect your living space and extend the lifespan of your home systems.

Preventing Water Damage

Clogged gutters can lead to significant water damage. When debris accumulates, it prevents rainwater from flowing freely through the system. This results in water overflow, which can seep into your roof, walls, and foundation.

Identifying potential issues: Look for water stains on walls or ceilings that may indicate leaks.

Water damage can lead to costly repairs, including mold remediation and structural repairs, which can range from $3,000 to $10,000. Cleaning your gutters regularly prevents these problems, ensuring water is diverted away from your home effectively.

Protecting Against Ice Dams and Sagging Gutters

In colder climates, clogged gutters can contribute to ice dams. These occur when melting snow refreezes in the gutters, creating blockages that trap water.

Ice dams can cause:

  • Roof leaks
  • Roof damage
  • Increased mold growth

Additionally, sagging gutters often result from accumulated weight from debris and water. This not only affects the system’s functionality but also leaves your home susceptible to further water damage. Regular gutter maintenance helps prevent these issues and keeps your gutters functioning optimally, ensuring your home’s safety during harsh weather conditions.

Identifying When Gutters Need Cleaning

Regular maintenance of your gutters is essential to prevent water damage and other issues. You should be aware of the signs indicating when cleaning is necessary, especially after heavy storms and seasonal changes.

Signs of Clogged Gutters

There are several clear indicators that your gutters need cleaning. Look for the following signs:

  • Overflowing Water: If water spills over the edges during rain, your gutters are likely clogged.
  • Water Stains: Streaks on your home’s exterior or near the foundation can signify failing drainage.
  • Debris Build-Up: Visible leaves, twigs, or dirt in your gutters is a strong signal they need attention.
  • Pest Activity: Insects often inhabit clogged gutters. If you see nests or increased bug activity, cleaning is overdue.

Promptly addressing these signs helps prevent water damage and preserves your gutter system, avoiding costly repairs.

Impact of Seasons and Weather

Seasons significantly affect how often you should clean your gutters. For instance:

  • Fall: Leaves from trees contribute to clogs. Clean your gutters at least twice during this season to remove fallen debris.
  • Winter: Ice and snow can prevent proper drainage. Ensure gutters are clear before winter to avoid ice dams.
  • Spring and Summer: Heavy storms can bring additional debris. After significant weather events, inspect and clean gutters to maintain optimal flow.

By factoring in seasonal conditions and weather events, you can effectively manage gutter maintenance and safeguard your home from potential issues.

Best Practices for Gutter Cleaning

Maintaining efficient gutters is essential for protecting your home from water damage. Understanding effective techniques and safety measures will help ensure the cleaning process is both thorough and secure.

Gutter Cleaning Techniques

Begin by gathering your tools: a sturdy ladder, gloves, a bucket, and a garden trowel. If you have a leaf blower, it can be advantageous for removing loose debris quickly.

  1. Clear Large Debris: Use your hands or trowel to remove leaves and twigs. Place debris into your bucket for easy disposal.
  2. Flush with Water: After clearing, use a hose to flush out small particles and check for clogs. Make sure to direct water toward downspouts.
  3. Check for Leaks: Inspect for gaps or leaks in the gutters. If you find any, consider applying a gutter sealant to ensure proper water flow.

With these techniques, you can efficiently keep your gutters clean and functional.

Safety Considerations

Safety is paramount during gutter cleaning. Here are several key precautions to take:

  1. Use a Stable Ladder: Ensure your ladder is on a flat surface and extend it at least three feet above the edge of your roof.
  2. Never Clean Alone: It’s safer to have someone hold the ladder while you work.
  3. Wear Protective Gear: Gloves protect your hands from sharp debris, while a dust mask can prevent inhaling unwanted particles.

Additionally, be mindful of electrical wires and overhanging branches. If your gutters are too high or unsafe to reach, consider hiring a professional service to manage the cleaning. Safety should always come first.

Determining the Frequency of Gutter Cleaning

Knowing how often to clean gutters is essential for maintaining your home. Generally, it is recommended to clean your gutters at least twice a year. However, various factors can influence this frequency.

Consider the following factors:

  • Climate: If you live in an area with heavy rainfall or snow, more frequent cleaning may be necessary.
  • Surrounding Vegetation: Proximity to trees can increase debris accumulation, requiring more regular cleaning.
  • Roofing Material: Certain roofing materials may shed more debris than others, impacting gutter maintenance needs.

You might also consider hiring professional gutter cleaning services. They can offer the expertise needed to assess your gutters properly and ensure they remain functional.

Signs that indicate your gutters need attention include:

  • Overflowing water
  • Visible debris or clogs
  • Sagging gutters

If you prefer a comprehensive approach, some companies specialize in home maintenance tasks, including gutter cleaning. This can help simplify your schedule by allowing you to address multiple maintenance needs in one visit.

Regular gutter maintenance is a preventive measure. It can save you from costly repairs down the line by prolonging the lifespan of your home’s drainage system.

Addressing Common Gutter Issues

Maintaining your gutters is crucial for the overall health of your home. Two key issues often arise: overflowing gutters and standing water, leading to foundation problems and pest infestations. Addressing these problems promptly can save you from costly repairs.

Dealing with Overflowing Gutters and Standing Water

If you notice overflowing gutters, this often indicates clogs that prevent proper drainage. Regular cleaning is essential to keep debris like leaves and twigs from causing blockages. To address this issue, consider these steps:

  • Inspect your gutters every few months for debris buildup.
  • Use a garden hose to flush out minor clogs.
  • For stubborn blockages, remove debris manually or use a plumber’s snake.

Standing water in gutters can cause further problems. It can erode your landscaping and lead to leaks in your roofing. To prevent this, ensure your gutters are installed with a proper slope for effective drainage.

Preventing Foundation Problems and Pest Infestations

Gutters that do not function correctly can cause water to pool around your foundation. This accumulation can lead to foundation problems, including cracking and shifting. To mitigate this risk, follow these recommendations:

  • Direct downspouts away from the foundation, ideally at least 6 feet away.
  • Install gutter extensions to allow for proper water flow.

Additionally, stagnant water in gutters attracts pests, including mosquitoes and termites. To prevent pest infestations, ensure:

  • Your gutters are regularly cleaned to eliminate standing water.
  • Consider installing gutter guards to minimize debris accumulation while allowing water to flow freely.

Advantages of Installing Gutter Guards

Installing gutter guards offers several benefits for homeowners. These guards prevent debris from accumulating in your rain gutters, which can lead to costly repairs.

One significant advantage is reduced maintenance. With gutter guards, you can cut down on cleaning frequency, making it easier to maintain your home. This means fewer trips up the ladder and less time spent on regular upkeep.

Gutter guards also protect your downspouts. By minimizing clogs, they help ensure proper drainage, which is essential for your property’s foundation. This proactive measure can prevent water damage and structural issues.

Another benefit is the potential increase in your home’s resale value. Well-maintained rain gutters, equipped with guards, convey to prospective buyers that the property has been cared for, making it more appealing.

In addition, various types of gutter guards are available. Options include mesh screensfoam inserts, and surface tension guards. Choosing the right one for your home can enhance the effectiveness of your drainage system.

Lastly, investing in gutter guards can ultimately save you money. Fewer repairs and less frequent cleaning can lead to significant long-term savings. You will appreciate the convenience and peace of mind that comes with having a well-protected gutter system.

Frequently Asked Questions

Cleaning your gutters is an essential home maintenance task that varies based on several factors. The questions below address the frequency, timing, and signs indicating when it’s necessary to clean your gutters.

How often should gutters be cleaned in areas with no surrounding trees?

If your home is in an area without surrounding trees, it is generally recommended to clean your gutters at least once a year. This frequency helps prevent any potential buildup from other debris such as dust, dirt, and pollen that may accumulate over time.

What is the recommended frequency for cleaning gutters with guards installed?

For gutters equipped with guards, cleaning is typically recommended once or twice a year. While guards can reduce debris accumulation, they do not eliminate the need for maintenance entirely.

In what month is it typically best to clean your gutters?

The ideal time to clean your gutters is usually in the spring or fall. Cleaning in the spring prepares your gutters for the rainy season, while cleaning in the fall removes leaves and debris before winter storms can exacerbate blockages.

What are the signs that indicate gutters need cleaning?

Several signs suggest your gutters may need cleaning. Look for water overflowing from the gutters, visible debris in the troughs, or sagging sections that could indicate blockages. Additionally, if you notice plants or weeds growing in the gutters, it’s a clear sign that cleaning is necessary.

Is it better to clean gutters before or after the leaves fall in autumn?

It is generally better to clean your gutters after the leaves have fallen in autumn. This ensures that you remove all the accumulated debris, reducing the risk of clogs during winter, when moisture can freeze and create more significant issues.

What is the average cost for professional gutter cleaning services?

The average cost for professional gutter cleaning services typically ranges from $100 to $300, depending on the size of your home and the amount of debris present. This investment can save you from costly repairs due to water damage caused by clogged gutters.


Best Way to Clean Extractor Fan Filters for Optimal Performance

Best Way to Clean Extractor Fan Filters for Optimal Performance | Totally Maintained

Keeping your kitchen fresh and safe starts with clean extractor fan filters. The best way to clean these filters is to regularly soak them in hot soapy water or run them through the dishwasher, depending on the manufacturer’s guidelines. Neglecting this task can lead to grease buildup, which not only affects the performance of your cooker hood but can also pose a fire hazard.

In addition to ensuring the efficiency of your kitchen extractor fan, regular maintenance of your filters prolongs their lifespan, saving you money over time. Every one to two months is the recommended frequency for cleaning, depending on how often you cook. By prioritizing this simple task, you can maintain a clean cooking environment and enhance the overall performance of your kitchen appliances.

Understanding Extractor Fans and Filters

Extractor fans play a vital role in maintaining air quality in your kitchen by removing smoke, odors, and moisture. The filters within these fans are designed to trap grease and particles, ensuring efficient operation and a cleaner environment.

Types of Extractor Fan Filters

There are several types of filters used in kitchen extractor fans, each serving a specific purpose. The metal grease filter is common in many households. It captures grease particles and is usually made from stainless steel. These filters are washable and reusable, making them economical.

Another type is the charcoal filter, which is often found in recirculating extractor hoods. Charcoal filters absorb odors and improve air quality but need to be replaced periodically. Understanding these filters helps you choose the right maintenance approach for your specific extractor fan system.

Importance of Regular Cleaning

Regular cleaning of extractor fan filters is essential for optimal performance. When filters become clogged with grease and grime, they can impede airflow and reduce the efficiency of the extractor fan.

This buildup can also pose a fire hazard, making cleaning even more critical. Depending on the type, metal grease filters should be cleaned at least once a month, while charcoal filters may need replacement every 3 to 6 months. By maintaining a cleaning schedule, you ensure that your kitchen extractor fan operates effectively, providing a purer cooking environment and extending the lifespan of the appliance.

Preparation for Cleaning

Before you start cleaning your extractor fan filters, it’s essential to ensure that you are ready. This preparation involves safety measures and gathering the right materials to make the task efficient and effective.

Safety First

Begin by turning off the power to your extractor fan. Unplugging it or switching off the circuit breaker can help prevent accidents while cleaning. Always allow the filters to cool if they’ve been in use; hot filters can cause burns.

Wear appropriate safety gear such as gloves and goggles. Gloves protect your hands from grease and cleaning agents, while goggles shield your eyes from splashes. If you are using any harsh cleaning solutions, consider wearing a mask to avoid inhaling fumes. Ensuring proper ventilation in your kitchen will also help in dispersing any strong odors or hazardous vapors released during cleaning.

Gathering Materials

To clean your extractor fan filters effectively, gather the following materials: a bucket, dish soap or washing up liquid, and bicarbonate of soda (baking soda).

  • Bucket: Use it for mixing your cleaning solution.
  • Dish Soap: This helps break down grease build-up on the filters.
  • Bicarbonate of Soda: This works as an additional cleaning agent, tackling stubborn residues.

Start by filling the bucket with warm water and add a generous amount of dish soap along with a few tablespoons of bicarbonate of soda. This solution will help lift the grease and grime from the filters. Keep a sponge or soft brush handy to assist with scrubbing. With these preparations, you will be well-equipped to clean your extractor fan filters effectively.

The Cleaning Process

Cleaning your extractor fan filters effectively is essential for optimal performance and longevity. Follow these steps to ensure a thorough cleaning that addresses grease buildup while maintaining the integrity of the filters.

Removing Filters

Begin by safely removing the filters from your extractor fan. Most filters can be unclipped or unscrewed, depending on your model. Consult your manufacturer’s instructions if you’re unsure how to proceed. Take care while removing the filters to avoid damage.

Once detached, inspect the filters for any significant buildup of grease and grime. This preliminary check will help you understand the extent of the cleaning required. Have a designated space ready where you can clean the filters without making a mess.

Applying Cleaning Solutions

Fill a sink or bucket with hot water and mix in a suitable cleaning solution, such as dish soap or a degreaser. The hot water will help dissolve grease buildup more effectively. Ensure that the cleaning solution is safe for the type of filter you are using.

Soak the filters in the solution for about 15-30 minutes. This soaking process allows the cleaner to penetrate the material, loosening any stuck grime. Avoid using harsh chemicals that could damage the filters or leave residues.

Scrubbing and Rinsing

After soaking, use a non-abrasive sponge or soft brush to scrub the filters gently. Focus on areas with heavy grease build-up, applying more pressure as necessary. Be thorough, as any remaining residue can hinder the filter’s performance.

Once satisfied with the scrubbing, rinse the filters under running water to wash away any remaining cleaning solution and debris. Ensure that all soap is removed to prevent future filtering issues. Shake off excess water before moving on to drying.

Drying and Reinstalling

After rinsing, allow the filters to air dry completely. Depending on the ambient temperature, this can take a few hours. Ensure they are entirely dry to prevent moisture from building up in your extractor fan.

Once dry, carefully reinstall the filters back into the extractor fan. Ensure they fit snugly to avoid any air leaks. Following these steps will help maintain clean extractor fan filters and enhance the efficacy of your kitchen’s ventilation system.

Maintaining Your Extractor Fan

Proper maintenance of your extractor fan is essential for its efficiency and longevity. Regular cleaning and implementing preventative measures can significantly enhance its performance and reduce potential hazards in your kitchen.

Regular Cleaning Schedule

To keep your extractor fan functioning optimally, establish a regular cleaning routine. Ideally, you should clean the fan filters every 2-3 months. This helps remove grease build-up and prevents clogs.

Begin by unplugging the unit and removing the filters. You can soak them in hot soapy water or place them in the dishwasher on a high-temperature cycle for thorough cleaning. Ensure all components are completely dry before reassembling.

In addition, wipe down the exterior of the fan with a damp cloth to remove dust and grime. A consistent cleaning schedule not only enhances performance but also prolongs the lifespan of your extractor fan.

Preventative Measures

Incorporate preventative measures to minimize the frequency of deep cleaning. Using a splatter guard while cooking can help reduce grease accumulation. This simple addition can significantly decrease the amount of residue that settles on your extractor fan.

Another effective tip is to ensure proper ventilation during cooking. Opening windows or using additional fans can help disperse heat and moisture, reducing the burden on your extractor fan.

Consider creating a kitchen cleaning checklist to remind yourself of cleaning tasks, including fan maintenance. Regular inspections also help you identify potential issues early, preventing costly repairs and extending the life of your kitchen appliances.

Troubleshooting Common Issues

When confronted with problems related to your extractor fan, understanding how to tackle specific concerns can enhance kitchen hygiene and safety. Whether it’s stubborn grease buildup, unpleasant odors, or poor ventilation, each issue requires a focused approach to ensure your extractor fan operates effectively.

Dealing with Stubborn Grease

Grease can accumulate over time, making it difficult to maintain a clean extractor fan. Start by removing the filters and soaking them in hot, soapy water for 30 minutes. If the grease persists, use a mixture of household glass cleaner and a soft-bristle toothbrush to scrub the filters gently.

For metal filters, a more thorough clean can be achieved by using a degreaser. Spray it onto the surface, allowing it to sit before wiping it off. Avoid abrasive materials to prevent damage. Remember to rinse thoroughly to eliminate any cleaner residue.

Eliminating Odors

Unpleasant odors can signal a buildup of grease or food particles within the extractor fan. Start by inspecting the filters. If they are clogged with grime, clean them as described above.

For deeper odors, you can place a bowl of vinegar in the kitchen while the fan operates to neutralize unwanted smells. You could also use baking soda for absorption. Regular cleaning routines are essential to prevent the return of these odors, ensuring your kitchen remains fresh.

Addressing Poor Ventilation

If you experience reduced airflow from your extractor fan, check for blockages in the vents. Make sure the ductwork is clear of debris or grease. If the fan is struggling, it may require a thorough cleaning or filter replacement.

Inspect the extraction technology in use; if it’s a recirculating model, replacing carbon filters regularly is critical. Lastly, ensure that the fan is set at the appropriate speed for the volume of cooking. Regular maintenance will enhance airflow and significantly improve kitchen hygiene.

Frequently Asked Questions

Cleaning extractor fan filters is essential for maintaining kitchen hygiene and efficiency. Here are some specific methods and tips for effective cleaning, along with answers to common questions.

How can vinegar be used to clean metal mesh cooker hood filters?

Vinegar is an effective cleaning agent for metal mesh filters due to its acidity, which can break down grease. Soak the filters in a mixture of equal parts vinegar and warm water for about 30 minutes. Scrub gently with a soft brush, then rinse thoroughly before reinstalling them.

What is the most effective method to clean grease from hood fan filters?

The most effective method involves using a degreaser specifically designed for kitchen use. Apply the degreaser on the filter and let it sit for the recommended time. Following this, scrub with a brush to remove any remaining grease, and rinse thoroughly to ensure no product residue remains.

Is it possible to clean an exhaust fan filter with baking soda, and how?

Yes, baking soda can be used to clean exhaust fan filters. Make a paste of baking soda and water, apply it to the filter, and let it sit for about 15-20 minutes. Afterward, scrub the filter gently and rinse it off with warm water to remove the baking soda residue.

Can dishwasher tablets be used for cleaning extractor fan filters, and what is the process?

Dishwasher tablets can effectively clean extractor fan filters. Place the filters in a basin filled with hot water and dissolve a dishwasher tablet in the water. Let the filters soak for 15-30 minutes, then scrub with a brush before rinsing with clean water.

What are the steps to clean an extractor fan grease filter?

Begin by removing the filter according to the manufacturer’s instructions. Soak the filter in a mixture of hot water and a degreasing agent for about 30 minutes. Scrub away any stubborn grease, rinse thoroughly, and let the filter dry completely before reinstalling it.

What strategies can be employed to maintain and clean metal mesh filters regularly?

Regular maintenance can involve establishing a cleaning schedule every 1-3 months. During each cleaning, use vinegar or a degreaser to prevent buildup. Additionally, regularly check the filters for any signs of grease accumulation, addressing them promptly to prolong the lifespan of the filters.