(248) 297-3485

(248) 297-3485

Where Are the Condenser Coils on a Whirlpool Refrigerator? A Guide to Their Location and Maintenance

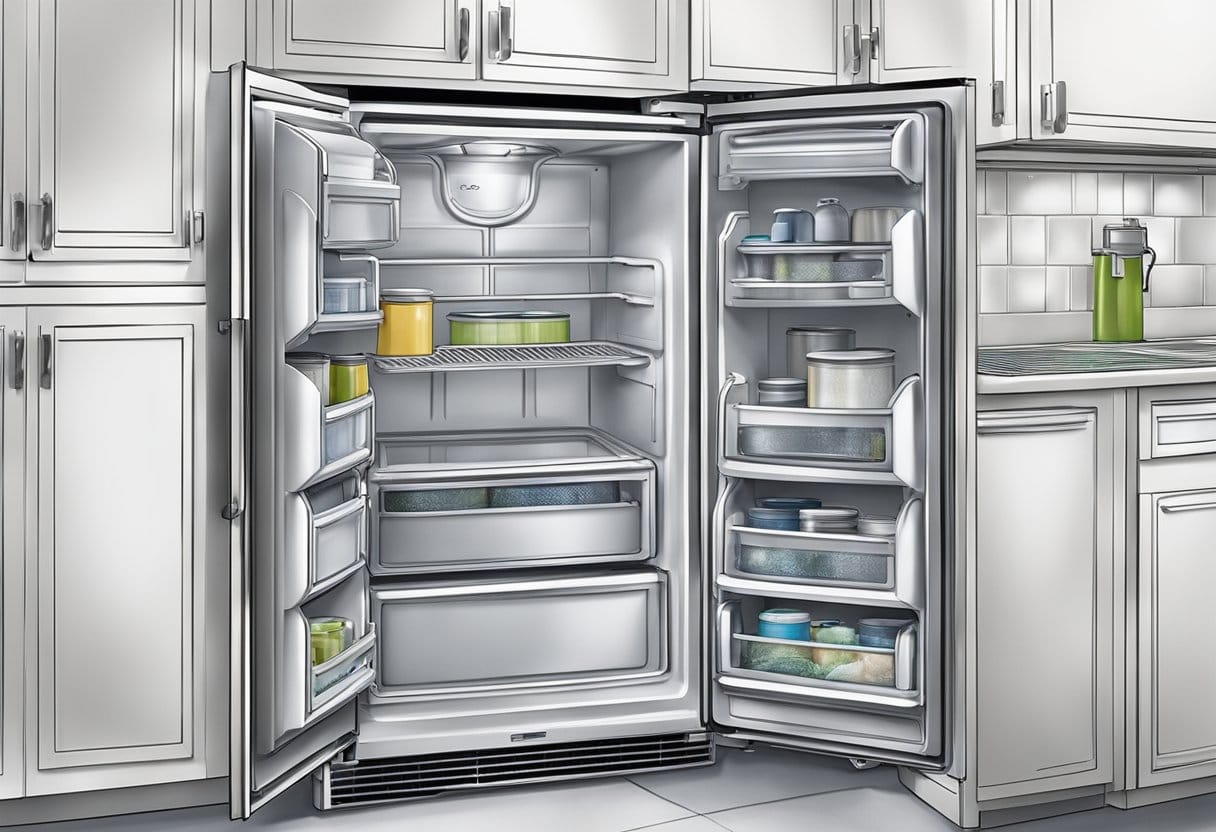
Locating the condenser coils on your Whirlpool refrigerator is essential for maintaining its efficiency. Typically, the condenser coils can be found either at the back of the unit or underneath it, depending on the model. These coils play a crucial role in the refrigeration process, and keeping them clean is vital for optimal performance.

Understanding the placement of these refrigerator components can save you time and enhance the lifespan of your appliance. Regular maintenance, including cleaning the coils, can prevent unnecessary breakdowns and ensure your refrigerator runs smoothly. Knowing where to find and how to care for these coils can lead to significant improvements in your fridge’s energy efficiency.

By taking the time to check on your Whirlpool refrigerator’s condenser coils, you’re taking a proactive approach to home maintenance. This simple step can lead to better cooling performance and lower energy bills, making it a valuable tip for any homeowner.

Understanding Whirlpool Refrigerator Components

A Whirlpool refrigerator relies on a few key components to ensure effective cooling. Among these, the condenser coils, compressor, and evaporator coils play critical roles in refrigerant management and temperature regulation.

Function of Condenser Coils

Condenser coils are essential for the cooling process in your refrigerator. Located typically at the back or bottom, they expel heat from the refrigerant, allowing it to transition from gas to liquid. This transformation is crucial, as it prepares the refrigerant for its next phase in the cooling cycle.

When cleaning the condenser coils, it’s important to remove dust and debris, which can impair efficiency. Using a vacuum with a soft brush can help you maintain these coils. A clean set of coils enhances cooling efficiency and prolongs the life of your refrigerator.

Role of the Compressor

The compressor is another vital component, acting as the heart of the refrigeration system. It pumps the refrigerant through the coils and is responsible for compressing the refrigerant gas, raising its pressure and temperature. The high-pressure gas then enters the condenser coils, where it sheds heat.

In essence, the compressor ensures that refrigerant circulates properly, enabling consistent cooling throughout the appliance. An efficient compressor contributes to lower energy costs and is key to preventing breakdowns. Regular maintenance of this component can extend its lifespan.

Importance of the Evaporator Coils

Evaporator coils work in conjunction with the other components to complete the refrigeration cycle. Located inside the refrigerator and freezer sections, these coils absorb heat from the interior, cooling the air within. This process transforms the refrigerant from liquid to gas, completing the cycle.

Keeping the evaporator coils free from frost or ice is critical to optimal performance. If these coils become blocked, the refrigerator may not cool effectively. Regular inspection will help avoid potential issues, ensuring your refrigerator runs smoothly and efficiently.

Locating the Condenser Coils

Identifying the location of the condenser coils in your Whirlpool refrigerator is essential for effective maintenance and troubleshooting. Knowing where these coils are situated can help you keep your refrigerator running efficiently and prevent cooling issues.

Typical Placement

Condenser coils are commonly located in two main areas of Whirlpool refrigerators: at the back or underneath the unit.

  • Back Location: If your refrigerator has coils at the back, they will typically run vertically along the rear panel.
  • Bottom Location: For many models, especially newer ones, the coils are found at the bottom front behind a removable toe panel.

You may need to pull the refrigerator away from the wall to gain access. Regular inspection of these coils is crucial, as dust and debris accumulation can hinder performance and lead to cooling problems.

Accessing Hidden Coils

When the coils are positioned in less obvious locations, accessing them can be challenging but manageable.

  1. Remove Panels: For bottom-mounted coils, start by locating and removing the toe kick or lower front panel.
  2. Use a Vacuum: Once exposed, use a vacuum cleaner with a soft brush attachment to gently clean the coils.

In some cases, the coils may be tucked away, making it difficult to see them. Refer to your specific model manual if needed, as some units might have unique configurations. Keeping these areas clean is vital for proper refrigerator troubleshooting and long-term efficiency.

Maintenance of Refrigerator Coils

Maintaining the condenser coils of your Whirlpool refrigerator is crucial for optimal performance. Proper cleaning and regular maintenance can enhance efficiency and prolong the life of the appliance.

Cleaning Process

To clean the condenser coils, follow these steps for effective maintenance:

  1. Unplug the Refrigerator: Before beginning, ensure your refrigerator is unplugged to avoid any electrical hazards.
  2. Locate the Coils: Depending on your model, the coils may be at the back or beneath the unit. Refer to your manual if needed.
  3. Remove Obstacles: If the coils are located under the refrigerator, remove the lower toe panel for better access.
  4. Vacuum the Coils: Use a vacuum with a brush attachment to gently clean the coils. Ensure you remove dust and debris thoroughly.
  5. Clean the Condenser Fan: Inspect the condenser fan for dust build-up. Clean it using a soft cloth or a can of compressed air. A clean fan blade ensures effective cooling.

Regular cleaning of the coils improves energy efficiency by preventing overheating and helps in maintaining optimal cooling performance.

Frequency of Cleaning

The frequency of cleaning your refrigerator’s condenser coils depends on your home environment. Generally, you should aim to clean the coils every 6 to 12 months.

Consider these factors that may require more frequent cleaning:

  • Pet Hair: If you have pets, clean every 3 to 6 months to prevent fur buildup.
  • Dusty Environments: Homes in dusty areas may need more frequent attention.
  • Cluttered Spaces: Ensure that debris isn’t accumulating around the refrigerator, as this can obstruct airflow.

Regular maintenance not only enhances cooling efficiency but can also extend the overall lifespan of the appliance. Keeping the coils clear of dust ensures that the refrigerator operates effectively.

Troubleshooting Poor Refrigerator Performance

If your Whirlpool refrigerator isn’t functioning as it should, identifying the root cause is essential. Common issues usually involve the condenser coils and ice production, which affect cooling efficiency. Here’s how to troubleshoot these problems.

Identifying Common Issues

Begin by checking the condenser coils. Dust and debris can accumulate, hindering performance. Locate the coils, typically either on the back or beneath the unit. Clean them using a vacuum with a soft brush attachment.

Next, consider poor ice production. If your icemaker isn’t producing ice, check the water supply for blockages. Ensure that the water line is connected and free of ice.

Additionally, keep an eye on the temperature settings. The fridge should be set between 37°F and 40°F while the freezer is at 0°F. Verify if the door seals are tight; worn seals can lead to temperature fluctuations.

When to Call a Professional

If you’ve cleaned and checked everything but your refrigerator still isn’t performing well, it may be time to seek help.

  • Look for strange noises: Rumbling or buzzing sounds might indicate a failing compressor or a malfunctioning fan.
  • Inconsistent temperatures: If your fridge frequently fluctuates in temperature despite correct settings, an electrical issue or a faulty thermostat could be at play.
  • Icemaker problems can also signal deeper issues. Low water pressure or malfunctioning components typically require expert assessment.

If these concerns persist, contacting a qualified technician ensures accurate diagnosis and repair, helping to restore your refrigerator’s performance efficiently.

Optimizing Refrigerator Efficiency

To enhance your Whirlpool refrigerator’s efficiency, focus on several key areas:

  1. Condenser Coils: These coils play a crucial role in cooling. Locate them typically at the back or beneath your refrigerator. Ensure they are clean and free of dust and debris for optimal performance. Regular cleaning is recommended.
  2. Evaporator Coil: This coil absorbs heat from inside the fridge. Ensure the airflow around the evaporator is not blocked. Clutter can hinder its function, leading to less efficient cooling.
  3. Fridge Door: Regularly check the door seals for wear and tear. A damaged seal can allow warm air to enter, making your fridge work harder. Consider replacing seals if they show signs of damage.
  4. Temperature Settings: Keep your refrigerator at 37°F and the freezer at 0°F. This balance maintains food freshness while consuming less energy.
  5. Airflow: Maintain adequate space around your refrigerator for airflow. Avoid placing it too close to walls or cabinets to prevent overheating.

By focusing on these areas, you can improve the efficiency of your Whirlpool refrigerator, extend its lifespan, and save on energy costs. Regular upkeep prevents common issues and ensures your appliance operates at its best.

Frequently Asked Questions

Finding and maintaining the condenser coils on your Whirlpool refrigerator is essential for optimal performance. This section addresses common inquiries related to their location, cleaning, and maintenance.

How do I locate the condenser coils on a Whirlpool side-by-side refrigerator?

On a Whirlpool side-by-side refrigerator, the condenser coils are usually located at the back of the unit. You may need to move the refrigerator away from the wall for better access.

What is the process for cleaning the condenser coils on a Whirlpool fridge?

To clean the condenser coils, first unplug the refrigerator. Use a vacuum cleaner with a soft brush attachment to gently remove dust and debris from the coils and surrounding areas.

Where can I find the condenser coils on a Whirlpool French Door refrigerator?

In a Whirlpool French Door refrigerator, the condenser coils are typically located at the bottom rear of the appliance. You might need to remove a cover panel to access them effectively.

Which tool is recommended for cleaning Whirlpool refrigerator coils?

A vacuum cleaner with a soft brush attachment is recommended for cleaning Whirlpool refrigerator coils. This tool helps remove dust without damaging the coils.

What signs indicate that the condenser coils in a refrigerator may be blocked?

Signs of blocked condenser coils include increased energy consumption and the refrigerator not cooling efficiently. You may also notice unusual noise levels coming from the compressor.

Is there a specific method to clean the condenser coils on a Whirlpool refrigerator?

Yes, begin by unplugging the refrigerator. Carefully vacuum the coils and the area underneath. For stubborn grime, wipe the coils with a damp cloth and ensure they dry thoroughly before reconnecting the power.

Can I Use Compressed Air to Clean Refrigerator Coils? A Practical Guide

Cleaning refrigerator coils is essential for optimal appliance performance, and many homeowners wonder about the best methods to do so. You can use compressed air to clean refrigerator coils effectively, but it requires careful consideration to avoid potential downsides. Using compressed air can dislodge dust and debris in hard-to-reach areas, making it a convenient option when performed correctly.

In addition to compressed air, several other methods exist for cleaning refrigerator coils. Each has its advantages and possible drawbacks, depending on your specific situation. This article will guide you through the best practices for maintaining your refrigerator coils, ensuring efficiency and longevity for your appliance.

Understanding Refrigerator Coils

Refrigerator coils play a crucial role in your appliance’s operation. They help maintain energy efficiency by transferring heat away from the interior to keep your food cold.

There are two main types of coils in a refrigerator:

  • Condenser Coils: Located on the back or bottom, these coils release the heat absorbed from inside the fridge to the outside air.
  • Evaporator Coils: Found inside the fridge, they absorb heat, allowing the refrigerant to cool the air circulating within your appliance.

Keeping these coils clean is essential. Dust and debris can accumulate, hindering their performance. When coils are dirty, your refrigerator has to work harder, leading to increased energy consumption and reduced lifespan.

Using compressed air is an effective method to clean condenser coils. It reaches tight spaces, dislodging dust without causing damage. For best results, make sure your refrigerator is unplugged before cleaning.

Regular maintenance of your refrigerator coils not only improves energy efficiency but also saves you money in the long run. Clean coils can lead to better cooling performance and reduced wear, enhancing the overall lifespan of your appliance.

Benefits of Cleaning Refrigerator Coils

Cleaning refrigerator coils brings several advantages that enhance performance and efficiency.

1. Improved Energy Efficiency
Dirty coils can hinder heat transfer, making your refrigerator work harder. Regular cleaning can lead to more efficient operation, reducing energy consumption and lowering your electricity bills.

2. Enhanced Cooling Performance
Clean coils help maintain optimal cooling. This means your food stays fresher for longer, reducing spoilage and waste.

3. Extended Appliance Lifespan
By keeping your refrigerator coils clean, you support the longevity of your appliance. Less strain on the system translates to fewer repairs and a longer lifespan.

4. Easy Maintenance
Using tools like compressed air can simplify the cleaning process. This method allows you to reach tight spaces and effectively remove dust and debris.

5. Environmental Benefits
Increased energy efficiency not only saves you money but also reduces your carbon footprint. A well-maintained refrigerator is better for the planet.

Regularly cleaning your refrigerator coils is a simple yet effective step in home maintenance. This proactive measure can result in significant benefits for both your wallet and the environment.

Preparing to Clean Refrigerator Coils

Cleaning refrigerator coils is essential for maintaining efficiency. Before you start, focus on safety and gather the necessary tools. This preparation will make the cleaning process effective and straightforward.

Safety Considerations

Before you begin, ensure your safety by unplugging the refrigerator. This eliminates the risk of electric shock while working on the coils.

Wear Safety Gear: Use safety goggles and a dust mask. These items protect your eyes and lungs from dust and debris.

Secure the Area: Clear the area around the refrigerator. This reduces the risk of tripping over items and gives you space to work comfortably.

Avoid Sharp Objects: When cleaning, avoid using sharp tools that could damage the coils. This can lead to costly repairs.

Be Aware of Possible Dust: Dust accumulation can be significant. Use a vacuum with a HEPA filter to minimize dust spread in your home.

Gathering Necessary Tools

Having the right tools is crucial for an effective cleaning process. Start by gathering the following items:

  • Coil Brush: This tool is specifically designed to reach between coils, making it efficient for removing dust.
  • Air Compressor: Using an air compressor can blow away stubborn dust that a vacuum may miss.
  • Shop Vac: A shop vac can quickly collect debris from the area, making cleanup easier.
  • Compressed Air Cans: These are useful for reaching tight spots where larger tools cannot fit.
  • Soft Cloths: Use these for wiping down areas around the coils after the dust has been removed.

Preparing properly means you can clean the coils safely and effectively. By focusing on safety and having the right tools, you ensure the process is smooth and beneficial for your refrigerator’s performance.

Step-by-Step Guide to Cleaning Coils with Compressed Air

Cleaning your refrigerator coils with compressed air can effectively remove dust and debris, enhancing your appliance’s efficiency. Follow these steps for optimal results.

Accessing the Coils

To begin, locate the coils on your refrigerator. They are usually found either at the back or beneath the appliance.

  1. Unplug the Refrigerator: Safety first. Disconnect the refrigerator from the power source to avoid any electrical hazards.
  2. Move the Refrigerator: If the coils are at the back, carefully pull the refrigerator away from the wall. If they’re underneath, ensure you have sufficient space to work.
  3. Check the Area: Look for any visible dust or debris near the coils. This can give you an idea of how much cleaning is needed.

Gather your cleaning materials, including a compressor and appropriate nozzle attachment, to effectively reach and clean those coils.

Compressed Air Cleaning Technique

Using compressed air can effectively blow out dust and dirt from the coils. Here’s how to do it properly:

  1. Attach the Nozzle: Connect the narrow nozzle to your compressor. This will help deliver focused air to tight spaces.
  2. Maintain Distance: Hold the nozzle about 6-12 inches from the coils. This distance prevents moisture from the air compressor from reaching the coils.
  3. Blow Out Dust: Turn on the compressor and direct the air towards the coils. Sweep from top to bottom to ensure all debris is removed. Move the nozzle along the length of the coil to dislodge any stubborn dust.
  4. Check Progress: Periodically inspect the coils to see how much dust has been dislodged. Repeat the process as necessary until the coils look clean.
  5. Wear Protective Gear: Utilize a dust mask to avoid inhaling particles that may become airborne during this process.

Post-Cleaning Steps

After cleaning, take a few additional actions to ensure your refrigerator functions efficiently:

  1. Inspect the Coils: Check that all dust and debris have been removed. If any particles remain, consider a second pass with the compressed air.
  2. Plug the Refrigerator Back In: Once satisfied with the cleaning, reconnect the refrigerator to the power source.
  3. Return the Appliance: Carefully push the refrigerator back into its original position. Ensure no cords or hoses are pinched.
  4. Set a Cleaning Schedule: Make a note to clean the coils every six months or more frequently if you have pets or high dust conditions.

Following these steps will help maintain your refrigerator and extend its lifespan by ensuring it operates efficiently.

Maintaining Your Refrigerator Post-Cleaning

After cleaning your refrigerator coils, it’s crucial to take steps to maintain its efficiency. Regular maintenance keeps your appliance running smoothly and prolongs its lifespan.

Check the Temperature Settings: Ensure your refrigerator is set between 35°F and 38°F. This range helps preserve food without overworking the compressor.

Clean Coils Regularly: Aim to clean the coils every six months. Use a vacuum or a can of compressed air to remove dust buildup, ensuring the appliance operates efficiently.

Inspect Door Seals: Examine the door seals for tears or gaps. Faulty seals can lead to energy waste. If damaged, replace them to improve efficiency.

Clear Space Around the Refrigerator: Maintain at least a few inches of space around your fridge. This promotes airflow and helps prevent overheating.

Monitor for Unusual Noises: If the refrigerator makes strange sounds or runs constantly, check for issues that might require attention. Early detection can prevent larger problems.

Schedule Regular Maintenance: Consider professional home maintenance services. These can include dryer vent cleaning or pressure washing, which help keep your home systems in top condition.

By implementing these practices, you ensure your refrigerator operates efficiently, ultimately saving you money on energy costs and extending its lifespan.

Understanding Warranty and Service Information

When considering using compressed air to clean refrigerator coils, it’s essential to understand your warranty conditions. Many manufacturers require that maintenance be performed according to specific guidelines.

Key Points to Remember:

  • Warranty Coverage: Check if using compressed air to clean coils affects your warranty. Some warranties may become void if improper cleaning methods are used.
  • Service Information: Refer to your refrigerator’s manual for recommended maintenance practices. This can include details on cleaning methods and any necessary precautions.
  • Privacy Policy: When you consult service providers for advice or assistance, review their privacy policy. Understand how they will handle your personal information.

Considerations for Maintenance:

  • Use Certified Technicians: If you’re uncertain, hiring professionals who understand warranty requirements can prevent issues.
  • Scheduled Services: Regular preventive maintenance from services like Totally Maintained can help extend the lifespan of your appliance.
  • Links for Further Information: Make use of manufacturer websites and trusted service providers for more detailed service guidelines.

Maintaining your refrigerator properly not only keeps it running efficiently but also ensures your warranty remains intact.

Frequently Asked Questions

When cleaning refrigerator coils, various methods and tools can be used effectively. Understanding safety precautions and the location of the condenser coils can help ensure the job is done correctly and efficiently.

What is the best method to clean refrigerator coils?

The best method typically involves using a vacuum cleaner with a brush attachment or compressed air. Air compressors are particularly effective because they can blow dust and debris out of tight spaces. For optimal cleanliness, ensure the refrigerator is unplugged before cleaning.

Is it safe to use a vacuum to clean fridge coils?

Yes, using a vacuum to clean fridge coils is safe as long as you use the appropriate attachments. A brush attachment can aid in removing dust without damaging the coils. Avoid using a vacuum with a direct hose attachment, as this may cause harm.

Where can I find the condenser coils on my refrigerator?

Condenser coils are usually located at the back or bottom of the refrigerator. If you have trouble locating them, consult your appliance’s user manual for specific guidance. Checking behind or underneath the unit will often reveal the coils.

What alternatives are there to using a brush for cleaning refrigerator coils?

If a brush isn’t available, you can use compressed air or a microfiber cloth to clean the coils. Compressed air is effective in blowing away dirt that is hard to reach, while a cloth can help wipe down accessible areas.

What precautions should be taken when cleaning a refrigerator compressor?

Before beginning, unplug the refrigerator to ensure safety. Wear gloves to protect your hands from sharp edges. Be cautious not to damage any components while cleaning the compressor area, as this can lead to ineffective operation.

Can homemade cleaners be effective for refrigerator coil maintenance?

Homemade cleaners can be effective for regular maintenance but should be used cautiously. A simple solution of vinegar and water may help remove grime. Always wipe off any residue with a damp cloth to avoid attracting more dirt.

Why Flush a Water Heater: Understanding the Benefits for Efficiency and Longevity

Flushing your water heater is a crucial maintenance task that many homeowners overlook. Regularly flushing your water heater can prevent sediment buildup, which enhances its efficiency and prolongs its lifespan. By taking this simple step, you can ensure that your water heater operates effectively, providing hot water when you need it.

Neglecting to flush your water heater can lead to various issues, such as decreased efficiency and higher energy bills. Over time, minerals and sediment accumulate in the tank, causing it to work harder to heat water. This not only wastes energy but can also result in costly repairs down the line.

Incorporating a routine flush into your maintenance plan helps avoid these problems and keeps your system running smoothly. You’ll find that the benefits far outweigh the minimal effort required to perform this task. Understanding the importance of flushing your water heater is the first step towards maintaining a comfortable and efficient home.

The Importance of Regular Maintenance

Regular maintenance of your water heater is crucial for ensuring its efficiency and longevity. By understanding the significance of managing sediment buildup and maintaining proper water pressure, you can enhance your water heater’s performance and extend its lifespan.

Preventing Sediment Build Up

Sediment buildup in your water heater can lead to various issues, including decreased efficiency and increased energy bills. Over time, minerals such as calcium and lime accumulate at the bottom of the tank.

To prevent this, consider flushing your water heater annually. Doing so removes the accumulated sediments, allowing the unit to operate more effectively. This process not only improves heating efficiency but also prolongs the life of the water heater, ultimately saving you money on repairs and replacements.

Maintaining Water Pressure and Heating Efficiency

Regular maintenance, including flushing the tank, helps maintain optimal water pressure. Sedimentary deposits can clog pipes and reduce water flow, which affects the entire plumbing system in your home.

By keeping the tank clean, you ensure that water heats more efficiently. This reduces energy consumption and can lead to lower utility bills. Moreover, proper water pressure helps improve the performance of various appliances, such as dishwashers and washing machines, making maintenance an essential part of home care.

Understanding Your Water Heater

Knowing the type of water heater you have and its essential components can enhance your maintenance efforts. Proper understanding allows you to effectively flush your system, ensuring longevity and efficiency.

Different Types of Water Heaters

Water heaters come in various types, each with unique features. Electric water heaters utilize electrical elements to heat water and are usually found in homes without gas supply. They are popular for their efficiency and lower initial costs.

Tankless water heaters heat water on demand, providing hot water without storing it in a tank. This type can save space and energy but may require a higher upfront investment.

Hot water tanks, commonly used in traditional setups, store and maintain a reservoir of heated water. Regular maintenance, especially flushing, is crucial to prevent sediment buildup and improve energy efficiency.

Components Vital for Flushing

Flushing a water heater involves a few key components to facilitate the process. The drain valve is essential for emptying the tank. It is located at the bottom of the water heater and connects to a garden hose for drainage.

The shutoff valve is crucial as well. This valve allows you to stop the water supply before flushing begins, preventing potential overflow.

Performing regular flushing can significantly improve the performance and lifespan of your water heater, keeping it functioning optimally.

Step-by-Step Flushing Guide

Flushing your water heater is an essential maintenance task that ensures optimal performance and longevity. Follow these steps to safely and effectively flush your heater.

Safety Measures Before You Start

Before beginning, ensure that your safety is a priority. Start by turning off the power to your electric water heater at the circuit breaker. If it’s a gas water heater, set the thermostat to the “Vacation” setting.

Next, shut off the cold water supply by closing the shutoff valve. This valve is usually located above the heater. Make sure to wear gloves and goggles to protect yourself from potential hot water splashes.

Finally, check your garden hose for any leaks. Connect it to the drain valve at the bottom of the tank. Run the other end outside or into a drain area. These precautions will help ensure a safe flushing process.

Draining the Tank

With safety measures in place, you can begin draining the tank. First, turn on a hot water faucet in your home. This will help prevent a vacuum from forming in the pipes.

Next, open the drain valve on the water heater using a wrench if necessary. As the tank drains, monitor the flow. If you notice sediment mixed with water, this indicates that the flushing process is working effectively.

Once the tank is empty, it’s important to flush it for a few minutes with a cold water supply. Open the shutoff valve to let cold water flow through the tank. This helps dislodge any remaining sediment.

Cleaning the Water Heater

After draining and flushing, you can clean the tank. While the tank is empty, visually inspect the interior for any signs of damage, corrosion, or excessive sediment build-up.

If necessary, use a long-handled brush to gently scrub the interior surfaces. This step is critical for maintaining efficiency and preventing potential issues. After cleaning, reconnect the garden hose and close the drain valve securely.

Once everything is reassembled, you can refill the tank by turning on the cold water supply. Remember to bleed air from the system by opening hot water faucets until water flows steadily. This ensures that your water heater is ready for normal operation again.

Post-Flushing Procedures

After flushing your water heater, there are essential steps to follow to ensure everything is reconnected correctly and operating efficiently. These procedures will help you restore functionality safely and effectively.

Reconnecting Your Water Heater

First, ensure that you have turned off the water heater’s power before starting this process. For electric water heaters, switch off the circuit breaker. If you have a gas heater, turn the thermostat to the “off” position.

Next, reconnect the cold water supply line. Open the valve to allow water to flow back into the tank. Check for any leaks at the connection points. Once the tank is filled to the proper level, you’ll see water flowing from the hot water faucet.

For tankless water heaters, reconnect the inlet and outlet piping, ensuring tight seals. It’s important to inspect all connections visually before proceeding to restore power. If you notice any leaks or issues, address them immediately.

Restoring Power and Water Supply

After confirming everything is connected properly, it’s time to restore power. For electric water heaters, switch the circuit breaker back on. Allow the heater some time to heat the water. This may take several minutes, so be patient.

If it’s a gas water heater, turn the thermostat back to the desired temperature setting. Light the pilot if needed, following the manufacturer’s instructions.

Once these steps are complete, open a hot water faucet to release any trapped air and monitor the water flow. This will help ensure the system operates effectively. As the hot water begins to flow, check for leaks again. This final inspection is crucial for ensuring your hot water heater is ready for use.

When to Seek Professional Help

Knowing when to call a professional for your water heater can save you time, money, and stress. Certain warning signs indicate that your system may require expert attention, and finding a verified professional can ensure the job is done correctly.

Identifying Potential Issues

If you notice unusual noises, such as popping or rumbling sounds, this could indicate sediment buildup in your water heater. Additionally, water discoloration or an unpleasant odor may suggest that your heater requires attention.

Leaks or pooling water around the unit are critical signs that immediate professional intervention is necessary. Ignoring these symptoms can lead to more extensive damage.

You may also want to seek help if the water temperature is inconsistent or if the heater frequently shuts off. These problems can signal underlying issues that need specialized knowledge to resolve effectively.

Finding Verified Experts

When looking for a professional, always seek verified experts in home maintenance. Start your search by checking platforms like JustAnswer for trustworthy recommendations.

Look for professionals who have specific experience with water heaters. Checking reviews and credentials is crucial.

Additionally, consider companies that focus on preventive maintenance. They can help extend the lifespan of your systems and address issues before they escalate. Engaging verified professionals ensures your water heater operates safely and efficiently.

Frequently Asked Questions

Understanding the specifics of water heater maintenance can help you ensure optimal performance and longevity. Here are answers to common questions regarding flushing your water heater.

How often should a water heater be flushed for optimal performance?

Water heaters should typically be flushed every one to three years. This frequency can depend on your water source and the amount of sediment that builds up in your specific model.

What are the necessary steps to flush an electric water heater effectively?

To flush an electric water heater, start by turning off the power supply. Connect a garden hose to the drain valve, open the valve, and let the water flow until it runs clear. Be sure to close the valve and disconnect the hose afterward.

Can cleaning a hot water heater with vinegar improve its efficiency and lifespan?

Yes, cleaning a hot water heater with vinegar can help remove mineral buildup. This process can enhance efficiency and may extend the lifespan of the unit, especially in areas with hard water.

What are the signs that indicate it’s time to flush my water heater?

Signs that you should flush your water heater include discolored water, strange noises, or reduced hot water supply. If you notice sediment buildup during a flush, it’s a good indication that routine maintenance is needed.

How does regularly flushing a water heater contribute to its longevity and safety?

Regular flushing prevents sediment accumulation that can lead to corrosion and damage. This maintenance step ensures your water heater operates efficiently, which helps to prolong its lifespan and maintains safety.

What tools and equipment are required to perform a hot water heater flush?

To flush your hot water heater, you need a garden hose, a bucket, and a pair of pliers for the drain valve if necessary. Wearing gloves is also recommended for safety during the flushing process.

How Often Do Gutters Need Cleaning for Optimal Home Maintenance?

Gutters play a crucial role in protecting your home from water damage, but many homeowners overlook their maintenance. To ensure your gutters function effectively, they should be cleaned at least twice a year, typically in the spring and fall. Neglecting this task can lead to clogs, which may cause water to overflow and damage your roof and foundation.

A person is standing on a ladder, scooping out debris from a clogged gutter. Leaves and dirt are scattered on the ground below

If your home is surrounded by trees, you may need to clean your gutters more frequently to remove fallen leaves and debris. Regular gutter cleaning not only helps prevent costly repairs but also extends the lifespan of your home’s drainage system. Understanding the right frequency for gutter cleaning is essential for maintaining the integrity of your property and avoiding unnecessary expenses.

Why Cleaning Gutters is Essential

Maintaining clean gutters is critical for protecting your home from various issues that can arise from neglect. Regular cleaning helps prevent water damage, ice dams, and drainage problems that can lead to extensive repairs and costly consequences.

Preventing Water Damage

Clogged gutters can lead to significant water damage to your home. When rainwater is unable to flow freely through the gutters, it can overflow. This overflow can saturate the foundation, leading to cracks and instability.

Additionally, water can seep into the walls, causing mold and mildew to develop. These issues not only affect the structural integrity but can also pose health risks to your family. Keeping your gutters clean ensures that rainwater is effectively redirected away from your home, thus preventing these expensive problems.

Avoiding Ice Dams

During winter, blocked gutters can cause ice dams to form. Ice dams occur when melting snow flows down the roof and refreezes at the gutters. This buildup creates a barrier that prevents proper drainage.

As a result, water can back up under shingles and lead to leaks inside your home. The consequences include damaged ceilings, walls, and insulation. Regularly cleaning your gutters prevents the accumulation of debris that can contribute to ice dam formation and keeps your roof in good condition.

Mitigating Drainage Issues

Effective drainage is essential for maintaining the integrity of your landscape and foundation. Clogged gutters can lead to poor drainage, resulting in water pooling around the foundation of your home. This pooled water can erode soil, compromise landscaping, and lead to pricey landscaping repairs.

When gutters are clean, water is directed away from your property as intended. This practice also reduces the risk of flooding in basements and ensures that your yard stays healthy and well-watered without unnecessary runoff. Regular gutter cleaning ultimately helps maintain both your property’s aesthetic and its structural integrity.

Signs Your Gutters Need Cleaning

Your gutters play an essential role in directing water away from your home. When they become clogged, it can lead to serious issues. Look for specific signs that indicate it’s time for a thorough cleaning to prevent damage and maintain the integrity of your home.

Visible Debris and Plant Growth

If you notice leaves, twigs, or other debris accumulating in your gutters, it’s a clear sign they need attention. Clogs can trap moisture, creating an environment for moss or even small plants to grow. Clear gutters should not have any noticeable debris or signs of vegetation.

Regularly inspect your gutters to ensure they are free from clogs that can lead to blockages. If plants are growing within the gutters, it’s likely the drainage is compromised. This debris can obstruct water flow and ultimately damage your home’s foundation or walls.

Water Spillover During Rain

One of the most immediate indicators that your gutters are clogged is when water spills over the edges during a rainstorm. If your gutters cannot effectively channel water away from your roof, this overflow can saturate your landscaping and lead to erosion or flooding around your foundation.

Monitor your gutters during rain to check for this overflow. If water is spilling out, it may be due to debris blocking the downspouts. Address this issue promptly to avoid water damage to your property.

Sagging or Separated Gutters

If your gutters appear to sag or have sections that are separating from the house, this can indicate they are full of debris or the support brackets are damaged. Clogged gutters that can’t support their weight may also start bending, leading to structural issues.

Ensure your gutters are securely attached and level. A thorough cleaning can often resolve minor sagging issues caused by accumulated debris. However, if you notice significant sagging or separation, it may be time to consult with professionals to assess and repair any harm done to your gutter system.

How Often Should Gutters Be Cleaned

Maintaining your gutters is crucial for preventing water damage and ensuring your home remains in excellent condition. The frequency of gutter cleaning can vary based on specific factors, including location and foliage around your home.

Typical Gutter Cleaning Frequency

For most homes, it’s recommended that you clean your gutters at least twice a year. This schedule typically includes cleanings in spring and fall. These seasons are crucial as they often coincide with periods of heavy rainfall and leaf shedding, leading to the accumulation of debris.

If you live in areas with significant tree cover, you may need to increase this frequency to three or four times a year. In contrast, homes without nearby trees might only require annual cleanings. Regular maintenance helps prevent clogs, which can lead to costly repairs due to water damage.

Factors Affecting Cleaning Schedule

Several factors can influence how often you need to clean your gutters.

  1. Proximity to Trees: Homes surrounded by trees will gather more debris, leading to more frequent cleanings.
  2. Local Climate: Locations with heavy rainfall or storms may necessitate more regular upkeep due to increased debris and water flow.
  3. Type of Gutters: Different gutter systems may perform better or worse under various conditions. Some designs might require more frequent inspections.
  4. Roof Type: Roofs with a steep pitch or unique materials can also impact how debris collects in your gutters.

By considering these factors, you can develop a tailored cleaning schedule that best fits your home maintenance needs.

Choosing Between DIY and Professional Gutter Cleaning

When deciding how to clean your gutters, weighing the benefits and drawbacks of doing it yourself versus hiring a professional is crucial. Each option has unique advantages that can influence your choice based on your circumstances.

Pros and Cons of DIY Cleaning

Pros:

  • Cost-Effective: DIY cleaning can save you money, as you won’t pay for labor costs. All you need are basic tools like a ladder, gloves, and a trowel.
  • Control and Flexibility: You can choose when to clean your gutters, aligning it with your schedule and needs.
  • Learning Experience: This can be an opportunity to learn more about your home’s maintenance needs.

Cons:

  • Safety Risks: Climbing ladders poses a risk of falls, and without proper safety equipment, you may endanger yourself.
  • Time-Consuming: Cleaning gutters can take much longer than expected, particularly if you face stubborn debris.
  • Inexperience: Without experience, you might overlook issues like misaligned gutters or hidden damage.

When to Hire a Professional

Hiring a professional for gutter cleaning is beneficial in specific situations.

  • Height and Accessibility: If your gutters are high or difficult to reach, a professional will have the right equipment and safety training.
  • Extensive Damage: If you suspect structural problems or see signs of wear, a pro can assess and address these issues effectively.
  • Time Constraints: If your schedule is tight, a professional service can clean your gutters quickly and efficiently, freeing up your time for other tasks.

Professional gutter cleaning services can provide thorough cleanings, often including inspections for potential issues. Understanding typical gutter cleaning costs can also help you make an informed decision.

Enhancing Gutter Functionality

To maintain proper drainage and prevent water damage, enhancing the functionality of your gutters is essential. Key measures include installing gutter guards and performing regular maintenance on downspouts. Both actions significantly reduce debris build-up and ensure smooth water flow.

Installing Gutter Guards

Installing gutter guards can be a highly effective solution for improving gutter performance. These guards act as a barrier, preventing leaves and debris from entering your gutters while allowing water to flow freely.

Benefits of Gutter Guards:

  • Reduced Maintenance: With guards installed, you can decrease the frequency of gutter cleaning.
  • Prevention of Clogs: Guards keep out larger debris, reducing clogs in the downspouts.
  • Protection from Ice Dams: They help prevent ice build-up during winter months.

You can find various types of gutter guards, such as mesh screens, reverse curves, and foam inserts. Selecting the right type based on your specific needs and local climate is crucial. Proper installation ensures that they function effectively.

Regular Downspout Check and Maintenance

Regularly checking and maintaining your downspouts is vital for gutter efficacy. Clogged downspouts can lead to overflow, which damages your home’s foundation and landscaping.

Key Maintenance Tips:

  • Inspect for Blockages: Periodically check downspouts for debris or clogs. Clear them to ensure proper flow.
  • Ensure Proper Alignment: Make sure downspouts direct water away from your home to prevent pooling.
  • Consider Extensions: If necessary, add downspout extensions to direct water further from your foundation.

By proactively maintaining your downspouts, you help prolong the lifespan of your gutter system and avoid costly repairs. Keeping everything flowing smoothly prevents many common water-related issues.

Frequently Asked Questions

Maintaining your gutters is essential for the longevity of your home. Several factors determine how often you should clean them, including the presence of nearby trees, gutter guards, and the season.

How frequently should gutters be cleaned if there are no nearby trees?

If your home is free from nearby trees, you might clean your gutters once a year. This is generally sufficient since fewer leaves and debris will accumulate. However, monitor them regularly for any signs of buildup.

What is the recommended cleaning interval for gutters with guards installed?

Gutters equipped with guards typically need cleaning every one to two years. While guards reduce the amount of debris that enters the gutters, they do not eliminate the need for maintenance entirely. Regular checks help ensure that the guards are working effectively.

When should gutters typically be cleaned during the autumn season?

During autumn, it’s best to clean your gutters after the majority of leaves have fallen. This usually occurs late in the season. Clearing them at this time helps prevent blockages caused by decaying leaves and ensures proper drainage through the winter months.

What are the consequences of neglecting gutter maintenance?

Neglecting gutter maintenance can lead to serious issues like water damage, mold growth, and structural damage to your home. Clogged gutters can prevent water from flowing properly, causing it to overflow and damage your roof or foundation.

Can gutters be effectively cleaned from ground level?

It is possible to clean some gutters from ground level using extension tools or pressure washers, but this method may not be as thorough. For higher gutters or severe clogs, a ladder or professional service is often necessary to ensure complete cleaning.

What factors determine the lifespan of gutters before they need replacing?

The lifespan of your gutters can be affected by materials, environmental conditions, and maintenance frequency. Aluminum gutters generally last 20 years, while steel may last up to 30 years. Regular maintenance can significantly extend their useful life.

Range Hood Maintenance: Essential Tips for Longevity and Performance

Maintaining your range hood is essential for its efficiency and the overall air quality in your kitchen. Regular maintenance helps prevent grease buildup, ensures proper ventilation, and prolongs the lifespan of the appliance. Failure to keep your range hood in good condition can lead to unpleasant odors and even fire hazards, making it crucial to stay on top of cleaning tasks.

You can easily keep your range hood functioning well with a few straightforward practices. Cleaning the filters, wiping down surfaces, and checking for any mechanical issues should be part of your routine. Using simple ingredients like hot water and mild soap can make the cleaning process effective without requiring excessive effort.

By prioritizing range hood maintenance, you not only enhance your cooking environment but also save money on potential repairs and replacements down the line. Your kitchen deserves a clean, safe atmosphere, and a well-maintained range hood plays a vital role in achieving that.

Understanding Your Range Hood

A range hood is essential in maintaining a clean and safe kitchen environment. By understanding its types and components, you can ensure optimal performance and longevity.

Types and Styles

Range hoods come in various types and styles, each designed for specific kitchen layouts and cooking needs. Here are the most common options:

  • Wall-Mounted: Attached to the wall above the cooktop, providing a sleek appearance.
  • Under-Cabinet: Installed beneath cabinets, saving space while effectively ventilating cooking odors.
  • Island Hoods: Designed for kitchens with a freestanding cooktop on an island. They hang from the ceiling and provide powerful ventilation.
  • Ductless Models: Utilize charcoal filters to recirculate air, ideal for kitchens without ductwork.

Each model combines functionality with aesthetics, often featuring stainless steel finishes that blend seamlessly with modern kitchen designs. Choosing the right type is crucial for effective odor and smoke management.

Key Components

To ensure your range hood operates efficiently, it’s essential to understand its key components.

  1. Fan/Blower: This is the heart of your range hood, responsible for sucking up smoke and odors. Different models offer varying fan speeds for customizable ventilation.
  2. Filters: Range hoods usually include grease filters and, in ductless models, charcoal filters. Regular cleaning or replacement of these filters is vital to maintain airflow and performance.
  3. Ductwork: For ducted hoods, proper installation of ductwork directs air outside, minimizing indoor air contamination.
  4. Controls: Most range hoods feature easy-to-use controls for adjusting fan speed and lighting, enhancing user experience.

Familiarizing yourself with these components will help you maintain your range hood effectively, ensuring a fresher kitchen environment.

Basic Maintenance for Longevity

Maintaining your range hood ensures it operates efficiently and lasts longer, contributing to a cleaner kitchen environment. Focus on implementing a consistent cleaning routine and taking proper care of the filters to maximize performance.

Routine Cleaning Schedule

Establish a routine cleaning schedule for your range hood to prevent grease buildup and ensure optimal function. Clean the exterior of the hood weekly. Use a mild degreaser on a soft cloth; this will keep surfaces shiny and free from residue.

Every one to two months, focus on the inside. Remove any debris that might accumulate in the vent system. This will help maintain airflow and efficiency. During your cleaning sessions, check for any signs of wear or damage that may need attention.

Filter Care and Replacement

Filters are crucial for trapping grease and maintaining air quality. Depending on the type, clean your metal grease filters every 1-2 months. A simple wash in warm, soapy water typically suffices. For charcoal filters, plan for replacement every 1-3 months as they can’t be cleaned.

To remove a filter, check your model’s instructions. Properly cleaning or replacing filters prevents buildup that could affect airflow. A well-maintained filter enhances the range hood’s performance and prolongs its lifespan, ensuring your kitchen remains free of smoke and odors.

Deep Cleaning Techniques

Maintaining your range hood requires deep cleaning to ensure efficient operation and a grease-free kitchen. Effective techniques focus on degreasing the range hood and cleaning the ventilation ducts.

Degreasing the Range Hood

Start by removing any metal grates and filters from the range hood. Soak these in a mixture of hot water, dish soap, and baking soda for about 15-20 minutes. This helps break down stubborn grease.

For the exterior, use a commercial degreasing solution or a homemade mix of vinegar and water. Apply it with a cleaning spray bottle and let it sit for a few minutes. Wipe with a soft cloth to remove residues. For tough grime, consider using ammonia-dampened paper towels on the affected areas.

Always rinse the filters thoroughly with warm water before reinstalling them. This ensures that no cleaning agents remain that could affect food safety. Regularly repeating this process will keep your range hood in top condition.

Cleaning the Ventilation Ducts

Cleaning ductwork is essential for optimal airflow and grease management. Start by turning off the power to your range hood for safety. Remove any accessible duct sections and clean them using a damp cloth and soapy water.

For stubborn grease buildup, a degreaser can be effective. Spray it generously in the ducts, allowing it to sit for a few minutes before wiping it clean. Make use of a long brush to reach deeper areas of the ducts.

Inspect the ventilation system for any clogs or obstructions. If necessary, use a vacuum to remove debris throughout the ductwork. Regular duct cleaning not only improves efficiency but reduces fire hazards associated with grease buildup.

Troubleshooting Common Problems

When facing issues with your range hood, two primary areas to consider are electrical and mechanical problems. Identifying these issues can help you address them effectively and ensure your range hood operates efficiently.

Electrical Issues

Electrical problems are often the root cause of range hood malfunctions. Start by checking the power supply; ensure the unit is plugged in and the outlet is functioning. If the lights aren’t working, it’s likely due to a burned-out light bulb.

Replace the bulb with a compatible type.

Inspect wiring for any visible damage or loose connections. Damaged wiring could lead to shorts and dangerous conditions.

If you suspect issues with the fan motor or other electrical components, it’s essential to conduct careful troubleshooting. Use a multimeter to test the motor; if it shows no continuity, it may need replacing.

Mechanical Concerns

Mechanical issues can significantly affect performance, often stemming from fan-related components. Start by inspecting the fan blades and bearings. Accumulated grease can cause imbalances, leading to noise and reduced airflow.

Clean the fan blades regularly and ensure they turn freely.

Check the blower for any obstructions or blockages; this can prevent proper air circulation. Loud noises may indicate a failing motor that requires attention.

Listen for unusual sounds during operation, as this can signal mechanical failure. If the fan motor appears to be struggling, it may need repair or replacement.

Addressing these mechanical concerns promptly can prolong the life of your range hood.

Advanced Care and Replacement

Maintaining your range hood ensures optimal performance and longevity. With proper care, you can enhance its efficiency and know when it’s time to replace parts or seek professional assistance.

Upgrading Components

Upgrading components of your range hood can significantly improve its performance. Start by checking the motor and filters. High-performance parts, like a more powerful motor or specialized filters, can enhance airflow and capture more grease. Refer to your owner’s manual for compatible upgrades.

Consider upgrading the lighting as well. Energy-efficient LED lights provide better visibility while consuming less energy. Installing a new control panel or digital interface can simplify operation and monitoring.

Lastly, you might opt for advanced ventilation systems that reduce noise levels during operation. Regular upgrades will ensure your range hood operates efficiently and effectively, extending its lifespan and functionality.

When to Call a Professional

There are times when professional help becomes essential for maintaining your range hood. If you notice persistent noises, reduced airflow, or strange odors, these may indicate underlying issues requiring expertise.

When replacing major components, such as the motor or ventilation systems, it’s advisable to consult professionals or refer to your operation manual for specifications.

Additionally, a qualified technician can perform thorough cleaning and maintenance, which are crucial for maintaining performance and safety. Regular inspections can prevent further damage and ensure your range hood remains an effective appliance in your kitchen.

Frequently Asked Questions

Understanding the maintenance of your range hood is crucial for ensuring its efficiency and longevity. The following information addresses common questions related to filter cleaning, vent system maintenance, and best practices for both residential and commercial kitchens.

How often should range hood filters be cleaned for optimal performance?

You should clean range hood filters every month if you cook regularly. For occasional use, every three months is sufficient. Cleaning keeps the filters effective and prevents grease buildup, ensuring your range hood operates efficiently.

What is the best method for cleaning a range hood’s vent system?

The best method involves disassembling the vent cover and using a vacuum to remove loose debris. Follow this by applying a degreaser and scrubbing with a soft brush. Rinse thoroughly to avoid residue, ensuring the vent system remains clear for optimal airflow.

Can professional cleaning services prolong the life of a range hood?

Yes, professional cleaning services can help maintain your range hood effectively. Regular deep cleaning by experienced technicians can significantly extend its lifespan by removing tough grease and buildup that you may miss during routine cleaning.

What are the steps in a typical range hood maintenance routine?

A typical maintenance routine includes cleaning the filters, inspecting the vent system, checking for any grease buildup, and ensuring that all components are functioning correctly. Regular checks can help identify issues before they become major problems.

What type of degreaser is most effective for removing kitchen hood grease?

A non-abrasive degreaser specifically designed for kitchen appliances is ideal. Look for products that are food-safe and formulated to cut through grease without damaging the metal surfaces of your range hood.

Are there any specific considerations for maintaining a commercial kitchen hood?

Yes, commercial kitchen hoods require more frequent maintenance due to higher cooking volumes. Regular inspections and cleanings, often every month or bi-monthly, are necessary to comply with health regulations and ensure the safety of your kitchen environment.

How to Unclog a Gutter: Effective Techniques for Maintenance

Clogged gutters can lead to serious issues for your home, including water damage and foundation problems. To effectively unclog a gutter, start by removing visible debris from the top, then use tools such as a plumber’s snake or a garden hose to clear out stubborn blockages. By addressing these clogs promptly, you can prevent costly repairs down the line.

Understanding the causes of gutter clogs is crucial. Leaves, twigs, and other debris often build up over time, especially in heavily wooded areas. Regular cleaning and maintenance can significantly reduce the frequency of clogs, keeping your gutters functioning properly.

In this article, you will discover practical methods for unclogging gutters, ensuring your home remains protected from potential water damage. Prepare to take charge of your home’s maintenance and keep your gutters clear and efficient.

Understanding Gutter Clogs

Gutter clogs can lead to significant issues for homeowners, from water overflow to potential structural damage. Recognizing the common causes of these clogs and understanding their impacts is crucial for maintaining a functional gutter system.

Common Causes of Clogs

One of the primary reasons for gutter clogs is the accumulation of leaves. As autumn approaches, fallen leaves can gather, creating blockages that restrict water flow.

Another contributor is dirt and debris that accumulates over time. This buildup can occur due to wind or rain, which carries particles into the gutter system. Additionally, the organic matter from plants attracts insects and can foster mold growth, worsening the clog.

If you don’t regularly clean your gutters, these materials can mix and solidify, making it difficult to remove. This situation can escalate quickly and lead to overflowing gutters during heavy rains, causing water damage to your home.

Impact of Neglected Gutters

Neglecting your gutters can have several negative consequences. Clogged gutters can cause water to overflow and pool around your home’s foundation, potentially leading to foundation issues.

Moreover, stagnant water in gutters can attract pests, such as mosquitoes, increasing the risk of infestations. These conditions not only create an unsightly mess but can also degrade your home’s curb appeal.

Water damage caused by overflowing gutters may impact your roof, leading to costly repairs. By performing routine maintenance, you can avoid these issues and ensure your gutters function effectively to protect your home.

Safety Preparations

Before starting the gutter unclogging process, it’s important to prioritize safety. Proper equipment, attire, and assessing your work area are essential steps to ensure a safe and effective experience.

Proper Equipment and Attire

Wearing the right attire is crucial for your safety while cleaning gutters. Opt for sturdy, non-slip shoes to prevent falls. Consider using gloves to protect your hands from sharp debris and potential contaminants. A safety helmet may also be wise, especially if you’re working under trees or where debris may fall.

Ensure you use a stable ladder rated for the weight it will bear, and always place it on a flat surface. For added safety, utilize a ladder stabilizer to prevent tipping. Using a roof harness can also enhance safety when working on slopes. Having a safety whistle is a practical addition; it can alert others in case of an emergency.

Assessing the Work Area

Before you begin, evaluate the area around your gutters for potential hazards. Check for loose branches, power lines, or slippery surfaces to minimize risks. If you notice overhanging limbs, trim them back to create a safer workspace. Also, inspect the ground for obstacles that could trip you during the task.

You should consider weather conditions as well. Working in dry conditions is safer than during wet or windy weather, which can increase the risk of accidents. Remove any debris from the ground below to create a clear landing area if you were to fall. Finally, ensure that children and pets stay away from the work area for their safety.

Manual Gutter Cleaning Techniques

For effective gutter cleaning, you can use hands-on methods that allow you to remove debris efficiently. Manual techniques are essential, especially for stubborn clogs.

Hand Clearing Method

The hand clearing method is a straightforward and effective way to clean your gutters. Start by wearing gloves to protect your hands from sharp objects and debris. Use a sturdy ladder to access the gutters safely.

Once you are in position, inspect the gutter for leaves, twigs, and other blockages. Remove the debris by hand, making sure to discard it in a bucket or bag for easy cleanup. Pay special attention to downspouts as clogs often form there.

After clearing, flush the gutter with water using a hose. This step ensures any remaining dirt is washed away. Regularly practicing this method can help maintain clear gutters.

Using a Gutter Scoop

A gutter scoop is a specialized tool designed to assist in cleaning your gutters. It helps you reach deep into the gutter to extract compacted debris effectively. When using a gutter scoop, start at the farthest end of the gutter and work toward the downspout.

Position the scoop at the base of the gutter’s curve to gather debris without spilling it. Move the scoop back and forth gently to detach stubborn clogs. Place the debris into a bucket for easy removal.

After you’ve cleared the gutters, use a hose to rinse any remaining dirt and ensure proper water flow. This tool enhances your efficiency and makes the cleaning process streamlined, allowing you to clean your gutter more thoroughly.

Advanced Gutter Cleaning Tools

When tackling clogged gutters, using advanced tools can make the process significantly easier and more efficient. Several specialized options can help you effectively clear away debris, ensuring your gutters remain functional and free-flowing.

Power Washer vs. Pressure Washer

Both power washers and pressure washers are effective for gutter cleaning, but they have distinct differences. A power washer uses heated water, making it suitable for removing tough buildup and grime. It’s particularly useful when you face stubborn dirt that hasn’t been cleared in a long time.

On the other hand, a pressure washer relies solely on high-pressure water jets. It is ideal for lighter cleaning tasks, like blasting away leaves and dirt. For optimal use, ensure the nozzle is adjusted correctly to avoid damaging gutters. Always maintain a safe distance, typically between 18 to 24 inches, to protect the gutter surfaces.

Effective Use of a Leaf Blower

A leaf blower is a versatile tool that can quickly clear debris from gutters. When using a leaf blower, choose one with a focused nozzle attachment for better efficiency.

Position yourself at a safe distance from the gutter edge to prevent damage. Angle the blower to direct debris toward an open area for easy cleanup. It’s effective for removing leaves, twigs, and small dirt particles. However, avoid using it in wet conditions as it may scatter mud and worsen the clog.

How to Operate a Shop Vac

Using a shop vac can be an effective method for clearing clogged gutters, especially for debris that’s accumulated over time. Start by attaching the appropriate nozzle for suctioning debris.

Position the shop vac at the base of the gutter. Use an extension wand if necessary to reach higher areas without climbing. After it’s set up, turn on the shop vac and slowly guide the nozzle along the gutter line, sucking up leaves and dirt.

For optimal results, consider adding a filter that can trap finer particles. Regular maintenance with a shop vac can prevent clogs from forming, keeping your gutters in good condition year-round.

Unclogging the Downspout

Maintaining the flow of water through your downspout is crucial for effective gutter performance. If it becomes clogged, two effective methods to consider are utilizing a drain snake and flushing with high water pressure.

Guidelines for Drain Snake Usage

Using a drain snake is an efficient way to clear clogs within your downspout. Begin by selecting a flexible plumbing snake that can navigate the bends of your downspout.

  1. Preparation: Ensure you have gloves and safety goggles to protect yourself.
  2. Insertion: Feed the snake into the downspout carefully. Make sure it reaches the clog.
  3. Operation: Crank the handle to break up debris. This typically includes leaves, dirt, or other obstructions.

Keep in mind: A drain snake with a corkscrew end can be particularly effective for pulling out tougher clogs. If resistance occurs, feel free to pull back slightly and reinsert to tackle the blockage from different angles.

Flushing with Water Pressure

Using water pressure is another reliable solution. This method effectively dislodges clogs without heavy tools.

  1. Equipment: Attach a hose to your outdoor water source capable of delivering a strong stream, typically with a pressure of at least 40-60 PSI.
  2. Flushing: Insert the hose directly into the downspout. Turn on the water and allow it to flow through the pipe. The force of the water will help to clear minor clogs.

Tip: If your downspout remains clogged, consider increasing the water pressure gradually, but avoid excessive force that could damage the system. Flush until you see clear water exiting at the bottom. This method is effective and minimizes cleanup efforts, ensuring optimal water flow through your gutter downspout.

Aftercare and Maintenance Advice

Maintaining your gutters is essential for proper drainage and preventing future clogs. Regular inspection and preventive measures will extend the life of your gutter system and reduce maintenance costs.

Routine Gutter Inspection

Inspect your gutters at least twice a year, ideally in the spring and fall. Look for signs of blockage, sagging, or rust. Pay attention to the downspouts, as they can easily become clogged with leaves and debris.

When performing your inspection, use a sturdy ladder and wear gloves for safety. Check for any leaks or damage to the seams and joints. Ensure that water flows freely through the downspouts during intense rain.

If you notice persistent issues, consider consulting a professional for advice. They can assess the condition of your gutters and recommend appropriate maintenance services.

Preventative Measures

Taking proactive steps will significantly reduce the risk of clogged gutters. Installing gutter guards can help keep debris out while allowing water to flow through. Regularly trimming nearby trees and shrubs will also minimize leaf buildup.

Consider scheduling routine professional maintenance. Services like gutter cleaning and inspection can catch potential problems early, ensuring your system functions well year-round.

Utilizing a comprehensive home maintenance service can simplify upkeep for all your home systems. This reduces the need for multiple providers and helps you focus on preventive care, extending the life of your gutter system.

By implementing these measures, you can effectively maintain healthy gutters and safeguard your home from water damage.

Frequently Asked Questions

When it comes to unclogging gutters, there are specific tools and techniques that can help. Understanding how to safely remove blockages and maintain your gutters is essential for preventing future issues. Here are some frequently asked questions that can guide you through the process.

What tools are necessary for safely clearing out gutter blockages?

To clear out gutter blockages, you will need a few essential tools. A sturdy ladder, gloves, a small trowel or scoop, and a bucket for debris collection are vital. You may also consider a garden hose or a pressure washer for additional cleaning power.

Can downspout blockages be effectively removed from the ground?

Yes, downspout blockages can often be removed from the ground. Using a hose with a special nozzle can send water directly into the downspout to dislodge clogs. Additionally, tapping or gently smacking the downspout may help loosen stubborn blockages.

What method can be used to clean an underground clogged gutter drain?

Cleaning an underground clogged gutter drain typically involves using a plumbing snake or auger to break up the clog. You can also use a high-pressure water jetting service to clear out debris effectively without damaging the pipes.

Who should be contacted for professional gutter clog removal?

If you encounter persistent clogs or are unable to clear them safely, it is best to contact a professional gutter cleaning service. They possess the right tools and expertise to handle difficult blockages effectively.

Is it safe to use chemical cleaners for gutter and downspout clogs?

While some chemical cleaners are available for unclogging gutters, they can be harmful to your roofing and the environment. It is advisable to rely on mechanical methods or eco-friendly alternatives to avoid potential damage.

How should one properly maintain gutters to prevent clogs?

To maintain gutters and prevent clogs, regular cleaning is essential. Aim to clean your gutters at least twice a year, especially after heavy storms or during the fall when leaves accumulate. Installing gutter guards can also reduce debris buildup and simplify maintenance.

Dryer Damaged During Condo Lint Trap Maintenance: Understanding Liability and Prevention

Regular maintenance of your dryer is crucial, especially when managing lint traps in condos. Failing to address lint buildup can lead to more than just performance issues; it can damage your dryer and present fire hazards. Proper lint trap maintenance not only enhances your dryer’s efficiency but also prevents costly repairs or replacements.

If you’ve noticed reduced drying performance or excessive heat, your lint trap might require attention. In condos, shared systems can lead to faster lint accumulation, making it vital to clean your dryer vents at least once a year. Effective cleaning ensures that your dryer operates optimally and helps avoid serious damage that can disrupt your daily routines.

Understanding how to maintain your lint trap and when to seek professional help can save you time and money. Preventive care plays a significant role in extending the lifespan of appliances, allowing you to enjoy stress-free laundry days.

Understanding Dryer Lint Traps and Vents

Proper maintenance of dryer lint traps and vents is crucial for the efficient operation of your dryer. An understanding of these components can help you avoid safety hazards and extend the life of your appliance.

Importance of Lint Trap Maintenance

The lint trap plays a vital role in your dryer’s functionality. It captures lint and debris from your clothing, which can otherwise cause blockages. When not regularly cleaned, the lint trap can become clogged, restricting airflow. This leads to increased drying times and can even cause the dryer to overheat, presenting a fire hazard.

Regularly checking and cleaning your lint trap after each load is essential. According to maintenance experts, neglect can lead to system failures and increased energy consumption. This not only affects performance but can also escalate your utility bills.

You should incorporate lint trap cleaning into your routine. This simple practice can help ensure safe dryer operation and enhance drying efficiency.

Different Types of Dryer Vents

Dryer vents come in various types, each designed for specific setups. Knowing which type you have can help you understand the maintenance needs better.

  1. Rigid Metal Vents: These are the most recommended due to their durability and effective airflow. They minimize lint buildup and offer strong protection against fire hazards.
  2. Flexible Plastic or Aluminum Vents: While easier to install, they can accumulate lint more quickly. This type is generally less advisable and may require more frequent inspection and cleaning.
  3. Semi-Rigid Vents: A compromise between rigid and flexible, these are more flexible than metal but still maintain good airflow.

Proper maintenance of your dryer vents, regardless of type, is crucial to prevent blockages. Regular cleaning not only promotes performance but also enhances safety.

Preventative Measures to Protect Your Dryer

To keep your dryer functioning efficiently and safely, focus on regular maintenance routines and being aware of potential fire hazards. Implementing these strategies will help minimize risks and extend the lifespan of your appliance.

Regular Cleaning and Maintenance

Cleaning your dryer and its components regularly is vital. Start with the lint screen; remove lint after every load to maintain airflow. Clogged screens can lead to overheating and reduced efficiency.

Schedule deeper cleaning of the dryer vents every six months. Use a professional service or a vacuum attachment designed for this purpose. This will help prevent lint build-up in the venting system, reducing fire hazards.

Consider investing in dryer maintenance services, like those offered by Totally Maintained, to ensure thorough inspections and cleaning. Regular upkeep not only promotes safety but can also prolong the life of your dryer.

Identifying Fire Hazards

Being proactive about fire safety is crucial. Regular inspection of your dryer and surrounding area is necessary to spot potential fire hazards. Check the venting system for any signs of blockage or damage.

Ensure that no flammable materials are stored near the dryer. Maintain clear pathways around the appliance to allow for proper airflow.

Make it a habit to educate yourself about the signs of problems, such as unusual noises or burning smells, as these may indicate a malfunction. By understanding these risks, you can take immediate action to safeguard your home against fires caused by dryer appliances.

Steps for Safe Lint Trap and Dryer Vent Cleaning

Cleaning the lint trap and dryer vent is essential for maintaining your appliance and preventing hazards. The following steps will guide you through using a dryer vent cleaning kit and the options for professional versus DIY cleaning.

Using a Dryer Vent Cleaning Kit

A dryer vent cleaning kit is a practical tool for maintaining airflow in your dryer system. The kit typically includes flexible rods and brushes designed to remove lint buildup from the vent.

  1. Preparation: Before starting, unplug the dryer and remove the lint trap. This ensures safety while you work.
  2. Assemble the kit: Connect the rods according to the manufacturer’s instructions. Ensure they are secure to prevent breakage during cleaning.
  3. Insert the brush: Feed the brush into the vent, moving it back and forth. This action loosens the lint and debris.
  4. Use the vacuum: If possible, attach a vacuum to the vent to suck out loose lint as you clean. This provides a more thorough clean.
  5. Caution: Be mindful of any sharp edges inside the vent and avoid pushing too forcefully to prevent damage.

Professional Versus DIY Cleaning

Choosing between DIY cleaning and hiring a professional depends on your comfort level and the extent of the lint buildup.

DIY Cleaning: This option is cost-effective and allows you to maintain your schedule. With a dryer vent cleaning kit, you can regularly check and clean your dryer vent. Ensure you follow safety guidelines.

Professional Cleaning: Hiring a professional offers expertise and thoroughness. They have specialized equipment that can reach deeper into the vent system, removing more accumulated lint. This can be particularly beneficial for condos or homes with long venting systems.

Ultimately, if you feel uncertain about the process, consider engaging a professional service to ensure thorough cleaning and safety.

Troubleshooting and Repair after Damage

When a dryer suffers damage during lint trap maintenance, it’s crucial to identify the specific issues and the best path for repair. Understanding how to assess damage and finding experienced professionals can save you significant time and costs.

Identifying Damage to Dryer and Motor

Start by unplugging your dryer for safety. Check the exterior for any visible signs of damage, such as cracks or dents. Next, inspect the lint trap area thoroughly. If you hear unusual noises, it may indicate a problem with the motor. Make sure to locate your dryer’s model number, as this information is vital for part replacements.

Open the dryer door and check the drum for any obstructions or disconnections. Inspect the motor for frayed wires or signs of overheating. If the dryer fails to start, the issue may be electrical or mechanical, necessitating further investigation.

Common symptoms to note include:

  • Unusual noises: Grinding or squealing sounds may signal motor issues.
  • Drum not turning: Indicates a possible motor malfunction.
  • Burning smell: Could indicate overheating components.

Taking detailed notes about the observed issues aids during the repair process.

Finding the Right Professional for Repairs

When selecting a repair professional, prioritize those with experience specifically related to your dryer model and type. Look for reviews or ask for references from neighbors or friends who have previously used their services.

Make sure to inquire about certifications and warranties on their work. A good technician will provide a clear explanation of the diagnosed issues, outline necessary repairs, and give estimates of costs involved.

Additionally, confirm that they understand the importance of preventive maintenance. This knowledge ensures your appliance receives care that prolongs its lifespan. Make use of professional services designed for comprehensive home maintenance when necessary, as they help avoid future damage and save time.

Enhancing Efficiency and Extending Dryer Lifespan

Regular maintenance is essential for optimizing dryer performance and prolonging its lifespan. Focusing on specific maintenance tasks can prevent issues that lead to longer drying times and costly repairs.

Impact of Maintenance on Drying Time

Cleaning the lint trap after every use is crucial for maintaining good airflow. A clogged lint trap can increase drying time and may even pose a fire hazard. You should also consider cleaning the dryer vent regularly. A clear vent allows moisture to escape efficiently.

Implementing a routine maintenance schedule can significantly reduce drying times. This includes checking for blockages and performing a thorough cleaning. Performing these simple tasks can result in very good efficiency and extend the life of your dryer while saving you on energy costs.

Gas Dryer Considerations

For gas dryers, ensuring proper ventilation is vital. You need to check the gas line and venting system regularly. Proper ventilation helps prevent overheating and carbon monoxide buildup, which can be dangerous.

Additionally, consider having a professional clean your dryer’s exhaust duct annually. This step helps maintain optimal performance and enhances efficiency. Regular checks will keep your gas dryer running smoothly and reduce the risk of unexpected breakdowns. Taking these precautions can significantly extend the lifespan of your appliance.

Frequently Asked Questions

This section addresses common concerns regarding dryer damage during lint trap maintenance in a condominium. You’ll find information on costs, insurance coverage, maintenance responsibilities, and proper cleaning procedures.

What are the potential costs of repairing a dryer damaged during lint trap maintenance?

Repair costs can vary significantly based on the extent of the damage. Minor repairs might range from $100 to $300, depending on the specific components that need fixing. Major issues that affect the motor or wiring can lead to expenses of $500 or more.

Can damage to a dryer during lint trap maintenance in a condo be covered by home insurance?

Typically, home insurance may cover damage if it results from a sudden accident or malfunction. Ensure you check with your policy details and contact your insurance provider for guidance on your specific situation. Documenting the damage and maintenance history can support your claim process.

What is the process for replacing a ceiling lint trap in a condominium?

Replacing a ceiling lint trap involves several steps. First, you should turn off the power and disconnect the dryer. Next, access the ceiling trap by removing the cover. Clean out any accumulated lint and replace the trap with a new unit, ensuring proper sealing to prevent air leaks.

Are condo owners responsible for cleaning their own dryer vents, or is this handled by building maintenance?

In many cases, condo owners are responsible for cleaning their own dryer vents. However, some buildings may offer maintenance services for this task. Refer to your condo association’s regulations to clarify your responsibilities regarding dryer vent cleaning.

How often should secondary dryer lint traps be maintained or replaced?

It is advisable to maintain and clean secondary lint traps at least once a year, particularly in condos where lint buildup can occur more rapidly. If you notice reduced efficiency or increased drying times, check and clean the trap more frequently.

What steps should be taken to properly clean a dryer vent in a condominium setting?

To clean a dryer vent effectively, first disconnect the dryer and clear surrounding areas. Use a vacuum or a specialized brush to remove lint from the vent pipe and the lint trap. It’s also essential to inspect the exterior vent cap for blockages, ensuring unobstructed airflow.

How to Clean the Condenser Coils on a Refrigerator for Optimal Performance

Cleaning the condenser coils on your refrigerator is a critical task that can significantly improve its energy efficiency. Regular maintenance helps prevent overheating and extends the lifespan of your appliance. Neglecting this important chore can lead to higher energy bills and potential breakdowns, making it essential to incorporate it into your home improvement routine.

By keeping your refrigerator coils clean, you ensure optimal performance and reduce the risk of costly repairs. This straightforward process involves a few simple steps that anyone can do, saving you the hassle of calling in a professional. Incorporating coil cleaning into your regular maintenance schedule not only promotes better energy efficiency but also keeps your refrigerator running smoothly for years to come.

In this guide, you’ll discover easy-to-follow tips for maintaining your refrigerator coils effectively. Whether you’re a seasoned DIYer or new to home maintenance, understanding how to clean your refrigerator coils will empower you to take care of this key appliance with confidence.

Understanding Your Refrigerator

A thorough understanding of your refrigerator can enhance its performance and lifespan. Knowing where to find the condenser coils and identifying your specific refrigerator model are crucial steps in maintaining your appliance effectively.

Locating the Condenser Coils

Condenser coils are essential for your refrigerator’s cooling process. They are typically located at the back or beneath the appliance.

To locate them:

  • Back Mount: If your refrigerator has coils at the back, you may see them exposed or covered by a grille.
  • Bottom Mount: For models with coils underneath, look for a grille at the base of the fridge.

Check your user manual for precise locations. Regular cleaning of these coils can improve efficiency and prolong the appliance’s life.

Identifying Refrigerator Model

Understanding your refrigerator’s model number helps you find specific maintenance information and replacement parts.

To identify your model:

  • Label Location: Look for a label usually found inside the fridge, either on the side wall or the door frame.
  • Information on the Label: The model number often consists of letters and numbers that indicate the brand and specifications.

Remember this model number when searching for cleaning instructions or replacement parts. Knowing your model ensures you access accurate and relevant information tailored for your refrigerator.

Preparation for Cleaning

Preparing to clean your refrigerator’s condenser coils is essential for efficiency and effectiveness. This section covers the necessary tools and important safety measures to take before beginning the cleaning process.

Gathering Cleaning Tools

Start by assembling all required tools to make the cleaning process smooth. You’ll need:

  • Coil Brush: This specialized brush helps reach tight spaces around the coils.
  • Cleaning Brush: A softer brush can be useful for dusting nearby areas.
  • Shop Vac: This tool is effective for removing large amounts of dust and debris.
  • Air Compressor: Use this for blowing out accumulated dust from hard-to-reach areas.
  • Screwdriver: If your refrigerator has cover panels, a screwdriver will help remove them.

Having everything on hand minimizes interruptions and helps you stay focused during the cleaning task. Ensure your tools are in good condition for the best results.

Safety Precautions and Preparation

Safety is paramount when working with appliances. Follow these steps to protect yourself:

  1. Unplug the Refrigerator: Always disconnect power before starting any maintenance work to prevent electric shock.
  2. Clear the Surrounding Area: Move any obstacles to create a safe workspace. This prevents tripping hazards.
  3. Wear Protective Gear: Consider wearing gloves and a dust mask to prevent any irritants from the dust.
  4. Consult Manufacturer’s Guidelines: Check your refrigerator’s manual for specific instructions regarding coil cleaning.

By taking these precautions, you can ensure a safe and effective cleaning experience. Proper preparation sets the stage for maintaining your refrigerator efficiently.

Step-by-Step Cleaning Process

Cleaning the condenser coils of your refrigerator is essential for its efficiency. Follow these steps to ensure a thorough and effective cleaning process.

Turning Off the Refrigerator

Before you begin, it’s crucial to disconnect the power supply. Locate the refrigerator’s power cord and unplug it from the wall to ensure safety during the cleaning process. This prevents any risk of electric shock while you’re working on the appliance. If your fridge is hardwired, locate the circuit breaker and turn it off. Wait a few minutes to let the system come to a complete stop.

Accessing the Coils

Next, you need to access the coils. Depending on your refrigerator model, the condenser coils may be located at the back or underneath. If they are at the back, carefully pull the refrigerator away from the wall to gain access. For coils located beneath, you’ll need to remove the kick plate. Use a screwdriver to detach it. Be gentle to avoid damaging any components.

Applying Cleaning Techniques

Once you have access to the coils, it’s time to clean. Start with a vacuum cleaner to remove loose dust and debris. Use the hose attachment to vacuum around the coils carefully, ensuring you reach all areas. After that, take a coil brush to scrub off any stubborn dirt or grime that the vacuum might have left behind. You can also use a damp cloth to wipe any remaining residues for a thorough clean.

Final Cleaning and Reassembly

After cleaning, give everything a final inspection. Ensure all debris is removed, and the coils are clean. If you used a damp cloth, let the coils dry thoroughly to prevent moisture build-up. Next, reattach the kick plate or push the refrigerator back into its original position. Finally, plug the refrigerator back in or turn on the circuit breaker. Wait a few minutes before checking that the appliance is running properly. Regularly checking and cleaning your refrigerator coils can help maintain efficiency and prolong its lifespan.

Maintenance and Tips for Longevity

Maintaining your refrigerator’s condenser coils is essential for optimal performance and energy efficiency. A few simple strategies can ensure longevity and reduce unexpected repair costs.

Regular Coil Cleaning Schedule

To keep your refrigerator running efficiently, establish a regular cleaning schedule for the condenser coils. Aim to clean the coils at least once every six months. If you have pets or live in a dusty environment, you may need to clean them more frequently.

Steps to Clean the Coils:

  1. Unplug the refrigerator to ensure safety.
  2. Use a soft brush or vacuum attachment to remove dust and debris.
  3. Clean hard-to-reach areas with a coil cleaning brush.

This regular maintenance not only improves energy efficiency but also extends the lifespan of your appliance. A clean coil allows your refrigerator to cool more effectively, reducing energy bills.

Preventing Coil Dust Build-Up

To minimize dust accumulation on your condenser coils, consider these proactive measures:

  • Location Matters: If possible, position your refrigerator away from heat sources and high-traffic areas to reduce exposure to dust.
  • Install Filters: Use air filters in your home to trap dust and particles before they settle on your refrigerator.
  • Routine Inspections: Regularly check the area around your refrigerator for dust and debris. Address build-up promptly to prevent it from affecting performance.

By implementing these strategies, you can maintain optimal energy efficiency and prolong the life of your refrigerator. Keeping the coils clean will help your refrigerator function effectively, saving you time and money in the long run.

Frequently Asked Questions

Cleaning the condenser coils on your refrigerator is essential for efficient operation. Below are specific questions and answers designed to clarify the process and importance of this maintenance task.

What is the recommended method for cleaning a refrigerator’s condenser coils?

The best method involves using a vacuum cleaner with a brush attachment. Gently vacuum the coils to remove dust and debris. You may also use a coil brush for stubborn dirt that the vacuum cannot reach.

How often should one clean the condenser coils of a refrigerator?

It is generally recommended to clean the condenser coils every six months. This prevents dust buildup, which can lead to inefficient cooling and increased energy consumption.

What can I use to clean the condenser coils beneath a refrigerator if I don’t have a brush?

If you don’t have a brush, you can use a vacuum cleaner with a narrow attachment. Alternatively, a soft cloth or a compressed air canister can help dislodge dust and dirt.

Where can I locate the condenser coils on my refrigerator?

Condenser coils are usually located at the back or beneath the refrigerator. Check your appliance’s manual for the exact location, as this can vary by model.

Are there any signs indicating that the condenser coils on my fridge need cleaning?

Yes, some signs include increased energy bills, unusual noises from the appliance, or the refrigerator not cooling properly. These issues often suggest that dust has accumulated on the coils.

Can refrigerator condenser coils be cleaned without using a vacuum cleaner?

Yes, while a vacuum is effective, you can clean the coils using a damp cloth to wipe off dust or a stiff brush if you have one. Compressed air can also help reach tight spaces.

How to Clean a Greasy Cooker Hood: Effective Techniques for a Sparkling Kitchen Appliance

Cleaning a greasy cooker hood can seem like a daunting task, but it’s essential for maintaining a clean kitchen environment. To effectively clean your cooker hood, start by gathering your supplies, which should include hot water, degreasing dish soap, and a non-abrasive scrub brush. Removing built-up grease not only improves the appearance of your kitchen but also enhances the efficiency of your appliance.

Regular maintenance of your cooker hood can prevent larger cleaning jobs in the future. Grease buildup can affect the performance of your hood and even contribute to unwanted kitchen odors. With just a little time and the right techniques, you can restore your cooker hood to its original shine and ensure it functions properly.

In this article, you’ll discover practical steps and tips that will make the cleaning process straightforward. From using common household items to effective scrubbing techniques, you’ll be equipped to keep your cooker hood in optimal condition.

Understanding Your Cooker Hood

A cooker hood is an essential appliance in your kitchen, helping to eliminate smoke, steam, and odors while you cook. Understanding its types and the importance of regular cleaning can enhance your user experience and prolong its lifespan.

Types of Cooker Hoods and Filters

Cooker hoods come in various styles, each suited to different kitchen designs and needs. The common types include:

  • Wall-mounted hoods: These are attached directly to the wall above your cooking surface. They are popular for their sleek designs.
  • Island hoods: Designed for kitchens with a central cooking island, these hoods hang from the ceiling and offer 360-degree ventilation.
  • Under-cabinet hoods: These are installed beneath cabinets and save space while providing effective ventilation.

Filters in cooker hoods can be categorized into two main types: grease filters and charcoal filters. Grease filters capture cooking residues and are typically made of aluminum or stainless steel. Charcoal filters help remove odors and are often replaceable, making it crucial to know which type your hood uses to maintain optimal function.

Importance of Regular Cleaning

Regular cleaning of your cooker hood is vital for several reasons. A clean hood improves airflow and efficiency, allowing your appliance to operate effectively. Grease and dirt buildup can lead to unpleasant odors and even fire hazards if not addressed.

To clean your hood filter, refer to guidelines suitable for its material. For metal filters, washing with hot soapy water or placing them in the dishwasher is generally effective. If you use charcoal filters, replacing them per manufacturer instructions is recommended. Regular maintenance not only enhances the user experience but can also extend the life of your cooker hood, saving you money on replacements.

Preparing for Cleaning

Before diving into the cleaning process of your greasy cooker hood, it’s essential to take the right steps to ensure effective and safe cleaning. This involves prioritizing safety measures and gathering all necessary materials to streamline the task ahead.

Safety Precautions

Start by turning off the cooker hood and unplugging it if possible. This reduces the risk of electric shock or injury while cleaning.

Wear gloves to protect your hands from harsh chemicals like degreasers. If you are sensitive to strong odors or chemicals, consider using a mask or ventilating the area by opening windows.

Keep a fire extinguisher nearby, as cooking appliances can be prone to grease fires. Ensure that you have a stable step stool or ladder if you need to reach high areas, and secure it properly.

Finally, be mindful of hot surfaces right after cooking. Wait for the cooker hood to cool down before you begin cleaning, as hot components can cause burns.

Gathering Necessary Materials

To clean your greasy cooker hood effectively, you will need a few key materials. Start with a good degreaser designed for kitchen surfaces. Look for products specifically labeled for use on metal and grease removal.

You will also require a soft sponge or cloth to avoid scratching the surface, and a sturdy brush for tough spots.

Prepare a bowl of hot water to help loosen the grease and make cleaning easier. For added effectiveness, combining hot water with baking soda can create a non-toxic cleaning solution that works well on stubborn grease.

Don’t forget a bucket for collecting any dirty water and a microfiber cloth for a streak-free finish. Having all these materials ready will make your cleaning task much more efficient.

The Cleaning Process

Cleaning your greasy cooker hood involves several important steps to ensure effectiveness. You will address the exterior, clean the metal filters, and conduct a deep cleaning of the interior. Each step focuses on using the right products and methods to maintain your appliance’s efficiency.

Cleaning the Exterior

Start by selecting a suitable degreaser designed for use on stainless steel. Apply it evenly across the surface, following the manufacturer’s instructions.

Use a microfiber cloth or sponge to gently scrub the exterior, removing built-up grease and grime. For stubborn spots, let the degreaser sit for a few minutes before wiping.

Rinse the surface with warm water to remove any cleaning residue. Finally, dry the exterior thoroughly with a clean cloth to prevent water spots. Regularly maintaining the exterior helps keep your cooker hood looking new and functioning properly.

Cleaning Metal Filters

Begin by removing the metal filters from your cooker hood. Most filters can be easily detached without tools. Once removed, soak them in a mixture of hot water and a quality degreaser for about 15-30 minutes.

This soaking helps break down the grease effectively. After soaking, scrub the filters gently with a non-abrasive sponge to remove any remaining residue. Rinse thoroughly under warm water until the water runs clear.

Allow the filters to dry completely before reinstalling them. Clean filters not only improve airflow but also enhance the overall performance of your cooker hood.

Deep Cleaning the Interior

For deep cleaning the interior, start by turning off the power and removing any cover panels. Use a degreaser to spray the walls and surfaces inside the hood. Allow it to sit for a few minutes to loosen the grease.

Using a scrub brush, carefully scrub the surfaces, paying special attention to corners and crevices where grease collects. Wipe the cleaned areas with a damp cloth to remove debris.

If there’s significant build-up, repeated applications may be necessary. Once finished, ensure everything is dry before reassembling and turning the power back on. This thorough cleaning will enhance the efficiency and longevity of your cooker hood.

Maintenance and Care

Proper maintenance and care of your cooker hood will enhance its efficiency and longevity. Implementing a regular cleaning schedule and understanding when to replace filters are crucial elements to ensure optimal performance.

Regular Cleaning Schedule

Establish a consistent cleaning routine for your cooker hood. Wipe down the exterior weekly with a damp cloth and a mild detergent to remove grease and dust build-up. For the interior, focus on the fan and light fixtures, as grease can accumulate here, reducing efficiency.

Schedule a deep clean monthly. This involves removing the filter to soak in a baking soda solution. This method effectively tackles stubborn grease. Make sure to dry the filter thoroughly before reinstalling it to prevent moisture buildup.

Setting reminders can help you stick to your cleaning schedule. You can use a calendar or app to ensure you don’t forget. Regular upkeep not only improves performance but also enhances the aesthetics of your kitchen.

Filter Replacement and Care

Pay close attention to your cooker hood’s filter, as it plays a vital role in trapping grease and odors. Depending on usage, filters should be replaced every 3 to 6 months. If you cook frequently, a shorter interval is advisable.

Some filters are washable, while others are disposable. Washable filters should be cleaned monthly. Remove any built-up grease or grime using a degreasing agent, and make sure they are completely dry before reinstallation. It’s crucial to ensure that the filter fits snugly to maintain efficiency.

Keep an eye on any signs of deterioration, like unusual noises or reduced airflow. These may indicate that it’s time for replacement. Staying proactive with filter care can notably improve the user experience and functionality of your cooker hood.

Optimizing Kitchen Ambiance

Creating a pleasant kitchen atmosphere enhances your cooking experience and makes the space more inviting. Important aspects to consider include user experience and the role of cookie use in your kitchen.

Enhancing User Experience

A well-optimized kitchen enhances usability through design and cleanliness. Start by ensuring your workspace is clutter-free. Keep frequently used items, such as utensils and spices, within easy reach.

Lighting plays a crucial role. Use a combination of overhead lights and task lighting to illuminate work areas without causing harsh shadows. Consider dimmable lights for more control over the mood.

Adding personal touches, like herbs in decorative pots or colorful dishware, can make the space feel warm. Ensure the air quality is fresh; regularly clean your cooker hood to eliminate smoke and smells. A fresh environment improves your cooking experience and makes the kitchen a more enjoyable place to gather.

Considerations for Cookie Use in the Kitchen

Using cookies for baking and decorating can be a fun addition to your kitchen activities. Pay attention to the placement of your cookie-related tools and ingredients for smooth workflow.

Store cookie sheets, cutters, and decorations in a designated area to promote efficiency. Use stackable storage containers to save space and keep items organized. Don’t forget about safety; ensure all surfaces are clean and free from grease when baking.

You might also consider investing in a dedicated baking station. This can include counters that accommodate mixing bowls and a small oven for cookies. Such arrangements improve your user experience while encouraging creativity and experimentation in the kitchen.

Frequently Asked Questions

Cleaning a greasy cooker hood can be straightforward with the right methods and materials. Below are specific questions and answers that will help you tackle grease effectively.

What are effective methods for removing heavy grease from a range hood?

One effective method involves using a mixture of hot water and dish soap. Soak removable parts in this solution, then scrub gently with a soft-bristled brush. Another alternative is to use a vinegar and baking soda paste for tough spots.

Which household items can be used to clean a greasy cooker hood effectively?

Common household items like baking soda, vinegar, and dish soap work well for cleaning. A solution of warm water mixed with vinegar can cut through grease easily. Additionally, lemon juice can help remove stubborn stains due to its natural acidity.

What steps should be taken to clean a greasy cooker hood vent?

Start by turning off the power to the vent. Remove the vent cover and soak it in warm, soapy water. Clean the interior surfaces with a damp cloth, then reassemble everything once completely dry.

How can one clean grease off range hood filters without damaging them?

Submerge the filters in a warm dish-soap solution for about 15–20 minutes. Use a soft brush to scrub them gently and avoid harsh abrasives. Rinse thoroughly with warm water and let them air dry completely before reinstalling.

What is the best technique for cleaning a stainless steel cooker hood to avoid streaks?

For stainless steel, use a solution of vinegar and water for cleaning. Apply it with a microfiber cloth in the direction of the grain. Finish by wiping dry with a clean, dry cloth to prevent streaks.

How can you degrease kitchen exhaust fans safely and efficiently?

First, detach the fan and wipe down the surfaces with a cloth soaked in soapy water. For stubborn grease, consider using a degreaser spray. Rinse everything thoroughly and allow it to dry before reattaching the fan.

How to Flush Water Heater with Vinegar: A Step-by-Step Guide to Maintain Efficiency

Flushing your water heater with vinegar is an effective way to remove sediment buildup and improve its efficiency. This simple method not only cleans your tank but can also extend the lifespan of your water heater, particularly if you own a tankless model. Regular maintenance is essential to ensure your water heater runs smoothly and efficiently.

Using vinegar as a cleaning agent is straightforward and environmentally friendly. By allowing the vinegar to sit in the tank, you can break down stubborn deposits that accumulate over time, enhancing the performance of your unit. Whether you have a traditional tank or a tankless water heater, flushing with vinegar can be done easily by following a few simple steps.

It’s important to schedule this maintenance task regularly. Doing so will help prevent costly repairs and ensure that your water heater continues to function optimally. With just a few hours dedicated to this process, you’ll enjoy cleaner water and more efficient heating.

Understanding Your Water Heater

Knowing how your water heater works is essential for effective maintenance. Two key aspects are the role of the anode rod and the differences between tankless and conventional water heaters. This understanding will help you keep your system running efficiently.

The Role of the Anode Rod in Water Heater Maintenance

The anode rod is a vital component in preventing tank corrosion. Made of magnesium, aluminum, or zinc, this rod attracts corrosive elements in the water, extending the lifespan of your heater.

You should check the anode rod every few years, especially in areas with hard water. If it’s significantly corroded or depleted, it’s time to replace it. Replacing the anode rod periodically can save you from premature tank failure.

To check the anode rod:

  1. Turn off the electricity or gas supply to the heater.
  2. Drain some water from the tank to reduce pressure.
  3. Remove the anode rod using a socket wrench.

Differences Between Tankless and Conventional Water Heaters

Tankless water heaters heat water on demand, providing endless hot water without the need for a storage tank. These units are generally more energy-efficient since they only operate when hot water is needed.

In contrast, conventional water heaters store hot water in a tank and may use more energy to keep that water heated. They can run out of hot water during periods of high demand.

For maintenance:

  • Tankless heaters require periodic flushing to remove mineral buildup.
  • Conventional heaters need regular flushing to remove sediment.

Understanding these differences will guide you in choosing the right maintenance approach for your specific model.

Preparing for a Vinegar Flush

Before you begin the vinegar flush process for your water heater, it’s essential to prioritize safety and gather the necessary materials. This preparation will ensure a smooth and effective cleaning experience.

Safety First: What You Need To Do Before You Start

Safety is paramount when working with any appliance. Start by turning off the power supply to your water heater. For electric heaters, unplug the unit; for gas heaters, set the thermostat to the lowest setting.

Next, turn off the cold water inlet valve. This isolation prevents any fresh water from entering the tank during the flush. Open a hot water faucet in your home to relieve pressure and allow for efficient draining later on.

Always wear protective gear such as gloves and goggles. These safeguards protect you from potential splashes and spills. Once you have ensured these safety measures, you can confidently proceed with the flushing process.

Materials Required for a Vinegar Flush

Gathering the right materials will make your vinegar flush more efficient. You will need three gallons of white vinegar, which acts as a natural cleaning agent and effectively dissolves mineral buildup.

funnel is essential for pouring vinegar into the tank without spilling. You may also require a hose to facilitate draining water from the tank.

If your water heater has a drain valve, ensure you have a bucket or hose ready for collection. Additionally, having a screwdriver on hand will help you access any necessary parts easily. By preparing these materials ahead of time, you streamline the flushing process and reduce the risk of delays.

The Vinegar Flush Process

Flushing your water heater with vinegar is an effective way to remove sediment buildup and prolong its lifespan. The following steps will guide you through the process while emphasizing monitoring the flush and replacing the vinegar solution as needed.

Step-by-Step Guide to Flushing Your Water Heater

  1. Turn Off Power and Water Supply: Start by turning off the power to your water heater and shutting off the cold water supply using the isolation valve.
  2. Connect a Hose: Attach a garden hose to the drain valve at the bottom of the tank. Place the other end in a bucket or outside to direct the water flow.
  3. Drain the Tank: Open the pressure relief valve to allow air into the tank. Then, open the drain valve to empty any existing water.
  4. Add Vinegar: After draining, close the drain valve. Pour about four gallons of vinegar into the tank through the opening. This vinegar flush will help dissolve sediment.
  5. Let it Sit: Allow the vinegar to sit for at least 24 hours. This time lets the acidity work effectively on the buildup.

Monitoring the Flush and Vinegar Solution Replacement

During the flushing process, it’s essential to monitor how the vinegar is interacting with the sediment.

  • Visual Check: Examine the hose’s drainage. If you notice sediment, this indicates the flushing is effective.
  • Vinegar Replacement: If flushing continues for an extended period, consider replacing the vinegar solution to maximize cleaning efficiency. You may add fresh vinegar after the initial 24 hours.

After the vinegar has had time to work, you can drain it again and follow up with a fresh water rinse to clear out any remaining sediment and vinegar. This rinsing helps ensure your water heater is clean and ready for use.

Finishing Up and Water Heater Reconnection

After completing the vinegar descaling process, you need to properly rinse the water heater and restore the power or gas supply. This ensures that your water heater operates efficiently and effectively, extending its lifespan.

Rinsing the Water Heater

Begin by turning off the inlet valve to stop any new water from entering the tank. Then, attach a garden hose to the drainage valve at the bottom of the water heater and direct the other end into a bucket or outside. Open the drainage valve and allow the tank to empty completely.

Once drained, close the valve and disconnect the hose. Reopen the inlet valve to fill the tank with clean water. Allow it to run for a few minutes to flush out any remaining vinegar and sediment. This step is crucial to prevent any lingering acidity from affecting the inner components of the heater. Checking for leaks while the tank fills is also essential.

Restoring Power and Gas Supply

With the water heater rinsed, it’s time to restore the power or gas supply. If you have an electric model, turn the thermostat back on, ensuring it is set to your desired temperature. For gas models, relight the pilot light according to the manufacturer’s instructions.

Once restored, allow the heater to heat the water. This may take some time, so check the temperature before use. Monitor the water pressure in your system during this period. Proper reconnection eliminates issues related to inconsistent heating and optimizes your water heater’s performance. Regular flushing enhances its efficiency and extends its lifespan, making home maintenance simpler and more effective.

Water Heater Maintenance and Upkeep

Proper maintenance of your water heater is crucial for optimal performance and longevity. Keeping your system in good shape helps prevent issues such as scale build-up while ensuring your water heater operates efficiently.

Regular Maintenance to Prevent Scale Build-Up

Regular checks of your water heater can significantly reduce the risk of scale build-up caused by mineral deposits. Start by flushing the tank with vinegar to eliminate any accumulated sediment, which can affect heating efficiency.

You should also inspect and possibly replace the anode rod every couple of years. This rod prevents rust and extends the life of your tank. If you notice any wear, replacing it promptly can save you from costly repairs later.

Don’t forget to check the pressure valve occasionally. If it’s not functioning correctly, it may lead to excessive pressure build-up, which can damage your system. A proactive maintenance schedule will keep your water heater running smoothly and efficiently.

Recognizing When It’s Time to Call a Professional

While basic maintenance is manageable, some situations call for a professional’s expertise. If you notice unusual noises coming from the tank, such as rumbling or popping, this may indicate sediment build-up requiring a thorough inspection.

Leaking water around the heater is another sign that something is amiss. This could be related to a faulty temperature gauge, valve, or even the tank itself. If you have a tankless model like a Navien or Rinnai, regular servicing is recommended to avoid costly failures.

Finally, if you consistently have inadequate hot water, it’s time to consult with a professional. They can assess whether the problem lies with the heater’s capacity or other underlying issues.

Frequently Asked Questions

Flushing your water heater with vinegar is a common practice, and there are several aspects you may want to understand. This section addresses safety, the type of vinegar to use, duration of use, and proper procedures involved in the flushing process.

Is it safe to use vinegar to flush my water heater?

Yes, it is safe to use vinegar for flushing your water heater. Vinegar is a natural acidic substance that helps dissolve mineral buildup without causing damage. Just ensure that you’re following the correct procedure to avoid any issues with your water heater.

What type of vinegar is recommended for flushing a tankless water heater?

White distilled vinegar is recommended for flushing tankless water heaters. It has a high acidity level, which is effective in breaking down sediment. Avoid using apple cider vinegar or flavored vinegars, as they may leave residues that can affect the water quality.

How long should vinegar be left inside a water heater during the flushing process?

It’s advisable to leave vinegar inside your water heater for at least 24 hours. This duration allows the vinegar to effectively dissolve sediment and buildup. Make sure to check the manufacturer’s guidelines for any specific recommendations related to your model.

Can vinegar be used in combination with baking soda to flush a water heater?

Using vinegar with baking soda is not recommended for flushing a water heater. The chemical reaction between them produces carbon dioxide gas, which may cause pressure buildup. Stick to using vinegar alone for the flushing process to ensure safety and efficiency.

What is the proper procedure for flushing a hot water heater?

To flush your hot water heater with vinegar, start by turning off the power and water supply. Drain the tank completely, then add the vinegar through the cold water inlet. Let it sit for a full 24 hours before draining and rinsing the tank thoroughly.

Does vinegar effectively remove sediment from water heaters?

Vinegar is quite effective in removing sediment from water heaters. Its acidity helps break down mineral deposits, ensuring cleaner tank interiors. Regular flushing with vinegar can help maintain the efficiency and longevity of your water heater.