(248) 297-3485

(248) 297-3485

Plumbing System Servicing: Essential Maintenance for Optimal Performance

Your plumbing system is a crucial part of your home that requires regular servicing to function effectively. Routine plumbing maintenance not only helps you avoid costly repairs but also ensures that your systems run smoothly and efficiently. By addressing potential plumbing problems early, you can prolong the lifespan of your pipes and fixtures, ultimately saving you money.

Engaging in preventative plumbing services allows you to tackle common issues before they escalate. Whether it’s scheduling an annual inspection to check for leaks or keeping drains free of debris, these proactive measures can prevent more serious complications down the line. You can trust that comprehensive plumbing system servicing provides peace of mind as you maintain a comfortable and functional living environment.

Investing in your plumbing system is essential for preserving the value of your home. Regular maintenance can help you identify issues promptly and avoid the inconvenience of unexpected breakdowns. Emphasizing preventive care means you can enjoy your home without the stress of plumbing concerns looming overhead.

Understanding Your Plumbing System

A solid grasp of your plumbing system is essential for any homeowner. Knowing the types of systems in your home, common components, and the significance of regular inspections can help you maintain efficiency and prevent problems.

Types of Plumbing Systems

There are two main types of plumbing systems: drainage systems and water supply systems.

  1. Water Supply System: This system delivers fresh water to your sinks, toilets, and other fixtures. It includes pipes, valves, and faucets that connect to municipal water supplies or private wells.
  2. Drainage System: This system removes wastewater from your home. It consists of pipes, vents, and traps that transport waste to the municipal sewer or septic system.

Knowing these systems helps you identify issues quickly, ensuring efficient operation and water conservation.

Common Plumbing Components

Your plumbing system consists of several key components that work together seamlessly. These include:

  • Piping: Pipes are responsible for transporting water to and from fixtures. Common materials include PVC, copper, and PEX.
  • Valves: These control water flow and pressure, ensuring you can shut off water supply easily in emergencies.
  • Fittings: Connect different sections of piping, allowing for proper routing of water throughout your home.

Understanding these components helps you troubleshoot minor issues and informs you when professional maintenance is needed.

The Importance of Regular Inspection

Regular plumbing inspections can save you time and money by identifying potential issues early. A qualified professional can assess your system for:

  • Leaking Pipes: Small leaks can lead to significant water damage over time if uncaught.
  • Corroded Components: Aging pipes and valves may weaken, necessitating replacement to avoid catastrophic failures.
  • Clogged Drains: Routine inspections help detect clogs before they become serious blockages, ensuring smooth drainage.

Scheduling regular inspections promotes efficient functionality and extends the lifespan of your plumbing fixtures, securing your investment long-term.

Routine Plumbing Maintenance

Maintaining your plumbing system is essential for preventing costly repairs and ensuring everything runs smoothly. By implementing a well-structured maintenance plan and following practical tips, you can manage your plumbing effectively. Here are key areas to focus on.

Maintenance Plan Development

A maintenance plan is crucial for sustaining your plumbing system’s health. Start by scheduling regular inspections of critical components like pipes, faucets, and water heaters. Aim for annual inspections, especially in older homes where wear and tear is more common.

Consider documenting any plumbing problems you encounter, including leaks or unusual noises. This record will help identify recurring issues over time. Incorporate specific tasks, such as drain cleaning and checking for signs of corrosion, into your annual maintenance calendar to ensure nothing is overlooked.

DIY Plumbing Maintenance Tips

For effective DIY maintenance, begin with simple tasks. Regularly check for leaks in faucets and toilets, as these can waste significant water over time. Fixing these issues promptly can save you money on water bills and prevent larger plumbing problems.

Another tip is to clean your drains. Use a mixture of baking soda and vinegar to keep them clear of buildup. This natural method helps maintain flow without harsh chemicals. Additionally, insulating pipes, especially those in unheated areas, can prevent freezing and bursting during colder months.

Make it a habit to flush your water heater annually to remove sediment and prolong its life. These straightforward DIY plumbing maintenance tips will help you maintain an efficient plumbing system.

Professional Plumbing Services

While DIY maintenance is beneficial, certain tasks require professional expertise. Professional plumbing services, such as thorough inspections and repairs, add an extra layer of assurance. Specialists can identify issues that may not be immediately visible, such as hidden leaks or deteriorating pipes.

Consider utilizing professional services for routine water heater maintenance, ensuring optimal performance. Regular drain cleaning services can also prevent clogs and buildup that DIY methods might not fully address. Scheduling these services can extend the lifespan of your plumbing system and minimize the risk of emergency repairs, making it a smart investment for your home.

Identifying and Addressing Common Issues

Homeowners often encounter various plumbing issues that require attention to maintain a safe and functional living space. Recognizing and addressing these problems early can save you time, money, and stress. This section focuses on key plumbing challenges including leaks, clogs, and low water pressure.

Dealing With Leaks and Water Stains

Leaks are common issues that can lead to water stains on ceilings and walls. To identify a leak, look for damp spots, mold growth, or peeling paint. Once discovered, you can often fix minor leaks by tightening connections or using plumber’s tape on threaded fittings.

For persistent leaks, it may be necessary to replace washers or O-rings in faucets and fixtures. If you notice water pooling or significant stains, you might need to inspect pipes for corrosion or damage. Timely repairs can help prevent costly water damage and structural issues.

Resolving Clogs and Slow Drains

Clogged drains are frustrating and can disrupt your daily routine. Begin by using a plunger to dislodge minor blockages in sinks and toilets. For kitchen sinks, a mixture of baking soda and vinegar can help break down grease and food build-up.

If these methods don’t work, consider using a drain snake to remove deeper clogs. Regular maintenance such as flushing drains with hot water can help keep pipes clear. Avoid using chemical drain cleaners as they can corrode pipes over time.

Fixing Low Water Pressure

Low water pressure can affect your plumbing system’s performance. Start by checking if the issue is localized to one fixture or impacts the whole house. If it’s isolated, a clogged aerator or showerhead might be the culprit. Cleaning these components can restore normal flow.

For whole-house issues, check the main shut-off valve to ensure it’s fully open. If problems persist, sediment build-up within pipes could be the cause, requiring professional cleaning. Regular inspections can help maintain optimal water pressure and the efficiency of your plumbing system.

When to Repair vs. Replace

Deciding whether to repair or replace your plumbing system is crucial for maintaining efficiency and preventing further issues. Key factors include assessing repair costs, understanding the lifespan of your plumbing fixtures, and recognizing signs that indicate a need for replacement.

Assessing Repair Costs and Benefits

When evaluating whether to repair or replace, start by estimating repair costs. Minor issues often require simple repairs that can be completed for under $500. Compare this with the long-term costs of repeated repairs, especially for aging systems.

For example, if you find yourself needing multiple repairs within a short time frame, it may be more cost-effective to invest in a replacement. Consider the type of pipe involved. Galvanized pipes tend to corrode over time, leading to persistent issues, whereas newer materials might yield better longevity.

Understanding the Lifespan of Plumbing Fixtures

Different plumbing components have varying lifespans. For instance, PVC pipes can last around 25-40 years, while copper pipes can endure 50 years or more with proper care. Aiming for preventive maintenance can significantly extend these lifespans.

Consider your plumbing fixtures. If they are nearing the end of their expected lifespan and show signs of wear, it might be time for a comprehensive evaluation of your plumbing system. Investing in newer materials or fixtures can reduce future repairs.

Signs You Need a Replacement

Be alert to specific indicators that suggest your plumbing may need replacement. Common signs include:

  • Frequent clogs or backups: These may indicate extensive damage or deterioration of the plumbing.
  • Unpleasant odors: Sulfur or sewage smell can signal leaks in sewer lines.
  • Rust or discoloration: This can point to corroded pipes, especially with older galvanized models.

If you notice any of these signs, act quickly to avoid potential damage to your home.

Handling Plumbing Emergencies

When faced with a plumbing emergency, timely and appropriate action can minimize potential damage. Knowing how to identify an emergency, take immediate steps to mitigate water damage, and select a reliable service is crucial for every homeowner.

Immediate Steps to Mitigate Water Damage

In the event of a plumbing emergency, your first task is to stop the water flow. Locate the main shut-off valve and turn it off. This action can drastically reduce water damage.

Next, assess the situation. Look for visible leaks or broken pipes. If you notice pooling water, move belongings to higher ground to prevent further damage.

Consider using towels, buckets, or a wet vacuum to remove excess water. If there are any strange noises coming from your plumbing system, take note. These sounds could indicate underlying issues that may worsen if not addressed promptly.

Identifying an Emergency Plumbing Situation

Not all plumbing malfunctions constitute an emergency. However, certain signs indicate urgent situations. For example, if you experience sudden leaks, especially those causing significant water damage, you need immediate assistance.

Other emergencies include backed-up toilets or sinks, which can lead to sanitation issues. If your heating system fails during cold weather, it is also critical. Be aware of warning signs like strange noises or a persistent drop in water pressure, as these may precede more significant problems.

Regular preventive plumbing maintenance can help you spot these issues before they escalate into emergencies. Being proactive can save you time and money in the long run.

Choosing an Emergency Plumbing Service

Selecting a trustworthy emergency plumbing service can make a substantial difference. Look for companies that prioritize fast response times, as delays can exacerbate water damage.

Check online reviews and ask for recommendations from friends or family. A reputable service should be transparent about their pricing and offer a guarantee on their work.

Don’t hesitate to inquire about their experience with specific plumbing emergencies. If they offer preventive plumbing maintenance services, that is a good indication of their commitment to long-term solutions.

Make sure to choose a service that understands the urgency of your situation and can provide rapid, effective assistance.

Frequently Asked Questions

Understanding your plumbing system and its maintenance can help prevent costly repairs and extend the lifespan of your home’s systems. Here are some common queries related to servicing your plumbing.

How often should plumbing be serviced?

Plumbing generally should be serviced at least once a year. Regular check-ups help identify potential issues before they become serious problems, ensuring your system functions optimally.

What is included in plumbing system maintenance?

Maintenance typically includes inspecting pipes for leaks, checking water pressure, cleaning out drains, and ensuring that fixtures operate properly. A thorough inspection will also cover your water heater and other essential components.

How much does service plumbing typically cost?

Service plumbing costs can vary widely, depending on the complexity of the job and regional pricing. On average, homeowners can expect to pay between $100 and $300 for basic maintenance services.

Are plumbing service plans worth the investment?

Investing in a plumbing service plan can save you money over time. These plans often offer regular maintenance at a reduced rate, which can prevent costly repairs and extend the life of your plumbing systems.

What items are on a plumbing maintenance checklist?

Common items on a plumbing maintenance checklist include checking for leaks, inspecting toilets for proper function, clearing clogs from drains, and flushing the water heater. Regularly reviewing this checklist can help maintain your system’s efficiency.

What are the signs that indicate a need for plumbing maintenance?

Signs that your plumbing needs attention include slow drains, unusual noises in pipes, reduced water pressure, or damp spots on walls or ceilings. Recognizing these early warning signs can prompt timely service and prevent major issues.


How to Dispose of Old Clogged Dryer Vent Piping Safely and Effectively

When it’s time to replace old clogged dryer vent piping, knowing how to dispose of it properly is essential for safety and environmental reasons. Metal dryer vent pipes can typically be recycled at scrap metal facilities, while plastic vents should be disposed of in your regular trash if recycling is not an option. Understanding the material of your vent is the first step toward responsible disposal.

If you’re unsure about where to take your old pipe, consider checking local recycling centers or community guidelines to see what materials they accept. You may also explore alternatives like donation to local building supply stores, which sometimes take such items for resale. Making informed decisions about disposal not only helps maintain your home but also contributes positively to community waste management efforts.

By learning the proper disposal methods, you can ensure that your old dryer vent piping is handled correctly while also creating a safer environment in your home. This simple act can have a significant impact on both your safety and local ecological health.

Understanding the Importance of Proper Dryer Vent Disposal

Proper disposal of old clogged dryer vent piping is crucial for multiple reasons that impact your home’s safety, air quality, and maintenance efficiency. Addressing these factors can help you create a safer living environment and improve your home’s overall functionality.

Risks Associated With Old Dryer Vent Piping

Old dryer vent piping poses various risks that homeowners should not ignore. As the materials age, they can deteriorate and crack, leading to lint buildup. This accumulation increases the chances of obstruction, which can impede airflow and cause your dryer to work ineffectively.

Failing to dispose of old piping properly might lead to increased energy costs due to the dryer working harder. Additionally, broken pipes can create fire hazards, as accumulated lint is highly flammable. Regular assessment and maintenance of your dryer vent system can help mitigate these issues and ensure safety.

Impact on Safety and Fire Hazards

Dryer vent systems are a leading cause of dryer fires. Each year, thousands of houses suffer damage due to clothes dryer fires fueled by lint buildup in clogged vents. The National Fire Protection Association (NFPA) emphasizes that nearly 30% of these fires are caused by unclean dryer vents.

By properly disposing of old and clogged vent piping, you decrease the likelihood of such dangerous situations. Installing new, appropriate materials reduces fire hazards, enhances dryer efficiency, and promotes a safer home environment. Regular checks and timely disposal contribute to minimizing these serious safety risks.

Connection Between Dryer Vents and Air Quality

The state of your dryer venting system directly affects your home’s indoor air quality. Poorly maintained dryer vents can release harmful particles and lint into the air, impacting your respiratory health. Proper disposal of obstructed piping ensures that air can circulate freely, reducing airborne contaminants.

A clean airflow contributes to better energy efficiency, which reduces stress on your dryer. This practice not only assists in improving energy costs but also enhances the living environment in your home. Implementing regular maintenance can significantly boost air quality, ensuring you and your family breathe easier.

Identifying When to Replace Dryer Vent Piping

Recognizing when to replace your dryer vent piping can prevent inefficiencies and safety hazards. There are specific signs that indicate your vent system may require attention, and understanding these can enhance the longevity and performance of your dryer.

Common Signs of Clogged or Damaged Vents

You might notice several indicators that your dryer vent is clogged or damaged. Increased drying times are a primary sign; if clothes take longer than normal to dry, it could mean air flow is restricted. Another warning sign is unusual odors; a burning smell is particularly concerning and often indicates lint accumulation or overheating.

Physical damage to the vent itself may include dentscracks, or discoloration. Regular inspections are key. If you see lint buildup at the vent opening or notice moisture around your dryer, these are clear signals that your vent requires immediate attention. Addressing these signs early can prevent more significant issues.

Effect on Dryer Efficiency and Maintenance

A clogged dryer vent can significantly impact your dryer’s efficiency and maintenance requirements. When airflow is obstructed, your dryer has to work harder, consuming more energy. This increased workload can elevate your utility bills.

Additionally, regular maintenance becomes crucial. Scheduled dryer vent cleaning is essential for ensuring the vent remains free of debris. It’s generally recommended to clean the vent at least once a year. By investing time in maintenance, you can enhance your dryer’s longevity and performance, ensuring it operates efficiently without unnecessary strain.

Potential Issues With Washing Machine Drain Lines

It’s important to consider the connection between your dryer vent and your washing machine’s drain lines. Moisture can accumulate in these areas, leading to blockages and potential damage. If your dryer vent is clogged, it could result in excess moisture in the laundry area, impacting the washer’s drain functionality.

Common issues include water backup in wash cycles and increased humidity. If you notice these problems, it may be time to inspect both your dryer vent and washing machine drain lines. Ensuring both systems are clear is vital for maintaining efficiency and preventing additional repairs or replacements.

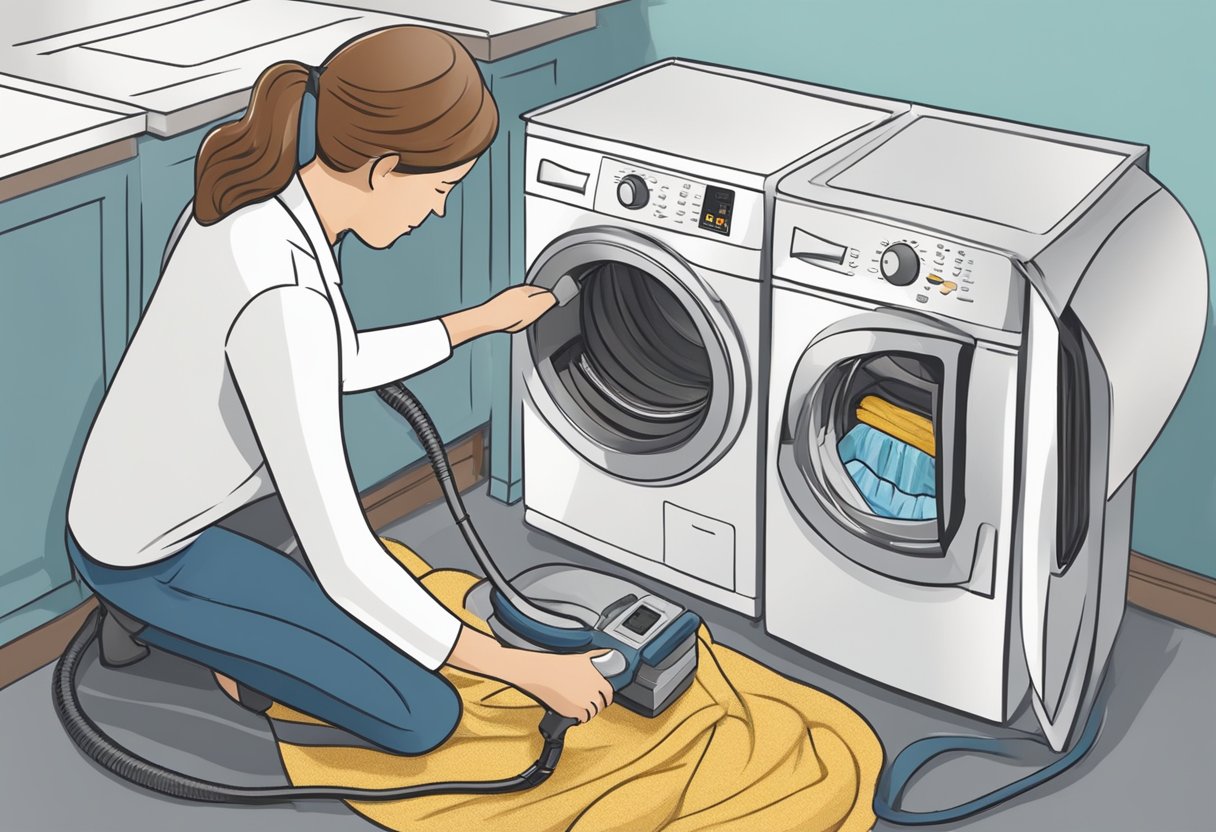
Step-By-Step Guide to Removing Old Dryer Vent Piping

Removing old clogged dryer vent piping requires careful attention to safety and proper procedures. This guide covers essential safety precautions, tools needed, and steps to disconnect and dismantle the piping correctly.

Safety Precautions Before Removal

Before starting the removal process, prioritize safety. First, unplug the dryer to prevent any electrical issues. It’s also wise to ensure that the area is well-ventilated. Wear protective gloves and safety goggles to shield against sharp edges and dust.

Inspect the existing duct for signs of damage or wear. If the duct is made of aluminum or plastic, handle it with caution to avoid tearing. Having a fire extinguisher nearby is a prudent safety measure due to lint buildup being a fire hazard. Taking these precautions helps create a safe environment for the task ahead.

Required Tools and Supplies

Gathering the right tools and supplies simplifies the removal process. You will need:

  • Phillips head screwdriver to loosen screws securing the vent.
  • A pair of scissors or a utility knife for cutting duct tape and possibly the duct itself.
  • Duct tape for temporary patches if needed during removal.
  • dryer vent cleaner for any further cleaning post-removal.
  • A vacuum cleaner or a shop vac to remove any loosened lint or debris.

Having these supplies ready ensures you can complete the removal smoothly and quickly without unnecessary interruptions.

Proper Disconnection and Dismantling Procedures

Start by disconnecting the dryer from its power source. Next, locate the vent at the back of your dryer. Use the Phillips head screwdriver to remove any screws holding the vent in place.

Gently pull the dryer vent away from the wall and detach it from the duct. If the vent is stuck, using a slight twisting motion can help loosen it. Be cautious not to damage the vent itself, as you may need to recycle it later. After detachment, check both the dryer opening and the wall duct for any lint buildup and clean it promptly.

Handling Lint Trap and Lint Build-Up

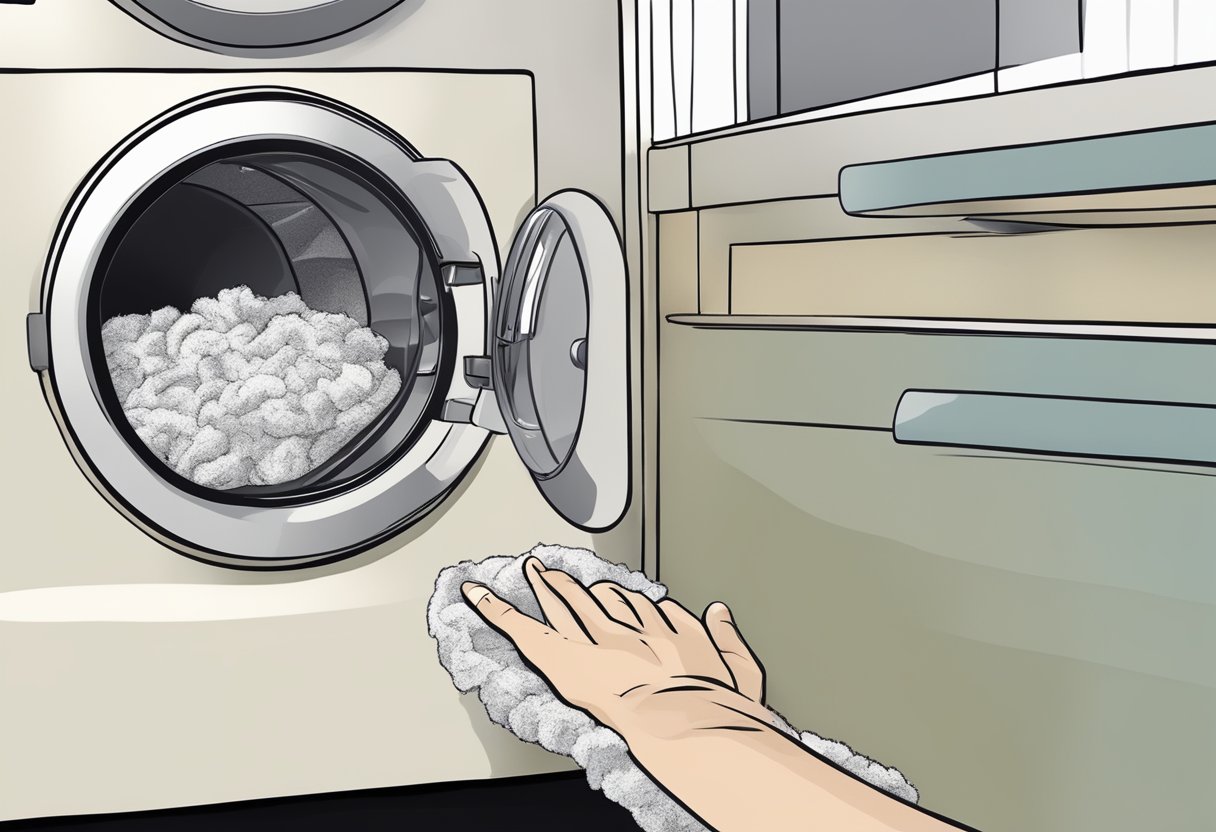
During the removal process, pay special attention to the lint trap. Inspect the trap for any accumulated lint, as this can contribute to clogs and potential fire hazards. Use the dryer vent cleaner to remove stubborn lint effectively.

Once the vent is removed, vacuum any visible debris within the ductwork. Lint buildup not only affects airflow but can also cause dangerous situations. Take this opportunity to clean the duct leading outside, ensuring maximum efficiency for your dryer and a safer home environment. Proper handling of the lint trap and buildup is crucial for optimal dryer performance.

Eco-Friendly and Compliant Disposal Methods

When disposing of old clogged dryer vent piping, it’s essential to consider local regulations, recycling options, and ways to prevent environmental hazards. Proper disposal methods not only ensure compliance but also promote environmental sustainability.

Local Regulations and Waste Management

Before disposing of your dryer vent piping, check your local regulations regarding home appliance waste. Many communities have specific rules for how materials should be discarded to promote proper waste management.

You can often find information through your local waste management authority. Look for details on scheduled disposal events and designated drop-off locations for hazardous materials. Some areas also offer curbside collection services for bulky items.

If you live in an area with strict regulations, fines may apply for improper disposal. To avoid penalties, ensure that you adhere to these guidelines.

Recycling Versus Trash Disposal

Deciding whether to recycle or dispose of dryer vent piping can impact the environment significantly. Recycling helps conserve resources and reduces landfill waste. Many materials in dryer vents, such as aluminum or plastic, can often be recycled.

Check with local recycling centers to determine if they accept dryer vent materials. Some retailers may offer take-back programs for older appliances or broken components.

If recycling isn’t an option, ensure the materials are disposed of in compliance with local waste regulations. Using trash disposal for non-recyclable parts should be a last resort.

Preventing Environmental Hazards

Improper disposal of old dryer vent piping can pose environmental risks, such as moisture build-up and air quality issues. To mitigate these problems, take precautions during removal.

Clean the area surrounding the vent, removing any accumulated lint or debris. This step minimizes the risk of mold growth and air contamination after disposal.

Once removed, avoid leaving the old piping outdoors, as it can attract pests or become a hazard. Instead, store the material securely until disposal. Taking these actions can help prevent environmental hazards while ensuring a safe and compliant disposal process.

Installing New Dryer Vent Systems for Optimal Performance

When upgrading your dryer vent system, it’s essential to focus on material choice, installation practices, and components that enhance efficiency. By making informed decisions, you can ensure effective airflow, safety, and energy savings.

Choosing the Right Replacement Materials

Selecting durable and efficient materials is crucial for your new dryer vent system. Opt for rigid metal ducting over flexible plastic or foil. Metal ducts, particularly galvanized steel or aluminum, resist damage and allow for optimal airflow.

Consider the diameter of the duct as well. Most dryers require a 4-inch vent, but verify your specific model’s requirements. Avoid duct tape; instead, use metal clamps for secure connections. Ensure any materials you use meet local building codes and are suitable for your climate.

Proper Installation for Improved Air Flow

Correct installation of your dryer vent directly impacts its performance. Start by ensuring the vent path is as straight as possible; each bend reduces efficiency. If your vent must have turns, opt for long-radius elbows for better airflow.

Seal all joints and connections tightly to prevent leaks, which can hinder dryer efficiency. The vent should terminate outside, at least 3 feet away from any openings. Also, ensure that the vent system is free of lint buildup by checking regularly. This maintenance increases safety and airflow significantly.

Importance of Vent Covers and Louvered Vents

Using vent covers is essential for maintaining optimal airflow while preventing lint accumulation and pests. Make sure to install a louvered vent cover that opens when the dryer operates and closes when it’s off. This feature reduces heat loss and improves energy efficiency.

Choose one with a smooth surface to minimize airflow resistance. For regions with extreme weather, a cover that protects against rain and snow is advisable. Properly installed vent covers not only enhance performance but provide peace of mind by keeping your home safe from unwanted elements.

Ensuring Energy Efficiency and Peace of Mind

Efficiency extends beyond just the choice of materials; how you utilize your dryer vent system also matters. Regular maintenance, such as routine cleaning, keeps airflow steady and minimizes energy consumption.

Educate yourself about signs of inefficiency, including increased drying times or a hot dryer exterior. Keeping your vent clean and free from blockages not only saves energy but also reduces fire hazards, ensuring peace of mind. Investing in a smart vent system can further maximize efficiency, incorporating sensors that alert you when cleaning is needed.

Routine Maintenance and Prevention Tips

Regular maintenance is crucial to ensure the efficiency of your dryer vent system. Implementing effective prevention strategies can help you avoid clogs and pests, while also maintaining appliance warranties.

Scheduling Regular Dryer Vent Cleaning

It is essential to schedule dryer vent cleaning at least once a year. Regular cleanings help remove lint buildup that can obstruct airflow and increase fire hazards. This can also positively impact the efficiency of your dryer, leading to shorter drying times and lower energy consumption.

You can hire professionals who specialize in dryer vent maintenance. They have the proper tools and expertise to ensure that your vents are thoroughly cleaned. When choosing a service provider, look for one that incorporates dryer vent cleaning as part of broader home maintenance services. This can help streamline your maintenance routine.

Preventing Pests and Future Clogs

Keeping your dryer vents clean can also prevent pests like rodents and insects from nesting. Regular inspections are crucial; check for any signs of damage or entry points where animals could enter. Installing pest-proof covers on vent openings can deter unwanted visitors.

Additionally, using a lint trap on your dryer can capture excess lint before it accumulates in your ducts. Always ensure that the vent exit is clear and free from obstructions. This not only helps in preventing clogs but also encourages proper ventilation, reducing moisture buildup inside your home.

Protecting Appliance Warranty

Many appliance warranties require consistent maintenance to remain valid. Neglecting regular dryer vent cleaning may void your warranty, particularly if issues arise due to clogged vents. Keep all maintenance records as proof that you’ve followed the recommended servicing schedule.

Consult your appliance manufacturer’s guidelines regarding maintenance requirements. By adhering to these guidelines, you not only protect your warranty but also prolong the lifespan of your appliance, making it a wise investment in the long term.

Frequently Asked Questions

This section provides insights into various aspects of disposing of old clogged dryer vent piping. You will find specific answers to common queries regarding safe removal, eco-friendly disposal options, and when to replace your venting system.

How can you safely remove old dryer venting systems?

To remove an old dryer venting system, first turn off the dryer and disconnect it from the power source. Carefully detach the duct from the dryer and the exterior vent, ensuring you don’t damage any surrounding materials. If the venting is clogged or difficult to remove, consider using a dryer vent cleaning brush to assist in dislodging any buildup.

Are there eco-friendly methods for disposing of metal or plastic dryer ducts?

Metal dryer ducts can typically be recycled as scrap metal at local recycling centers. For plastic ducts, check if your local waste management has specific collection points for plastic materials. Always confirm the recycling guidelines in your area to ensure proper disposal.

What are the signs that indicate a dryer vent needs to be replaced instead of cleaned?

You should consider replacing your dryer vent if you notice frequent clogs, signs of damage like dents or tears, or an increase in drying times. Additionally, if the vent appears to be corroded or rusted, replacing it is preferable for safety and efficiency reasons.

Can professional services be employed for recycling or disposing of old dryer vents, and what are the associated costs?

Yes, professional services can assist in disposing of old dryer vents. Costs can vary based on the service provider and the materials involved, but expect to pay between $50 to $150 for complete removal and disposal. Some companies may also offer recycling services for an additional fee.

What potential risks are associated with improper disposal of dryer venting?

Improper disposal of dryer venting can pose fire hazards due to flammable materials. Additionally, sending materials that can be recycled to landfills contributes to environmental harm. Following local disposal guidelines helps mitigate these risks.

Who should be contacted for regulations and best practices when disposing of household construction materials such as dryer vents?

To find regulations and best practices, contact your local waste management authority or environmental protection agency. They can provide specific guidelines for recycling and disposing of construction materials like dryer vents safely and responsibly.

Will Flushing Water Heater Improve Your Water Pressure?

Flushing your water heater can significantly impact water pressure in your home. By removing sediment buildup from the tank, flushing helps ensure smoother water flow, potentially resolving pressure issues. Regular maintenance of your water heater not only enhances its performance but can also contribute to a more efficient water delivery system throughout your household.

If you’ve noticed a drop in water pressure, especially in hot water, flushing might be a necessary step. Over time, minerals and debris can accumulate at the bottom of the heater, leading to restricted water flow. You’ll find that addressing these concerns through a simple flush can help restore the pressure to desired levels, creating a more comfortable experience in your daily routines.

Whether you’re dealing with inconsistent water pressure or just want to maintain your water heater’s efficiency, understanding how flushing works can empower you as a homeowner. Don’t let low water pressure disrupt your daily activities—consider the benefits of this often-overlooked maintenance task.

Understanding Water Pressure Issues in Water Heaters

Water pressure challenges in your home can significantly impact your water heater’s efficiency. Recognizing the mechanics of water pressure, identifying common causes of reduced flow, and spotting signs of pressure problems are essential steps to maintain your system effectively.

How Water Pressure Works in Residential Plumbing

Water pressure involves the force that moves water through your plumbing system. In most homes, municipal systems provide pressure, typically ranging from 40 to 80 psi (pounds per square inch). Pressure affects how quickly water reaches taps and fixtures.

As you use hot water, your water heater contributes to maintaining consistent pressure. If pressure drops, it can lead to slower water flow in showers and faucets. Regular checks of your system ensure that water pressure remains within optimal levels, promoting efficiency and comfort in your home.

Common Causes of Reduced Water Flow

Several factors can lead to reduced water flow from your water heater. Common causes include:

  • Sediment Build-Up: Over time, minerals and debris accumulate in the tank, obstructing water flow.
  • Corroded Pipes: Aging or damaged pipes can restrict water passage, leading to decreased pressure.
  • Clogged Fixtures: Faucet aerators or showerheads can become clogged with mineral deposits, reducing flow rates.

If you notice a significant drop in water pressure, checking these factors can help determine the root cause of the issue, allowing for timely action and potential solutions.

Identifying Signs of Water Pressure Problems

Recognizing early signs of water pressure issues is vital for addressing problems effectively. Some indicators include:

  • Inconsistent Flow: Fluctuating water output, particularly when multiple fixtures are used simultaneously.
  • Low Flow Rates: Reduced water flow in showers or sinks, making daily tasks inconvenient.
  • Strange Noises: Unusual sounds from plumbing or the water heater, such as banging or hissing.

Monitoring these symptoms may prevent larger issues related to water quality and pressure, ensuring your home’s systems function optimally. Addressing these signs early can help maintain healthy water flow and prevent costly repairs down the line.

The Impact of Sediment Buildup on Water Pressure

Sediment buildup in your water heater can significantly affect water pressure. Understanding how this accumulation occurs, its symptoms, and the role of hard water can help you maintain optimal water flow and prolong the life of your system.

How Sediment and Mineral Accumulation Occurs

Sediment buildup typically occurs due to the presence of minerals and debris in your water supply. Common contributors include sanddirt, and rust. As water is heated, these particles settle at the bottom of the tank.

Over time, this accumulation restricts the flow of water, leading to reduced pressure. Regular maintenance, such as flushing your water heater, can minimize this buildup. This practice helps ensure that your system functions efficiently and continues to deliver the expected water pressure.

Symptoms of Sediment in Water Heaters

You can identify sediment buildup through several symptoms. These include:

  • Reduced Water Pressure: A noticeable decline in water pressure suggests potential blockages.
  • Discolored Water: Black or cloudy water may indicate rust or minerals affecting your water quality.
  • Unusual Noises: Banging or popping sounds during heating often result from trapped sediment.

If you experience these issues, it may indicate that sediment is impacting your water heater’s performance. Regular inspections can help catch these symptoms early and maintain proper water flow.

Hard Water and Calcium Deposits

Hard water is rich in minerals, particularly calcium and magnesium. When hard water enters your water heater, it can lead to significant calcium deposits.

These deposits accumulate over time, compounding the effects of sediment buildup. In severe cases, they can create a thick layer that further reduces water pressure and increases energy expenses as the heater works harder.

Implementing a water softener may help alleviate some of this mineral buildup. Additionally, flushing your water heater regularly is crucial in maintaining efficiency and prolonging the lifespan of the appliance.

How Flushing Your Water Heater Can Improve Water Pressure

Flushing your water heater is an essential maintenance task that can enhance your system’s efficiency and help restore water pressure. By removing sediment buildup and addressing potential restrictions, this process leads to better performance over time.

The Flushing Process Explained

To flush a tank water heater, first, turn off the power supply and shut off the cold water inlet. Connect a garden hose to the drain valve located at the bottom of the tank. Before you begin draining, ensure that the hose is directed to a suitable drainage area. Open the drain valve slowly, allowing water and sediment to escape through the hose. You can also open a hot water faucet nearby to aid in the draining process, which reduces pressure and speeds up water flow. Once the tank empties, flush with cold water for a few minutes before fully closing the drain valve.

Benefits of Flushing Tank Water Heaters

Regular water heater flushing can significantly improve your system’s efficiency. By reducing sediment buildup, you ensure that the heating element operates more effectively, which can lead to lower energy bills. Clear water passages mean that hot water can flow freely, helping to restore any diminished water pressure you may have experienced. Additionally, this maintenance step can extend the lifespan of your heater, reducing the likelihood of costly repairs or replacements. It is advised to flush your tank heater at least once a year, especially if you live in an area with hard water.

Descaling and Maintenance Tips

Descaling is crucial for systems affected by hard water, which can introduce minerals such as calcium and magnesium into your water heater. Regular flushing, combined with the use of descaling products, can help combat these issues. When performing maintenance, always check the anode rod for corrosion and replace it as necessary—it helps protect the tank from rust. Ensure to also inspect the drain valve for leaks and consider installing a water softener if hard water is persistent in your area. This proactive approach helps maintain energy efficiency and keeps your system in optimal condition.

Different Types of Water Heaters and Their Water Pressure Concerns

Understanding the type of water heater you have is crucial for addressing water pressure issues. Different systems have unique maintenance needs and performance characteristics that can affect your overall water pressure.

Comparing Tank and Tankless Water Heater Maintenance

Tank water heaters store a significant volume of hot water, typically between 30 to 80 gallons. Over time, sediment and mineral buildup can occur, impacting efficiency and water pressure. Regular flushing can help remove these deposits and maintain optimal operation.

Tankless water heaters, on the other hand, heat water on demand. They are generally more efficient and don’t suffer from sediment buildup to the same extent as tank models. However, you may still need to perform maintenance to ensure proper function, including descaling if hard water is an issue.

Both types require regular checking of components like pressure-relief valves to avoid potential problems that could affect water pressure.

Electric Water Heaters vs. Gas Models

Electric water heaters are known for their consistency and easy maintenance. They typically require less frequent flushing compared to gas models, as they don’t produce combustion byproducts. However, mineral buildup in tanks can still hinder performance, affecting water pressure.

Gas water heaters may need more attentive upkeep due to the complexities of combustion systems. Flushing is essential to eliminate sediment that can accumulate in the tank and pipes, leading to reduced water pressure. Regular inspection of gas lines and ventilation is also necessary to ensure safety and functionality.

Choosing the right type of maintenance for your heater can significantly increase the efficiency and longevity of your hot water supply, ensuring better water pressure in your household.

Preventing and Solving Water Pressure Issues

Maintaining optimal water pressure is essential for household functionality. A few key strategies can help you address and solve issues effectively, ensuring that your water supply remains consistent and reliable.

Addressing Leaks and Anode Rod Replacement

Leaks in your plumbing system can lead to reduced water pressure. Check for visible leaks around pipes, faucets, or fixtures. Regular inspection can help you identify these issues early.

Another factor affecting the performance of your water heater is the anode rod. This component helps prevent tank corrosion. Over time, the rod can deteriorate, leading to sediment buildup and decreased efficiency. Replacing the anode rod periodically can enhance your water heater’s longevity and maintain optimal water pressure.

Improving Water Quality With Water Softeners

Hard water can carry minerals that build up in your plumbing over time, leading to clogs and reduced water flow. A water softener can help mitigate this problem.

Installing a water softener reduces mineral deposits and can significantly improve the quality of your water. By treating hard water, you can also protect your pipes and fixtures, reducing the frequency of maintenance needed to keep up with water pressure concerns. The regular use of a water softener may lead to better water quality throughout your home.

Aerators and Household Fixtures

Aerators, installed on faucets and showerheads, can help regulate water flow and pressure. These devices mix air with water, creating a more efficient flow while reducing water usage.

Check your fixtures regularly for clogs or mineral buildup. Cleaning or replacing aerators can enhance water pressure significantly. Opt for high-efficiency fixtures designed to optimize water flow without sacrificing performance. This simple step can contribute to a noticeable increase in water pressure and overall satisfaction with your plumbing system.

When to Call Verified Experts

While many issues can be resolved with basic maintenance, some situations require professional intervention. If you experience persistent low water pressure despite your efforts, it might be time to consult with verified experts.

Professionals can assess your entire plumbing system, identifying underlying issues that may not be detectable to the average homeowner. This might include problems like hidden leaks, pipe obstructions, or inadequate system design. Engaging in an expert evaluation ensures that any complex issues are addressed properly, maintaining the integrity of your water supply.

Ensuring Reliable Water Pressure: Practical Tips

Maintaining consistent water pressure in your home is crucial for daily activities such as showering and washing dishes. Here are some specific tips that can help you achieve this.

Checking Your Cold Water Supply and City Connections

Start by inspecting your cold water supply line. A blockage or leak in this pipe can lead to reduced water pressure throughout your home. Look for any visible signs of deterioration or damage.

Next, assess your city water connection. In some cases, municipal systems may experience pressure variations. Contact your local water utility to confirm if there are any ongoing issues.

You can also consider installing a water pressure gauge on your main line. This provides a clear reading of pressure levels. If the reading is consistently low, further investigation might be needed.

Regular Water Heater Maintenance Schedules

Regular maintenance of your water heater is essential for optimal performance. Aim to flush your water heater at least once a year. This process removes sediment buildup that can hinder functionality and water flow.

Inspect the anode rod annually. This component helps prevent corrosion inside the tank. If it’s worn out, replace it to prolong the life of your water heater.

Additionally, consider professional maintenance services that focus on preventive care, such as those offered by Totally Maintained. Scheduling routine checks can significantly reduce the risk of pressure issues stemming from your water heater, ensuring a reliable supply for your home.

Frequently Asked Questions

Flushing a water heater can have various impacts on hot water pressure, and there are specific reasons for changes in water flow after the process. Understanding these factors can help you troubleshoot any issues effectively.

How does flushing a water heater impact hot water pressure?

Flushing a water heater removes sediment and buildup that can restrict water flow. This process can improve hot water pressure by allowing for a clearer pathway for water to travel through the system.

What could cause low water pressure after a water heater has been flushed?

If you experience low water pressure after flushing, it may be due to air trapped in the pipes or proper sediment removal. Air pockets can disrupt the flow, while leftover debris can still create blockages.

Can a water heater pressure relief valve affect overall water pressure?

Yes, a malfunctioning pressure relief valve can lead to inconsistent water pressure. If the valve is stuck open or closed, it might either cause a drop in pressure or prevent water from flowing properly.

Does the process of draining a water heater alleviate water pressure issues?

Draining a water heater can alleviate water pressure issues by eliminating any sediment obstructing the flow. However, if not done correctly, it might cause fluctuations in pressure until the system is refilled properly.

How might a water pressure regulator be involved in water pressure changes after water heater maintenance?

A water pressure regulator controls the flow of water entering your home. If it is not calibrated correctly or becomes faulty after maintenance, it may contribute to unexpected changes in water pressure.

Why is there no water coming out after flushing a water heater?

If no water is coming out after flushing, it could indicate that the water supply valve is closed or that there is an issue with the connections. Additionally, a blocked or malfunctioning pipe could restrict water flow entirely.

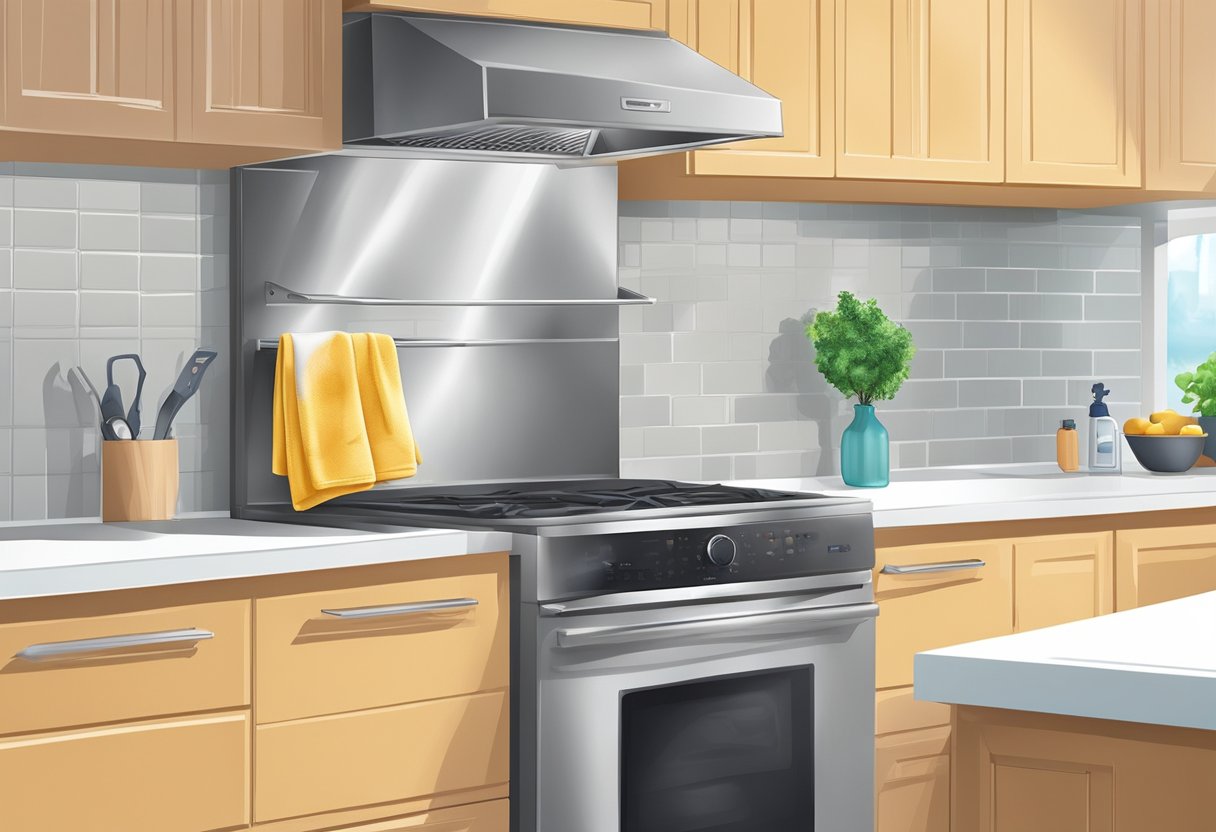
How to Clean Stainless Steel Range Hood: Essential Tips for a Sparkling Finish

Cleaning your stainless steel range hood is essential for maintaining both its appearance and functionality in your kitchen. Regular cleaning not only removes grease and grime but also extends the lifespan of your appliance. With the right methods, you can easily restore its shine and keep it looking new.

To effectively clean your range hood, start by determining the direction of the stainless steel grain, as this will guide your cleaning technique. Use a soft cloth or sponge along with a mixture of warm water and mild dish detergent to tackle any dirty areas. For tougher stains, rubbing acetone can be effective when used carefully.

Incorporating these simple cleaning steps into your routine will ensure that your range hood remains a functional and polished part of your kitchen. A well-maintained range hood can significantly enhance your cooking environment and overall home aesthetics.

Essential Tools and Materials for Cleaning Stainless Steel Range Hoods

To effectively clean your stainless steel range hood, you need the right tools and materials. Selecting the appropriate cleaner and using suitable cleaning materials will ensure that your range hood shines while protecting it from scratches.

Selecting the Right Stainless Steel Cleaner

Choosing a dedicated stainless steel cleaner is crucial. These cleaners are formulated to cut through grease and grime while leaving a protective layer on the surface. Look for a cleaner that is non-toxic and safe for kitchen use.

When applying the cleaner, always follow the manufacturer’s instructions for the best results. Using too much product or improper application can leave streaks. A quality stainless steel cleaner not only cleans but also helps to maintain the appliance’s finish.

Alternatives: Vinegar, Baking Soda, and Homemade Cleaning Solutions

If you prefer natural cleaning solutions, consider using vinegar or baking soda. Vinegar is an effective cleaner that helps dissolve grease and can leave a streak-free finish. Mix equal parts vinegar and water in a spray bottle for quick use.

Baking soda, on the other hand, is great for tougher stains. Create a paste with water and apply it to the stained area. Let it sit for a few minutes before scrubbing gently.

Homemade solutions can be just as effective as commercial products. Ensure you test any homemade mixture on a small area first to avoid damage.

Cloths, Soft Sponges, and Non-Abrasive Materials

When it comes to tools, use soft cloths and non-abrasive sponges. Microfiber cloths are an excellent choice as they effectively lift dirt without scratching the surface.

Avoid steel wool or rough sponges, as these can damage the stainless steel finish.

For best results, dampen the cloth with your chosen cleaning solution and wipe the surface in the direction of the grain. This technique helps prevent scratches and ensures an even clean.

Step-by-Step Cleaning Process for Stainless Steel Range Hoods

Cleaning your stainless steel range hood is essential for maintaining its appearance and functionality. A thorough process involves preparing the hood, using the right techniques, and addressing stubborn stains.

Preparing the Range Hood for Cleaning

Before you start, make sure to turn off the range hood and unplug it if necessary. Remove the grease filter as it often collects the most buildup. Check your manufacturer’s instructions to see if it can be washed in the dishwasher or needs hand cleaning.

Gather your cleaning supplies, including a non-abrasive cleaner, microfiber cloths, and a degreaser specifically formulated for stainless steel. If your range hood has been heavily used, mixing warm water with mild dish detergent can prepare a suitable cleaning solution. Having everything ready will streamline the cleaning process.

Proper Technique for Cleaning Exterior Surfaces

For the exterior surfaces of your range hood, use a microfiber cloth dampened with the cleaning solution. Wipe in the direction of the grain to avoid scratching the surface. This approach helps maintain the stainless steel’s shine.

In case of light grease, a quick spray of degreaser can be effective. Spray it directly onto the cloth, not the surface, to control the amount applied and prevent drips. After wiping, use a clean, dry cloth to buff away any streaks and enhance the finish.

Handling Stubborn Stains and Grease Buildup

For tougher stains that don’t come off with regular cleaning, consider a baking soda paste. Mix baking soda with a small amount of water to form a thick paste. Apply this paste directly to the stain and let it sit for several minutes before wiping it away gently with a microfiber cloth.

Sometimes, you may need more potent solutions. In this case, using a specialized degreaser can be beneficial. Always follow the manufacturer’s instructions on application and rinse thoroughly. Be cautious with any abrasive materials that could damage your stainless steel surface. Regular maintenance will help prevent heavy buildup in the future.

Cleaning Range Hood Filters and Interior Components

Proper maintenance of your range hood filters and interior components is essential for optimal performance. This section highlights effective methods to clean grease filters, utilize your dishwasher, and maintain the fan blades and interior surfaces.

Removing and Washing Grease Filters

Start by turning off the range hood and allowing it to cool. Locate the grease filters, typically found beneath the hood. Remove them gently, as they may be secured with clips or screws.

To clean, prepare a cleaning solution using warm water and a few drops of dish soap. Soak the filters in this solution for about 15-20 minutes. Scrub with a non-abrasive sponge to remove grease buildup. Rinse thoroughly under hot water before air drying completely.

Regular cleaning should be scheduled at least once a month, depending on usage. This helps maintain airflow and efficiency, ensuring your cooking space remains clean.

Using the Dishwasher for Filter Cleaning

If your grease filters are dishwasher-safe, this method simplifies the cleaning process. Check the manufacturer’s guidelines to confirm compatibility with the dishwasher.

Place the filters in the top rack of your dishwasher. For optimal results, use a heavy-duty dishwasher detergent. Set the dishwasher to a high-heat cycle for effective grease removal.

Once the cycle is complete, inspect the filters for any remaining residue. If necessary, repeat the process or hand wash stubborn spots. This hands-off approach saves time and ensures a thorough clean without manual scrubbing.

Maintaining Fan Blades and Interior Surfaces

Fan blades and interior surfaces can accumulate dust and grease, impacting performance. To maintain these components, use a soft cloth or microfiber towel dampened with a mild cleaning solution.

For the fan blades, ensure the power is off. Wipe each blade gently, removing any buildup. For hard-to-reach areas, a small appliance cleaning brush may assist in dislodging dirt.

The interior surfaces should also be wiped down regularly with a mild cleaner and a cloth. Keep in mind that regular cleaning minimizes odors and ensures better ventilation, which is crucial for a clean kitchen environment.

Protecting and Maintaining Stainless Steel Finishes

Maintaining the pristine appearance of your stainless steel range hood involves careful protection and maintenance. By using metal polish and taking steps to prevent scratches, you can ensure your range hood remains in excellent condition.

Applying Metal Polish and Maintaining the Coating

To keep your stainless steel looking its best, regularly apply a high-quality metal polish designed specifically for stainless steel finishes. This polish helps create a protective barrier against fingerprints, smudges, and grime.

  1. Frequency: Aim to polish your range hood every few months, or more frequently in high-use kitchens.
  2. Application: Use a soft microfiber cloth to apply the polish. Gently buff the surface in a circular motion to ensure even coverage.
  3. Additional Protection: If possible, choose a polish with a protective coating that resists water spots and allows for easier cleaning.

By maintaining the protective coating, you minimize the need for extensive cleaning and prolong the life of your stainless steel surface.

Preventing Scratches and Surface Damage

Preventing scratches is crucial to preserving the appearance of your stainless steel range hood. Here are some effective strategies:

  • Use the Right Cleaning Tools: Always opt for non-abrasive cloths, such as microfiber, to wipe down the surface. Avoid steel wool or scouring pads that can scratch the finish.
  • Avoid Harsh Chemicals: Steer clear of bleach or ammonia-based cleaners, as these can damage the protective coating and lead to corrosion.
  • Careful Placement: Be mindful of the items you place near or on your range hood. Heavy pans or sharp utensils can easily cause scratches.

With these steps, you can maintain the sleek, shiny look of your stainless steel range hood for years to come.

When to Seek Professional Help or Expert Advice

Knowing when to consult an appliance technician or a home improvement expert is crucial for maintaining your stainless steel range hood. Certain issues may require specialized skills or knowledge to address effectively.

Identifying Issues That Require Appliance Technicians

If you notice any unusual noises, reduced performance, or persistent grease buildup that standard cleaning cannot rectify, it may be time to contact an appliance technician. These professionals can diagnose issues like malfunctioning fans, faulty filters, or electrical problems that could compromise the hood’s functionality.

Signs that indicate the need for a technician include leaks, odors, or smoke, which could signal serious underlying problems. Attempting to fix these issues without expertise can lead to further damage. If the hood is still under warranty, professional service might be required to avoid voiding it.

Guidance from Verified Experts in Home Improvement

Consulting verified experts can provide tailored cleaning and maintenance strategies for your stainless steel range hood. These specialists offer insights into the best cleaning products and methods that suit your specific model and environment.

You can find these experts through local home improvement stores, community workshops, or online resources. Engaging with them can enhance your understanding of proper maintenance techniques. They can also offer advice on how to prevent future issues, ensuring your range hood operates efficiently for years to come.

Frequently Asked Questions

Cleaning a stainless steel range hood involves several specific techniques and products to ensure effective maintenance. Below are key answers that address common queries regarding this essential kitchen appliance.

What is the best method to clean filters in a stainless steel range hood?

To clean the filters, remove them from the hood and soak them in hot, soapy water. Use a mild dish detergent and a soft sponge to scrub away grease and grime. Rinse thoroughly and allow the filters to dry completely before reinstalling them.

What can I use to effectively remove grease from a stainless steel cooker hood?

A mixture of warm water and mild dish soap works well for regular grease removal. For stubborn grease, consider using a commercial kitchen degreaser or a vinegar-water solution. Apply the cleaner, let it sit briefly, then wipe it down with a microfiber cloth.

How can baking soda be used to clean a range hood?

Baking soda is an excellent abrasive cleaner. Make a paste by mixing baking soda with water, then apply it to the greasy areas of the range hood. Let it sit for a few minutes before scrubbing gently with a soft cloth or sponge to lift the grease.

What’s the most effective degreaser for a stainless steel range hood?

For tough grease, a dedicated kitchen degreaser designed for stainless steel is most effective. Look for products that specify their suitability for stainless steel surfaces. Always follow the manufacturer’s instructions for the best results.

Which cleaner is recommended for maintaining stainless steel appliances?

Stainless steel cleaners specifically formulated for use on appliances are recommended. These cleaners help prevent streaks and enhance shine. Always use a soft cloth to apply them, following the grain of the steel for the best finish.

How do I maintain the cleanliness of a stainless steel range top?

Maintain cleanliness by wiping down the range top after each use with a damp cloth and mild detergent. Regularly check for burnt-on stains and use a non-abrasive cleaner to tackle these. Keeping it dry will also prevent water spots and streaks.

How to Unclog Gutters and Downspouts: Effective Techniques for Homeowners

Clogged gutters and downspouts can lead to serious issues, including water damage to your home’s foundation and landscape. Learning how to effectively unclog these key components is essential for maintaining the integrity of your property. Regular maintenance not only ensures proper water flow but also helps prevent costly repairs down the line.

There are various methods you can use to clear blockages, ranging from simple DIY techniques to tools designed specifically for the task. Familiarizing yourself with these methods will empower you to tackle this common home maintenance task with confidence. Keeping your gutters and downspouts clean is an important step in protecting your home from water-related problems.

By investing a little time and effort, you can ensure that rainwater flows freely away from your home, safeguarding not just your structure but also your landscaping. Get ready to take control of your home maintenance and learn the best practices for unclogging your gutters and downspouts.

Understanding Gutter and Downspout Systems

Gutters and downspouts play a critical role in managing rainwater and protecting your home. Knowing how these systems operate, understanding common issues like clogs, and recognizing the risks of neglect can help ensure effective maintenance.

How Gutters and Downspouts Function

Gutters collect rainwater from your roof and channel it toward downspouts. This process protects your home’s foundation by directing water away from it.

Gutters are typically made of materials like aluminum, vinyl, or steel. They are installed along the eaves of the roof, forming a trough to catch the rain. Downspouts then transport this water vertically down and away from the home’s structure.

Properly functioning gutters and downspouts help prevent soil erosion, basement flooding, and damage to your landscaping. Regularly inspecting and cleaning these systems ensures they remain effective.

Common Causes of Clogged Gutters

Clogs in gutters and downspouts can lead to significant water-related issues. The most common culprits include leaves, twigs, and other debris. Seasonal changes often increase the volume of organic matter that accumulates in gutters.

Other causes may include the growth of moss or algae, which can obstruct water flow. Broken or improperly installed gutters can further contribute to blockages by interrupting the natural path of water.

Using leaf guards can minimize debris buildup but won’t eliminate the need for regular maintenance. A clogged downspout can severely hinder your gutter system’s effectiveness, making timely cleaning essential.

Risks of Neglecting Gutter Maintenance

Failing to maintain your gutters can lead to serious risks for your home. Water that overflows from clogged gutters can damage your roof, siding, and foundation.

Basement flooding is another common risk associated with poor gutter maintenance, leading to potential mold growth and structural damage.

Inadequate drainage can also result in soil erosion and landscaping damage, impacting your yard’s aesthetics and health. By prioritizing gutter care, you effectively minimize long-term repair costs and maintain your home’s integrity.

Preparing to Unclog Gutters and Downspouts

Before starting the process of unclogging your gutters and downspouts, it’s essential to prioritize safety and gather the right tools. Assessing the clog’s severity will help you determine the most effective method for removal. This preparation ensures a more efficient cleaning process and minimizes potential hazards.

Safety Precautions and Equipment

Prioritize your safety before you begin. Wear sturdy gloves to protect your hands from sharp debris and potential allergens. A hard hat can shield your head from falling objects, especially during windy conditions.

Make sure to use non-slip footwear to avoid any accidents on ladders or rooftops.

If you’re using a ladder, have a spotter stand at the base to steady it. Utilize safety goggles to protect your eyes from flying debris while working. Always be aware of electrical wires or power lines near your work area.

Assessing the Severity of the Clog

Understanding the severity of your clog will guide your approach. Begin by examining your gutters for visible blockages, such as leaves, twigs, or dirt buildup. A minor obstruction can often be cleared by hand, while a more serious blockage might require higher water pressure.

Look for signs of water pooling around the downspouts, which may indicate a more significant clog deeper in the system. If the clog is extensive, consider using a high-pressure hose to effectively clear the entire length of the downspout.

Each individual situation can vary; knowing the specifics helps you choose the right method.

Gathering Necessary Tools

Have the right tools ready before you start. Key items include a garden trowel for scooping debris, a bucket for collecting waste, and a high-pressure hose for flushing out clogs.

Safety gear like gloves and goggles are essential, as mentioned previously.

If the clog persists, consider a plumber’s snake or fish tape to reach deeper obstructions effectively. Having duct tape can be helpful to seal any leaks during your cleaning. Gathering quality tools ensures that your multi-step expert quality process goes smoothly, making the task less daunting.

Step-by-Step Guide to Unclogging Gutters

Maintaining clean gutters is essential for proper water flow and preventing damage to your home. This guide provides clear steps for removing debris, flushing your gutters, and checking for any damage after cleaning.

Removing Debris from Gutters

Start by gathering your tools: a sturdy ladder, gloves, a scoop, and a bucket. Safety is vital, so ensure your ladder is stable. Once you’re set, climb the ladder and begin removing leaves, twigs, and other debris from the gutters.

Use a scoop or your hands, placing the debris in a bucket to avoid mess. Pay close attention to the corners and around downspouts, as these areas tend to accumulate more debris. If you encounter stubborn clogs, a trowel can help.

After clearing, inspect for any blockages in the downspouts. If water can’t flow freely, you may need to address those clogs separately.

Flushing Gutters with Water

Once the debris is removed, it’s time to flush the gutters. Connect a garden hose to a water source and ensure it has good pressure. Start at the farthest point from the downspout to ensure the water flows towards it.

Run water through the gutters. Watch for any slow drainage areas, which may indicate additional clogs further down the line. For stubborn blockages, consider using a high-pressure nozzle to help dislodge debris.

Ensure water flows freely through the downspout. If it doesn’t, you may have to tackle deeper clogs. Flushing not only helps in clearing remaining debris but also allows you to check for proper alignment and drainage.

Inspecting for Damage After Cleaning

After cleaning and flushing, inspect your gutters. Look for cracks, rust, or sagging sections. These issues may need attention, as they can lead to further problems.

Check for loose connections in the gutter system and tighten any fasteners if necessary. Look for signs of water overflow, which can indicate improper pitch or clogs.

If you notice significant damage or persistent clogs, consider contacting a professional for home repair. Regular inspections and maintenance are crucial in prolonging the lifespan of your gutters, effectively safeguarding your property from water damage.

Clearing Downspouts Effectively

Maintaining clear downspouts is crucial for effective gutter drainage. Using specific techniques can ensure you unclog downspouts quickly and efficiently, preventing water damage to your home. Here are some effective methods for clearing downspouts.

Using a High-Pressure Hose

A high-pressure hose is one of the best tools for removing clogs in your downspouts. Start by inserting the hose into the top opening of the downspout. Ensure that you use the most powerful setting available, ideally with a narrow spray nozzle, as this focused water pressure aids in dislodging debris.

As you activate the water flow, monitor any resistance. If the clog remains, adjust the hose slightly to find the best angle for maximum effect. This method not only removes blockages but also flushes out debris that may have accumulated over time.

Applying a Drain Snake or Similar Tools

A drain snake can be an effective solution to tackle stubborn clogs in your gutter downspouts. Begin by removing any visible debris from the top of the downspout. Insert the snake carefully through the top opening, pushing it down the pipe.

As you maneuver the snake, it can help break apart obstructions. Turn the handle to dislodge the debris effectively. Once you feel resistance lessen, carefully pull the snake out, removing any clogs with it. Following this, run water through the downspout to ensure the passage is clear.

Utilizing a Pressure Washer

Using a pressure washer can be an effective technique for clearing downspouts. Attach a specialized nozzle designed for downspouts to your pressure washer. Insert the nozzle into the top of the downspout.

Activate the pressure washer, directing the water flow down the pipe. The high-velocity water pressure will help break apart and push out clogs. It is essential to keep a firm grip on the hose to manage the recoil, ensuring safety and effectiveness. After using the pressure washer, check the downspout to confirm a clear flow.

When to Seek Professional Help

Certain situations warrant enlisting the help of professionals for unclogging gutters and downspouts. Recognizing complex issues, selecting qualified services, and consulting verified experts can significantly impact the effectiveness of the maintenance you require.

Identifying Complex Gutter Issues

When you notice persistent problems such as water spilling over the sides of the gutters, it may indicate more than simple clogs. Structural issues, like sagging or improperly pitched gutters, can lead to ineffective water drainage. If you encounter rust, mold, or insect infestations within the gutter system, these are signs that require expert intervention.

You should also be wary of any damage to the roofline or surrounding areas, as this could indicate water damage that has gone unnoticed. If you see significant wear and damage, it’s time to consult a professional. A thorough inspection will help reveal these complex issues and ensure your home is adequately protected.

Choosing Qualified Gutter Cleaning Services

Selecting the right professional service is essential for effective maintenance. Look for companies that specialize exclusively in gutter cleaning and maintenance, rather than general handyman services, as they will have targeted expertise. Check for certifications and insurance, ensuring that your chosen provider follows safety standards.

Reading online reviews and asking for references can provide insight into their work quality. Make sure to ask about their methods and equipment used for the job, as effective tools like pressure washers or professional gutter cleaning attachments can yield better results.

Consulting Verified Experts Online

Online platforms like JustAnswer can connect you with verified experts who can offer advice on gutter maintenance tailored to your specific needs. These platforms often have professionals experienced in home repair, providing insights based on their expertise without requiring an in-person visit initially.

You can ask detailed questions regarding your gutter system and receive instant feedback from knowledgeable individuals. This can help you understand whether your issue is something you can handle on your own or if it’s time to call in professionals for assistance.

Frequently Asked Questions

Clogged gutters and downspouts can lead to various issues if not addressed promptly. Here, you will find practical answers to common queries about cleaning and maintaining these essential components of your home’s drainage system.

What is the best method to clean a clogged downspout from the ground?

You can clean a clogged downspout effectively by using a garden hose. Insert the hose into the top of the downspout, then ask someone to turn on the water. This helps to dislodge any debris and flush it out. Alternatively, taking sections apart can also assist in clearing stubborn clogs.

What tool can I use for gutter downspout cleaning effectively?

Using a plumber’s snake or a special gutter cleaning tool can be very effective. These tools help reach and clear clogs from hard-to-access areas. A wet/dry vacuum can also work well for suctioning out debris.

Who should I contact when dealing with a severely clogged downspout?

For severe clogs, consider reaching out to a professional gutter cleaning service. They have the expertise and equipment needed to resolve complicated clogs safely and effectively. This is especially important if the clog is causing water overflow or damage.

Can you clear a downspout clogged underground without professional help?

While some homeowners may attempt to clear underground clogs themselves, it can be challenging. If the blockage is deep, using a plumber’s snake or water jetting equipment may help. If these methods fail, professional intervention is recommended for more severe cases.

What are the risks associated with clogged downspouts and how can I prevent them?

Clogged downspouts can cause water damage to your home’s foundation, roof, and landscaping. Regular cleaning and inspections can help prevent clogs. Installing gutter guards can also reduce debris accumulation in the gutters.

How can gutter cleaning be done safely without using a ladder?

You can safely clean gutters from the ground using a gutter cleaning tool that extends from the ground. This allows you to remove debris without climbing. A high-pressure nozzle attached to a garden hose can also help flush debris out of the gutters effectively.

How to Clean Grease off Cooker Hood Filters: A Step-by-Step Guide

Cooker hood filters play a crucial role in keeping your kitchen air clean and free from smoke and odors. Over time, grease and grime can build up on these filters, making it difficult for them to function effectively. Regularly cleaning your cooker hood filters not only extends their lifespan but also improves the air quality in your home.

Knowing the right method to clean these filters can save you time and ensure they work optimally. You can use common household items like baking soda and dish soap to tackle stubborn residue effectively. By following a straightforward cleaning routine, you can maintain a healthier cooking environment with minimal effort.

Stay tuned to discover the most effective techniques and tips for cleaning grease off your cooker hood filters, so you can cook in a fresher and cleaner kitchen.

Understanding Cooker Hood Filters

Cooker hood filters are essential components that trap grease, smoke, and odors, contributing to a cleaner kitchen environment. Knowing the different types, how they operate, and signs of needed cleaning will help maintain their effectiveness.

Types of Cooker Hood Filters

There are two main types of cooker hood filters: metal filters and charcoal filters.

  • Metal filters are typically made from aluminum or stainless steel. They can be washed and reused multiple times, making them a cost-effective choice. These filters effectively capture grease and can often be cleaned in the dishwasher.
  • Charcoal filters, or carbon filters, are designed to absorb odors rather than grease. These are often used in recirculating extraction systems. Unlike metal filters, charcoal filters are not washable and should be replaced periodically.

Understanding which type you have will guide your cleaning and maintenance practices.

How Cooker Hood Filters Work

Cooker hood filters operate by using a combination of physical and chemical processes to remove unwanted elements from the air.

  1. Grease Capture: As fumes rise from cooking, metal filters trap grease particles through their mesh design. This prevents grease from coating the internal components of the cooker hood.
  2. Odor Absorption: In the case of charcoal filters, activated carbon absorbs smells from cooking, helping to keep your kitchen fresh.

The efficiency of these filters directly impacts your cooker hood’s performance. Regular maintenance ensures that airflow remains unobstructed.

Signs Your Filter Needs Cleaning

Recognizing when your cooker hood filter requires cleaning is key to maintaining efficient operation.

  • Diminished Performance: If you notice reduced airflow or increased noise from the hood, it may indicate a clogged filter.
  • Visible Grease Buildup: A filter visibly coated in grease suggests it’s time for a thorough cleaning.
  • Lingering Odors: If cooking smells persist despite using the hood, this could be a sign that the charcoal filter has reached its capacity.

By keeping an eye on these indicators, you can ensure that your cooker hood remains effective and your kitchen stays inviting.

Preparing to Clean Grease Off Cooker Hood Filters

Cleaning grease off cooker hood filters requires proper preparation to ensure an effective and safe process. You need to gather the right supplies and take safety precautions before starting the task.

Gathering Necessary Supplies

Before you begin, collect the following items:

  • Boiling Water: Fill a sink or bucket with boiling water to help dissolve grease and grime.
  • Dish Soap: Use a degreasing dish soap for effective cleaning.
  • Baking Soda: This can enhance the cleaning process and neutralize odors.
  • Scrub Brush: Choose a brush with stiff bristles to tackle stubborn grease.
  • Gloves: Ensure you wear gloves to protect your hands from harsh chemicals and hot water.

Having these supplies ready will streamline your cleaning process. Depending on the level of grease, you may also consider having a container for soaking the filters. Soaking can be particularly effective for restoring heavily soiled filters.

Ensuring Safety Before Cleaning

Safety is essential when dealing with hot water and potential hazards. Here are some precautions:

  • Turn Off Power: Ensure the cooker hood is unplugged or the circuit is switched off to avoid any electric shock while cleaning.
  • Ventilation: Open windows or turn on a fan to ensure good airflow in the kitchen, especially if using strong cleaning agents.
  • Avoid Fire Hazards: Keep flammable materials away from the cooking area and be cautious with boiling water to prevent burns.
  • Wear Protective Gear: In addition to gloves, consider safety goggles if you’re using strong cleaning agents to avoid splashes.

By taking these steps, you will create a safer environment for cleaning and reduce the risk of accidents during the process.

Step-By-Step Cleaning Methods

Cleaning grease off cooker hood filters can seem daunting, but with the right methods, you can restore them to their original condition. Here are effective approaches to tackle grease build-up effectively.

Basic Cleaning With Dish Soap and Hot Water

Begin by removing the filters from your cooker hood. Fill a sink or a large bucket with hot water; boiling water works best for breaking down grease. Add a generous amount of dish soap to the water.

Submerge the filters in the soapy water, ensuring they are fully covered. Allow them to soak for about 15-30 minutes. This soaking helps loosen the grease. After soaking, use a non-abrasive scrub brush to gently scrub the filters. Focus on any areas with visible grease deposits. Rinse the filters thoroughly with clean, hot water to remove any soap residue. Allow them to dry completely before reattaching them to the hood.

Deep Cleaning Using Baking Soda and Bicarbonate of Soda

For more stubborn grease, a deep cleaning method is recommended. Start by filling your sink or bucket with boiling water. Add a cup of baking soda along with a cup of bicarbonate of soda. The combination creates an effective degreasing solution.

Place the filters in the mixture and let them soak for at least 30 minutes. The baking soda works to break down the grease further. After soaking, use your scrub brush to scrub the filters gently. Pay extra attention to any remaining greasy spots. Rinse thoroughly with hot water and ensure they are free from any baking soda. Let the filters dry before reinstalling them.

Dealing With Stubborn Grease Build-Up

If you’ve tried the previous methods and still face stubborn grease, a more aggressive approach may be necessary. Use a concentrated degreaser spray, like Dawn Powerwash. Spray the filters thoroughly and let the product sit for 10-15 minutes.

After waiting, scrub the filters again with your scrub brush. This method boosts the cleaning action of the spray. Rinse with hot water, ensuring all chemical residue is washed away. If some grease remains, repeat the process as needed. Regular maintenance will prevent the need for such intensive cleaning in the future.

Maintaining and Replacing Cooker Hood Filters

Proper maintenance and timely replacement of cooker hood filters are essential for ensuring optimal performance and reducing cooking smells. Understanding how often to clean or replace filters, caring for different filter types, and taking preventive measures can significantly extend their lifespan.

How Often to Clean or Replace Filters

You should aim to clean metal filters every month to ensure effective grease removal. In contrast, charcoal filters require replacement every 3 to 6 months, depending on usage. A good indicator for charcoal filter replacement is the lingering cooking odors, which signify saturation.

Create a cleaning schedule and adhere to it. For a busy kitchen, consider more frequent cleanings. Keeping your filters clean not only enhances air quality but also improves the efficiency of your cooker hood.

Caring for Charcoal and Carbon Filters

Charcoal and carbon filters play a crucial role in absorbing cooking smells. Unlike metal filters, you cannot clean charcoal filters; instead, you must replace them regularly.

When you install new charcoal filters, ensure they fit securely to optimize their performance. If you notice persistent odors, check for proper installation and consider replacing the filter sooner than recommended.

To prolong the life of charcoal filters, use your cooker hood on higher settings during heavy cooking. This minimizes residue build-up and maximizes efficiency in filtering out unwanted smells.

Preventing Grease Build-Up in the Future

To reduce future grease build-up, cook with low to medium heat when possible. This limits the amount of smoke and grease released into the air. Always use the cooker hood while cooking to capture vapors early.

Additionally, maintaining good ventilation in your kitchen can make a significant difference. Open windows or doors to allow fresh air to circulate, helping to disperse odors and minimize grease accumulation.

Incorporating these practices into your routine will help keep your kitchen cleaner and your cooker hood filters less burdened by grease. Regular attention will lead to more effective ventilation and a more pleasant cooking environment.

Additional Considerations for a Cleaner Kitchen

Maintaining a clean kitchen goes beyond just regular cleaning. You can enhance air quality, reduce risks, and improve your overall experience in the kitchen. Here are some practical considerations.

Reducing Cooking Smells and Improving Ventilation

To minimize cooking odors, ensure proper ventilation during and after meal preparation. Using an effective range hood can help channel smoke and steam outside. Make it a habit to turn on the hood prior to cooking.

Consider installing a hood that matches the size of your stove for optimal performance. Regularly clean the filters for their maximum efficiency. If you notice persistent smells, check for grease buildup, as this can trap odors.

Add an air purifier to your kitchen to eliminate airborne particles and odors. You can also place bowls of vinegar or baking soda in the kitchen to absorb unpleasant smells. Maintaining clean surfaces and appliances can significantly enhance your kitchen’s air quality.

Addressing Fire Hazards Related to Grease

Grease buildup in your range hood and filters poses a significant fire hazard. Regular cleaning prevents ignition, reducing this risk. Always inspect your range hood for accumulated grease and replace filters as needed.

Set a schedule for your cleaning routine; a monthly deep clean is advisable for heavy users. Keep flammable items away from your stovetop and hood. Install a smoke detector in your kitchen to provide an early warning, and ensure it is in working order.

If you experience excessive smoke or unusual odors while cooking, turn off the heat immediately. Avoid leaving cooking unattended to minimize fire risks. A proactive approach can safeguard your kitchen and home.

Enhancing User Experience and Site Traffic With Cleaner Appliances

A clean kitchen not only fosters a pleasant cooking environment but also reflects your attention to home maintenance. Appliances that are clean and well-maintained operate more efficiently, enhancing your cooking experience.

For those who share your cooking space through food blogs or social media, a tidy kitchen attracts more viewers, boosting your online presence. Clean surfaces and appliances are visually appealing images that draw attention.

Regular maintenance, like filtering and cleaning your range hood, ensures appliances function smoothly. This can lead to improved performance and prolong the lifespan of your kitchen equipment, ultimately benefiting your home.

Functionality and Cookie Use on This Site

Cookies play a crucial role in enhancing your browsing experience and maintaining the functionality of this site. Understanding how cookies work and their benefits can help you navigate the site more effectively.

Understanding Cookies and Their Benefits

Cookies are small data files stored on your device when you visit websites. They help remember your preferences and actions, making your experience smoother.

Benefits of Cookies include:

  • Personalization: Cookies accumulate data about your interests, allowing the site to tailor content and suggestions specifically for you.
  • Session Management: They help maintain your login sessions, so you don’t have to enter your credentials repeatedly during your visit.
  • Analytics: Cookies collect information on user behavior, which assists in optimizing the website’s performance and functionality.

Understanding how cookies function empowers you to make informed choices regarding your privacy and personalization preferences.

Cookie Policy and How It Impacts Functionality

The cookie policy outlines how cookies are used on this site, which directly impacts your browsing experience.

You will typically be informed of cookie usage upon your first visit. Accepting cookies enhances site functionality by:

  • Enabling faster load times and easier navigation.
  • Allowing access to features that wouldn’t function properly without cookies.
  • Supporting content relevance and improved user experience through tailored recommendations.

You can manage cookie preferences through your browser settings, providing flexibility in how cookies affect your interactions with the site. Adjusting these settings may limit certain functionalities, but you retain control over your browsing experience.

Frequently Asked Questions

Cleaning grease off cooker hood filters is a common concern for many homeowners. Below are specific answers to frequently asked questions related to effective methods and tips for cleaning these essential kitchen components.

What is the best method to clean a metal mesh cooker hood filter?

To clean a metal mesh cooker hood filter, remove it from the hood and soak it in hot, soapy water. Use a soft-bristled brush to scrub off any stubborn grease. Rinse thoroughly and allow it to dry completely before reinstalling.

Can baking soda be used to effectively remove grease from cooker hood filters?

Yes, baking soda is an effective grease remover. Make a paste by mixing baking soda with water, apply it to the filter, and let it sit for at least 15 minutes. Rinse with hot water to help lift the grease.

What steps should be followed to clean kitchen exhaust fan grease?

Start by turning off the power to the exhaust fan. Remove the grease filter and soak it in soapy water. While it soaks, clean the fan blades with a cloth dipped in a degreaser. After soaking, scrub the filter with a brush, rinse, and dry before replacing.

Is vinegar an effective cleaning agent for rangehood filters?

Vinegar is effective for cleaning rangehood filters. Mix equal parts of water and vinegar, soak the filter in the solution for a few minutes, then scrub gently. Rinse well with hot water for best results.

How can I remove sticky grease from a stove hood?

For sticky grease, create a mixture of dish soap and warm water. Apply this directly to the greasy areas and let it sit for a few minutes. Use a sponge to scrub away the grease, then rinse with clean water.

What are the safety precautions to consider when cleaning extractor fan grease filters?

When cleaning grease filters, ensure the power is turned off to avoid accidents. Use gloves to protect your hands from harsh cleaning agents. Ensure proper ventilation when using any chemical cleaners, and thoroughly rinse the filters to remove any residue.

How to Tell if Dryer Vent is Clogged: Signs and Solutions to Ensure Efficient Drying

A clogged dryer vent can significantly impact your laundry efficiency and pose a fire hazard. You can identify a clogged vent by observing key signs such as longer drying times, excessive heat from the dryer, and damp clothes even after a full cycle. Being attentive to these indicators is crucial for maintaining your dryer’s performance and ensuring your home’s safety.

Regular checks on your dryer vent can prevent serious issues down the line. Not only will you save time and energy, but you also protect your home from potential fire risks associated with blocked vents. Understanding how to recognize the signs of a clogged dryer vent empowers you to take action before problems escalate.

If you notice any changes in your dryer’s operation, it’s essential to investigate further. In this article, you will learn practical methods to determine if your dryer vent is clogged and what steps you can take to remedy the situation efficiently.

Understanding Dryer Vent Systems

A dryer vent system is essential for the safe and efficient operation of your dryer. Understanding its components and how they work together will help you recognize potential issues, such as clogs, and maintain optimal performance.

How Dryer Vents Work

Dryer vents facilitate the expulsion of hot, moist air produced during the drying process. When you operate your dryer, it generates heat to evaporate moisture from clothes. This moist air is directed through the dryer vent system and discharged outside your home.

Proper airflow is vital for preventing overheating and fire hazards. If the vent is obstructed, warm air cannot escape, leading to inefficient drying and increased drying times. In severe cases, this can pose a fire risk, making it critical to ensure your dryer vent is clear.

Components of a Dryer Vent System

A dryer vent system comprises several key components that work in tandem. These include:

  • Exhaust Vent: The opening through which the moist air exits your home.
  • Ducting: Flexible or rigid tubing that connects the dryer to the exterior vent.
  • Transition Hose: A short section that connects the dryer to the ductwork.

It’s important to use smooth, short ducting materials, as rough or excessively long ducts can trap lint and restrict airflow. Regular inspection of these components helps in identifying areas that may require cleaning or replacement.

Importance of Proper Ventilation

Proper ventilation in your dryer vent system prevents a host of issues. Insufficient airflow can lead to longer drying times, increased energy costs, and a greater risk of fire due to lint buildup.

By maintaining good ventilation, you enhance the efficiency of your dryer, reducing wear and tear on your appliance. Regular maintenance, including dryer vent cleaning, can significantly extend the lifespan of your dryer and contribute to a safer home environment. Investing time in these preventive measures can yield long-term benefits for both your appliances and your wallet.

Common Signs Your Dryer Vent Is Clogged

Being aware of the signs that your dryer vent is clogged can help you prevent potential hazards and maintain your appliance’s efficiency. Look for the following indicators that suggest your dryer vent may need immediate attention.

Longer Drying Times

One of the most noticeable signs of a clogged dryer vent is an increase in drying times. If your clothes, towels, or bedding are taking significantly longer to dry, this could indicate that airflow is restricted.

When lint builds up in the vent, it obstructs the hot air from escaping. This results in your dryer working harder to achieve the desired drying effect. You might find that you need to run multiple cycles to dry a single load.

If you constantly face long drying times, it’s crucial to check the vent and clean it if necessary. Regular maintenance can help you avoid this issue.

Unusual Burning Smell

A burning smell while your dryer is operating can be a serious danger sign. This odor typically results from excessive lint buildup that overheats and potentially ignites.

If you smell a burning odor, turn off your dryer immediately and check the vent. Leaving a clogged dryer vent unattended can lead to dangerous situations, including house fires.

It’s vital to address this problem quickly. Ensuring proper airflow not only protects your home but also enhances dryer efficiency. Always inspect your vent if you notice any unusual odors during operation.

Excessive Lint Buildup Around Vent

Finding excessive lint buildup around the dryer vent is a clear indication of a blockage. Lint should only be collected in the lint trap, and any collection outside suggests a problem.

Ensure you regularly check the vent exterior for lint accumulation. If you notice a significant amount, it often means that the vent is obstructed. This can hinder dryer performance and impact safety.

Cleaning the vent will reduce the risk of fires and improve your dryer’s efficiency. Regular inspections and cleaning can keep your home safe and your dryer operating effectively.

Risks and Dangers of a Clogged Dryer Vent

Ignoring a clogged dryer vent can lead to serious issues. The risks include fire hazards, increased energy bills, and potential damage to your dryer appliances. Understanding these dangers can help you prioritize regular maintenance.

Fire Hazards and Safety Concerns

A clogged dryer vent poses a significant fire hazard. Lint buildup is highly flammable and can ignite if exposed to the heat generated during drying cycles. According to the National Fire Protection Association, approximately 15,500 dryer-related fires occur annually, often due to blocked vents.

To reduce this risk, regularly check and clean your dryer vent. Be aware of warning signs, such as clothes taking longer to dry or a burning smell. Maintaining clear airflow can prevent situations where your appliance becomes a fire risk.

Impact on Energy Bills and Appliance Efficiency

Clogged dryer vents can lead to increased energy bills. When airflow is restricted, your dryer has to work harder to dry clothes, using more electricity. This inefficiency not only raises energy costs but can also shorten the lifespan of your appliance.

If you notice a spike in your energy bill, consider checking your dryer vent. A clean vent allows your dryer to operate efficiently, ensuring you don’t pay extra in energy costs. Keeping vents clear can save you money in the long term.

Potential Damage to Dryer Appliances

Beyond fire risks and energy costs, a clogged vent can cause serious damage to your dryer. Overworking the appliance due to lint blockage can lead to mechanical failures. You may find yourself facing costly appliance repair or even replacement.

Regular maintenance, including professional dryer vent cleaning services, can prevent these issues. By addressing lint buildup early, you enhance your dryer’s performance and reliability. Investing in upkeep can prevent larger expenses down the line.

How to Inspect Your Dryer Vent for Clogs

Regular inspection of your dryer vent is essential for maintaining efficiency and preventing fire hazards. You can use both visual checks and airflow tests to determine if your vent is obstructed.

Visual Inspection Techniques

Start by checking the external vent hood. Look for any lint buildup around the edges. Ensure the flap opens freely when the dryer runs. If it doesn’t move or has visible debris, your vent may be clogged.

Next, inspect the vent hose. It should be smooth and free of kinks or dents. Cracks can trap lint inside. Detach the hose from the dryer and inspect the interior. Use a flashlight to see any lint accumulation that may impede airflow. Regular cleaning is crucial for avoiding serious issues.

Finally, observe your dryer during operation. Excessive heat or visible lint escaping from the vent indicates a potential blockage.

Testing Airflow and Dryer Performance

To assess airflow, turn on your dryer and feel for air blowing outside at the vent. A weak or nonexistent airflow suggests a clog in the vent system.

Also, pay attention to drying times. If your clothes take longer than usual to dry or require multiple cycles, there may be a clog affecting performance.

You can run a simple test: place a small piece of tissue at the vent cover. If it doesn’t flutter, airflow is restricted. This method is an easy and effective way to confirm the need for dryer vent cleaning.

Performing these checks regularly will help ensure your dryer operates efficiently and safely.

Preventative Measures and Cleaning Solutions

Maintaining a clean dryer vent is essential for optimal appliance performance and safety. Implementing the right practices helps prevent clogs and extends the lifespan of your dryer. Here are some effective strategies to keep your dryer vent clean and functional.

Best Practices for Dryer Vent Cleaning

To maintain your dryer vent, follow these best practices. Begin with regular inspections. Check for lint buildup around the vent hood and connection points. Clean the lint filter after every load, as this prevents excess lint from entering the vent.

Use a vent cleaning brush to remove debris from the ductwork every few months. Moreover, ensure that the duct is unobstructed and not kinked, as this can restrict airflow. Consider installing a vent hood with a flapper that closes when not in use to prevent outside debris from entering.

Scheduling Regular Maintenance

Regular maintenance plays a crucial role in preventing clogs. Schedule dryer vent cleaning at least once a year. If you do laundry frequently, consider increasing the frequency. Look for comprehensive home maintenance services that include dryer vent cleaning.

This can often be combined with other maintenance tasks, such as window cleaning or pressure washing, maximizing efficiency in your home management. Keeping your dryer serviced can improve energy efficiency and decrease the risk of fires, saving you time and money in the long run.

When to Call a Professional

Recognizing when to seek professional help is key to maintaining your dryer vent. If you notice longer drying times, a burning smell, or the vent exhaust is weak, it’s time to contact a professional.

Appliance repair experts can identify underlying issues that may not be apparent, such as blockages deep within the ductwork. Hiring professionals also ensures that the cleaning is done thoroughly and safely, as improper cleaning can lead to further damage.

Take action promptly to avoid potential hazards. Keeping your dryer vent in good condition protects your home and enhances the performance of your appliances.

Frequently Asked Questions

Understanding clogged dryer vents is essential for maintaining your appliance’s efficiency and safety. You may have specific questions about signs, risks, and maintenance practices related to blocked dryer vents.

What are the signs of a blocked dryer vent?

Common signs of a blocked dryer vent include longer drying times and clothes that remain damp after a cycle. You may also notice a burning smell or excessive heat coming from the dryer. Lint buildup around the vent’s outside opening is another indicator of blockage.

Can a clogged dryer vent cause the machine to stop drying effectively?

Yes, a clogged dryer vent significantly reduces the machine’s drying efficiency. When airflow is restricted, your dryer struggles to eliminate moisture, leading to prolonged drying times. This can also increase wear and tear on your appliance.

How can you perform a blockage test for a dryer vent?

To perform a blockage test, start by disconnecting the vent from the dryer and inspecting it for lint buildup. You can also run your dryer on the air-only setting for a few minutes. If airflow is weak or no air comes out of the vent outside, you likely have a blockage.

What risks are associated with a clogged dryer vent?

Clogged dryer vents pose serious fire risks due to lint buildup, which is highly flammable. Additionally, it can lead to moisture accumulation, causing mold growth and damaging your home. Regular checks can help mitigate these hazards.

What steps should be taken to unclog a dryer vent that’s within a wall?

If your dryer vent is located within a wall, start by removing the vent cover on the exterior. Use a flexible brush or a vacuum cleaner attachment to clear any visible lint. If the blockage seems severe, consider hiring a professional service to ensure a thorough cleaning.

How often should dryer vent cleaning be performed to prevent clogging?

It’s advisable to clean your dryer vent at least once a year. If you use your dryer frequently or notice signs of blockage, more frequent cleaning may be necessary. Regular maintenance helps prevent clogs and enhances your dryer’s efficiency.

How to Disinfect Dryer: Essential Steps for a Cleaner Appliance

Maintaining a clean and disinfected dryer is crucial for both hygiene and appliance longevity. To effectively disinfect your dryer, start by wiping down both the interior and exterior surfaces with disinfectant wipes or a mixture of bleach and water. Regular cleaning can prevent odors and ensure that your clothes come out fresh.

Many people overlook the importance of disinfecting their dryers, but this simple task can significantly reduce the risk of bugs, bacteria, and allergens. It’s also an excellent way to enhance the efficiency of your dryer. Running the appliance empty with a bleach solution helps eliminate any residual germs, keeping it in top condition.

By incorporating routine disinfection into your home maintenance schedule, you not only protect your family’s health but also extend the life of your appliance. Discover the straightforward methods that can keep your dryer clean and effective for years to come.

Understanding Why Disinfecting Your Dryer Is Important

Maintaining a clean dryer is essential for both safety and laundry hygiene. Neglecting this task can lead to lint buildup, microbial growth, and contamination, all of which significantly impact the effectiveness of your drying process and overall health.

Risks of Lint Buildup

Lint buildup is one of the primary concerns when it comes to dryer maintenance. Over time, loose fibers from clothing accumulate in the lint trap and dryer vent. This accumulation can restrict airflow, making your dryer less efficient.

Furthermore, a clogged vent increases the risk of fire. The National Fire Protection Association states that approximately 15,500 structure fires are caused by dryers each year. Cleaning the lint trap before and after every load, along with periodic professional cleaning, can help mitigate these risks.

Microbial Growth and Contamination

The environment inside a dryer can foster microbial growth if not properly cleaned. Moisture from damp laundry can create an ideal breeding ground for bacteria and mold.

When clothes are dried in a contaminated dryer, they can pick up harmful microbes. These microorganisms can cause skin irritations or allergic reactions, impacting your health. Disinfecting your dryer regularly minimizes this risk and ensures that your laundry remains clean and fresh.

Impact on Laundry Hygiene

Disinfecting your dryer directly influences your laundry hygiene. The drying process is designed to remove moisture, but it does not eliminate all contaminants. If your dryer is dirty, you risk transferring dirt and bacteria back onto your clean clothes.

A sanitized dryer helps maintain the quality of your laundry and can enhance the lifespan of fabrics by preventing damage from bacteria. Regular maintenance and disinfection ensure that your dryer operates at peak performance, ultimately preserving your clothing’s condition and keeping your laundry fresh.

Essential Tools and Safety Precautions

To effectively disinfect your dryer, it’s important to have the right tools and follow safety procedures. This ensures you not only achieve cleanliness but also protect yourself during the cleaning process.

Personal Protective Equipment

Before starting, equip yourself with proper personal protective equipment (PPE). Wear rubber gloves to shield your hands from harsh cleaning solutions. These gloves prevent skin irritation and allow you to handle chemicals safely.

Consider wearing a mask if you’re sensitive to dust or cleaning agents. Protective eyewear is also advisable to avoid irritation from splashes. Ensuring that you’re dressed appropriately will not only protect you but also help you feel more at ease during the cleaning process.

Selecting the Right Cleaning Solution

Choosing an effective cleaning solution is crucial for disinfecting your dryer. You can opt for products containing chlorine bleach, which is effective against a wide range of bacteria and viruses. Always dilute bleach according to the manufacturer’s instructions to prevent damaging your dryer.

Alternative options include vinegar or hydrogen peroxide for a less harsh approach. These natural cleaners can sanitize without leaving strong odors or harmful residues. Whichever cleaning solution you select, make sure it’s safe for your dryer model by checking the manufacturer’s guidelines.

Preparing Your Dryer

Before you start disinfecting, prepare your dryer properly. Begin by unplugging the appliance to ensure your safety while cleaning. Remove any items left inside the drum and clear the lint trap to prevent clogging.

Wipe down the exterior of the dryer with a damp cloth to remove any surface dust or debris. Open the dryer door and inspect the interior, noting any spots that require special attention. Having a clean workspace will make the disinfection process more efficient and thorough.

Step-By-Step Guide to Disinfecting Your Dryer

Disinfecting your dryer is essential to maintain a clean laundry environment. This process involves several steps that ensure every part of the dryer is properly sanitized to prevent bacteria and odor buildup.

Unplugging and Cooling Down the Appliance

Before you begin, ensure your dryer is unplugged to prevent any electrical hazards. This step is crucial for your safety. Allow the appliance to cool down if it has been in use recently.

Handling a hot dryer can cause burns. Once unplugged and cooled, you can proceed with the cleaning process.

Removing and Cleaning the Lint Screen

Start by removing the lint screen. This part is essential for the dryer’s performance and safety. Carefully pull it out, and remove any lint that has accumulated.

You can use a soft brush or your fingers to get rid of lint. Next, wash the lint screen in warm, soapy water. Rinse it thoroughly and let it air dry. Keeping this screen clean helps improve airflow and reduces fire hazards.

Wiping Interior Surfaces

Now, turn your attention to the dryer drum. Use a soft cloth dampened with a mixture of warm water and mild dish soap. Wipe the interior surfaces gently to remove any residues.

Pay attention to any visible stains or marks. For stubborn spots, consider using a non-abrasive cleaner. Ensure the drum is completely dry after cleaning to avoid mold growth. This step helps keep your clothes fresh and free of odors.

Sanitizing With Hot Water and Disinfectant

After wiping down the interior, it’s time to sanitize. Prepare a solution using hot water and a disinfectant safe for appliances. Avoid harsh chemicals that can damage the interior.

Using a clean cloth or sponge, apply the disinfectant solution to all surfaces, including the door seal and any crevices. Let it sit for the recommended time according to the disinfectant’s instructions. Rinse thoroughly with a damp cloth and ensure the drum is dry before using the dryer again.

Following these steps will help you maintain a clean and hygienic dryer, ensuring your laundry comes out fresh and safe.

Maintaining a Clean Dryer for Ongoing Safety

Consistent maintenance of your dryer is crucial for safety and efficiency. Regular cleaning, inspecting key components, and preventing lint buildup are essential practices to ensure your dryer operates safely and effectively.

Regular Cleaning Schedule

Establish a regular cleaning schedule to keep your dryer in optimal condition. Aim to clean your dryer every month, focusing on both the interior and exterior. This includes wiping down surfaces and disinfecting the drum to eliminate any lingering odors or bacteria.

Consider using a bleach solution to disinfect the drum; mix half a cup of bleach with a gallon of water. Additionally, check the dryer vent and lint trap for any obstructions. A clean dryer operates more efficiently and helps prevent fires caused by lint buildup.

Inspecting the Lint Filter and Drum

Inspecting the lint filter and drum is vital for your dryer’s performance. Clean the lint filter after every load to prevent lint buildup that can hinder airflow and increase fire risk. Use a nylon brush and hot, soapy water for a thorough clean every few months.

While inspecting the drum, look for any signs of damage or wear. A damaged drum can affect drying efficiency and could pose safety hazards. Making this inspection routine can help catch potential issues early.

Preventing Future Lint Buildup

You can take steps to prevent future lint buildup in your dryer. Start by ensuring that the lint filter is cleared after each use. This small action significantly reduces fire risk and improves your dryer’s efficiency.

Consider scheduling professional dryer vent cleaning at least once a year. This service eliminates accumulated lint that a standard cleaning may miss. A clean vent promotes better airflow, helps your dryer run more efficiently, and extends the lifespan of your appliance.

Additional Tips for Dryer Hygiene and Efficiency

Maintaining your dryer’s hygiene and ensuring its efficiency involves careful selection of disinfectants and adjusting your drying processes. Recognizing when to seek help can be crucial in maintaining optimal performance.

Choosing Effective Disinfectants

When selecting a cleaning solution for your dryer, consider disinfectants that are safe for appliance surfaces. Common options include diluted bleach, vinegar, or hydrogen peroxide.

  • Bleach is effective against bacteria but should be used sparingly. Ensure ventilation when using this option.
  • Vinegar is a natural disinfectant that helps remove odors while preventing mold growth. It is safe for most dryer interiors.
  • Hydrogen peroxide can also serve as a disinfectant but should be diluted properly.

Always test any cleaning solution on a small area first to ensure no adverse reactions with the dryer’s interior.

Improving the Drying Process

Efficient drying can not only save time but can also enhance hygiene. To improve the drying process, consider these steps:

  1. Avoid Overloading: Overloading the dryer can lead to inadequate airflow, resulting in longer drying times and potential mold growth.
  2. Use Dryer Balls: These help to prevent clothes from clumping together, improving airflow and reducing drying time.
  3. Check the Ventilation: Ensure your dryer vent is clean to allow proper airflow. A blocked vent can lead to reduced efficiency and increased risk of fire.
  4. Opt for Low Moisture Loads: Keeping loads at balanced moisture levels improves drying performance and extends the machine’s lifespan.

Adjusting these habits can significantly impact drying times and appliance longevity.

Recognizing When to Seek Professional Help

If you notice persistent issues with your dryer such as strange noises, extended drying times, or excessive lint buildup, it’s crucial to seek professional help.

Regular maintenance, such as dryer vent cleaning, is essential. Blocked vents can cause overheating and reduced efficiency.

    • Indicators for Help:
      • Strange Smells: Odors could indicate lint build-up.
      • Overheating: Appliances too hot may require immediate attention to prevent hazards.
      • Excessive Lint Production: Noticeable lint in the dryer or laundry indicates poor ventilation.


Scheduling maintenance with professionals can prevent larger issues down the line, ensuring your dryer operates efficiently.

Frequently Asked Questions

Cleaning and disinfecting your dryer is essential for maintaining its hygiene and performance. Here are some common questions and answers that can guide you in the process.

How can I sanitize my dryer without using bleach?

You can use a mixture of water and vinegar to sanitize your dryer. Combine equal parts of water and white vinegar in a spray bottle and wipe down the interior surfaces. This method is effective in killing bacteria and is safe for most dryer materials.

What steps should I take to disinfect a Whirlpool dryer?

Start by unplugging the dryer for safety. Remove any lint and debris, then wipe down the drum with a cloth dampened with a disinfectant solution. Pay attention to the door seal and control panel. Allow the interior to air out before plugging it back in.

Can vinegar be used to disinfect a clothes dryer, and if so, how?

Yes, vinegar is effective for disinfecting a clothes dryer. Spray the interior with a vinegar solution, let it sit for a few minutes, and then wipe it down with a clean cloth. The vinegar helps eliminate odors and bacteria without harsh chemicals.

What is the best way to clean a smelly dryer?

To tackle odors, start by cleaning the lint trap and vent. Then, wipe the interior with a solution of vinegar and water. For persistent smells, place a few damp, white towels inside and run the dryer on a low heat setting to help absorb and eliminate the odor.

Are disinfectant balls effective for sanitizing a dryer?

Disinfectant balls can be effective in reducing bacteria and odors in your dryer. When used as directed, they help sanitize the drum during the drying cycle, providing an additional layer of cleanliness.

Does my dryer’s sanitize cycle eliminate bacteria and, if not, what will?

A sanitize cycle can significantly reduce bacteria and other pathogens, but it may not eliminate all of them. For thorough disinfection, it’s best to use a combination of heat and an appropriate disinfectant solution to ensure a higher level of cleanliness.

How to Clean Hood Vent Filters: A Step-by-Step Guide for a Grease-Free Kitchen

Cleaning your hood vent filters is an essential maintenance task that often gets overlooked. Regularly cleaning these filters not only improves the efficiency of your range hood, but it also helps maintain better air quality in your kitchen. With the right approach, this process is quick and straightforward, allowing you to prevent grease buildup that can lead to unpleasant odors and decreased ventilation.

To start, gather a few basic supplies such as baking soda, degreasing dish soap, and hot water. These common household items will effectively break down the grease that accumulates on your filters. By following a simple soaking and scrubbing method, you can restore your filters to optimal condition, ensuring your kitchen remains fresh and clean.

Staying on top of this routine task will not only enhance your cooking environment but also prolong the life of your range hood. Investing a little time in maintenance can lead to significant benefits, making it easier to enjoy cooking without the hassle of lingering grease and odors.

Understanding Hood Vent Filters

Hood vent filters play a crucial role in maintaining indoor air quality and ensuring your kitchen remains free from grease and odors. By effectively trapping particles, these filters help keep your kitchen environment clean and safe.

Types of Range Hood Filters

There are several types of filters used in range hoods, each serving specific purposes. The most common are aluminum mesh filters and charcoal filters.

  • Aluminum mesh filters: These are reusable filters designed to capture grease and larger particles. They can be washed and used multiple times, making them a cost-effective option.
  • Charcoal filters: These are absorbent materials that eliminate odors and smoke. Typically found in ductless range hoods, they need to be replaced regularly, as they cannot be cleaned.

Knowing the type of filter your range hood uses is essential for effective maintenance and cleaner air.

How Filtration Works

Filtration in range hoods operates through physical and chemical processes.

  1. Physical filtration: This is where the aluminum mesh captures grease particles as air passes through it. The effectiveness depends on the filter’s design and material.
  2. Chemical filtration: Charcoal filters utilize activated carbon to absorb odors and volatile compounds. This process involves the trapping of particles at a molecular level.

To ensure optimal performance, regular cleaning or replacement of filters is essential for maintaining air quality and appliance efficiency.

Common Materials and Designs

Range hood filters are made from various materials, each with distinct advantages:

  • Aluminum filters: Lightweight and durable, these filters are great for grease capture and are washable.
  • Charcoal filters: Made from activated carbon, these filters are excellent for odor control but need replacement after a certain period.
  • Other materials: Some filters may use stainless steel or synthetic fibers, offering different benefits like enhanced durability or increased filtration efficiency.

The design of these filters also affects their performance. For instance, baffle filters are designed for commercial kitchens and offer superior grease capture, while mesh filters provide a good balance of efficiency and ease of maintenance.

Preparing to Clean Your Hood Vent Filters

Cleaning your hood vent filters requires careful preparation. You need to identify your filter type, gather the right supplies, and take necessary safety precautions. This ensures that the cleaning process is effective and safe.

Identifying Your Filter Type and Model

Before starting, check the model number of your hood vent. This information is crucial as it determines the type of filter you have, whether it’s aluminum, charcoal, or stainless steel.

  • Aluminum Filters: These are generally washable and can be cleaned with warm water and dish soap.
  • Charcoal Filters: These cannot be washed and must be replaced when they become saturated with grease and odors.

Review the manufacturer’s instructions for specific cleaning guidelines pertinent to your model. This will help you avoid damage and ensure optimal functionality.

Gathering Essential Cleaning Supplies

For effective cleaning, you’ll need several supplies. Here’s a list of essentials:

  • Dish Soap: A degreasing dish soap is vital for cutting through grease.
  • Baking Soda: This works as a gentle abrasive and deodorizer.
  • Scrub Brush: Choose one with soft bristles to avoid scratching filters.
  • Degreaser: A commercial degreaser can be used for tough buildups.
  • Stainless Steel Cleaner: If your hood has stainless steel, this will keep it looking polished.

Gather these items before starting to streamline the cleaning process. Having everything at hand will help you work more efficiently.

Safety Precautions and Setup

Safety is paramount when cleaning your hood vent filters. Start by unplugging your hood if it’s electric. If it’s hardwired, turn off the circuit breaker to avoid any electrical hazards.

  • Wear Gloves: Protect your hands from chemicals and grease.
  • Use Eye Protection: This helps shield your eyes from splashes and debris.
  • Cover Surfaces: Use old towels or paper to protect your countertops from drips and spills.

Arrange your workspace to ensure it’s well-ventilated. This will minimize fumes from cleaning agents and make the process more comfortable. Taking these precautions helps ensure a safe environment for your cleaning task.

Step-By-Step Cleaning Process

Cleaning your hood vent filters is essential for maintaining your kitchen’s efficiency and cleanliness. This process involves removing the filters, properly cleaning them based on their material, ensuring the longevity of charcoal filters, and drying and reinstalling them correctly.

Removing the Filters

Start by turning off the range hood and ensuring it has cooled down. Locate the latch or screws that hold the filters in place. If your hood uses filters with a latch, simply press or lift the latch to release the filter. For screw-secured filters, use a screwdriver to carefully remove them. Take care to avoid bending or damaging the filters during this process. Place the removed filters in a sink or bucket that is prepared for cleaning.

Cleaning Aluminum and Mesh Filters

Aluminum and mesh filters can trap grease and other debris, making them more challenging to clean. Begin by filling a sink or large basin with hot, soapy water. You can use a mixture of dish soap and baking soda for a powerful cleaning solution. Submerge the filters and let them soak for about 15–20 minutes. Use a soft brush or cloth to scrub the filters gently, focusing on areas with accumulated grease. Rinse thoroughly with hot water, ensuring all soap is washed away.

Caring for Charcoal Filters

Charcoal filters are different; they primarily work to eliminate smoke and odors rather than accumulating grease. Unlike aluminum filters, they are not washable. Typically, these filters need to be replaced every 6 to 12 months, depending on usage. To maintain their effectiveness, check the manufacturer’s recommendations. Ensure you have replacement filters on hand when the time comes, so your hood performs at its best.

Drying and Reinstalling Filters

After cleaning aluminum and mesh filters, shake off excess water and let them air dry completely. Placing them on a clean towel can expedite the drying process. Avoid using paper towels, as they may leave lint behind. Once dry, carefully reinstall the filters. Ensure they fit securely in their designated spots, checking for any movement. If using screws, tighten them gently to avoid stripping the threads. Proper installation is key to maintaining an effective range hood.

Dealing With Tough Grease Buildup

Removing tough grease buildup from hood vent filters can be a challenging task. By employing the right products and techniques, you can effectively restore your filters to a clean state.

Using Degreasers on Stubborn Areas

Start with a suitable degreaser specifically made for kitchen use. Look for a product that states it is safe on metal and effective for greasy residues.

Apply the degreaser directly to the stubborn areas of the filter. Let it sit for about 10-15 minutes, allowing the chemical to break down the grease.

Use a scrub brush with soft bristles to gently scrub the affected areas. Avoid harsh brushes that might scratch the filter’s surface. Rinse thoroughly with hot water afterward to remove any chemical residues.

For extremely stubborn grease, consider repeating this process or using a stronger product, following the manufacturer’s instructions carefully.

Effective Grease Removal Techniques

In addition to degreasers, combining household items can enhance the cleaning process. For example, baking soda and vinegar create a potent mixture for grease removal. Sprinkle baking soda on the filter and spray with vinegar. This reaction not only loosens grease but also helps eliminate odors.

Soaking is another effective technique. Fill a basin with boiling water and mix in a few drops of dishwashing liquid. Let the filter soak for 15-20 minutes. After soaking, use a sponge or non-abrasive scrub brush to remove the remaining residue. Rinse well with hot water to ensure all cleaning agents are gone.

Adopting these methods can significantly improve the cleanliness of your hood vent filters.

Maintenance and Preventive Care Tips

To ensure your hood vent operates efficiently, regular maintenance and preventive care are essential. Attention to cleaning schedules, grease tray inspection, and overall ventilation will optimize performance and extend the appliance’s lifespan.

Regular Cleaning Schedule

Establish a consistent cleaning schedule for your hood vent filters. Aim to clean them at least once a month, or more frequently if you cook often. Accumulated grease can hinder ventilation and lead to malfunction.

To clean the filters effectively:

  • Use warm water mixed with a degreasing dish soap or baking soda.
  • Soak the filters for about 15-30 minutes.
  • Scrub with a soft brush to remove stubborn grease.

Dishwasher cleaning is also an option if filters are dishwasher-safe. Regular maintenance prevents buildup, maintaining optimal airflow and reducing fire risks.

Inspecting the Grease Tray

The grease tray collects excess grease that escapes from the filters, so regular inspection is crucial. Check the tray every few weeks and clean it as needed.

Steps to inspect and clean the grease tray:

  1. Remove the tray carefully from the hood.
  2. Empty any greasy residue into a disposable container.
  3. Clean the tray with hot, soapy water or a vinegar solution to break down any stuck grease.

Keeping the grease tray clean helps maintain proper ventilation and enhances the efficiency of your hood.

Maintaining Ventilation and Performance

Proper ventilation impacts overall performance. Ensure your hood is adequately vented to the outside, which prevents grease accumulation and improves air quality in your kitchen.

To maintain optimal ventilation:

  • Check ductwork for clogs or obstructions regularly.
  • Make sure the vent is clear and free of any foreign objects.
  • If using a recirculating hood, replace charcoal filters as recommended by the manufacturer.

Consistent care of these elements will keep your range hood running smoothly and effectively eliminate cooking odors and smoke.

Frequently Asked Questions

Cleaning hood vent filters involves understanding the best methods, frequency, and proper techniques. Addressing common queries helps maintain efficiency and hygiene in your kitchen.

What is the best method to clean greasy range hood filters at home?

The most effective method involves soaking the filters in hot soapy water. You can use a degreasing dish soap mixed with boiling water. After soaking for about 10-15 minutes, scrub the filters with a soft brush to remove any stubborn grease.

Can I clean my kitchen exhaust fan filters in the dishwasher?

Yes, most metal filters can be cleaned in the dishwasher. Place them on the top rack for optimal cleaning. Use a heavy-duty cycle without any drying heat to avoid warping or damaging the filter.

What process should be followed to clean commercial hood filters effectively?

For commercial filters, start by removing them from the vent and soaking them in a heavy-duty degreaser. Scrub using a brush, ensuring all grease is removed. Rinse thoroughly and allow them to air dry before reinstallation.

How often are you recommended to clean vent hood filters for maintenance?

It is recommended to clean vent hood filters at least once a month. If you cook frequently or use your hood extensively, consider cleaning them bi-weekly to maintain performance and efficiency.

What are the steps to clean a greasy range hood duct?

Begin by turning off power to the hood and removing the duct cover. Use a vacuum to remove loose debris. Next, apply a degreaser to the duct interior and scrub with a long brush. Rinse well and ensure it is completely dry before reassembly.

Is it safe to use a vinegar and baking soda mixture for cleaning hood vent filters?

Yes, a mixture of vinegar and baking soda can safely clean hood vent filters. This combination effectively cuts through grease. Apply it to the filter, let it sit for a while, then scrub and rinse thoroughly.

Energy-Efficient Home Maintenance: Essential Tips for Sustainable Living

Energy-efficient home maintenance is essential for ensuring that your living space remains comfortable and cost-effective. By focusing on preventive care, you can extend the lifespan of your home’s systems and appliances while significantly reducing energy costs. Regular maintenance tasks such as dryer vent cleaning, window cleaning, and pressure washing can have a profound impact on your home’s overall efficiency.

With a comprehensive approach to home care, you can schedule multiple maintenance services in a single visit. This not only saves time but also ensures that all aspects of home upkeep are addressed effectively. Prioritizing energy savings through these maintenance routines allows you to maintain a healthy home environment while protecting your investment.

Embracing energy-efficient home maintenance practices leads to long-term benefits. By investing in services that prioritize preventive maintenance, you position yourself to maximize comfort and savings within your home. Explore the various ways you can enhance your home’s efficiency today and enjoy the rewards for years to come.

Assessing Your Home’s Energy Efficiency

To ensure your home is energy-efficient, you need to evaluate its current performance. This involves understanding where energy is consumed and identifying areas that may lead to waste. An energy audit, along with checking for common leaks, can provide you with a clear picture of your home’s efficiency.

Conducting an Energy Audit

An energy audit is a thorough assessment of your home’s energy use. It analyzes how much energy your home consumes and identifies key areas for improvement. During this process, a professional or a qualified homeowner will evaluate insulation, heating, cooling systems, and appliances.

Using specialized tools, such as blower doors and infrared cameras, the auditor can detect drafts and inefficiencies in your home’s structure. This audit usually culminates in a detailed report outlining specific recommendations for improvements and estimated costs to implement these changes. Implementing suggestions from the audit can lead to significant savings on energy bills.

Identifying Common Energy Leaks

Your home may lose energy through common areas that often go unnoticed. Identifying these leaks can drastically improve efficiency. Look for drafts around windows, doors, and vents. These spots can allow conditioned air to escape, forcing your heating or cooling systems to work harder.

Aside from visual inspections, apply the “hand test” by feeling for drafts on windy days. Check electrical outlets and switch plates as they can also be sources of leaks. Seal these gaps with weatherstripping or caulk to enhance your home’s performance. Addressing these issues not only reduces energy waste but increases comfort in your living space as well.

Improving Insulation and Sealing

Enhancing your home’s insulation and sealing can significantly improve energy efficiency and comfort. This section delves into practical choices for insulation, the advantages of air sealing, and methods to prevent heat loss through windows and doors.

Choosing the Right Insulation

When selecting insulation, consider factors such as R-value, material type, and installation method. The R-value indicates insulation’s resistance to heat flow; higher values mean better insulation. Common materials include fiberglass, foam board, and spray foam.

Fiberglass batts are popular for attics and walls but can be challenging to install in tight spaces. Foam board provides high R-values in thinner sections, ideal for basements. Spray foam expands on application, sealing gaps and optimizing energy efficiency. Whichever option you choose, ensure proper installation for maximum effectiveness.

Benefits of Air Sealing

Air sealing is crucial in maintaining a comfortable indoor environment. By sealing gaps and cracks, you minimize drafts and improve energy efficiency. Key areas to focus on include attics, crawl spaces, and around windows and doors.

Using materials like caulk and weather stripping can effectively close gaps. This preventive measure not only helps reduce energy bills but also enhances indoor air quality by limiting the entry of outside pollutants. Investing time in air sealing can lead to significant savings on heating and cooling costs in the long run.

Preventing Heat Loss Through Windows and Doors

Windows and doors are common culprits for heat loss. Upgrading to energy-efficient models or applying weather stripping can make a noticeable difference. Weather stripping is a simple and cost-effective way to seal gaps around movable parts like doors and windows.

You can also consider storm windows for added insulation. These act as a barrier against drafts while allowing natural light into your home. Regularly check seals and frames for wear and replace them as necessary to maintain effectiveness. Properly sealing these areas can lead to a more comfortable living space and lower energy expenses.

Heating, Cooling, and Ventilation Systems

Effective heating, cooling, and ventilation systems are essential for maintaining comfort in your home while managing energy costs. Proper maintenance and the use of efficient equipment can significantly reduce energy consumption and enhance overall performance.

Optimizing HVAC Performance

To optimize your HVAC system’s performance, you should conduct regular maintenance checks. Start with changing air filters every 1-3 months to ensure proper airflow. A clean filter also improves the efficiency of your system.

Scheduling annual tune-ups with professionals can identify potential issues before they become costly repairs. They’ll assess the system, check refrigerant levels, and clean coils. You might also consider installing a smart thermostat that adjusts based on your schedule, ensuring that you save energy when you’re not home.

Choosing Efficient Heating and Cooling Equipment

When selecting heating and cooling equipment, prioritize energy-efficient models. Look for units with the Energy Star label, which indicates adherence to energy efficiency guidelines. This can greatly reduce your energy costs.

Consider all options, including heat pumps, which can heat and cool your home efficiently. Additionally, ensure that systems are properly sized for your space. An oversized or undersized unit can lead to increased energy consumption and discomfort.

The Role of Ventilation in Energy Conservation

Proper ventilation is crucial for maintaining indoor air quality and energy conservation. By ensuring good airflow, you can lower energy costs associated with heating and cooling.

Investing in energy recovery ventilators allows for efficient exchange of air without losing temperature. This can help mitigate unwanted heat loss in winter and heat gain in summer. Regularly inspect and clean vents to avoid blockages that impair airflow and force your HVAC system to work harder than necessary.

Implementing effective ventilation strategies, alongside heating and cooling maintenance, enhances energy efficiency, resulting in lower utility bills.

Utilizing Smart Home Technology

Integrating smart home technology can significantly enhance energy efficiency in your home. By automating and optimizing your energy usage, you can reduce consumption and save on utility bills.

Installing a Smart Thermostat

A smart thermostat is a powerful tool for managing your home’s temperature efficiently. Unlike traditional thermostats, smart models can learn your preferences and adjust settings based on your daily routines.

Key features include remote access via smartphone apps, which allows you to monitor and manage your energy usage from anywhere. For example, you can lower the temperature when you’re away or optimize settings to ensure comfort during your return.

Some models also provide insights into your energy consumption patterns. This data helps you make informed decisions about heating and cooling, reducing unnecessary energy expenditure. Investing in a smart thermostat can lead to an annual savings of up to 10-15% on heating and cooling costs.

Energy Management with Smart Appliances

Smart appliances are designed to enhance energy efficiency by optimizing their performance based on your usage patterns. Examples include smart refrigerators, washing machines, and dishwashers that communicate with each other and respond to your commands.

Many smart appliances can minimize energy usage by running during off-peak hours when electricity rates are lower. For instance, your smart washer can be scheduled to operate at night, saving you money and helping reduce demand on the electrical grid.

Moreover, these devices often provide real-time usage data, helping you identify high-energy-consuming appliances. This transparency allows you to adjust usage habits, further contributing to energy savings. By incorporating smart appliances, you can achieve significant reductions in your energy bills while benefiting from enhanced functionality.

Renewable Energy and High-Efficiency Solutions

Utilizing renewable energy sources and high-efficiency systems is an impactful way to enhance your home’s energy performance. By focusing on options like solar energy and heat pumps, you can significantly lower utility costs and increase overall comfort in your living space.

Incorporating Solar Energy

Incorporating solar energy into your home can provide substantial benefits. Solar panels capture sunlight and convert it into electricity, reducing your reliance on grid power.

Key benefits include:

  • Cost Savings: You can save significantly on electricity bills.
  • Tax Incentives: Various credits like the Energy Efficient Home Improvement Credit may help offset initial costs.
  • Sustainability: Reduce your carbon footprint and promote ecological benefits.

Most solar energy systems have become more affordable and efficient in recent years. Homeowners can choose from grid-tied systems, which provide more energy efficiency, or off-grid systems for complete energy independence. Moreover, adding battery storage allows you to store excess energy for nighttime use, making the system even more beneficial.

Heat Pumps and Heat Pump Water Heaters

Heat pumps offer an efficient heating and cooling solution. They work by transferring heat rather than generating it, providing cost-effective climate control in your home.

Considerations for heat pumps:

  • Energy Efficiency: Heat pumps can provide heating at a quarter of the cost of traditional heating systems.
  • Dual Functionality: Most systems can be reversed during summer months to function as air conditioners.
  • Environmentally Friendly: They emit fewer greenhouse gases compared to conventional systems.

Heat pump water heaters also utilize similar technology to heat water efficiently. They extract heat from the air, making them significantly more efficient than traditional electric water heaters. With proper installation and maintenance, these systems can provide substantial savings and excellent performance throughout the year.

Maintenance and Upkeep for Long-Term Savings

Effective maintenance is essential for your home’s longevity and energy efficiency. Regular upkeep not only enhances curb appeal but also contributes to significant savings on your utility bills over time. Here’s how you can achieve these goals.

Regular HVAC Maintenance

Keeping your heating, ventilation, and air conditioning (HVAC) systems in top shape is vital for energy efficiency. Schedule regular check-ups to clean or replace filters every 1-3 months. This practice prevents strain on your system and reduces energy consumption, lowering your heating bills.

Also, ensure that ducts are sealed and insulated properly to prevent energy loss. A well-maintained HVAC system can operate efficiently, allowing you to maximize your energy savings. Don’t forget about annual inspections to catch any potential issues early, saving you money on costly repairs in the future.

Addressing Exterior Maintenance

The exterior of your home plays a significant role in energy efficiency and appearance. Regularly check for and replace any damaged caulk around windows and doors to minimize drafts. This simple step helps in maintaining your home’s insulation and reduces utility expenses.

Moreover, consider pressure washing your home and keeping gutters clear of debris. A clean exterior not only enhances curb appeal but also prevents long-term damage from moisture buildup. Maintaining outdoor areas, such as sidewalks and patios, can also prevent hazards and ensure longevity.

Cold Weather and Preventing Ice Dams

During cold weather, it’s crucial to ensure your home is protected from ice dams. Use insulation to reduce heat loss from your roof, which helps avoid melting snow that can refreeze and form ice dams. Proper ventilation in the attic is essential for this.

Additionally, regularly check and clear your gutters to facilitate proper drainage. If ice dams do form, consider professional help to remove them safely, preventing potential roof damage. You may also want to have a fire extinguisher on hand for safety, especially during winter months.

Frequently Asked Questions

When considering energy-efficient home maintenance, you may have specific queries regarding qualifications, improvements, and available programs. The following sections address common questions to help you navigate the options for enhancing your home’s efficiency.

What qualifies for the energy-efficient home improvement credit?

To qualify for the energy-efficient home improvement credit, you can claim expenses for selecting energy-efficient windows, doors, and roofing. Additionally, qualified heating and cooling systems, as well as insulation upgrades, may also be eligible under this credit.

How can I make my house more energy-efficient?

You can improve your home’s energy efficiency by investing in LED lighting, programmable thermostats, and energy-efficient appliances. Sealing gaps and adding insulation can significantly reduce heating and cooling costs.

Does California offer a free window replacement program for energy efficiency?

Yes, California offers programs aimed at improving energy efficiency, which may include free or subsidized window replacement. These initiatives typically target low-income households to help reduce energy expenses.

What home improvements are covered under the ENERGY STAR tax credit?

The ENERGY STAR tax credit covers specific home improvements such as energy-efficient HVAC systems, insulation, and certain types of eco-friendly windows and doors. By using qualified products, you may benefit from tax credits as an incentive for upgrading.

How does a home energy audit benefit my energy efficiency efforts?

A home energy audit helps identify areas where your home loses energy. By pinpointing leaks and inefficiencies, you can make informed decisions about where to focus your improvements, leading to better energy savings.

Are there any grants available for energy-efficient home improvements?

Yes, various grants may be available to assist with energy-efficient home improvements. These grants are often funded by government entities or local organizations aimed at promoting energy savings among homeowners.