(248) 297-3485

(248) 297-3485

Residential Maintenance Team: Ensuring Optimal Home Care and Efficiency

A residential maintenance team plays a crucial role in ensuring your home remains in top condition. By focusing on preventive maintenance rather than repairs, these teams help extend the lifespan of your home systems and appliances, ultimately saving you money. You can think of them as your dedicated partners in home upkeep, tackling tasks such as dryer vent cleaning, window cleaning, and pressure washing.

Having a reliable maintenance team allows you to schedule multiple services in one visit, simplifying the process of home care. Instead of juggling several service providers for differing needs, you can streamline your experience with a single point of contact. This not only makes your life easier but also ensures consistent service quality across the board.

Investing in a residential maintenance team is a proactive approach to homeownership. Regular upkeep prevents small issues from escalating into costly repairs, giving you peace of mind and a well-maintained living environment.

Roles and Responsibilities

A residential maintenance team plays a vital role in ensuring that your home remains in optimal condition. Their responsibilities span various aspects of home upkeep, from routine tasks to specialized services that enhance both functionality and aesthetics.

Routine Maintenance

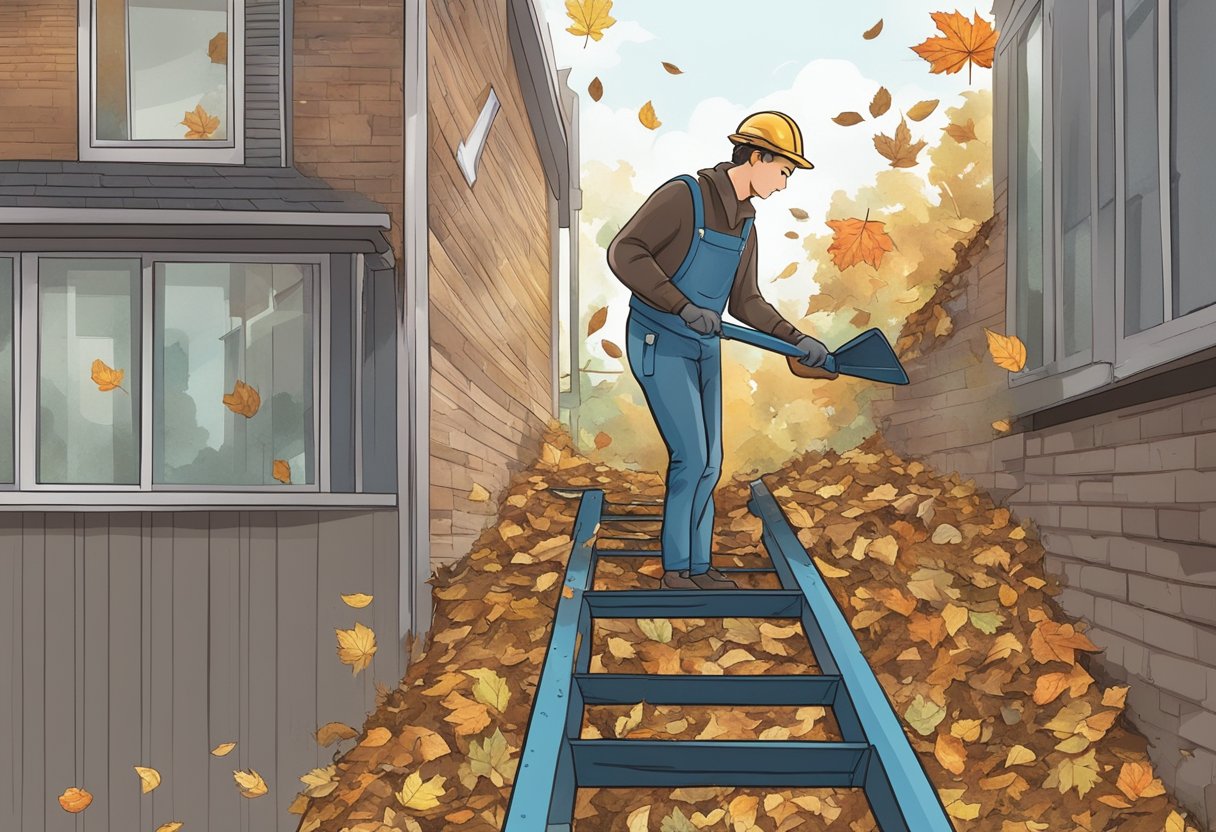
Routine maintenance includes scheduled tasks aimed at preserving the integrity of your home. This can involve inspections of heating and cooling systems, checking smoke detectors, and cleaning dryer vents.

It’s essential to stay on top of these tasks to prevent major issues from arising. Regular checks on plumbing systems can avert leaks and water damage. Other tasks may include changing air filters and testing security systems.

You may also want to consider pressure washing your home’s exterior. This not only improves appearance but can also prevent mold and mildew buildup.

Electrical and Plumbing

Maintenance regarding electrical and plumbing systems is crucial for safety and efficiency. Your maintenance team should regularly inspect wiring and outlets to prevent hazards. This includes replacing outdated fixtures and ensuring that all installations meet safety codes.

Plumbing tasks involve checking for leaks, clogs, and water pressure issues. Regular maintenance can extend the lifespan of your plumbing systems and prevent costly repairs later on.

Should issues arise, having a maintenance team readily available ensures that problems are addressed promptly. This minimizes disruptions and provides peace of mind.

Landscaping and Curb Appeal

Curb appeal significantly impacts your home’s value and overall impression. A well-maintained exterior can make your property more inviting. Tasks in this area include mowing the lawn, trimming bushes, and clearing debris.

Your maintenance team should also attend to seasonal needs, such as mulching in spring or raking leaves in fall. These activities keep your landscaping healthy and visually appealing.

In addition to the upkeep, consider enhancing features like flower beds and walkways. Regular care in landscaping can elevate the aesthetic of your property while increasing its market value.

Cleaning and Painting

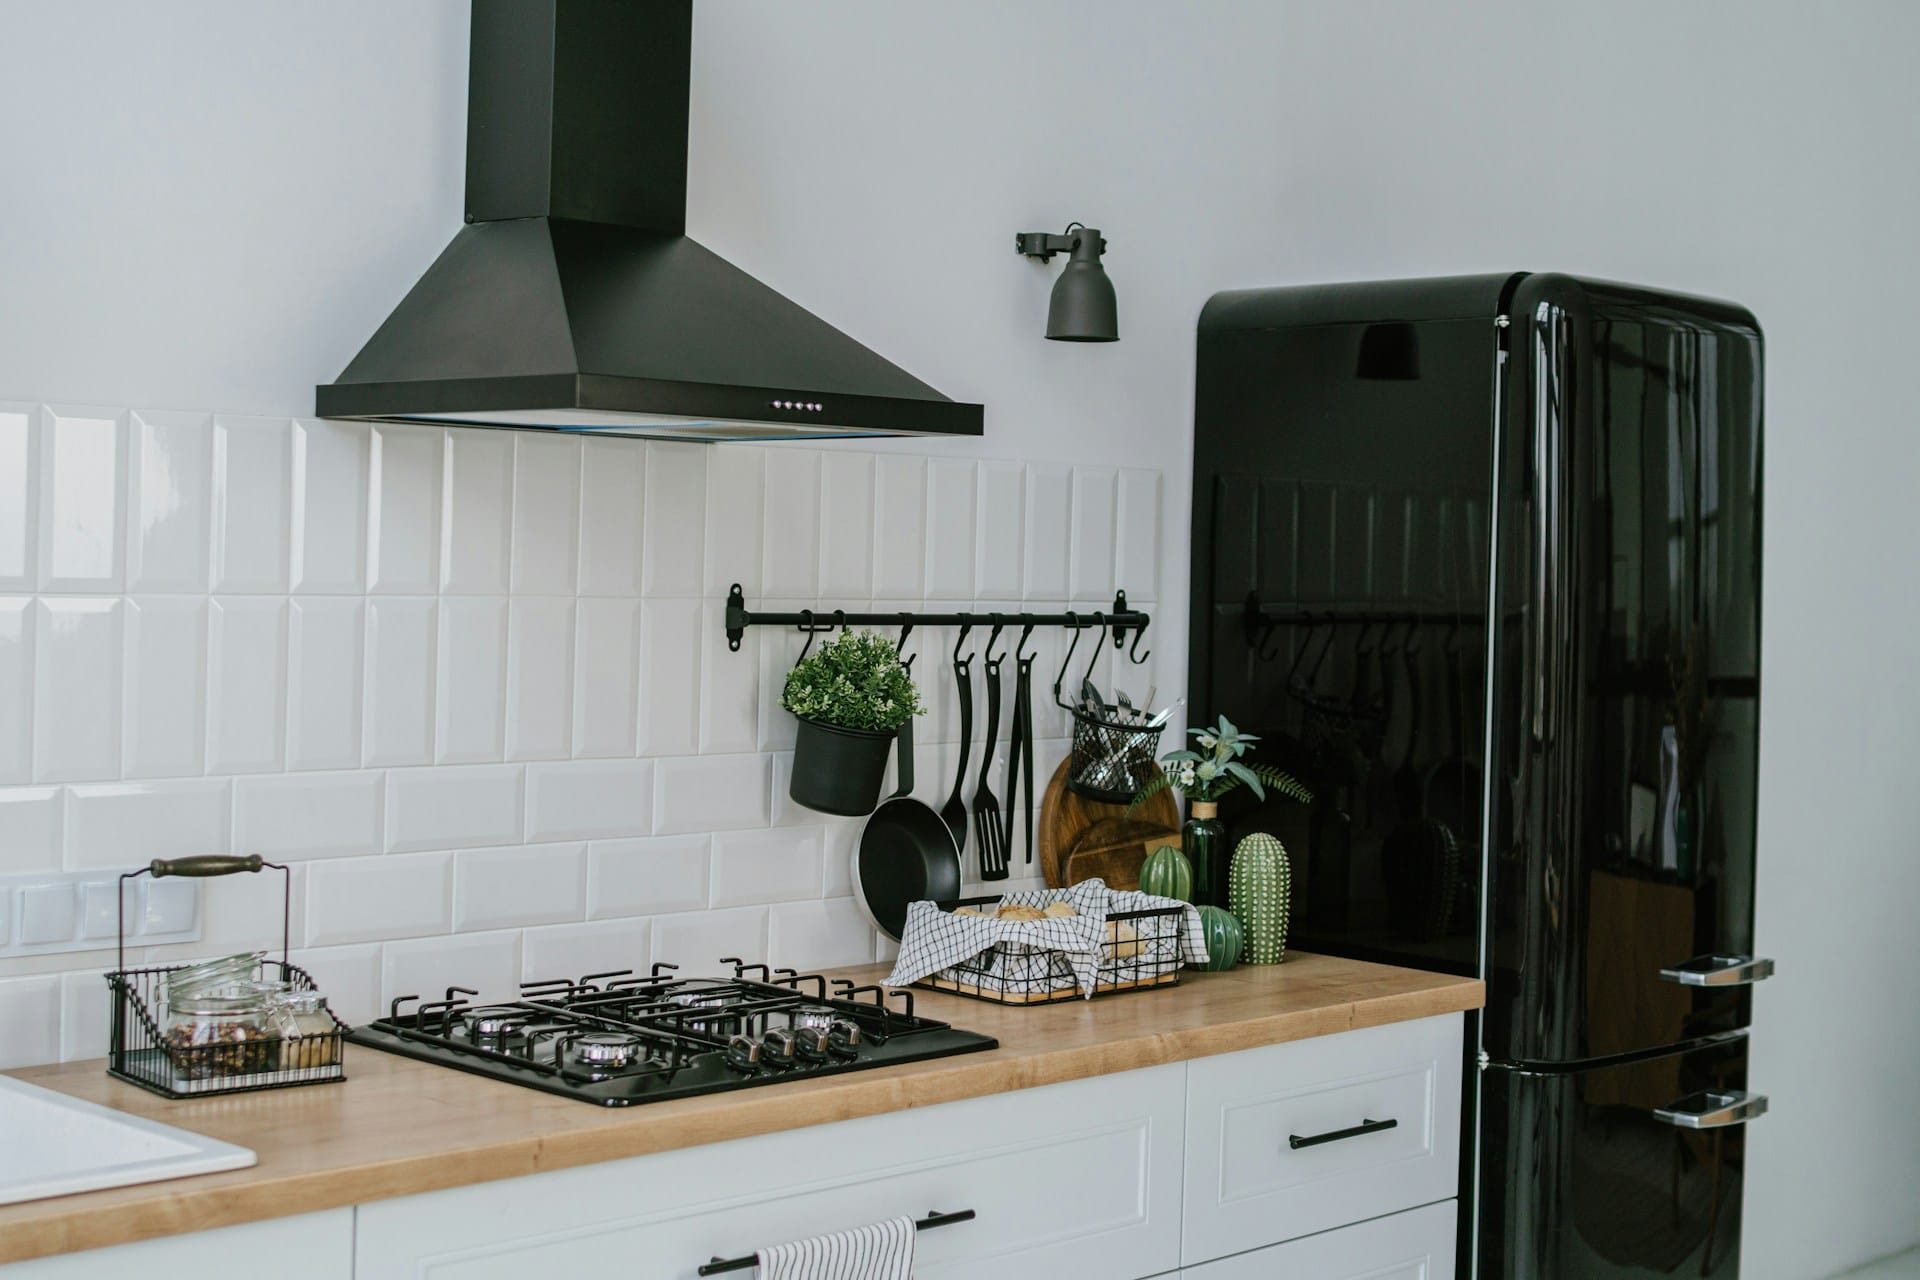
Cleaning and painting are essential for maintaining the aesthetic and structural integrity of your home. Routine cleaning services should include window cleaning, pressure washing, and deep cleaning of all surfaces.

Not only does cleaning improve appearance, but it also helps prevent long-term damage. For example, neglecting areas can lead to mold growth, which poses health risks.

Painting should be performed every few years to protect surfaces from weather damage and to refresh your home’s aesthetic. Choosing the right colors and finishes can significantly enhance the overall look of your property.

Staffing the Maintenance Team

Effective staffing is crucial for a residential maintenance team to ensure smooth operation and high-quality service delivery. Your team must be proficient in various maintenance tasks, including electrical work, plumbing, and HVAC maintenance, to meet homeowner needs efficiently.

Hiring and Training

When hiring for your maintenance crew, focus on individuals with specialized skills in areas such as electrical work, plumbing, and HVAC systems. Consider certifications or prior experience that demonstrate competence in these fields.

Training is equally important; it should emphasize safety protocols, customer service, and the specific maintenance tasks that your team will handle. Regular training sessions can keep your staff updated on new techniques and technologies in home maintenance. Offer opportunities for advancement to motivate employees and reduce turnover.

Assembling a Diverse Skill Set

A well-rounded maintenance team requires a diverse skill set to tackle various tasks. Ensure that your crew includes members with expertise in different areas. This diversity allows your team to address a wide range of homeowner concerns without needing to call in additional contractors.

For instance, having staff skilled in plumbing can quickly resolve leaks, while HVAC experts can handle heating and cooling systems. This structure improves efficiency and responsiveness. Regular skill assessments can identify gaps in your team’s capabilities, allowing for targeted training and hiring to fill those needs.

Maintenance Operations

Effective maintenance operations are essential for ensuring your home remains in optimal condition. By implementing structured processes for scheduling inspections, addressing issues, and promoting efficiency, you can enhance the overall functionality of your living space.

Scheduling Inspections

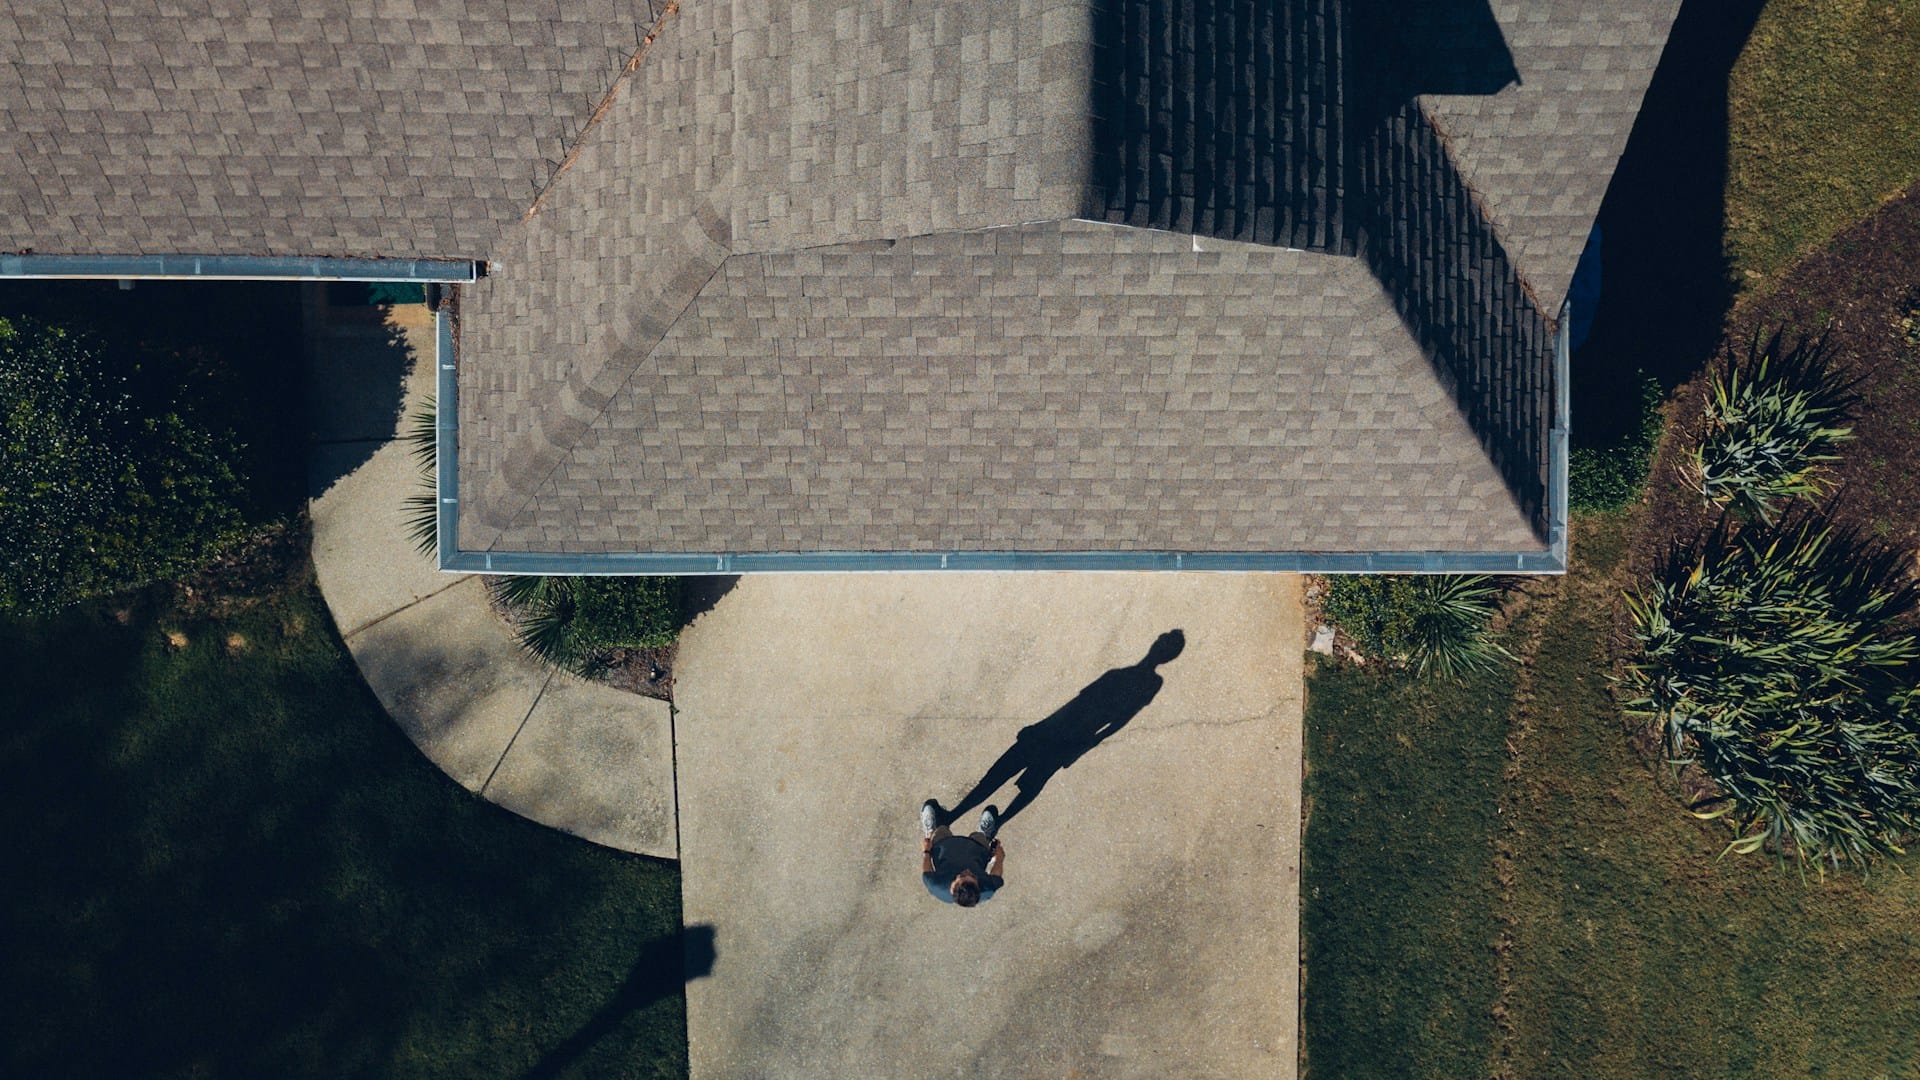
Regular inspections are vital for identifying potential issues before they escalate. You should consider establishing a routine schedule, perhaps quarterly, to assess critical systems within your home. This includes checking HVAC systems, plumbing, and even structural elements.

Using a maintenance services provider can streamline this process. They can organize inspections to coincide with other maintenance tasks, reducing disruption and allowing for a comprehensive review of your home’s condition. Online scheduling platforms can make this even easier, giving you the flexibility to choose times that fit your schedule.

Addressing Maintenance Issues

When maintenance issues arise, a swift response is crucial. You should prioritize addressing problems immediately to prevent further damage. Develop a system for reporting issues quickly, whether through a mobile app or a dedicated hotline.

Having a dedicated maintenance team is beneficial. They can handle various maintenance services, such as dryer vent cleaning or pressure washing, effectively and professionally. This proactive approach minimizes the chance of long-term repairs and ensures your home remains safe and comfortable.

Efficiency and Community Impact

Efficient maintenance operations don’t just benefit your home; they positively impact the entire community. A well-maintained property contributes to neighborhood aesthetics and can even enhance property values. You can encourage others in your community to adopt similar practices, leading to an overall improvement in local living standards.

Moreover, when maintenance tasks are performed regularly, community resources can be utilized more effectively. Streamlining maintenance processes helps your local service providers manage workloads better, ensuring prompt responses to issues in the area. This cooperative approach fosters a sense of community and shared responsibility for maintaining public and private spaces.

Maintaining Systems and Equipment

Proper maintenance of home systems and equipment is essential for ensuring efficiency and longevity. Focused care can prevent major issues and save costs over time, allowing you to enjoy a comfortable living environment without frequent disruptions.
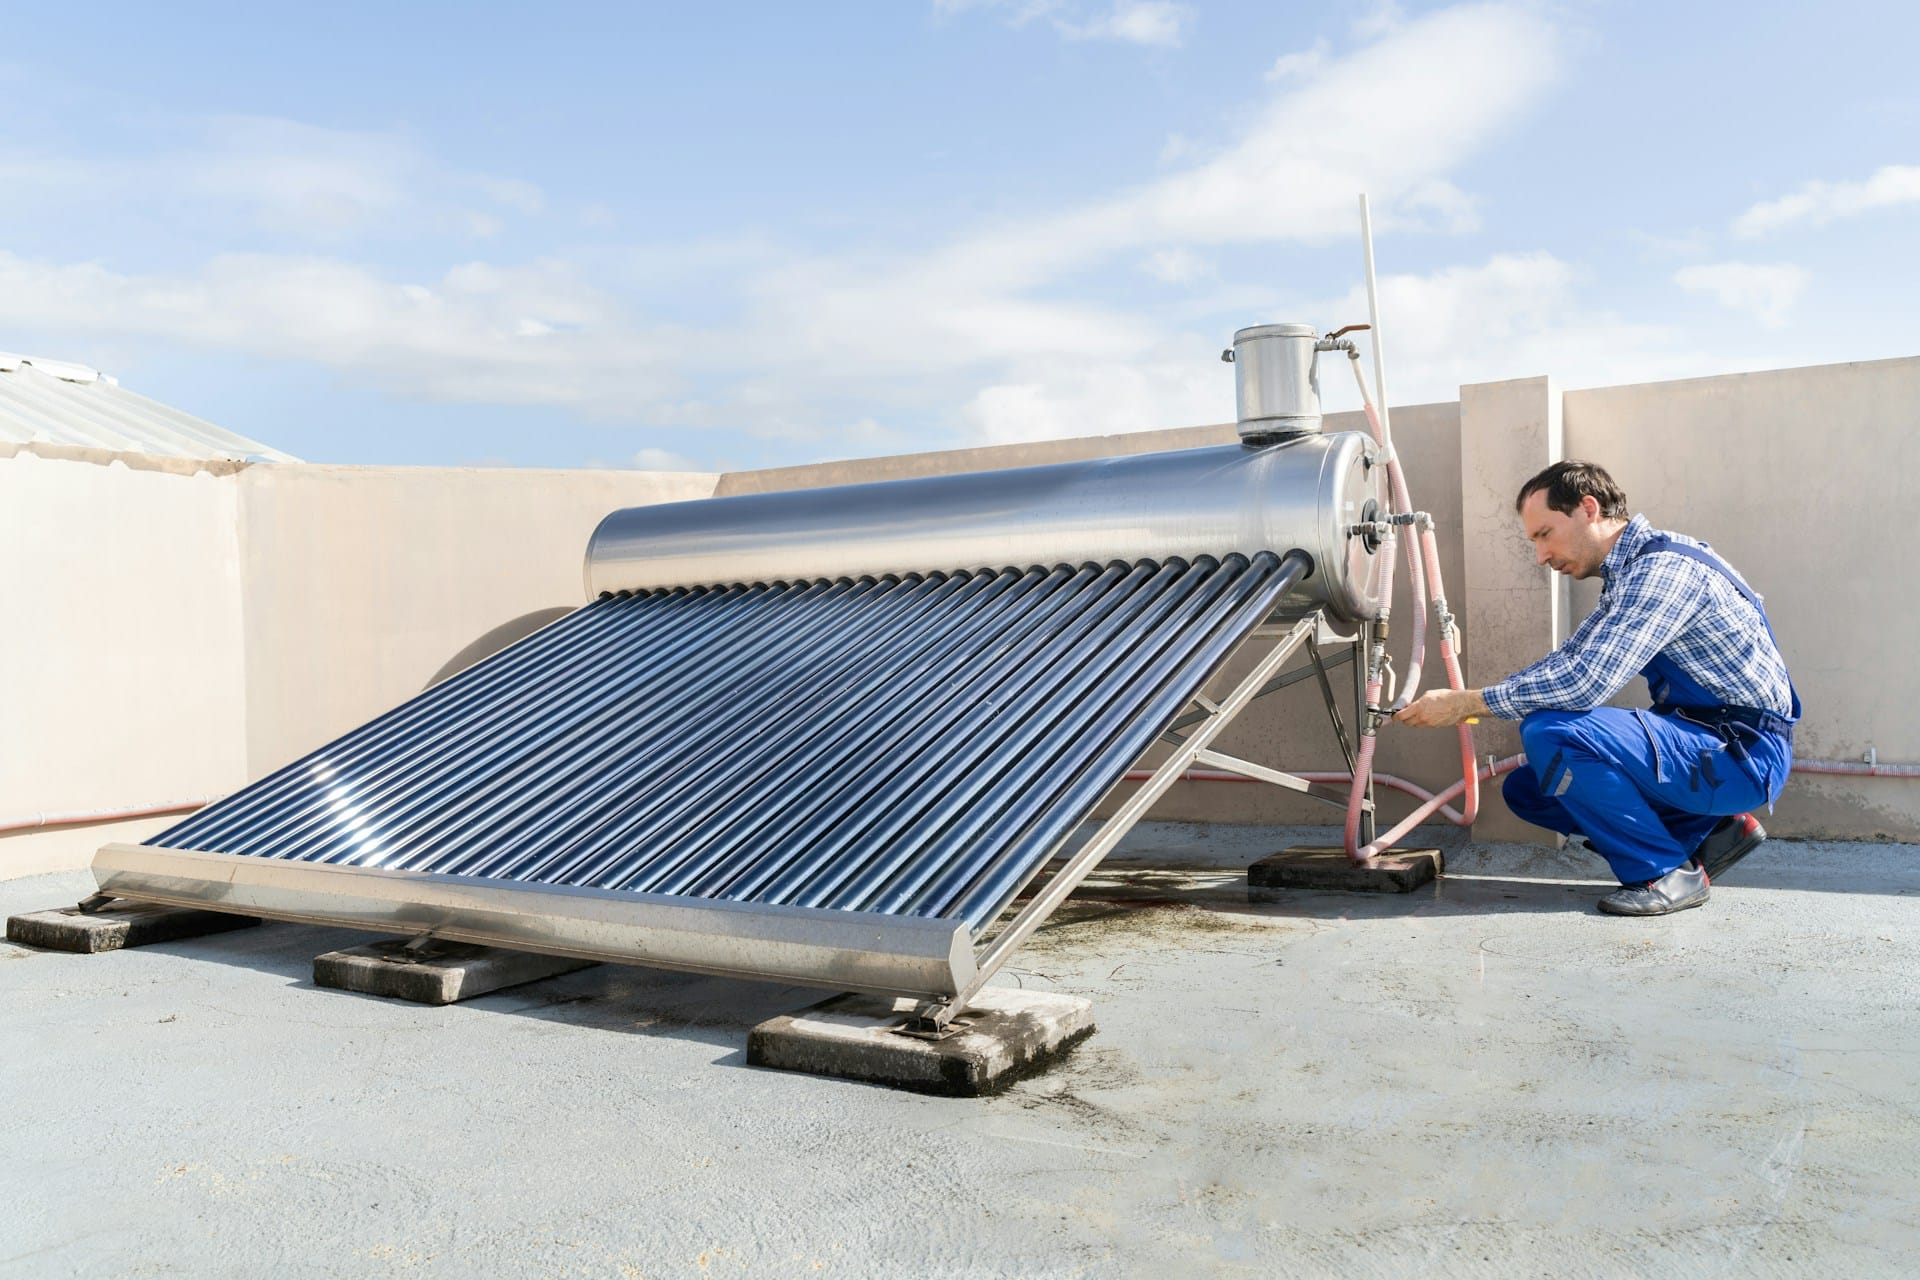
HVAC Systems

Your HVAC system requires regular attention to operate efficiently. Schedule routine maintenance checks at least twice a year to clean filters, inspect ductwork, and ensure the refrigerant levels are adequate. A clean system improves air quality and reduces energy bills.

It is also crucial to monitor for unusual noises or smells, which can indicate underlying issues. Investing in preventive maintenance can extend the life of your HVAC, avoiding costly repairs or replacements. Consider professional services for tasks like dryer vent cleaning to further enhance system efficiency.
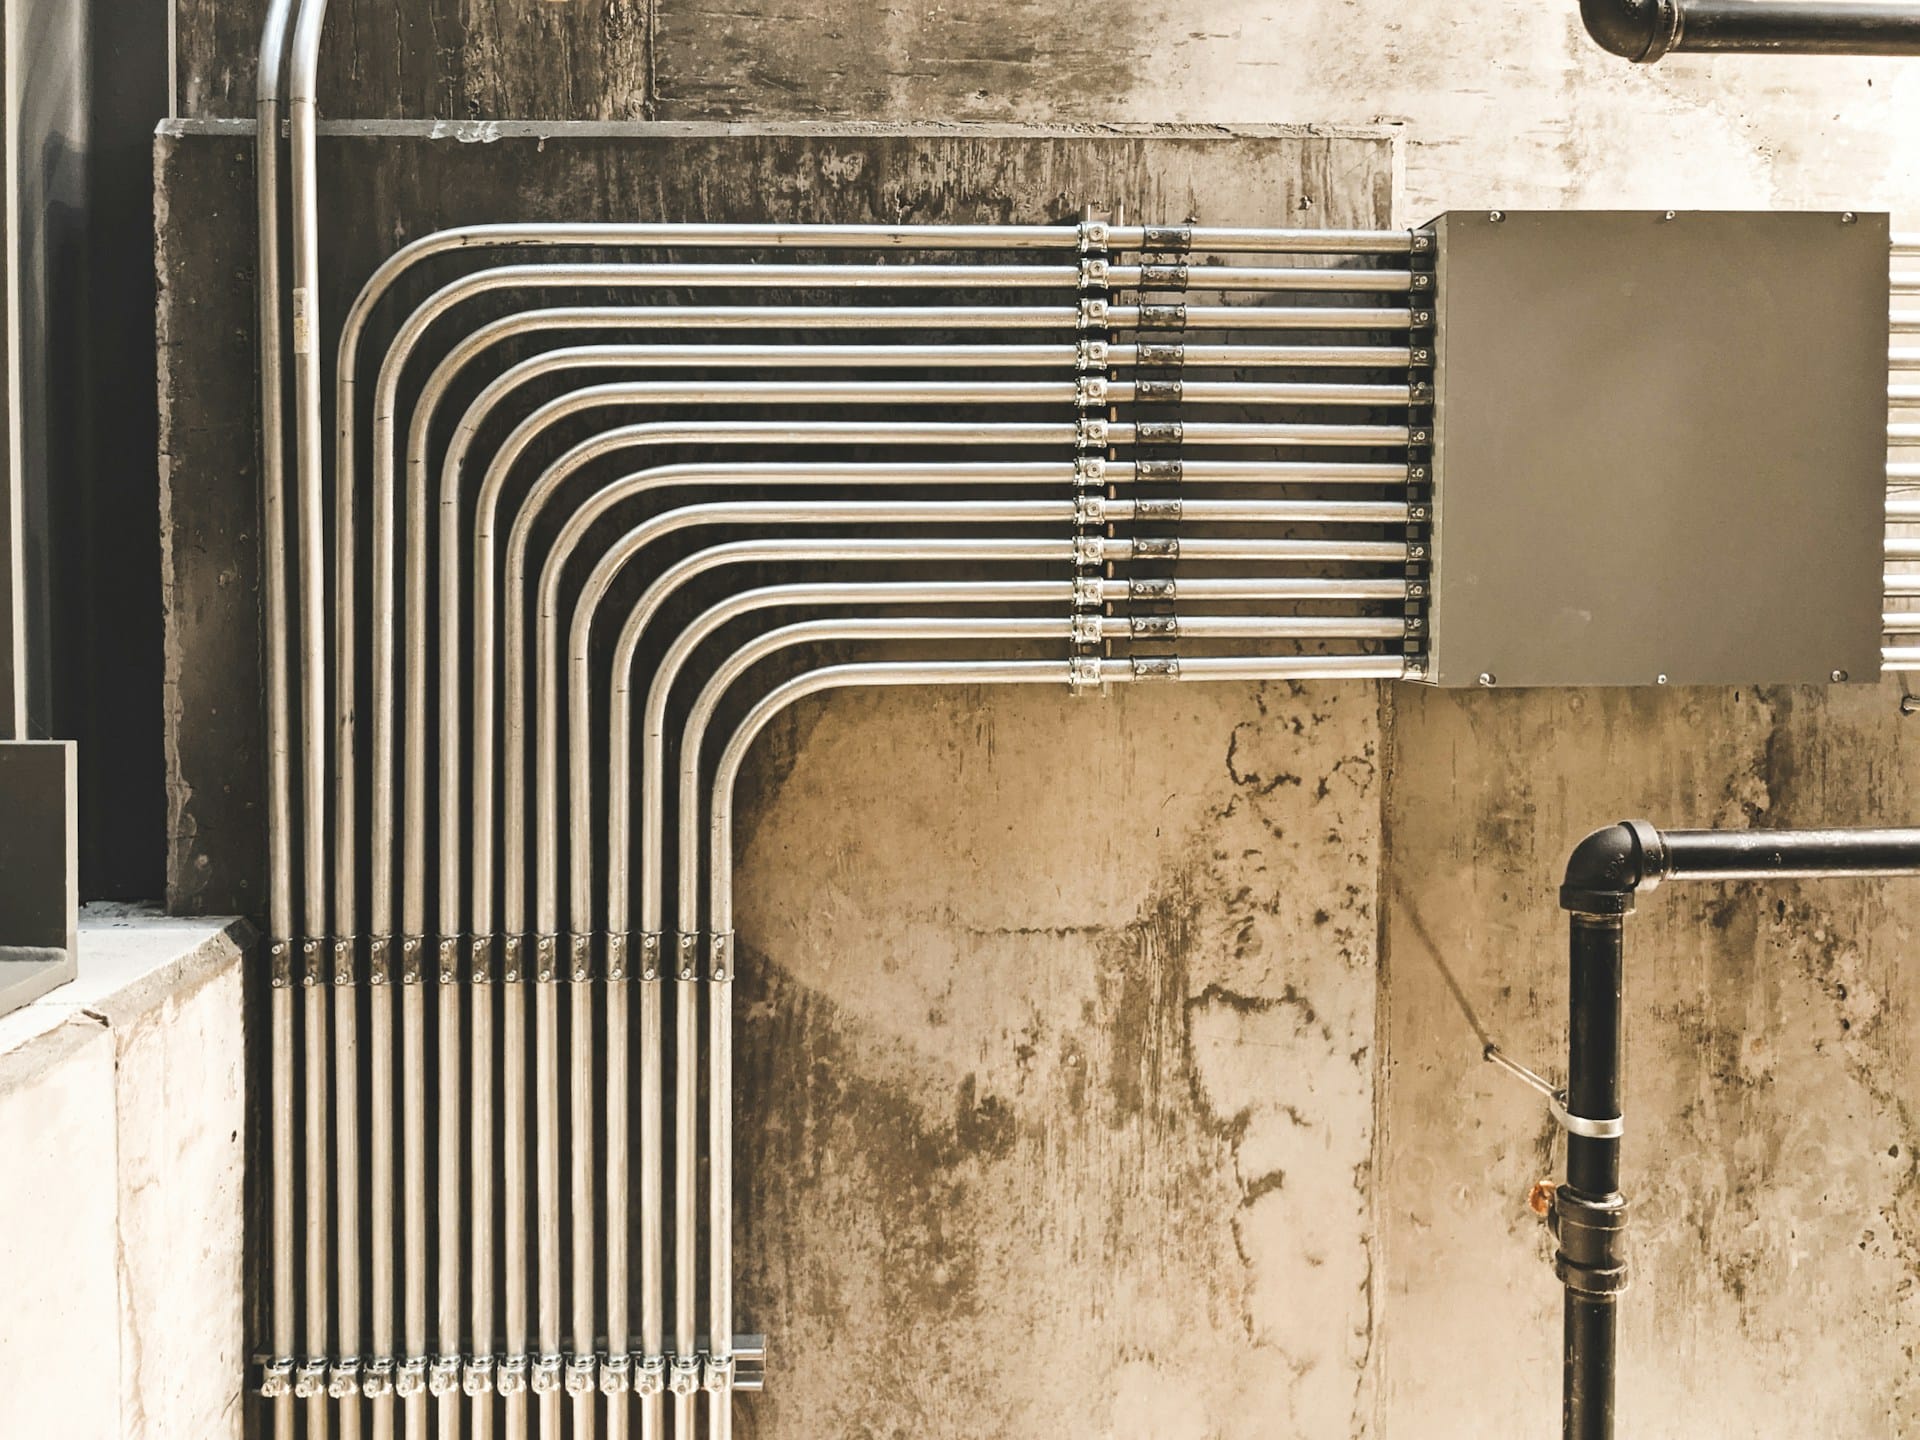
Electrical Systems

Maintaining your electrical systems is vital for safety and functionality. Regular inspections by a qualified professional can help identify potential hazards such as frayed wiring or overloaded circuits. Keeping your electrical panels and outlets in good condition is critical for preventing fires or outages.

You should also replace faulty light bulbs promptly and avoid using extension cords as permanent solutions. Implementing routine checks reduces risks and ensures that your home’s electrical systems are performing at their best. Regular electrical work can significantly enhance the reliability of your fixtures and devices.
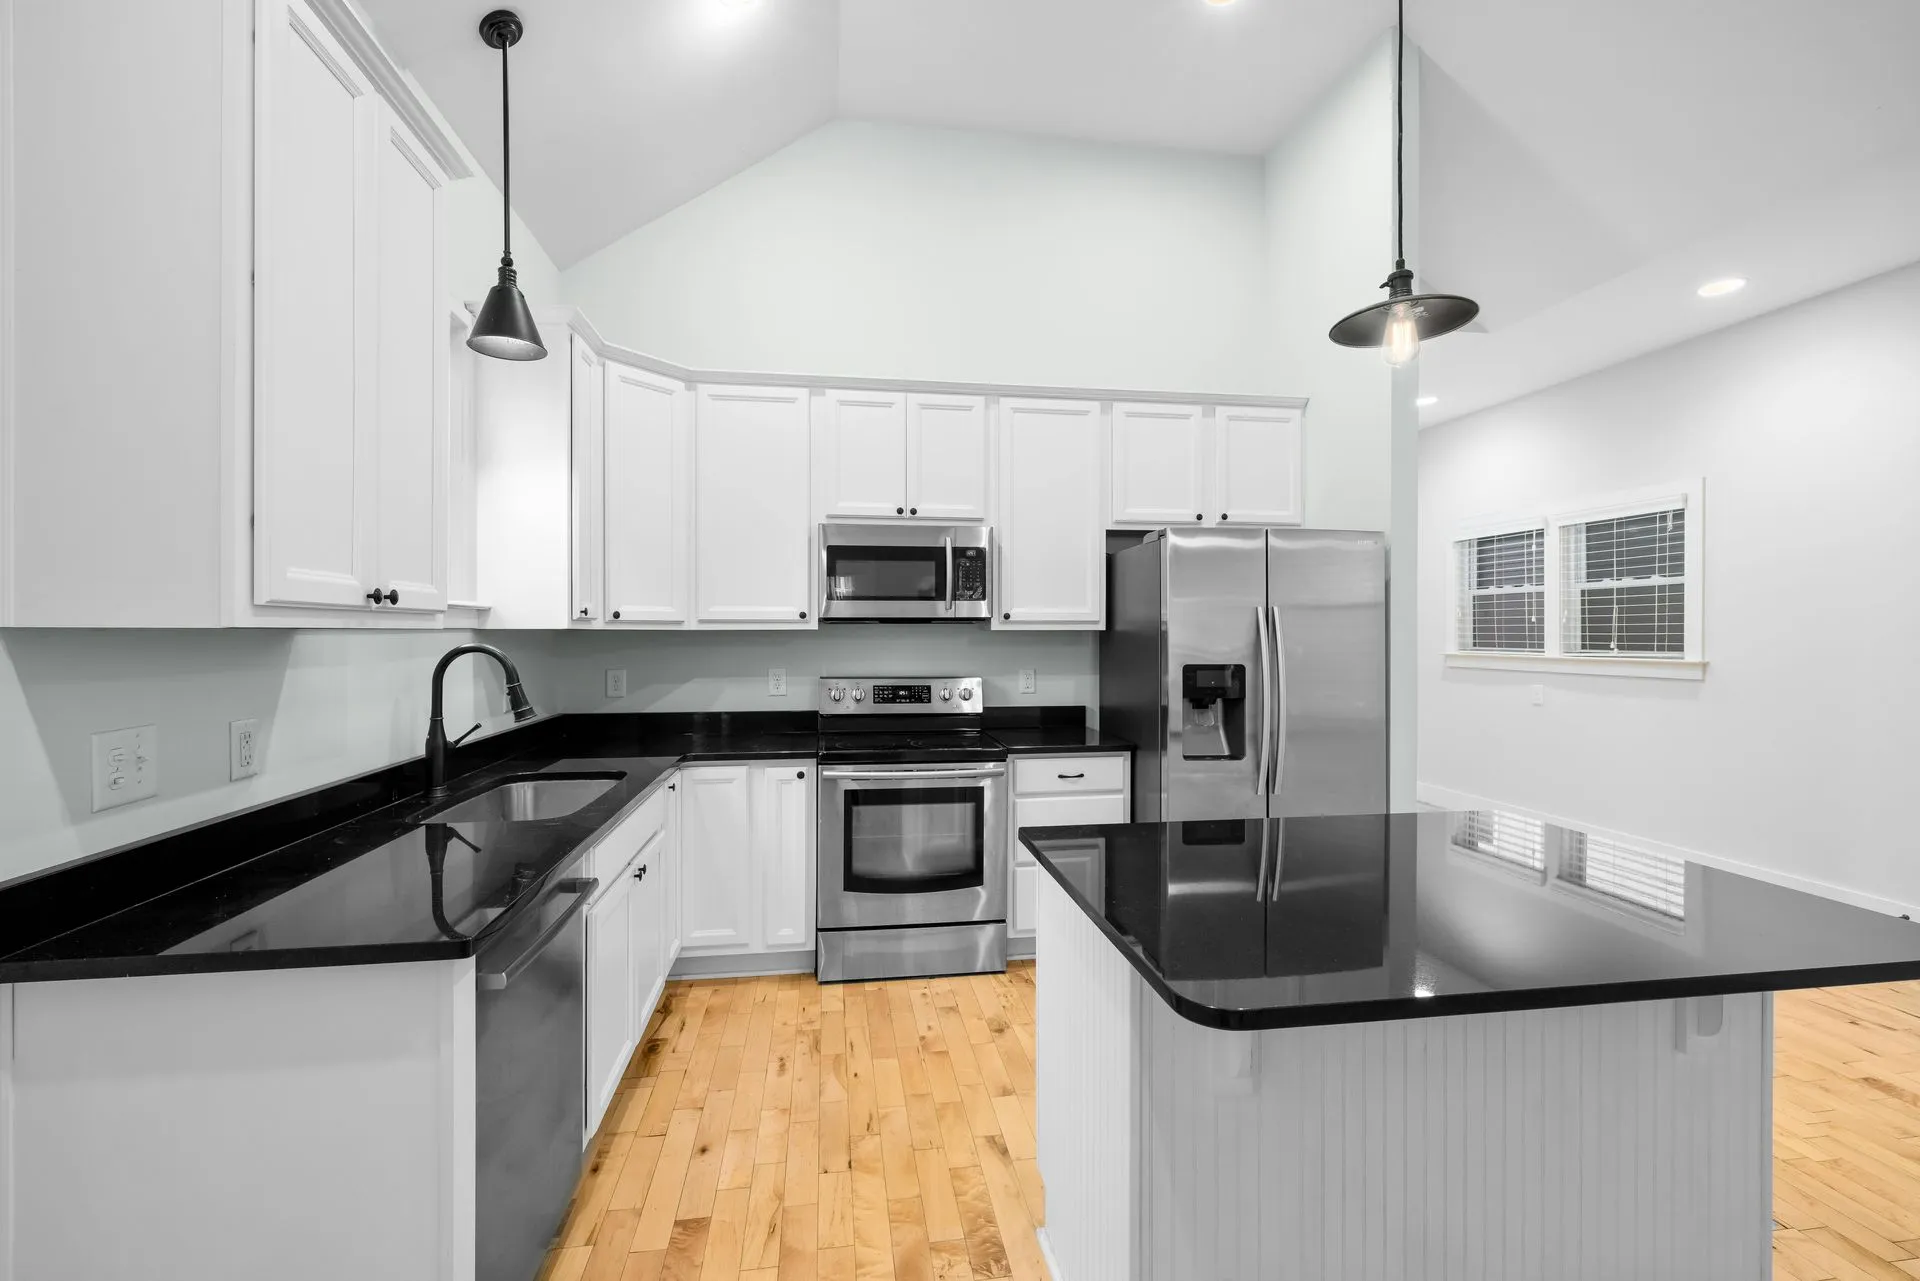
Plumbing Systems

Your plumbing systems should be routinely assessed to avoid leaks and clogs. Regular maintenance includes checking for slow drains, inspecting water heaters, and ensuring all pipes are leak-free. Addressing these issues promptly can prevent larger, costly damages in the future.

Keep a watchful eye on water pressure and the condition of fixtures. Cleaning out drains and maintaining adequate water flow also contributes to a healthier plumbing system. Engaging a professional for periodic inspections can help catch problems early, ensuring your plumbing remains efficient.

Enhancing Property Value

Maintaining and enhancing your property’s value is essential for maximizing your investment. Focusing on aesthetics and functional improvements can significantly impact how potential buyers perceive your property.

Improving Aesthetics

Curb appeal plays a crucial role in attracting potential buyers. Simple tasks such as landscaping, fresh painting, and regular maintenance create a welcoming exterior.

  • Landscaping: Trimmed hedges, colorful flower beds, and defined pathways improve the overall look.
  • Painting: A fresh coat of paint can rejuvenate surfaces, making your home look new. Choose neutral colors to appeal to a wider audience.

Don’t underestimate the importance of small details. Clean windows and pressure-washed exteriors enhance brightness and freshness. Regular updates to outdoor spaces can also significantly increase perceived value.

Functional Improvements

Functional enhancements ensure your home operates efficiently. Investing in essential systems like electrical and plumbing can yield long-term savings.

  • Electrical: Upgrading outdated wiring can improve safety and efficiency. Consider replacing old fixtures and adding dimmer switches for versatility.
  • Plumbing: Regular inspections can prevent leaks and clogs. Updating fixtures not only boosts functionality but can also enhance aesthetics.

Regular preventive maintenance checks extend the lifespan of systems and appliances, helping you avoid larger issues down the line. By focusing on both aesthetics and functionality, you create a home that is attractive and efficient.

Frequently Asked Questions

Understanding the roles and responsibilities of a residential maintenance team can help you ensure that your property is well cared for. The following sections address common inquiries regarding job functions, services provided, and effective maintenance practices.

What are the typical roles and responsibilities of a residential maintenance team?

A residential maintenance team typically handles routine inspections, preventive maintenance, and repairs. Their responsibilities may include landscaping, waste management, and ensuring compliance with safety standards.

Team members are skilled in various trades, allowing them to address a wide range of maintenance needs. This capability ensures that all aspects of property upkeep are managed efficiently.

What jobs are commonly associated with residential maintenance teams?

Common jobs for residential maintenance teams include plumbing, electrical work, and carpentry. They also manage tasks such as HVAC servicing, painting, and general cleaning to keep properties in optimal condition.

Team members often work on both indoor and outdoor maintenance projects, ensuring that every area of the property is well maintained.

What services are usually included in property maintenance?

Property maintenance services often include regular cleaning, lawn care, pest control, and seasonal maintenance tasks. Additional services may cover pressure washing, window cleaning, and dryer vent cleaning.

These services are crucial for preserving the quality and safety of your home while preventing costly repairs down the road.

Could you describe the job description for a residential maintenance worker?

A residential maintenance worker is typically responsible for performing routine inspections and conducting maintenance tasks. They may also oversee repairs, keep detailed service records, and ensure compliance with health and safety regulations.

Strong communication skills are essential, as workers often interact with residents and other team members to address needs promptly.

How should one conduct a property maintenance checklist?

To create a property maintenance checklist, identify key areas that require regular attention, such as plumbing, electrical systems, and exterior features. Schedule inspections for each area and note any upcoming maintenance tasks.

Regularly updating the checklist ensures that nothing is overlooked, helping maintain the property efficiently.

What are the different types of property maintenance?

Property maintenance can be categorized into preventive, corrective, and routine maintenance. Preventive maintenance focuses on regular upkeep to avoid major repairs, while corrective maintenance addresses existing issues.

Routine maintenance involves day-to-day tasks that keep the property functioning smoothly, ensuring a safe and pleasant environment for residents.

How Long to Drain Water Heater: A Step-by-Step Guide

Draining your water heater is an essential part of regular home maintenance that can enhance its efficiency and lifespan. Typically, it takes about 15 to 45 minutes to fully drain a water heater, depending on the size and water flow rate. Knowing this timeframe can help you plan your maintenance tasks effectively.

Neglecting this simple procedure can lead to sediment buildup, which may cause your unit to overwork and decrease its efficiency. By incorporating this quick maintenance task into your routine, you can save money on energy bills and extend the life of your appliance. Regularly maintaining your water heater is a smart move that can prevent costly repairs in the future.

Understanding Water Heaters

Water heaters play a crucial role in everyday comfort by providing hot water for various household needs. There are different types of water heaters, each with unique features, and understanding their components can enhance your maintenance practices.

Types of Water Heaters

You will primarily encounter two types of water heaters: tank water heaters and tankless water heaters.

  • Tank water heaters store hot water in a large reservoir, typically ranging from 20 to 80 gallons. They heat water continually, ensuring it’s available on demand. These units may require regular draining to remove sediment buildup.
  • Tankless water heaters, on the other hand, heat water instantly as it flows through the unit. They are more energy-efficient than tanks and do not take up much space. However, sediment can still accumulate, necessitating a different maintenance approach.

Understanding these types helps tailor your maintenance and drainage practices according to your specific heater type.

Role of the Drain Valve

The drain valve is a vital component of your water heater. It is typically located near the bottom of the tank and is used for draining and flushing the system.

To maintain optimal performance, you should regularly use the drain valve. This involves connecting a hose and allowing sediment to flow out of the tank. Sediment can affect heating efficiency and may even lead to tank corrosion.

Make sure to check the valve periodically for leaks or blockages. A properly functioning drain valve extends the lifespan of your water heater and improves its efficiency.

Sediment Buildup and Its Impact

Sediment buildup occurs when minerals, such as calcium and magnesium, accumulate at the bottom of your water heater. This can significantly impact its performance.

When sediment builds up, it creates a barrier between the water and the burner, forcing the unit to work harder to heat water. This inefficiency not only increases energy bills but can also lead to premature failure.

Regularly flushing your tank (at least once a year) helps manage sediment buildup. If you notice unusual noises or inconsistent hot water supply, it may indicate a problem with sediment accumulation. Addressing these issues promptly will help maintain the efficiency and longevity of your water heater.

Preparation for Draining a Water Heater

To effectively drain your water heater, you must prepare by ensuring that you prioritize safety and locate the necessary valves and drains. This process involves several critical steps that will make the draining task more efficient and safe.

Safety First: Turning Off Power and Water Supply

Before you begin draining your water heater, safety is paramount. If you have an electric water heater, make sure to turn off the power at the circuit breaker. This prevents any electrical hazards while working. For gas water heaters, turn the thermostat to the “off” position to stop the burner from engaging.

Next, shut off the cold water supply valve, typically located at the top of the unit. This stops any new water from entering while you drain the tank. It’s a good idea to turn on a hot water tap somewhere in your home to relieve pressure in the system, making the draining process smoother.

Locating the Valves and Drains

Identifying the correct valves and drain is key to a successful draining process. Locate the drain valve, usually found near the bottom of the water heater. This valve is often a standard garden hose fitting. You will connect a hose to this drain valve to direct water safely outside or into a bucket.

Next, find the cold water valve, which feeds water into the tank, and the hot water valve, which delivers hot water to your home. Understanding these connections is crucial before proceeding, as it will ensure that you can properly manage water flow throughout the draining process. Following these steps will help facilitate a smooth and efficient draining of your water heater.

Draining and Flushing the Tank

Properly draining and flushing your water heater is essential for maintaining its efficiency and extending its lifespan. This process removes sediment buildup that can lead to poor performance and damage.

Draining Steps and Procedures

To drain your water heater, follow these steps:

  1. Turn Off the Heater: Shut off the power to your electric water heater or set your gas unit to pilot.
  2. Connect a Hose: Attach a garden hose to the drain valve located at the bottom of the tank. Ensure the other end of the hose is placed in a bucket or outside.
  3. Open the Drain Valve: Carefully open the drain valve. Water will flow out through the hose. Monitor the flow to avoid overflow.
  4. Flush the Tank: To remove sediment, turn on a hot water faucet in your home. This allows air into the tank, helping the water drain better.
  5. Close Valve and Refill: Once the tank is empty, close the drain valve, remove the hose, and turn the water supply back on.

Flushing Out Sediment

Flushing your water heater helps eliminate sediment buildup. Regular maintenance can prevent issues. Here’s how to effectively flush it:

  1. Refill the Tank: After draining, close the drain valve. Allow the tank to refill completely to avoid running your heater dry.
  2. Heat the Water: Once filled, turn the power back on to the heater. Let it heat the water to the desired temperature.
  3. Repeat the Drain: After the heater cycles a few times, repeat the draining procedure to remove any remaining sediment.
  4. Frequency: It’s recommended to perform this flushing process at least once a year to maintain optimal performance and efficiency.

Maintaining your water heater through draining and flushing can help prevent costly repairs and inefficiencies caused by sediment buildup.

Post-Draining Steps and Reconnection

After draining your water heater, it’s essential to follow proper steps to ensure safe and effective reconnection. This process involves refilling the tank and reactivating the unit for optimal performance.

Refilling the Water Heater Tank

Start by ensuring the faucet connected to the hot water line is open. This allows air to escape while filling the tank, preventing pressure buildup. Next, close the drain valve and connect a garden hose if it’s still attached.

Turn on the cold water supply valve slowly. Monitor the tank—once you see water flowing steadily from the open faucet, you know it’s filling properly. Continue filling until water flows freely from the faucet, then close it. Check for leaks around the valve where you filled the tank and ensure no sediment buildup is present in the tank.

Reactivating the Water Heater

Once the tank is filled, you can reactivate your water heater. If it’s electric, switch the power back on. For gas models, set the thermostat to the desired temperature, usually between 120°F and 140°F.

Allow the heater to run for approximately 30 minutes to an hour. This duration ensures the water heats adequately. Keep an eye on the unit for any signs of malfunction or leaks during this time. Regular checks after maintenance can help prolong the lifespan of your water heater and minimize issues related to sediment buildup or pressure.

Ongoing Maintenance and Care

Regular maintenance of your water heater is essential for optimal performance and longevity. Key aspects include routine inspections, addressing any hard water issues, and proper winterizing techniques to prevent damage during cold months.

Regular Inspection and Preventive Measures

Conducting regular inspections of your water heater can help identify issues before they escalate. Schedule inspections at least once a year. During these checks, look for signs of leaks, corrosion, and unusual noises.

Consider testing the pressure relief valve to ensure it operates correctly. If you notice any changes in water temperature or pressure, these may indicate a malfunction.

Preventive maintenance tasks, such as flushing the tank to remove sediment, can extend the heater’s lifespan. Sediment build-up can lead to decreased efficiency and potential damage.

Keeping a maintenance log can help track when tasks were completed and when the next service is due.

Addressing Hard Water Issues

If you live in an area with hard water, you may experience increased mineral build-up in your water heater. This can lead to decreased efficiency and higher energy bills.

To manage this, consider installing a water softener, which helps reduce the hardness of your water. Routine descaling can also help mitigate issues caused by mineral deposits. Use descaling solutions specifically designed for water heaters and follow the manufacturer’s instructions.

Additionally, check your heater’s anode rod every two years. Replacing a corroded anode rod can prolong the tank’s life and reduce sediment accumulation.

Implementing these measures will improve performance and increase efficiency, ultimately saving you money.

Proper Winterizing Techniques

Preparing your water heater for winter is crucial if you live in colder climates. Start by draining the tank entirely. This prevents any remaining water from freezing and potentially damaging the unit.

Add antifreeze to the system, particularly if you have a vacation home or plan to turn off the heater for an extended period.

Ensure all pipes, including the bypass valve, are properly insulated to prevent drafts. This maintains internal temperatures and avoids freeze-related issues.

Check the thermostat settings and adjust them as necessary. Keeping your heater properly winterized safeguards against unexpected failures and ensures reliable performance when colder months arrive.

Frequently Asked Questions

Understanding the finer points of draining a water heater can help you manage your appliance more effectively. Here’s specific information to address common queries you may have.

What is the typical duration for draining a 50-gallon water heater?

Draining a 50-gallon water heater typically takes about 30 to 45 minutes. Factors such as water pressure and sediment buildup can influence the time required.

Why might a water heater take an extended period to drain?

If your water heater takes longer than expected to drain, it could be due to sediment buildup clogging the drain valve or a lower water pressure in your home. These issues can impede the flow of water, slowing the draining process.

What steps should be taken to thoroughly flush a water heater?

To flush a water heater, first turn off the power and let the water cool. Connect a hose to the drain valve, open the valve, and let the water flow out. After draining, close the valve, remove the hose, and refill the tank.

What are some tips for quickly draining a hot water heater?

To expedite the draining process, open a hot water faucet in your home to allow air in, which can help water flow more freely. Ensure the drain valve is fully open and consider using a larger diameter hose to reduce resistance.

What is the estimated time required to drain a 40-gallon water heater?

Draining a 40-gallon water heater generally takes around 30 minutes. Variables like water temperature and sediment can affect the exact time.

Is there a reason a water heater would continuously drain without stopping?

A water heater may continuously drain due to a malfunctioning drain valve or a problem with the plumbing system, such as a leak. Identifying and addressing these issues promptly is crucial to prevent water damage.

Air Care Dryer Vent Cleaning: Ensuring Safe and Efficient Appliance Performance

Maintaining a clean and efficient dryer vent is essential for the safety and longevity of your home. Regular dryer vent cleaning can reduce the risk of fire hazards and enhance the performance of your dryer, saving you time and energy costs. Over time, lint buildup can obstruct airflow, leading to inefficient drying cycles and potential damage to your appliance.

Engaging professional services for dryer vent cleaning can provide peace of mind. These experts ensure that all lint and debris are thoroughly removed, promoting a safer environment. By prioritizing this maintenance task, you contribute to the overall efficiency of your home and reduce the likelihood of expensive repairs in the future.

Choosing a company like Totally Maintained offers a comprehensive approach to home care. With services tailored for preventive maintenance, you can ensure that essential tasks like dryer vent cleaning are taken care of without the hassle of coordinating multiple service providers.

The Importance of Dryer Vent Cleaning

Maintaining a clean dryer vent is essential for ensuring your appliance operates safely and efficiently. Regular dryer vent cleaning can prevent serious hazards, enhance dryer performance, and extend the lifespan of your equipment.

Preventing Fire Hazards

A clogged dryer vent significantly elevates the risk of fire in your home. Lint buildup creates an environment where heat accumulates, potentially igniting nearby materials. According to the U.S. Fire Administration, failing to clean dryer vents is one of the leading causes of dryer fires.

To mitigate this risk, you should schedule regular cleaning. This service removes hazardous lint that can spark. Regular inspections can reveal any blockages or issues, providing peace of mind that your home remains safe.

Improving Efficiency and Performance

When your dryer vent is obstructed, your dryer must work harder to circulate air. This inefficiency results in longer drying times, increased energy consumption, and higher utility bills. A clean dryer vent allows for optimal airflow, which reduces drying times and saves energy.

By improving your dryer’s performance, you not only enhance your daily routines but also minimize wear and tear on the machine. A well-maintained vent can translate to monthly savings on your energy bills.

Extending Dryer Lifespan

Regular dryer vent cleaning directly contributes to the longevity of your appliance. Lint buildup can strain various components of your dryer, leading to breakdowns and costly repairs. By investing in preventive maintenance, you reduce the strain on your dryer, allowing it to operate efficiently.

An extended lifespan means that you can get the maximum return on your investment. Routine maintenance helps you avoid premature replacements and keeps your dryer functioning optimally for years to come.

By prioritizing dryer vent cleaning, you are safeguarding your home against potential hazards and optimizing your dryer’s performance.

Understanding Your Dryer Vent System

A properly functioning dryer vent system is crucial for the safe and efficient operation of your gas dryer. Knowing its components and types can help you maintain it effectively and avoid hazards.

Components of a Dryer Vent

Your dryer vent system consists of several key components:

  • Vent Pipe: This duct connects your dryer to the outside. It’s essential for expelling hot air, moisture, and lint.
  • Louvered Exhaust Hood: This prevents outside air from entering your home and allows lint to escape during dryer operation.
  • Connector Hose: This flexible tube attaches the dryer to the vent pipe and may need regular inspection for wear or blockages.
  • Clamps and Fasteners: Secure connections are vital. Ensure they are rust-free and tight, preventing any disconnections during use.

Regularly checking these components ensures your system remains efficient and reduces fire hazards.

Types of Dryer Vents

There are various types of dryer vents to consider, each with different materials and uses:

  • Rigid Metal Ducts: These are the most recommended option due to their durability and minimal lint buildup. Made of stainless steel or aluminum, they resist bending and can efficiently expel air.
  • Flexible Aluminum Ducts: These are easier to install in tight spaces but may collect lint more easily. Ensure they are kept straight to minimize airflow resistance.
  • Plastic Venting: While cheap, this type is not recommended as it can easily melt or become a fire hazard.

Choosing the right type depends on your home layout and local building codes. Regular maintenance and inspections can help ensure optimal dryer vent performance.

Professional Vent Cleaning Process

Understanding the professional vent cleaning process is essential for maintaining the efficiency and safety of your HVAC system. This involves a thorough inspection, effective cleaning techniques, and implementing post-cleaning maintenance strategies to ensure optimal performance.

Inspection and Assessment

The first step involves examining your dryer vent system to identify any potential issues. Professionals typically use cameras and other tools to assess the condition of ducts. This allows for the detection of clogs, damages, or other problems that could hinder airflow.

During this assessment, technicians will also check for proper connections and ensure there are no bends or kinks in the ductwork. Addressing these findings early is crucial to prevent future problems and enhance the efficiency of your system.

A detailed report after inspection can help you understand the condition of your vents and necessary cleaning needs.

Cleaning Techniques and Equipment

Effective vent cleaning involves specialized equipment designed to remove lint and debris accumulated within the ducts. Professional services often utilize high-powered vacuums equipped with HEPA filters to ensure that dust and allergens are contained.

Tools like rotary brushes can effectively dislodge stubborn debris from the duct walls. These brushes reach deep into the ductwork, clearing obstructions that may not be visible during the inspection phase.

Moreover, the use of a vacuum system during cleaning ensures that removed contaminants don’t recirculate in your home. Using professional-grade equipment is vital for thorough and safe vent cleaning.

Post-Cleaning Maintenance

After completing the cleaning process, it’s essential to implement a maintenance plan to keep your vents in good condition. Regular inspections should be scheduled—ideally once a year—to monitor vent performance and prevent buildup.

You should also maintain awareness of dryer performance. If you notice longer drying times or excessive heat, it may indicate that the vents need attention again.

Incorporating preventive measures, such as using lint traps and ensuring proper installation of vent covers, will significantly extend the lifespan of your vent system. This proactive approach is key to avoiding costly repairs down the line.

DIY Dryer Vent Cleaning Tips

Proper maintenance of your dryer vent is essential for ensuring efficiency and safety. Knowing when to clean your dryer vent, how to do it step-by-step, and understanding safety precautions can help you manage this task effectively.

When to Clean Your Dryer Vent Yourself

You should consider cleaning your dryer vent if you notice any of the following signs:

  • Longer Drying Times: If your clothes take longer than usual to dry, it may indicate a clogged dryer vent.
  • Heat or Moisture Accumulation: Excess heat and moisture around your dryer during operation can signal a blockage.
  • Lint Buildup: Regularly check the lint trap and vent for excessive lint accumulation.
  • Burning Smell: If you detect a burning smell while the dryer is operating, stop immediately and clean the vent.

It’s advisable to clean your dryer vent at least once a year, or more frequently if you use your dryer regularly. This preventive measure helps maintain the efficiency of your appliance and can reduce fire hazards.

Step-by-Step Cleaning Guide

  1. Unplug the Dryer: Always start by disconnecting the dryer from the power source.
  2. Pull Out the Dryer: Move the dryer away from the wall to access the vent.
  3. Disassemble the Vent: Carefully detach the vent duct from the back of the dryer. Remember to note how it’s configured for reassembly.
  4. Use a Brush Kit: Utilize a dryer vent cleaning brush to remove lint buildup. Insert the brush into the vent and rotate it while pulling it out.
  5. Vacuum the Duct: Use a vacuum with a hose attachment to clean both the duct and the area behind the dryer.
  6. Check Outside Vent: Don’t forget to clean the exterior vent cover to ensure airflow isn’t obstructed.
  7. Reassemble: Once everything is clean, reattach the vent and push the dryer back into place before plugging it in.

Make this a part of your home maintenance routine to ensure optimal dryer performance.

Safety Considerations

Always prioritize safety while cleaning your dryer vent:

  • Avoid Overheating: Regularly cleaning the vent reduces the risk of lint catching fire due to heat accumulation.
  • Use Protective Gear: Wear gloves and a mask to protect yourself from dust and lint particles.
  • Take Your Time: Be thorough to avoid missing areas that might still be clogged.
  • Check for Damage: Inspect the vent for any cracks or damage that could worsen airflow issues.

By following these safety guidelines, you can perform dryer vent cleaning effectively and securely.

Recognizing When Professional Help is Needed

Understanding when to seek professional assistance for dryer vent cleaning is crucial for maintaining your home safety and efficiency. Certain signs indicate a clogged dryer vent, and knowing these can help you prevent potential hazards.

Signs of a Clogged Dryer Vent

Recognizing a clogged dryer vent is essential for your safety and the efficiency of your appliance. Here are key indicators:

  • Longer Drying Times: If your clothes consistently take more than one cycle to dry, this may signal lint buildup.
  • Burning Smell: A noticeable burning odor during operation is a warning sign of overheating, which can indicate a clogged vent.
  • Excessive Lint: Accumulation of lint around the dryer or visible outside the vent indicates obstruction.
  • Hot Exterior: If the dryer feels unusually hot to the touch while running, it may suggest a blocked vent.
  • Increased Utility Bills: Higher energy costs can result from the dryer working harder due to inadequate airflow.

Prompt attention to these signs can prevent fire hazards and maintain your machine’s efficiency.

Benefits of Hiring Professionals

Bringing in a professional for dryer vent cleaning offers numerous advantages:

  • Expertise: Professionals are trained to identify and address specific issues efficiently, ensuring thorough cleaning.
  • Safety: A certified technician can safely handle tasks and reduce the risk of fire hazards associated with clogged vents.
  • Time-Saving: Hiring a professional allows you to focus on your daily activities while the job is completed efficiently.
  • Comprehensive Services: Many companies, like Totally Maintained, offer a range of home maintenance services, streamlining your maintenance needs.

By opting for professional help, you ensure a safer and more effective cleaning, extending the life of your dryer and enhancing its performance.

Frequently Asked Questions

This section addresses common questions regarding dryer vent cleaning, covering costs, signs that cleaning is needed, and frequency of service. Understanding these aspects helps you make informed decisions about maintaining your dryer vent.

How much does it typically cost to have a dryer vent cleaned by a professional?

The cost of professional dryer vent cleaning generally ranges from $100 to $300. Factors influencing the price include the location, complexity of the vent system, and whether any additional services are required.

What are the signs that my dryer vent needs to be cleaned?

Signs that indicate your dryer vent needs cleaning include longer drying times, a burning smell during operation, and lint buildup around the dryer. Additionally, if the vent cap flutters when the dryer is running, it may signal a blockage.

How often should dryer vent cleaning services be scheduled?

It is recommended to schedule dryer vent cleaning at least once a year for optimal safety and efficiency. If you use your dryer frequently, consider cleaning it more often, such as every six months.

What is the average duration of a professional dryer vent cleaning service?

A professional dryer vent cleaning service typically takes between 30 minutes to an hour. The duration may vary based on the vent’s length and condition.

Can cleaning my dryer vent improve the efficiency of my dryer?

Yes, cleaning your dryer vent can significantly improve the efficiency of your dryer. A clean vent allows for better airflow, which can reduce drying times and energy consumption.

What should I look for when choosing a dryer vent cleaning service provider?

When selecting a dryer vent cleaning service, prioritize providers with proper certifications, positive customer reviews, and a clear understanding of safety protocols. It’s also beneficial to inquire about their cleaning techniques and equipment to ensure comprehensive service.

How to Clean Covered Gutters: A Step-by-Step Guide for Effective Maintenance

Cleaning covered gutters can be a straightforward task if approached correctly. To effectively clean your covered gutters, you can use a combination of a hose, soft-bristled brush, or specialized tools designed for gutter cleaning. This method ensures that you remove leaves, dirt, and debris without damaging the guards.

Understanding the right techniques can save you time and effort. Many homeowners overlook the importance of maintaining their gutter systems, leading to potential water damage and costly repairs. By keeping your gutter guards clean, you ensure they function properly and protect your home effectively.

In this article, you will discover practical tips and tools to help you maintain your covered gutters easily. Whether you’re a seasoned DIY enthusiast or a homeowner looking for straightforward solutions, this guide will provide the information you need to keep your gutters in top condition.

Safety Precautions and Preparation

Before cleaning covered gutters, it’s vital to take necessary safety precautions and prepare adequately. This ensures not only your safety but also the effectiveness of the cleaning process.

Assessing the Gutters

Begin by inspecting your gutters before any cleaning. Look for signs of damage, such as rust, sagging, or separation from the house. Ensure that the coverings are securely fastened.

Check for debris: Remove any loose debris that could hinder your visibility or pose hazards while working.

Tools needed: Prepare essential tools such as a sturdy gutter scoop, a leaf blower, or a trowel. Having everything at hand will streamline the process and reduce the risk of accidents.

Take notes: Document any issues found during your inspection. This will help in planning any future maintenance or repairs needed for your gutters.

Setting Up the Ladder Safely

Using a ladder correctly is crucial for your safety. Ensure you select a ladder that is appropriate for your height and the job. A ladder rated for at least 300 pounds is often recommended.

Placement: Position the ladder on a flat, stable surface. Avoid soft or uneven ground that could cause it to tip over.

Angle: For optimal stability, set the ladder at a 75-degree angle. The base should be about one foot away from the wall for every four feet of ladder height.

Use a spotter: If possible, have someone hold the ladder while you work. This adds an extra level of safety, especially when reaching high areas.

By taking these precautions and preparing properly, you can clean your covered gutters effectively and safely.

Manual Cleaning Method

Cleaning covered gutters manually is essential to maintain their functionality. The process typically involves removing debris that accumulates and ensuring a clear passage for water. You’ll need the right tools and a systematic approach to effectively clean your gutters by hand.

Removing Debris with a Garden Trowel

Start by gathering your equipment, which should include a sturdy ladder, gloves, and a garden trowel. The trowel helps to scoop out leaves, sticks, and other debris that can clog your gutters.

Position your ladder safely against the house, ensuring it’s stable. Use the trowel to reach into the gutters, starting at the downspout and working your way along the entire length. Be cautious of sharp objects or any accumulated debris.

If your gutters have guards, you may need to remove them first. A routine check ensures maximum efficiency in your gutter cleaning. Aim to clear away any clumps of debris to facilitate better water flow.

Collecting and Disposing of Debris

As you remove debris from the gutters, it’s essential to have a collection method in place. Use a bucket or a tarp to gather the debris without making a mess in your yard.

Once you’ve collected all the debris, dispose of it properly. You can compost organic materials or bag and throw away the waste. Regular disposal prevents the buildup of rotten materials, which can create unpleasant odors and attract pests.

After removing all debris, consider rinsing the gutters with water to clear any remaining dirt. This ensures that your gutters are clean and ready to handle rainwater effectively. Proper disposal and cleaning will contribute to the longevity of your gutter system.

Machine Assisted Cleaning

Using machines can significantly streamline the process of cleaning covered gutters. One effective way to enhance efficiency is by utilizing a pressure washer, which can eliminate debris and buildup effectively.

Utilizing the Pressure Washer

When considering a pressure washer for gutter cleaning, it’s essential to choose the right model. A power washer with adjustable pressure settings will help you avoid damaging sensitive gutter materials.

Attach a spray nozzle to direct the water flow effectively. Start at the highest point of the gutter system, working your way down toward the downspout. This technique ensures debris is pushed down and out rather than clogging the system.

Adjust the pressure based on the debris type. For light buildup, lower pressure is sufficient, while heavier clogs may require more power. Always maintain a safe distance to prevent damage to the gutter’s surface.

After completing the cleaning, inspect the downspouts for blockages. It’s a good practice to run water through them using the pressure washer to ensure a clear flow. This step prevents future buildup and ensures your gutters function properly.

Addressing and Preventing Blockages

Maintaining clear gutters is essential to prevent water damage and ensure proper drainage. Understanding how to identify and clear blockages, along with implementing regular maintenance, plays a crucial role in keeping your covered gutters functioning effectively.

Identifying and Clearing Blockages

To keep your gutters functioning optimally, start by regularly inspecting for signs of blockages. Look for water overflow, sagging gutters, or dripping around seams. These can indicate clogged gutters that need attention.

When blockages are identified, the first step is to safely access the gutters using a stable ladder. Use a gutter scoop or trowel to remove leaves, twigs, and other debris. For stubborn clogs in downspouts, a plumber’s snake can be effective in breaking up compacted debris.

Before every inspection, ensure your safety gear is in place, including gloves and a sturdy ladder. For serious clogs, consider hiring a professional gutter cleaning service to avoid damage or injury.

Suggestions for Regular Maintenance

Establishing a regular cleaning schedule is vital for the longevity of your gutters. Aim to clear them at least twice a year or more frequently if you live near many trees. Regular cleaning helps prevent debris buildup and reduces the frequency of blockages.

In addition to cleaning, consider installing gutter guards. They can significantly reduce the accumulation of leaves and twigs. Trimming nearby tree branches can further decrease debris that falls into your gutters.

Finally, monitor standing water in your gutters. This can indicate poor drainage or blockages that require immediate attention. By practicing these maintenance tips consistently, you can extend the lifespan of your gutter system and keep your home protected from water damage.

Finishing Touches

After cleaning your covered gutters, it’s essential to focus on the finishing touches. This ensures your gutters not only function properly but also look good. You will want to inspect for stains and manage any potential mold or mildew growth.

Inspecting for and Removing Stains

Begin by visually inspecting your gutters for any unsightly stains. Common culprits are rust, dirt, or organic residue. Using a ladder, check both the exterior and interior surfaces. For stubborn stains, create a cleaning solution by mixing equal parts vinegar and water.

Apply this solution using a soft cloth or a sponge, allowing it to sit for a few minutes. Rinse thoroughly with water to ensure no cleaning solution remains. For rust stains, a specialized rust remover may be necessary.

Regular maintenance, including periodic inspections, helps catch these issues early and maintains the aesthetic appeal of your home.

Detection and Removal of Mold and Mildew

Mold and mildew thrive in damp environments, making gutter systems a prime target. Start by checking for any visible signs of growth. Use a flashlight if necessary to inspect dark corners.

To eliminate mold or mildew, prepare a mixture of one part bleach and three parts water. Wearing protective gloves and a mask, apply the mixture to the affected areas. Scrub gently with a soft brush to loosen the growth, then rinse thoroughly with a hose.

Ensure your gutters are cleaned regularly to prevent future mold and mildew buildup. Consider integrating a maintenance schedule that includes proper gutter cleaning to reduce moisture retention.

Frequently Asked Questions

Cleaning covered gutters involves specific techniques and tools to ensure effectiveness while preventing damage. This section addresses common queries related to the cleaning process and maintenance of gutters with guards.

What is the most effective method for cleaning gutters with installed gutter guards?

The most effective method involves using a wet/dry vacuum with a special gutter cleaning attachment. This tool vacuums out debris without damaging the guard or gutters, ensuring thorough cleaning.

Can cleaning covered gutters be done safely from the ground, and if so, how?

Yes, you can clean covered gutters safely from the ground. Using a pole-mounted cleaning tool, you can remove debris without climbing a ladder. Ensure that the tool reaches the gutter’s height to maintain safety.

What are the recommended tools for cleaning gutter guards without causing damage?

Recommended tools include a soft-bristle brush, a wet/dry vacuum, and a pole extension. These tools allow you to clean effectively while minimizing risks of scratching or harming the gutter guard material.

How often should gutters with covers be inspected and cleaned to ensure proper function?

You should inspect and clean gutters with covers at least twice a year, preferably in spring and fall. Regular inspections help identify potential blockages and ensure that water flows properly.

Is it necessary to remove gutter guards to clean underneath, and what is the process?

In many cases, it is not necessary to remove gutter guards. If a buildup occurs, you may need to detach the guards gently, clean underneath, and reattach them, ensuring not to damage any fasteners.

What should be the estimated cost for a professional gutter guard cleaning service?

The estimated cost for a professional cleaning service typically ranges from $100 to $300, depending on the extent of cleaning required and your area’s specific rates. Always request a detailed estimate before proceeding.

Where Are the Condenser Coils on a Whirlpool Refrigerator? A Guide to Their Location and Maintenance

Locating the condenser coils on your Whirlpool refrigerator is essential for maintaining its efficiency. Typically, the condenser coils can be found either at the back of the unit or underneath it, depending on the model. These coils play a crucial role in the refrigeration process, and keeping them clean is vital for optimal performance.

Understanding the placement of these refrigerator components can save you time and enhance the lifespan of your appliance. Regular maintenance, including cleaning the coils, can prevent unnecessary breakdowns and ensure your refrigerator runs smoothly. Knowing where to find and how to care for these coils can lead to significant improvements in your fridge’s energy efficiency.

By taking the time to check on your Whirlpool refrigerator’s condenser coils, you’re taking a proactive approach to home maintenance. This simple step can lead to better cooling performance and lower energy bills, making it a valuable tip for any homeowner.

Understanding Whirlpool Refrigerator Components

A Whirlpool refrigerator relies on a few key components to ensure effective cooling. Among these, the condenser coils, compressor, and evaporator coils play critical roles in refrigerant management and temperature regulation.

Function of Condenser Coils

Condenser coils are essential for the cooling process in your refrigerator. Located typically at the back or bottom, they expel heat from the refrigerant, allowing it to transition from gas to liquid. This transformation is crucial, as it prepares the refrigerant for its next phase in the cooling cycle.

When cleaning the condenser coils, it’s important to remove dust and debris, which can impair efficiency. Using a vacuum with a soft brush can help you maintain these coils. A clean set of coils enhances cooling efficiency and prolongs the life of your refrigerator.

Role of the Compressor

The compressor is another vital component, acting as the heart of the refrigeration system. It pumps the refrigerant through the coils and is responsible for compressing the refrigerant gas, raising its pressure and temperature. The high-pressure gas then enters the condenser coils, where it sheds heat.

In essence, the compressor ensures that refrigerant circulates properly, enabling consistent cooling throughout the appliance. An efficient compressor contributes to lower energy costs and is key to preventing breakdowns. Regular maintenance of this component can extend its lifespan.

Importance of the Evaporator Coils

Evaporator coils work in conjunction with the other components to complete the refrigeration cycle. Located inside the refrigerator and freezer sections, these coils absorb heat from the interior, cooling the air within. This process transforms the refrigerant from liquid to gas, completing the cycle.

Keeping the evaporator coils free from frost or ice is critical to optimal performance. If these coils become blocked, the refrigerator may not cool effectively. Regular inspection will help avoid potential issues, ensuring your refrigerator runs smoothly and efficiently.

Locating the Condenser Coils

Identifying the location of the condenser coils in your Whirlpool refrigerator is essential for effective maintenance and troubleshooting. Knowing where these coils are situated can help you keep your refrigerator running efficiently and prevent cooling issues.

Typical Placement

Condenser coils are commonly located in two main areas of Whirlpool refrigerators: at the back or underneath the unit.

  • Back Location: If your refrigerator has coils at the back, they will typically run vertically along the rear panel.
  • Bottom Location: For many models, especially newer ones, the coils are found at the bottom front behind a removable toe panel.

You may need to pull the refrigerator away from the wall to gain access. Regular inspection of these coils is crucial, as dust and debris accumulation can hinder performance and lead to cooling problems.

Accessing Hidden Coils

When the coils are positioned in less obvious locations, accessing them can be challenging but manageable.

  1. Remove Panels: For bottom-mounted coils, start by locating and removing the toe kick or lower front panel.
  2. Use a Vacuum: Once exposed, use a vacuum cleaner with a soft brush attachment to gently clean the coils.

In some cases, the coils may be tucked away, making it difficult to see them. Refer to your specific model manual if needed, as some units might have unique configurations. Keeping these areas clean is vital for proper refrigerator troubleshooting and long-term efficiency.

Maintenance of Refrigerator Coils

Maintaining the condenser coils of your Whirlpool refrigerator is crucial for optimal performance. Proper cleaning and regular maintenance can enhance efficiency and prolong the life of the appliance.

Cleaning Process

To clean the condenser coils, follow these steps for effective maintenance:

  1. Unplug the Refrigerator: Before beginning, ensure your refrigerator is unplugged to avoid any electrical hazards.
  2. Locate the Coils: Depending on your model, the coils may be at the back or beneath the unit. Refer to your manual if needed.
  3. Remove Obstacles: If the coils are located under the refrigerator, remove the lower toe panel for better access.
  4. Vacuum the Coils: Use a vacuum with a brush attachment to gently clean the coils. Ensure you remove dust and debris thoroughly.
  5. Clean the Condenser Fan: Inspect the condenser fan for dust build-up. Clean it using a soft cloth or a can of compressed air. A clean fan blade ensures effective cooling.

Regular cleaning of the coils improves energy efficiency by preventing overheating and helps in maintaining optimal cooling performance.

Frequency of Cleaning

The frequency of cleaning your refrigerator’s condenser coils depends on your home environment. Generally, you should aim to clean the coils every 6 to 12 months.

Consider these factors that may require more frequent cleaning:

  • Pet Hair: If you have pets, clean every 3 to 6 months to prevent fur buildup.
  • Dusty Environments: Homes in dusty areas may need more frequent attention.
  • Cluttered Spaces: Ensure that debris isn’t accumulating around the refrigerator, as this can obstruct airflow.

Regular maintenance not only enhances cooling efficiency but can also extend the overall lifespan of the appliance. Keeping the coils clear of dust ensures that the refrigerator operates effectively.

Troubleshooting Poor Refrigerator Performance

If your Whirlpool refrigerator isn’t functioning as it should, identifying the root cause is essential. Common issues usually involve the condenser coils and ice production, which affect cooling efficiency. Here’s how to troubleshoot these problems.

Identifying Common Issues

Begin by checking the condenser coils. Dust and debris can accumulate, hindering performance. Locate the coils, typically either on the back or beneath the unit. Clean them using a vacuum with a soft brush attachment.

Next, consider poor ice production. If your icemaker isn’t producing ice, check the water supply for blockages. Ensure that the water line is connected and free of ice.

Additionally, keep an eye on the temperature settings. The fridge should be set between 37°F and 40°F while the freezer is at 0°F. Verify if the door seals are tight; worn seals can lead to temperature fluctuations.

When to Call a Professional

If you’ve cleaned and checked everything but your refrigerator still isn’t performing well, it may be time to seek help.

  • Look for strange noises: Rumbling or buzzing sounds might indicate a failing compressor or a malfunctioning fan.
  • Inconsistent temperatures: If your fridge frequently fluctuates in temperature despite correct settings, an electrical issue or a faulty thermostat could be at play.
  • Icemaker problems can also signal deeper issues. Low water pressure or malfunctioning components typically require expert assessment.

If these concerns persist, contacting a qualified technician ensures accurate diagnosis and repair, helping to restore your refrigerator’s performance efficiently.

Optimizing Refrigerator Efficiency

To enhance your Whirlpool refrigerator’s efficiency, focus on several key areas:

  1. Condenser Coils: These coils play a crucial role in cooling. Locate them typically at the back or beneath your refrigerator. Ensure they are clean and free of dust and debris for optimal performance. Regular cleaning is recommended.
  2. Evaporator Coil: This coil absorbs heat from inside the fridge. Ensure the airflow around the evaporator is not blocked. Clutter can hinder its function, leading to less efficient cooling.
  3. Fridge Door: Regularly check the door seals for wear and tear. A damaged seal can allow warm air to enter, making your fridge work harder. Consider replacing seals if they show signs of damage.
  4. Temperature Settings: Keep your refrigerator at 37°F and the freezer at 0°F. This balance maintains food freshness while consuming less energy.
  5. Airflow: Maintain adequate space around your refrigerator for airflow. Avoid placing it too close to walls or cabinets to prevent overheating.

By focusing on these areas, you can improve the efficiency of your Whirlpool refrigerator, extend its lifespan, and save on energy costs. Regular upkeep prevents common issues and ensures your appliance operates at its best.

Frequently Asked Questions

Finding and maintaining the condenser coils on your Whirlpool refrigerator is essential for optimal performance. This section addresses common inquiries related to their location, cleaning, and maintenance.

How do I locate the condenser coils on a Whirlpool side-by-side refrigerator?

On a Whirlpool side-by-side refrigerator, the condenser coils are usually located at the back of the unit. You may need to move the refrigerator away from the wall for better access.

What is the process for cleaning the condenser coils on a Whirlpool fridge?

To clean the condenser coils, first unplug the refrigerator. Use a vacuum cleaner with a soft brush attachment to gently remove dust and debris from the coils and surrounding areas.

Where can I find the condenser coils on a Whirlpool French Door refrigerator?

In a Whirlpool French Door refrigerator, the condenser coils are typically located at the bottom rear of the appliance. You might need to remove a cover panel to access them effectively.

Which tool is recommended for cleaning Whirlpool refrigerator coils?

A vacuum cleaner with a soft brush attachment is recommended for cleaning Whirlpool refrigerator coils. This tool helps remove dust without damaging the coils.

What signs indicate that the condenser coils in a refrigerator may be blocked?

Signs of blocked condenser coils include increased energy consumption and the refrigerator not cooling efficiently. You may also notice unusual noise levels coming from the compressor.

Is there a specific method to clean the condenser coils on a Whirlpool refrigerator?

Yes, begin by unplugging the refrigerator. Carefully vacuum the coils and the area underneath. For stubborn grime, wipe the coils with a damp cloth and ensure they dry thoroughly before reconnecting the power.

Can I Use Compressed Air to Clean Refrigerator Coils? A Practical Guide

Cleaning refrigerator coils is essential for optimal appliance performance, and many homeowners wonder about the best methods to do so. You can use compressed air to clean refrigerator coils effectively, but it requires careful consideration to avoid potential downsides. Using compressed air can dislodge dust and debris in hard-to-reach areas, making it a convenient option when performed correctly.

In addition to compressed air, several other methods exist for cleaning refrigerator coils. Each has its advantages and possible drawbacks, depending on your specific situation. This article will guide you through the best practices for maintaining your refrigerator coils, ensuring efficiency and longevity for your appliance.

Understanding Refrigerator Coils

Refrigerator coils play a crucial role in your appliance’s operation. They help maintain energy efficiency by transferring heat away from the interior to keep your food cold.

There are two main types of coils in a refrigerator:

  • Condenser Coils: Located on the back or bottom, these coils release the heat absorbed from inside the fridge to the outside air.
  • Evaporator Coils: Found inside the fridge, they absorb heat, allowing the refrigerant to cool the air circulating within your appliance.

Keeping these coils clean is essential. Dust and debris can accumulate, hindering their performance. When coils are dirty, your refrigerator has to work harder, leading to increased energy consumption and reduced lifespan.

Using compressed air is an effective method to clean condenser coils. It reaches tight spaces, dislodging dust without causing damage. For best results, make sure your refrigerator is unplugged before cleaning.

Regular maintenance of your refrigerator coils not only improves energy efficiency but also saves you money in the long run. Clean coils can lead to better cooling performance and reduced wear, enhancing the overall lifespan of your appliance.

Benefits of Cleaning Refrigerator Coils

Cleaning refrigerator coils brings several advantages that enhance performance and efficiency.

1. Improved Energy Efficiency
Dirty coils can hinder heat transfer, making your refrigerator work harder. Regular cleaning can lead to more efficient operation, reducing energy consumption and lowering your electricity bills.

2. Enhanced Cooling Performance
Clean coils help maintain optimal cooling. This means your food stays fresher for longer, reducing spoilage and waste.

3. Extended Appliance Lifespan
By keeping your refrigerator coils clean, you support the longevity of your appliance. Less strain on the system translates to fewer repairs and a longer lifespan.

4. Easy Maintenance
Using tools like compressed air can simplify the cleaning process. This method allows you to reach tight spaces and effectively remove dust and debris.

5. Environmental Benefits
Increased energy efficiency not only saves you money but also reduces your carbon footprint. A well-maintained refrigerator is better for the planet.

Regularly cleaning your refrigerator coils is a simple yet effective step in home maintenance. This proactive measure can result in significant benefits for both your wallet and the environment.

Preparing to Clean Refrigerator Coils

Cleaning refrigerator coils is essential for maintaining efficiency. Before you start, focus on safety and gather the necessary tools. This preparation will make the cleaning process effective and straightforward.

Safety Considerations

Before you begin, ensure your safety by unplugging the refrigerator. This eliminates the risk of electric shock while working on the coils.

Wear Safety Gear: Use safety goggles and a dust mask. These items protect your eyes and lungs from dust and debris.

Secure the Area: Clear the area around the refrigerator. This reduces the risk of tripping over items and gives you space to work comfortably.

Avoid Sharp Objects: When cleaning, avoid using sharp tools that could damage the coils. This can lead to costly repairs.

Be Aware of Possible Dust: Dust accumulation can be significant. Use a vacuum with a HEPA filter to minimize dust spread in your home.

Gathering Necessary Tools

Having the right tools is crucial for an effective cleaning process. Start by gathering the following items:

  • Coil Brush: This tool is specifically designed to reach between coils, making it efficient for removing dust.
  • Air Compressor: Using an air compressor can blow away stubborn dust that a vacuum may miss.
  • Shop Vac: A shop vac can quickly collect debris from the area, making cleanup easier.
  • Compressed Air Cans: These are useful for reaching tight spots where larger tools cannot fit.
  • Soft Cloths: Use these for wiping down areas around the coils after the dust has been removed.

Preparing properly means you can clean the coils safely and effectively. By focusing on safety and having the right tools, you ensure the process is smooth and beneficial for your refrigerator’s performance.

Step-by-Step Guide to Cleaning Coils with Compressed Air

Cleaning your refrigerator coils with compressed air can effectively remove dust and debris, enhancing your appliance’s efficiency. Follow these steps for optimal results.

Accessing the Coils

To begin, locate the coils on your refrigerator. They are usually found either at the back or beneath the appliance.

  1. Unplug the Refrigerator: Safety first. Disconnect the refrigerator from the power source to avoid any electrical hazards.
  2. Move the Refrigerator: If the coils are at the back, carefully pull the refrigerator away from the wall. If they’re underneath, ensure you have sufficient space to work.
  3. Check the Area: Look for any visible dust or debris near the coils. This can give you an idea of how much cleaning is needed.

Gather your cleaning materials, including a compressor and appropriate nozzle attachment, to effectively reach and clean those coils.

Compressed Air Cleaning Technique

Using compressed air can effectively blow out dust and dirt from the coils. Here’s how to do it properly:

  1. Attach the Nozzle: Connect the narrow nozzle to your compressor. This will help deliver focused air to tight spaces.
  2. Maintain Distance: Hold the nozzle about 6-12 inches from the coils. This distance prevents moisture from the air compressor from reaching the coils.
  3. Blow Out Dust: Turn on the compressor and direct the air towards the coils. Sweep from top to bottom to ensure all debris is removed. Move the nozzle along the length of the coil to dislodge any stubborn dust.
  4. Check Progress: Periodically inspect the coils to see how much dust has been dislodged. Repeat the process as necessary until the coils look clean.
  5. Wear Protective Gear: Utilize a dust mask to avoid inhaling particles that may become airborne during this process.

Post-Cleaning Steps

After cleaning, take a few additional actions to ensure your refrigerator functions efficiently:

  1. Inspect the Coils: Check that all dust and debris have been removed. If any particles remain, consider a second pass with the compressed air.
  2. Plug the Refrigerator Back In: Once satisfied with the cleaning, reconnect the refrigerator to the power source.
  3. Return the Appliance: Carefully push the refrigerator back into its original position. Ensure no cords or hoses are pinched.
  4. Set a Cleaning Schedule: Make a note to clean the coils every six months or more frequently if you have pets or high dust conditions.

Following these steps will help maintain your refrigerator and extend its lifespan by ensuring it operates efficiently.

Maintaining Your Refrigerator Post-Cleaning

After cleaning your refrigerator coils, it’s crucial to take steps to maintain its efficiency. Regular maintenance keeps your appliance running smoothly and prolongs its lifespan.

Check the Temperature Settings: Ensure your refrigerator is set between 35°F and 38°F. This range helps preserve food without overworking the compressor.

Clean Coils Regularly: Aim to clean the coils every six months. Use a vacuum or a can of compressed air to remove dust buildup, ensuring the appliance operates efficiently.

Inspect Door Seals: Examine the door seals for tears or gaps. Faulty seals can lead to energy waste. If damaged, replace them to improve efficiency.

Clear Space Around the Refrigerator: Maintain at least a few inches of space around your fridge. This promotes airflow and helps prevent overheating.

Monitor for Unusual Noises: If the refrigerator makes strange sounds or runs constantly, check for issues that might require attention. Early detection can prevent larger problems.

Schedule Regular Maintenance: Consider professional home maintenance services. These can include dryer vent cleaning or pressure washing, which help keep your home systems in top condition.

By implementing these practices, you ensure your refrigerator operates efficiently, ultimately saving you money on energy costs and extending its lifespan.

Understanding Warranty and Service Information

When considering using compressed air to clean refrigerator coils, it’s essential to understand your warranty conditions. Many manufacturers require that maintenance be performed according to specific guidelines.

Key Points to Remember:

  • Warranty Coverage: Check if using compressed air to clean coils affects your warranty. Some warranties may become void if improper cleaning methods are used.
  • Service Information: Refer to your refrigerator’s manual for recommended maintenance practices. This can include details on cleaning methods and any necessary precautions.
  • Privacy Policy: When you consult service providers for advice or assistance, review their privacy policy. Understand how they will handle your personal information.

Considerations for Maintenance:

  • Use Certified Technicians: If you’re uncertain, hiring professionals who understand warranty requirements can prevent issues.
  • Scheduled Services: Regular preventive maintenance from services like Totally Maintained can help extend the lifespan of your appliance.
  • Links for Further Information: Make use of manufacturer websites and trusted service providers for more detailed service guidelines.

Maintaining your refrigerator properly not only keeps it running efficiently but also ensures your warranty remains intact.

Frequently Asked Questions

When cleaning refrigerator coils, various methods and tools can be used effectively. Understanding safety precautions and the location of the condenser coils can help ensure the job is done correctly and efficiently.

What is the best method to clean refrigerator coils?

The best method typically involves using a vacuum cleaner with a brush attachment or compressed air. Air compressors are particularly effective because they can blow dust and debris out of tight spaces. For optimal cleanliness, ensure the refrigerator is unplugged before cleaning.

Is it safe to use a vacuum to clean fridge coils?

Yes, using a vacuum to clean fridge coils is safe as long as you use the appropriate attachments. A brush attachment can aid in removing dust without damaging the coils. Avoid using a vacuum with a direct hose attachment, as this may cause harm.

Where can I find the condenser coils on my refrigerator?

Condenser coils are usually located at the back or bottom of the refrigerator. If you have trouble locating them, consult your appliance’s user manual for specific guidance. Checking behind or underneath the unit will often reveal the coils.

What alternatives are there to using a brush for cleaning refrigerator coils?

If a brush isn’t available, you can use compressed air or a microfiber cloth to clean the coils. Compressed air is effective in blowing away dirt that is hard to reach, while a cloth can help wipe down accessible areas.

What precautions should be taken when cleaning a refrigerator compressor?

Before beginning, unplug the refrigerator to ensure safety. Wear gloves to protect your hands from sharp edges. Be cautious not to damage any components while cleaning the compressor area, as this can lead to ineffective operation.

Can homemade cleaners be effective for refrigerator coil maintenance?

Homemade cleaners can be effective for regular maintenance but should be used cautiously. A simple solution of vinegar and water may help remove grime. Always wipe off any residue with a damp cloth to avoid attracting more dirt.

Why Flush a Water Heater: Understanding the Benefits for Efficiency and Longevity

Flushing your water heater is a crucial maintenance task that many homeowners overlook. Regularly flushing your water heater can prevent sediment buildup, which enhances its efficiency and prolongs its lifespan. By taking this simple step, you can ensure that your water heater operates effectively, providing hot water when you need it.

Neglecting to flush your water heater can lead to various issues, such as decreased efficiency and higher energy bills. Over time, minerals and sediment accumulate in the tank, causing it to work harder to heat water. This not only wastes energy but can also result in costly repairs down the line.

Incorporating a routine flush into your maintenance plan helps avoid these problems and keeps your system running smoothly. You’ll find that the benefits far outweigh the minimal effort required to perform this task. Understanding the importance of flushing your water heater is the first step towards maintaining a comfortable and efficient home.

The Importance of Regular Maintenance

Regular maintenance of your water heater is crucial for ensuring its efficiency and longevity. By understanding the significance of managing sediment buildup and maintaining proper water pressure, you can enhance your water heater’s performance and extend its lifespan.

Preventing Sediment Build Up

Sediment buildup in your water heater can lead to various issues, including decreased efficiency and increased energy bills. Over time, minerals such as calcium and lime accumulate at the bottom of the tank.

To prevent this, consider flushing your water heater annually. Doing so removes the accumulated sediments, allowing the unit to operate more effectively. This process not only improves heating efficiency but also prolongs the life of the water heater, ultimately saving you money on repairs and replacements.

Maintaining Water Pressure and Heating Efficiency

Regular maintenance, including flushing the tank, helps maintain optimal water pressure. Sedimentary deposits can clog pipes and reduce water flow, which affects the entire plumbing system in your home.

By keeping the tank clean, you ensure that water heats more efficiently. This reduces energy consumption and can lead to lower utility bills. Moreover, proper water pressure helps improve the performance of various appliances, such as dishwashers and washing machines, making maintenance an essential part of home care.

Understanding Your Water Heater

Knowing the type of water heater you have and its essential components can enhance your maintenance efforts. Proper understanding allows you to effectively flush your system, ensuring longevity and efficiency.

Different Types of Water Heaters

Water heaters come in various types, each with unique features. Electric water heaters utilize electrical elements to heat water and are usually found in homes without gas supply. They are popular for their efficiency and lower initial costs.

Tankless water heaters heat water on demand, providing hot water without storing it in a tank. This type can save space and energy but may require a higher upfront investment.

Hot water tanks, commonly used in traditional setups, store and maintain a reservoir of heated water. Regular maintenance, especially flushing, is crucial to prevent sediment buildup and improve energy efficiency.

Components Vital for Flushing

Flushing a water heater involves a few key components to facilitate the process. The drain valve is essential for emptying the tank. It is located at the bottom of the water heater and connects to a garden hose for drainage.

The shutoff valve is crucial as well. This valve allows you to stop the water supply before flushing begins, preventing potential overflow.

Performing regular flushing can significantly improve the performance and lifespan of your water heater, keeping it functioning optimally.

Step-by-Step Flushing Guide

Flushing your water heater is an essential maintenance task that ensures optimal performance and longevity. Follow these steps to safely and effectively flush your heater.

Safety Measures Before You Start

Before beginning, ensure that your safety is a priority. Start by turning off the power to your electric water heater at the circuit breaker. If it’s a gas water heater, set the thermostat to the “Vacation” setting.

Next, shut off the cold water supply by closing the shutoff valve. This valve is usually located above the heater. Make sure to wear gloves and goggles to protect yourself from potential hot water splashes.

Finally, check your garden hose for any leaks. Connect it to the drain valve at the bottom of the tank. Run the other end outside or into a drain area. These precautions will help ensure a safe flushing process.

Draining the Tank

With safety measures in place, you can begin draining the tank. First, turn on a hot water faucet in your home. This will help prevent a vacuum from forming in the pipes.

Next, open the drain valve on the water heater using a wrench if necessary. As the tank drains, monitor the flow. If you notice sediment mixed with water, this indicates that the flushing process is working effectively.

Once the tank is empty, it’s important to flush it for a few minutes with a cold water supply. Open the shutoff valve to let cold water flow through the tank. This helps dislodge any remaining sediment.

Cleaning the Water Heater

After draining and flushing, you can clean the tank. While the tank is empty, visually inspect the interior for any signs of damage, corrosion, or excessive sediment build-up.

If necessary, use a long-handled brush to gently scrub the interior surfaces. This step is critical for maintaining efficiency and preventing potential issues. After cleaning, reconnect the garden hose and close the drain valve securely.

Once everything is reassembled, you can refill the tank by turning on the cold water supply. Remember to bleed air from the system by opening hot water faucets until water flows steadily. This ensures that your water heater is ready for normal operation again.

Post-Flushing Procedures

After flushing your water heater, there are essential steps to follow to ensure everything is reconnected correctly and operating efficiently. These procedures will help you restore functionality safely and effectively.

Reconnecting Your Water Heater

First, ensure that you have turned off the water heater’s power before starting this process. For electric water heaters, switch off the circuit breaker. If you have a gas heater, turn the thermostat to the “off” position.

Next, reconnect the cold water supply line. Open the valve to allow water to flow back into the tank. Check for any leaks at the connection points. Once the tank is filled to the proper level, you’ll see water flowing from the hot water faucet.

For tankless water heaters, reconnect the inlet and outlet piping, ensuring tight seals. It’s important to inspect all connections visually before proceeding to restore power. If you notice any leaks or issues, address them immediately.

Restoring Power and Water Supply

After confirming everything is connected properly, it’s time to restore power. For electric water heaters, switch the circuit breaker back on. Allow the heater some time to heat the water. This may take several minutes, so be patient.

If it’s a gas water heater, turn the thermostat back to the desired temperature setting. Light the pilot if needed, following the manufacturer’s instructions.

Once these steps are complete, open a hot water faucet to release any trapped air and monitor the water flow. This will help ensure the system operates effectively. As the hot water begins to flow, check for leaks again. This final inspection is crucial for ensuring your hot water heater is ready for use.

When to Seek Professional Help

Knowing when to call a professional for your water heater can save you time, money, and stress. Certain warning signs indicate that your system may require expert attention, and finding a verified professional can ensure the job is done correctly.

Identifying Potential Issues

If you notice unusual noises, such as popping or rumbling sounds, this could indicate sediment buildup in your water heater. Additionally, water discoloration or an unpleasant odor may suggest that your heater requires attention.

Leaks or pooling water around the unit are critical signs that immediate professional intervention is necessary. Ignoring these symptoms can lead to more extensive damage.

You may also want to seek help if the water temperature is inconsistent or if the heater frequently shuts off. These problems can signal underlying issues that need specialized knowledge to resolve effectively.

Finding Verified Experts

When looking for a professional, always seek verified experts in home maintenance. Start your search by checking platforms like JustAnswer for trustworthy recommendations.

Look for professionals who have specific experience with water heaters. Checking reviews and credentials is crucial.

Additionally, consider companies that focus on preventive maintenance. They can help extend the lifespan of your systems and address issues before they escalate. Engaging verified professionals ensures your water heater operates safely and efficiently.

Frequently Asked Questions

Understanding the specifics of water heater maintenance can help you ensure optimal performance and longevity. Here are answers to common questions regarding flushing your water heater.

How often should a water heater be flushed for optimal performance?

Water heaters should typically be flushed every one to three years. This frequency can depend on your water source and the amount of sediment that builds up in your specific model.

What are the necessary steps to flush an electric water heater effectively?

To flush an electric water heater, start by turning off the power supply. Connect a garden hose to the drain valve, open the valve, and let the water flow until it runs clear. Be sure to close the valve and disconnect the hose afterward.

Can cleaning a hot water heater with vinegar improve its efficiency and lifespan?

Yes, cleaning a hot water heater with vinegar can help remove mineral buildup. This process can enhance efficiency and may extend the lifespan of the unit, especially in areas with hard water.

What are the signs that indicate it’s time to flush my water heater?

Signs that you should flush your water heater include discolored water, strange noises, or reduced hot water supply. If you notice sediment buildup during a flush, it’s a good indication that routine maintenance is needed.

How does regularly flushing a water heater contribute to its longevity and safety?

Regular flushing prevents sediment accumulation that can lead to corrosion and damage. This maintenance step ensures your water heater operates efficiently, which helps to prolong its lifespan and maintains safety.

What tools and equipment are required to perform a hot water heater flush?

To flush your hot water heater, you need a garden hose, a bucket, and a pair of pliers for the drain valve if necessary. Wearing gloves is also recommended for safety during the flushing process.

How Often Do Gutters Need Cleaning for Optimal Home Maintenance?

Gutters play a crucial role in protecting your home from water damage, but many homeowners overlook their maintenance. To ensure your gutters function effectively, they should be cleaned at least twice a year, typically in the spring and fall. Neglecting this task can lead to clogs, which may cause water to overflow and damage your roof and foundation.

A person is standing on a ladder, scooping out debris from a clogged gutter. Leaves and dirt are scattered on the ground below

If your home is surrounded by trees, you may need to clean your gutters more frequently to remove fallen leaves and debris. Regular gutter cleaning not only helps prevent costly repairs but also extends the lifespan of your home’s drainage system. Understanding the right frequency for gutter cleaning is essential for maintaining the integrity of your property and avoiding unnecessary expenses.

Why Cleaning Gutters is Essential

Maintaining clean gutters is critical for protecting your home from various issues that can arise from neglect. Regular cleaning helps prevent water damage, ice dams, and drainage problems that can lead to extensive repairs and costly consequences.

Preventing Water Damage

Clogged gutters can lead to significant water damage to your home. When rainwater is unable to flow freely through the gutters, it can overflow. This overflow can saturate the foundation, leading to cracks and instability.

Additionally, water can seep into the walls, causing mold and mildew to develop. These issues not only affect the structural integrity but can also pose health risks to your family. Keeping your gutters clean ensures that rainwater is effectively redirected away from your home, thus preventing these expensive problems.

Avoiding Ice Dams

During winter, blocked gutters can cause ice dams to form. Ice dams occur when melting snow flows down the roof and refreezes at the gutters. This buildup creates a barrier that prevents proper drainage.

As a result, water can back up under shingles and lead to leaks inside your home. The consequences include damaged ceilings, walls, and insulation. Regularly cleaning your gutters prevents the accumulation of debris that can contribute to ice dam formation and keeps your roof in good condition.

Mitigating Drainage Issues

Effective drainage is essential for maintaining the integrity of your landscape and foundation. Clogged gutters can lead to poor drainage, resulting in water pooling around the foundation of your home. This pooled water can erode soil, compromise landscaping, and lead to pricey landscaping repairs.

When gutters are clean, water is directed away from your property as intended. This practice also reduces the risk of flooding in basements and ensures that your yard stays healthy and well-watered without unnecessary runoff. Regular gutter cleaning ultimately helps maintain both your property’s aesthetic and its structural integrity.

Signs Your Gutters Need Cleaning

Your gutters play an essential role in directing water away from your home. When they become clogged, it can lead to serious issues. Look for specific signs that indicate it’s time for a thorough cleaning to prevent damage and maintain the integrity of your home.

Visible Debris and Plant Growth

If you notice leaves, twigs, or other debris accumulating in your gutters, it’s a clear sign they need attention. Clogs can trap moisture, creating an environment for moss or even small plants to grow. Clear gutters should not have any noticeable debris or signs of vegetation.

Regularly inspect your gutters to ensure they are free from clogs that can lead to blockages. If plants are growing within the gutters, it’s likely the drainage is compromised. This debris can obstruct water flow and ultimately damage your home’s foundation or walls.

Water Spillover During Rain

One of the most immediate indicators that your gutters are clogged is when water spills over the edges during a rainstorm. If your gutters cannot effectively channel water away from your roof, this overflow can saturate your landscaping and lead to erosion or flooding around your foundation.

Monitor your gutters during rain to check for this overflow. If water is spilling out, it may be due to debris blocking the downspouts. Address this issue promptly to avoid water damage to your property.

Sagging or Separated Gutters

If your gutters appear to sag or have sections that are separating from the house, this can indicate they are full of debris or the support brackets are damaged. Clogged gutters that can’t support their weight may also start bending, leading to structural issues.

Ensure your gutters are securely attached and level. A thorough cleaning can often resolve minor sagging issues caused by accumulated debris. However, if you notice significant sagging or separation, it may be time to consult with professionals to assess and repair any harm done to your gutter system.

How Often Should Gutters Be Cleaned

Maintaining your gutters is crucial for preventing water damage and ensuring your home remains in excellent condition. The frequency of gutter cleaning can vary based on specific factors, including location and foliage around your home.

Typical Gutter Cleaning Frequency

For most homes, it’s recommended that you clean your gutters at least twice a year. This schedule typically includes cleanings in spring and fall. These seasons are crucial as they often coincide with periods of heavy rainfall and leaf shedding, leading to the accumulation of debris.

If you live in areas with significant tree cover, you may need to increase this frequency to three or four times a year. In contrast, homes without nearby trees might only require annual cleanings. Regular maintenance helps prevent clogs, which can lead to costly repairs due to water damage.

Factors Affecting Cleaning Schedule

Several factors can influence how often you need to clean your gutters.

  1. Proximity to Trees: Homes surrounded by trees will gather more debris, leading to more frequent cleanings.
  2. Local Climate: Locations with heavy rainfall or storms may necessitate more regular upkeep due to increased debris and water flow.
  3. Type of Gutters: Different gutter systems may perform better or worse under various conditions. Some designs might require more frequent inspections.
  4. Roof Type: Roofs with a steep pitch or unique materials can also impact how debris collects in your gutters.

By considering these factors, you can develop a tailored cleaning schedule that best fits your home maintenance needs.

Choosing Between DIY and Professional Gutter Cleaning

When deciding how to clean your gutters, weighing the benefits and drawbacks of doing it yourself versus hiring a professional is crucial. Each option has unique advantages that can influence your choice based on your circumstances.

Pros and Cons of DIY Cleaning

Pros:

  • Cost-Effective: DIY cleaning can save you money, as you won’t pay for labor costs. All you need are basic tools like a ladder, gloves, and a trowel.
  • Control and Flexibility: You can choose when to clean your gutters, aligning it with your schedule and needs.
  • Learning Experience: This can be an opportunity to learn more about your home’s maintenance needs.

Cons:

  • Safety Risks: Climbing ladders poses a risk of falls, and without proper safety equipment, you may endanger yourself.
  • Time-Consuming: Cleaning gutters can take much longer than expected, particularly if you face stubborn debris.
  • Inexperience: Without experience, you might overlook issues like misaligned gutters or hidden damage.

When to Hire a Professional

Hiring a professional for gutter cleaning is beneficial in specific situations.

  • Height and Accessibility: If your gutters are high or difficult to reach, a professional will have the right equipment and safety training.
  • Extensive Damage: If you suspect structural problems or see signs of wear, a pro can assess and address these issues effectively.
  • Time Constraints: If your schedule is tight, a professional service can clean your gutters quickly and efficiently, freeing up your time for other tasks.

Professional gutter cleaning services can provide thorough cleanings, often including inspections for potential issues. Understanding typical gutter cleaning costs can also help you make an informed decision.

Enhancing Gutter Functionality

To maintain proper drainage and prevent water damage, enhancing the functionality of your gutters is essential. Key measures include installing gutter guards and performing regular maintenance on downspouts. Both actions significantly reduce debris build-up and ensure smooth water flow.

Installing Gutter Guards

Installing gutter guards can be a highly effective solution for improving gutter performance. These guards act as a barrier, preventing leaves and debris from entering your gutters while allowing water to flow freely.

Benefits of Gutter Guards:

  • Reduced Maintenance: With guards installed, you can decrease the frequency of gutter cleaning.
  • Prevention of Clogs: Guards keep out larger debris, reducing clogs in the downspouts.
  • Protection from Ice Dams: They help prevent ice build-up during winter months.

You can find various types of gutter guards, such as mesh screens, reverse curves, and foam inserts. Selecting the right type based on your specific needs and local climate is crucial. Proper installation ensures that they function effectively.

Regular Downspout Check and Maintenance

Regularly checking and maintaining your downspouts is vital for gutter efficacy. Clogged downspouts can lead to overflow, which damages your home’s foundation and landscaping.

Key Maintenance Tips:

  • Inspect for Blockages: Periodically check downspouts for debris or clogs. Clear them to ensure proper flow.
  • Ensure Proper Alignment: Make sure downspouts direct water away from your home to prevent pooling.
  • Consider Extensions: If necessary, add downspout extensions to direct water further from your foundation.

By proactively maintaining your downspouts, you help prolong the lifespan of your gutter system and avoid costly repairs. Keeping everything flowing smoothly prevents many common water-related issues.

Frequently Asked Questions

Maintaining your gutters is essential for the longevity of your home. Several factors determine how often you should clean them, including the presence of nearby trees, gutter guards, and the season.

How frequently should gutters be cleaned if there are no nearby trees?

If your home is free from nearby trees, you might clean your gutters once a year. This is generally sufficient since fewer leaves and debris will accumulate. However, monitor them regularly for any signs of buildup.

What is the recommended cleaning interval for gutters with guards installed?

Gutters equipped with guards typically need cleaning every one to two years. While guards reduce the amount of debris that enters the gutters, they do not eliminate the need for maintenance entirely. Regular checks help ensure that the guards are working effectively.

When should gutters typically be cleaned during the autumn season?

During autumn, it’s best to clean your gutters after the majority of leaves have fallen. This usually occurs late in the season. Clearing them at this time helps prevent blockages caused by decaying leaves and ensures proper drainage through the winter months.

What are the consequences of neglecting gutter maintenance?

Neglecting gutter maintenance can lead to serious issues like water damage, mold growth, and structural damage to your home. Clogged gutters can prevent water from flowing properly, causing it to overflow and damage your roof or foundation.

Can gutters be effectively cleaned from ground level?

It is possible to clean some gutters from ground level using extension tools or pressure washers, but this method may not be as thorough. For higher gutters or severe clogs, a ladder or professional service is often necessary to ensure complete cleaning.

What factors determine the lifespan of gutters before they need replacing?

The lifespan of your gutters can be affected by materials, environmental conditions, and maintenance frequency. Aluminum gutters generally last 20 years, while steel may last up to 30 years. Regular maintenance can significantly extend their useful life.

Range Hood Maintenance: Essential Tips for Longevity and Performance

Maintaining your range hood is essential for its efficiency and the overall air quality in your kitchen. Regular maintenance helps prevent grease buildup, ensures proper ventilation, and prolongs the lifespan of the appliance. Failure to keep your range hood in good condition can lead to unpleasant odors and even fire hazards, making it crucial to stay on top of cleaning tasks.

You can easily keep your range hood functioning well with a few straightforward practices. Cleaning the filters, wiping down surfaces, and checking for any mechanical issues should be part of your routine. Using simple ingredients like hot water and mild soap can make the cleaning process effective without requiring excessive effort.

By prioritizing range hood maintenance, you not only enhance your cooking environment but also save money on potential repairs and replacements down the line. Your kitchen deserves a clean, safe atmosphere, and a well-maintained range hood plays a vital role in achieving that.

Understanding Your Range Hood

A range hood is essential in maintaining a clean and safe kitchen environment. By understanding its types and components, you can ensure optimal performance and longevity.

Types and Styles

Range hoods come in various types and styles, each designed for specific kitchen layouts and cooking needs. Here are the most common options:

  • Wall-Mounted: Attached to the wall above the cooktop, providing a sleek appearance.
  • Under-Cabinet: Installed beneath cabinets, saving space while effectively ventilating cooking odors.
  • Island Hoods: Designed for kitchens with a freestanding cooktop on an island. They hang from the ceiling and provide powerful ventilation.
  • Ductless Models: Utilize charcoal filters to recirculate air, ideal for kitchens without ductwork.

Each model combines functionality with aesthetics, often featuring stainless steel finishes that blend seamlessly with modern kitchen designs. Choosing the right type is crucial for effective odor and smoke management.

Key Components

To ensure your range hood operates efficiently, it’s essential to understand its key components.

  1. Fan/Blower: This is the heart of your range hood, responsible for sucking up smoke and odors. Different models offer varying fan speeds for customizable ventilation.
  2. Filters: Range hoods usually include grease filters and, in ductless models, charcoal filters. Regular cleaning or replacement of these filters is vital to maintain airflow and performance.
  3. Ductwork: For ducted hoods, proper installation of ductwork directs air outside, minimizing indoor air contamination.
  4. Controls: Most range hoods feature easy-to-use controls for adjusting fan speed and lighting, enhancing user experience.

Familiarizing yourself with these components will help you maintain your range hood effectively, ensuring a fresher kitchen environment.

Basic Maintenance for Longevity

Maintaining your range hood ensures it operates efficiently and lasts longer, contributing to a cleaner kitchen environment. Focus on implementing a consistent cleaning routine and taking proper care of the filters to maximize performance.

Routine Cleaning Schedule

Establish a routine cleaning schedule for your range hood to prevent grease buildup and ensure optimal function. Clean the exterior of the hood weekly. Use a mild degreaser on a soft cloth; this will keep surfaces shiny and free from residue.

Every one to two months, focus on the inside. Remove any debris that might accumulate in the vent system. This will help maintain airflow and efficiency. During your cleaning sessions, check for any signs of wear or damage that may need attention.

Filter Care and Replacement

Filters are crucial for trapping grease and maintaining air quality. Depending on the type, clean your metal grease filters every 1-2 months. A simple wash in warm, soapy water typically suffices. For charcoal filters, plan for replacement every 1-3 months as they can’t be cleaned.

To remove a filter, check your model’s instructions. Properly cleaning or replacing filters prevents buildup that could affect airflow. A well-maintained filter enhances the range hood’s performance and prolongs its lifespan, ensuring your kitchen remains free of smoke and odors.

Deep Cleaning Techniques

Maintaining your range hood requires deep cleaning to ensure efficient operation and a grease-free kitchen. Effective techniques focus on degreasing the range hood and cleaning the ventilation ducts.

Degreasing the Range Hood

Start by removing any metal grates and filters from the range hood. Soak these in a mixture of hot water, dish soap, and baking soda for about 15-20 minutes. This helps break down stubborn grease.

For the exterior, use a commercial degreasing solution or a homemade mix of vinegar and water. Apply it with a cleaning spray bottle and let it sit for a few minutes. Wipe with a soft cloth to remove residues. For tough grime, consider using ammonia-dampened paper towels on the affected areas.

Always rinse the filters thoroughly with warm water before reinstalling them. This ensures that no cleaning agents remain that could affect food safety. Regularly repeating this process will keep your range hood in top condition.

Cleaning the Ventilation Ducts

Cleaning ductwork is essential for optimal airflow and grease management. Start by turning off the power to your range hood for safety. Remove any accessible duct sections and clean them using a damp cloth and soapy water.

For stubborn grease buildup, a degreaser can be effective. Spray it generously in the ducts, allowing it to sit for a few minutes before wiping it clean. Make use of a long brush to reach deeper areas of the ducts.

Inspect the ventilation system for any clogs or obstructions. If necessary, use a vacuum to remove debris throughout the ductwork. Regular duct cleaning not only improves efficiency but reduces fire hazards associated with grease buildup.

Troubleshooting Common Problems

When facing issues with your range hood, two primary areas to consider are electrical and mechanical problems. Identifying these issues can help you address them effectively and ensure your range hood operates efficiently.

Electrical Issues

Electrical problems are often the root cause of range hood malfunctions. Start by checking the power supply; ensure the unit is plugged in and the outlet is functioning. If the lights aren’t working, it’s likely due to a burned-out light bulb.

Replace the bulb with a compatible type.

Inspect wiring for any visible damage or loose connections. Damaged wiring could lead to shorts and dangerous conditions.

If you suspect issues with the fan motor or other electrical components, it’s essential to conduct careful troubleshooting. Use a multimeter to test the motor; if it shows no continuity, it may need replacing.

Mechanical Concerns

Mechanical issues can significantly affect performance, often stemming from fan-related components. Start by inspecting the fan blades and bearings. Accumulated grease can cause imbalances, leading to noise and reduced airflow.

Clean the fan blades regularly and ensure they turn freely.

Check the blower for any obstructions or blockages; this can prevent proper air circulation. Loud noises may indicate a failing motor that requires attention.

Listen for unusual sounds during operation, as this can signal mechanical failure. If the fan motor appears to be struggling, it may need repair or replacement.

Addressing these mechanical concerns promptly can prolong the life of your range hood.

Advanced Care and Replacement

Maintaining your range hood ensures optimal performance and longevity. With proper care, you can enhance its efficiency and know when it’s time to replace parts or seek professional assistance.

Upgrading Components

Upgrading components of your range hood can significantly improve its performance. Start by checking the motor and filters. High-performance parts, like a more powerful motor or specialized filters, can enhance airflow and capture more grease. Refer to your owner’s manual for compatible upgrades.

Consider upgrading the lighting as well. Energy-efficient LED lights provide better visibility while consuming less energy. Installing a new control panel or digital interface can simplify operation and monitoring.

Lastly, you might opt for advanced ventilation systems that reduce noise levels during operation. Regular upgrades will ensure your range hood operates efficiently and effectively, extending its lifespan and functionality.

When to Call a Professional

There are times when professional help becomes essential for maintaining your range hood. If you notice persistent noises, reduced airflow, or strange odors, these may indicate underlying issues requiring expertise.

When replacing major components, such as the motor or ventilation systems, it’s advisable to consult professionals or refer to your operation manual for specifications.

Additionally, a qualified technician can perform thorough cleaning and maintenance, which are crucial for maintaining performance and safety. Regular inspections can prevent further damage and ensure your range hood remains an effective appliance in your kitchen.

Frequently Asked Questions

Understanding the maintenance of your range hood is crucial for ensuring its efficiency and longevity. The following information addresses common questions related to filter cleaning, vent system maintenance, and best practices for both residential and commercial kitchens.

How often should range hood filters be cleaned for optimal performance?

You should clean range hood filters every month if you cook regularly. For occasional use, every three months is sufficient. Cleaning keeps the filters effective and prevents grease buildup, ensuring your range hood operates efficiently.

What is the best method for cleaning a range hood’s vent system?

The best method involves disassembling the vent cover and using a vacuum to remove loose debris. Follow this by applying a degreaser and scrubbing with a soft brush. Rinse thoroughly to avoid residue, ensuring the vent system remains clear for optimal airflow.

Can professional cleaning services prolong the life of a range hood?

Yes, professional cleaning services can help maintain your range hood effectively. Regular deep cleaning by experienced technicians can significantly extend its lifespan by removing tough grease and buildup that you may miss during routine cleaning.

What are the steps in a typical range hood maintenance routine?

A typical maintenance routine includes cleaning the filters, inspecting the vent system, checking for any grease buildup, and ensuring that all components are functioning correctly. Regular checks can help identify issues before they become major problems.

What type of degreaser is most effective for removing kitchen hood grease?

A non-abrasive degreaser specifically designed for kitchen appliances is ideal. Look for products that are food-safe and formulated to cut through grease without damaging the metal surfaces of your range hood.

Are there any specific considerations for maintaining a commercial kitchen hood?

Yes, commercial kitchen hoods require more frequent maintenance due to higher cooking volumes. Regular inspections and cleanings, often every month or bi-monthly, are necessary to comply with health regulations and ensure the safety of your kitchen environment.

How to Unclog a Gutter: Effective Techniques for Maintenance

Clogged gutters can lead to serious issues for your home, including water damage and foundation problems. To effectively unclog a gutter, start by removing visible debris from the top, then use tools such as a plumber’s snake or a garden hose to clear out stubborn blockages. By addressing these clogs promptly, you can prevent costly repairs down the line.

Understanding the causes of gutter clogs is crucial. Leaves, twigs, and other debris often build up over time, especially in heavily wooded areas. Regular cleaning and maintenance can significantly reduce the frequency of clogs, keeping your gutters functioning properly.

In this article, you will discover practical methods for unclogging gutters, ensuring your home remains protected from potential water damage. Prepare to take charge of your home’s maintenance and keep your gutters clear and efficient.

Understanding Gutter Clogs

Gutter clogs can lead to significant issues for homeowners, from water overflow to potential structural damage. Recognizing the common causes of these clogs and understanding their impacts is crucial for maintaining a functional gutter system.

Common Causes of Clogs

One of the primary reasons for gutter clogs is the accumulation of leaves. As autumn approaches, fallen leaves can gather, creating blockages that restrict water flow.

Another contributor is dirt and debris that accumulates over time. This buildup can occur due to wind or rain, which carries particles into the gutter system. Additionally, the organic matter from plants attracts insects and can foster mold growth, worsening the clog.

If you don’t regularly clean your gutters, these materials can mix and solidify, making it difficult to remove. This situation can escalate quickly and lead to overflowing gutters during heavy rains, causing water damage to your home.

Impact of Neglected Gutters

Neglecting your gutters can have several negative consequences. Clogged gutters can cause water to overflow and pool around your home’s foundation, potentially leading to foundation issues.

Moreover, stagnant water in gutters can attract pests, such as mosquitoes, increasing the risk of infestations. These conditions not only create an unsightly mess but can also degrade your home’s curb appeal.

Water damage caused by overflowing gutters may impact your roof, leading to costly repairs. By performing routine maintenance, you can avoid these issues and ensure your gutters function effectively to protect your home.

Safety Preparations

Before starting the gutter unclogging process, it’s important to prioritize safety. Proper equipment, attire, and assessing your work area are essential steps to ensure a safe and effective experience.

Proper Equipment and Attire

Wearing the right attire is crucial for your safety while cleaning gutters. Opt for sturdy, non-slip shoes to prevent falls. Consider using gloves to protect your hands from sharp debris and potential contaminants. A safety helmet may also be wise, especially if you’re working under trees or where debris may fall.

Ensure you use a stable ladder rated for the weight it will bear, and always place it on a flat surface. For added safety, utilize a ladder stabilizer to prevent tipping. Using a roof harness can also enhance safety when working on slopes. Having a safety whistle is a practical addition; it can alert others in case of an emergency.

Assessing the Work Area

Before you begin, evaluate the area around your gutters for potential hazards. Check for loose branches, power lines, or slippery surfaces to minimize risks. If you notice overhanging limbs, trim them back to create a safer workspace. Also, inspect the ground for obstacles that could trip you during the task.

You should consider weather conditions as well. Working in dry conditions is safer than during wet or windy weather, which can increase the risk of accidents. Remove any debris from the ground below to create a clear landing area if you were to fall. Finally, ensure that children and pets stay away from the work area for their safety.

Manual Gutter Cleaning Techniques

For effective gutter cleaning, you can use hands-on methods that allow you to remove debris efficiently. Manual techniques are essential, especially for stubborn clogs.

Hand Clearing Method

The hand clearing method is a straightforward and effective way to clean your gutters. Start by wearing gloves to protect your hands from sharp objects and debris. Use a sturdy ladder to access the gutters safely.

Once you are in position, inspect the gutter for leaves, twigs, and other blockages. Remove the debris by hand, making sure to discard it in a bucket or bag for easy cleanup. Pay special attention to downspouts as clogs often form there.

After clearing, flush the gutter with water using a hose. This step ensures any remaining dirt is washed away. Regularly practicing this method can help maintain clear gutters.

Using a Gutter Scoop

A gutter scoop is a specialized tool designed to assist in cleaning your gutters. It helps you reach deep into the gutter to extract compacted debris effectively. When using a gutter scoop, start at the farthest end of the gutter and work toward the downspout.

Position the scoop at the base of the gutter’s curve to gather debris without spilling it. Move the scoop back and forth gently to detach stubborn clogs. Place the debris into a bucket for easy removal.

After you’ve cleared the gutters, use a hose to rinse any remaining dirt and ensure proper water flow. This tool enhances your efficiency and makes the cleaning process streamlined, allowing you to clean your gutter more thoroughly.

Advanced Gutter Cleaning Tools

When tackling clogged gutters, using advanced tools can make the process significantly easier and more efficient. Several specialized options can help you effectively clear away debris, ensuring your gutters remain functional and free-flowing.

Power Washer vs. Pressure Washer

Both power washers and pressure washers are effective for gutter cleaning, but they have distinct differences. A power washer uses heated water, making it suitable for removing tough buildup and grime. It’s particularly useful when you face stubborn dirt that hasn’t been cleared in a long time.

On the other hand, a pressure washer relies solely on high-pressure water jets. It is ideal for lighter cleaning tasks, like blasting away leaves and dirt. For optimal use, ensure the nozzle is adjusted correctly to avoid damaging gutters. Always maintain a safe distance, typically between 18 to 24 inches, to protect the gutter surfaces.

Effective Use of a Leaf Blower

A leaf blower is a versatile tool that can quickly clear debris from gutters. When using a leaf blower, choose one with a focused nozzle attachment for better efficiency.

Position yourself at a safe distance from the gutter edge to prevent damage. Angle the blower to direct debris toward an open area for easy cleanup. It’s effective for removing leaves, twigs, and small dirt particles. However, avoid using it in wet conditions as it may scatter mud and worsen the clog.

How to Operate a Shop Vac

Using a shop vac can be an effective method for clearing clogged gutters, especially for debris that’s accumulated over time. Start by attaching the appropriate nozzle for suctioning debris.

Position the shop vac at the base of the gutter. Use an extension wand if necessary to reach higher areas without climbing. After it’s set up, turn on the shop vac and slowly guide the nozzle along the gutter line, sucking up leaves and dirt.

For optimal results, consider adding a filter that can trap finer particles. Regular maintenance with a shop vac can prevent clogs from forming, keeping your gutters in good condition year-round.

Unclogging the Downspout

Maintaining the flow of water through your downspout is crucial for effective gutter performance. If it becomes clogged, two effective methods to consider are utilizing a drain snake and flushing with high water pressure.

Guidelines for Drain Snake Usage

Using a drain snake is an efficient way to clear clogs within your downspout. Begin by selecting a flexible plumbing snake that can navigate the bends of your downspout.

  1. Preparation: Ensure you have gloves and safety goggles to protect yourself.
  2. Insertion: Feed the snake into the downspout carefully. Make sure it reaches the clog.
  3. Operation: Crank the handle to break up debris. This typically includes leaves, dirt, or other obstructions.

Keep in mind: A drain snake with a corkscrew end can be particularly effective for pulling out tougher clogs. If resistance occurs, feel free to pull back slightly and reinsert to tackle the blockage from different angles.

Flushing with Water Pressure

Using water pressure is another reliable solution. This method effectively dislodges clogs without heavy tools.

  1. Equipment: Attach a hose to your outdoor water source capable of delivering a strong stream, typically with a pressure of at least 40-60 PSI.
  2. Flushing: Insert the hose directly into the downspout. Turn on the water and allow it to flow through the pipe. The force of the water will help to clear minor clogs.

Tip: If your downspout remains clogged, consider increasing the water pressure gradually, but avoid excessive force that could damage the system. Flush until you see clear water exiting at the bottom. This method is effective and minimizes cleanup efforts, ensuring optimal water flow through your gutter downspout.

Aftercare and Maintenance Advice

Maintaining your gutters is essential for proper drainage and preventing future clogs. Regular inspection and preventive measures will extend the life of your gutter system and reduce maintenance costs.

Routine Gutter Inspection

Inspect your gutters at least twice a year, ideally in the spring and fall. Look for signs of blockage, sagging, or rust. Pay attention to the downspouts, as they can easily become clogged with leaves and debris.

When performing your inspection, use a sturdy ladder and wear gloves for safety. Check for any leaks or damage to the seams and joints. Ensure that water flows freely through the downspouts during intense rain.

If you notice persistent issues, consider consulting a professional for advice. They can assess the condition of your gutters and recommend appropriate maintenance services.

Preventative Measures

Taking proactive steps will significantly reduce the risk of clogged gutters. Installing gutter guards can help keep debris out while allowing water to flow through. Regularly trimming nearby trees and shrubs will also minimize leaf buildup.

Consider scheduling routine professional maintenance. Services like gutter cleaning and inspection can catch potential problems early, ensuring your system functions well year-round.

Utilizing a comprehensive home maintenance service can simplify upkeep for all your home systems. This reduces the need for multiple providers and helps you focus on preventive care, extending the life of your gutter system.

By implementing these measures, you can effectively maintain healthy gutters and safeguard your home from water damage.

Frequently Asked Questions

When it comes to unclogging gutters, there are specific tools and techniques that can help. Understanding how to safely remove blockages and maintain your gutters is essential for preventing future issues. Here are some frequently asked questions that can guide you through the process.

What tools are necessary for safely clearing out gutter blockages?

To clear out gutter blockages, you will need a few essential tools. A sturdy ladder, gloves, a small trowel or scoop, and a bucket for debris collection are vital. You may also consider a garden hose or a pressure washer for additional cleaning power.

Can downspout blockages be effectively removed from the ground?

Yes, downspout blockages can often be removed from the ground. Using a hose with a special nozzle can send water directly into the downspout to dislodge clogs. Additionally, tapping or gently smacking the downspout may help loosen stubborn blockages.

What method can be used to clean an underground clogged gutter drain?

Cleaning an underground clogged gutter drain typically involves using a plumbing snake or auger to break up the clog. You can also use a high-pressure water jetting service to clear out debris effectively without damaging the pipes.

Who should be contacted for professional gutter clog removal?

If you encounter persistent clogs or are unable to clear them safely, it is best to contact a professional gutter cleaning service. They possess the right tools and expertise to handle difficult blockages effectively.

Is it safe to use chemical cleaners for gutter and downspout clogs?

While some chemical cleaners are available for unclogging gutters, they can be harmful to your roofing and the environment. It is advisable to rely on mechanical methods or eco-friendly alternatives to avoid potential damage.

How should one properly maintain gutters to prevent clogs?

To maintain gutters and prevent clogs, regular cleaning is essential. Aim to clean your gutters at least twice a year, especially after heavy storms or during the fall when leaves accumulate. Installing gutter guards can also reduce debris buildup and simplify maintenance.