(248) 297-3485

(248) 297-3485

How Do You Clean Extractor Fan Filters: A Step-by-Step Guide for Effective Maintenance

Cleaning your extractor fan filters is essential for maintaining a safe and efficient kitchen environment. To effectively clean these filters, you can soak them in hot water with dish soap and baking soda, then scrub them gently with a non-abrasive brush. This simple yet effective method not only removes grease buildup but also enhances the airflow of your extractor fan.

Over time, uncleaned filters can hinder the performance of your kitchen appliances and even contribute to unpleasant odors. Regular maintenance of these filters ensures that your extractor fan operates at its best, which can ultimately lead to improved cooking conditions in your home.

In this article, you will discover various techniques and tips for cleaning extractor fan filters, making the task easier and more efficient. With the right approach, you can keep your kitchen fresh and your cooking appliances running smoothly.

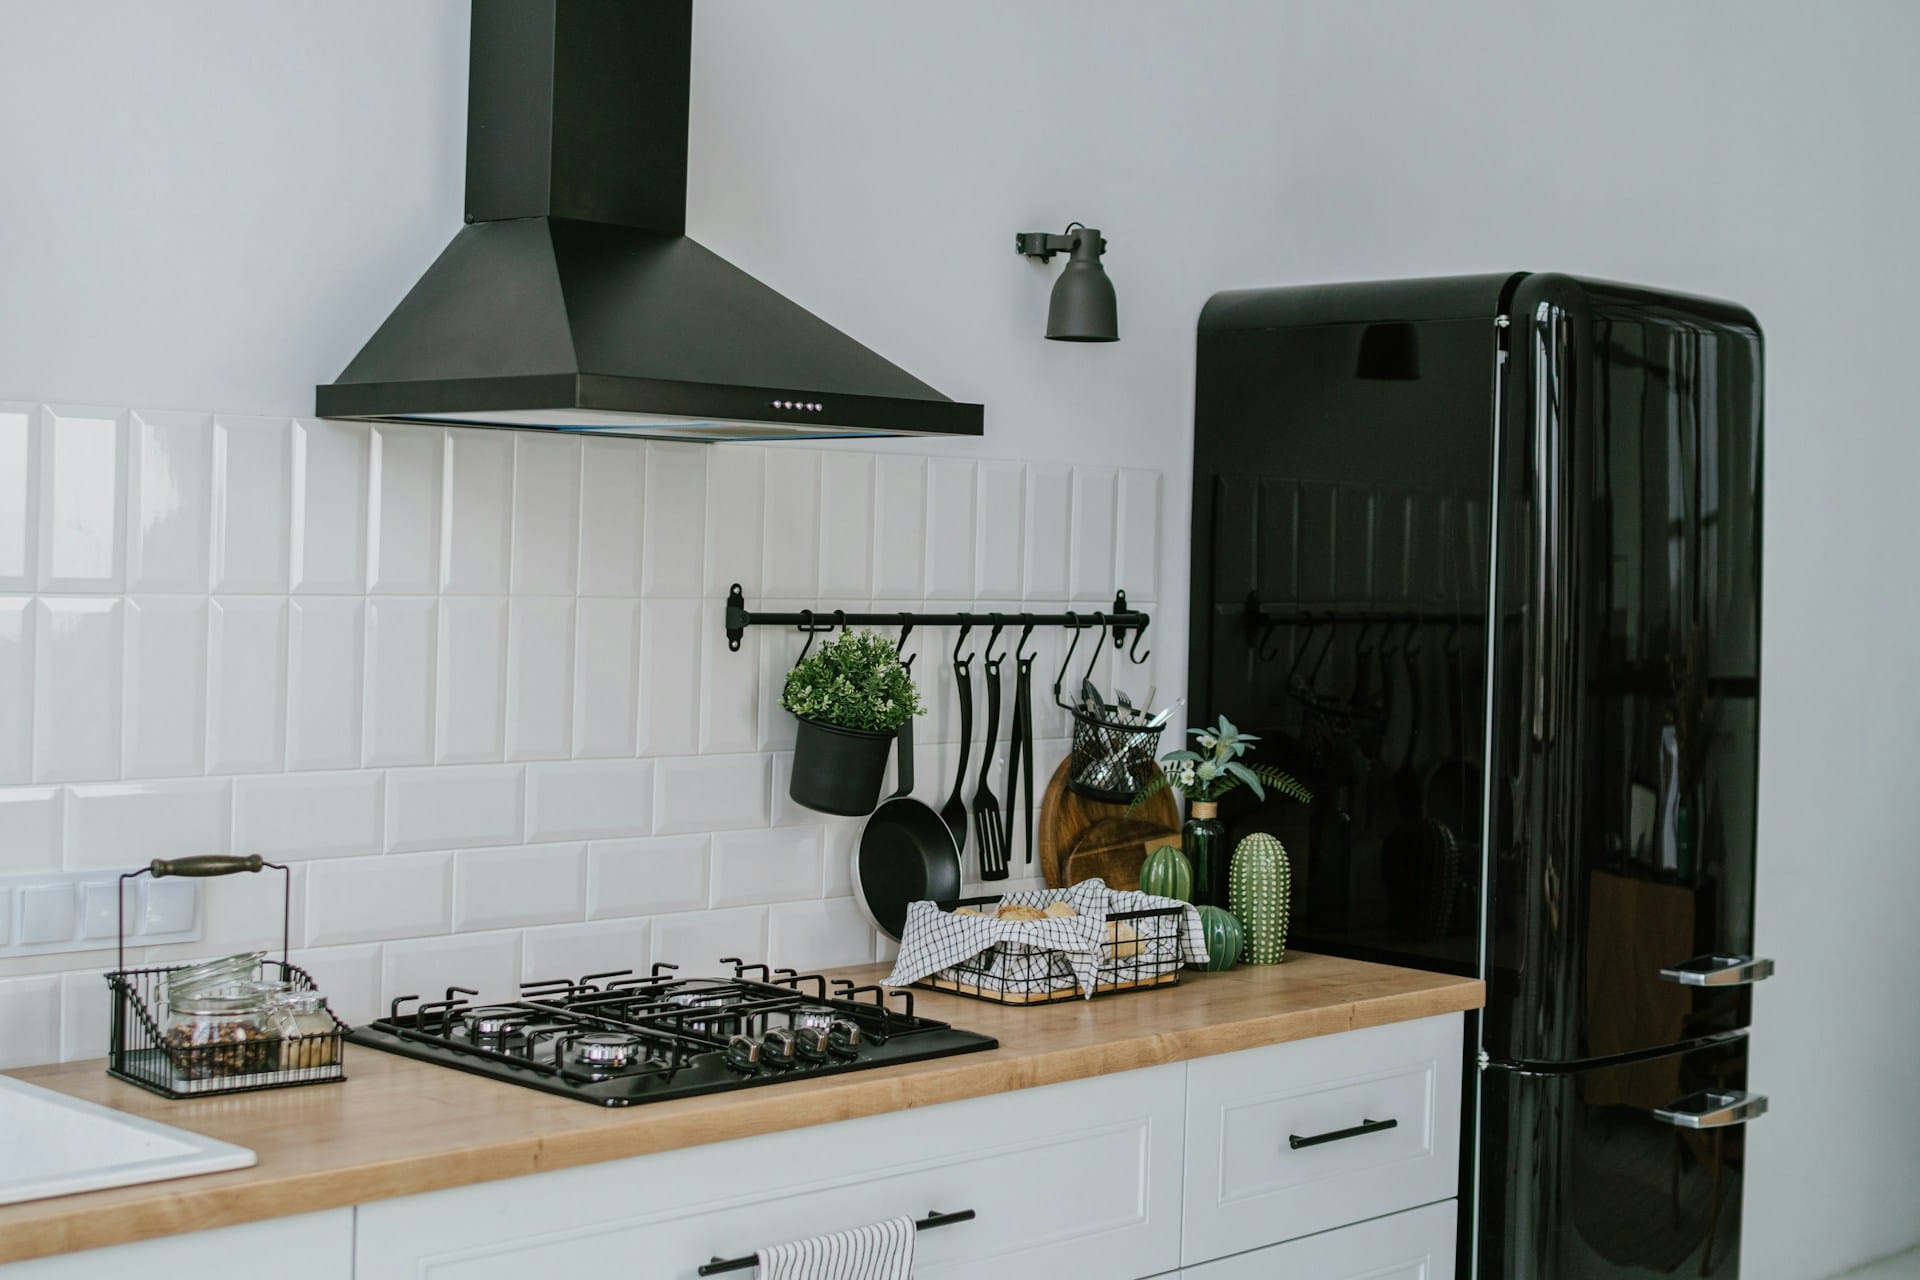
Understanding Extractor Fan Filters

Extractor fan filters play a crucial role in maintaining air quality in your kitchen. They come in various types, function to enhance ventilation, and can accumulate grease over time. Knowing their specifics can help you keep your kitchen environment clean and efficient.

Types of Extractor Fan Filters

There are primarily two types of filters used in extractor fans: grease filters and carbon filters.

  • Grease Filters are designed to capture grease and other particulates released during cooking. They can be made of metal mesh or baffle types, which are effective at trapping oils and fats.
  • Carbon Filters, also known as charcoal filters, are used primarily in recirculating systems. They absorb odors and harmful gases but do not capture grease.

Knowing which type you have helps in maintaining their effectiveness and ensuring proper kitchen ventilation.

The Role of Filters in Ventilation

Filters are essential for effective ventilation in your kitchen. They work by trapping airborne particles and grease, preventing them from circulating back into your living space.

Benefits of filters include:

  • Improved air quality: Filters remove contaminants, ensuring that the air you breathe is cleaner.
  • Reduced odors: Carbon filters absorb unwanted odors, making cooking more pleasant.
  • Extended lifespan of the extractor fan: Clean filters reduce strain on the fan, promoting efficient operation and longevity.

Regular maintenance of these filters is important for optimal performance and energy efficiency.

How Grease Accumulates

Grease accumulation is a common issue with extractor fan filters. During cooking, oils and fats vaporize, then condense on the surface of the filters.

Factors that contribute to grease buildup include:

  • Cooking methods: Frying or grilling typically produces more grease than steaming or boiling.
  • Frequency of use: The more often you cook, the more grease settles on the filters.
  • Type of filter: Certain filters trap more grease than others.

To manage grease, it’s crucial to clean your filters regularly, ensuring they function properly and maintain good air quality in your kitchen.

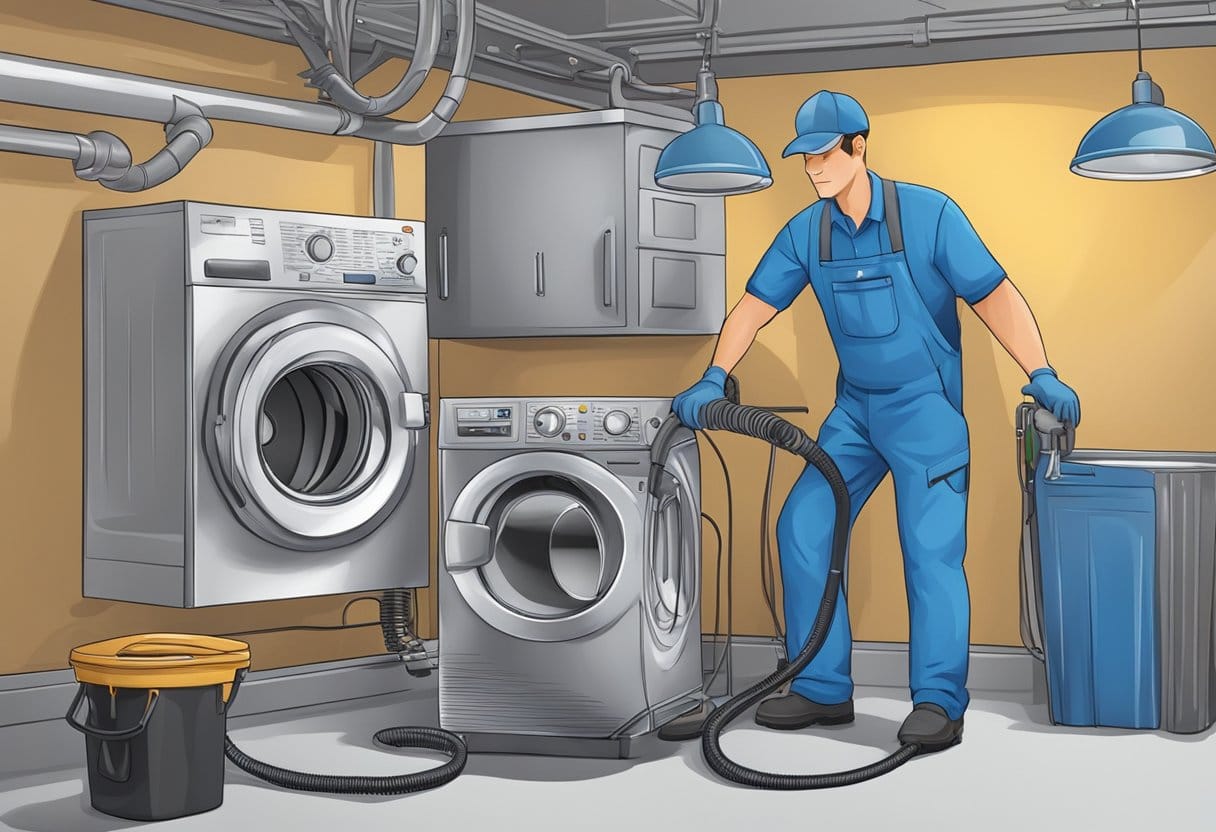
Preparing to Clean Your Extractor Fan Filters

Cleaning your extractor fan filters is essential for maintaining efficiency and hygiene in your kitchen. Proper preparation can make the process easier and more effective. Focus on safety first, gather the right tools, and learn how to remove your filters correctly.

Safety Precautions

Before starting the cleaning process, ensure your safety. Turn off the power to your extractor fan by unplugging it or switching off the circuit breaker. This step prevents any electrical hazards while you work.

Wear protective gear, such as gloves and goggles, to shield your hands and eyes from cleaning agents and grease. If you’re sensitive to strong odors, consider wearing a mask to avoid inhaling any fumes emitted from cleaning products. Ensure the area is well-ventilated to help disperse any potential fumes.

Gathering Essential Cleaning Supplies

To efficiently clean your extractor fan filters, gather specific supplies that will aid in the process. You will need:

  • Hot water: Essential for breaking down grease.
  • Dishwashing soap: Its degreasifying properties are effective for cleaning filters.
  • Baking soda: Helps to eliminate odors and enhance cleaning.
  • Old toothbrush: A useful tool for scrubbing hard-to-reach areas and crevices.
  • Soft cloth or non-abrasive sponge: For drying the filters and cleaning the fan housing.

Make sure to have a bucket or sink ready for soaking the filters in a soapy solution. Having everything organized will streamline the cleaning process.

How to Remove the Filter

Removing the filters from your extractor fan is straightforward. Locate the manufacturer’s instructions for specific guidance, as different models may have unique requirements. Generally, follow these steps:

  1. Open the fan cover: Depending on your model, there may be clips, screws, or a simple latch to access the filters.
  2. Carefully pull out the filters: Grasp the filter firmly and remove it from its slot. Avoid bending it to prevent damages.
  3. Inspect for damage: Before cleaning, check for wear and tear. If the filters are damaged, consider replacing them for optimal performance.

With the filters removed, you can now proceed to clean them effectively, ensuring your kitchen appliance continues to function efficiently.

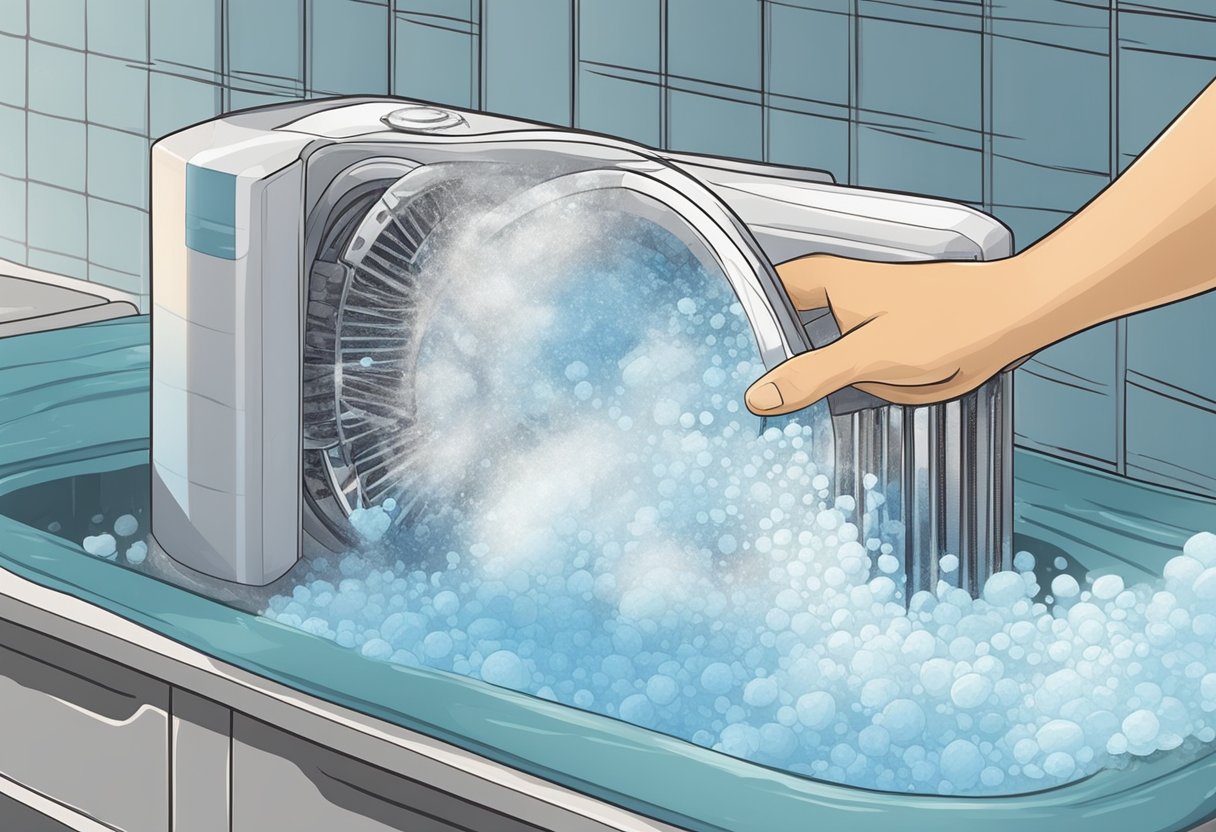
Step-by-Step Cleaning Process for Grease Filters

Cleaning your grease filters can boost efficiency and improve air quality in your kitchen. Here’s a focused approach to effectively remove grease using various methods.

Initial Rinse and Boiling Water Method

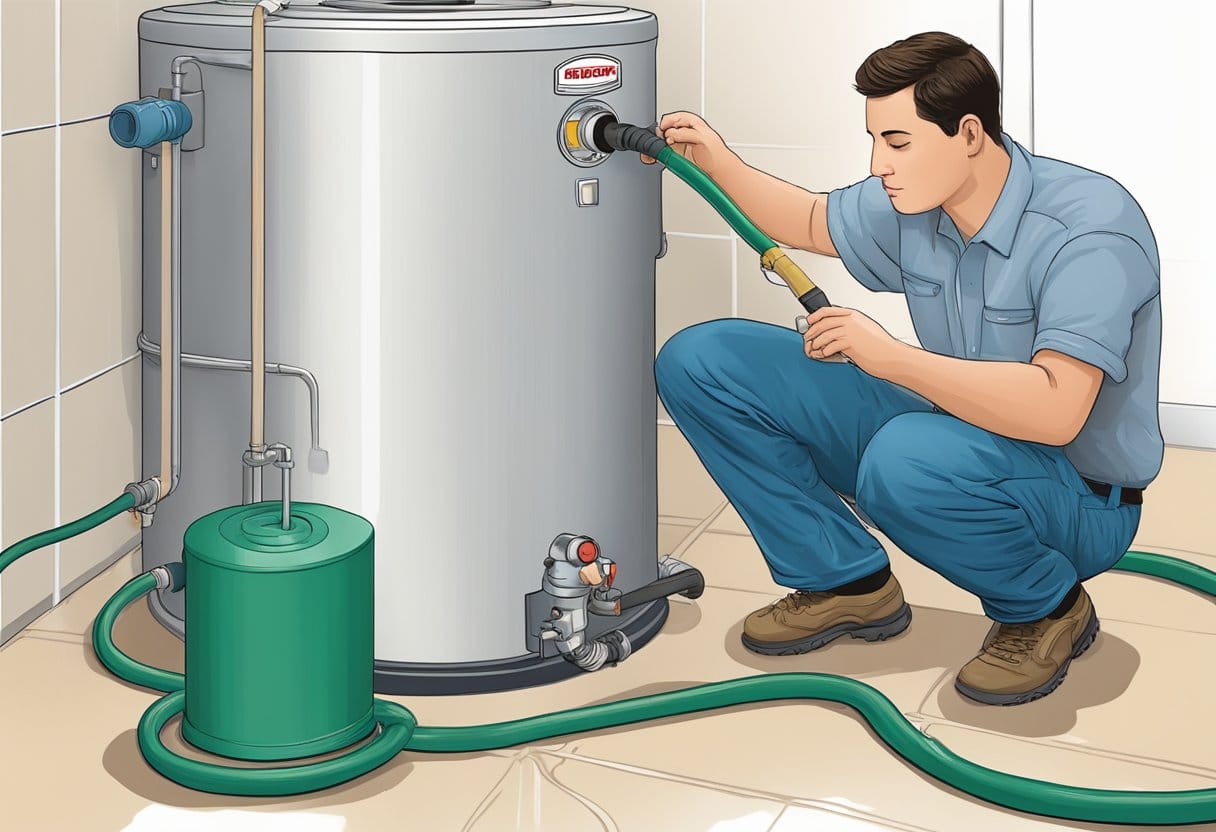
Begin by removing the grease filter from your extractor fan. Rinse it under warm water to remove loose debris. Next, fill a large pot with water and bring it to a boil. Carefully submerge the grease filter in the boiling water for about 10-15 minutes. The heat helps to loosen stubborn grease.

You can enhance this method by adding a few drops of dish soap to the boiling water. After soaking, lift the filter out, and allow it to cool slightly before rinsing it again under warm water. This method effectively reduces grease buildup without harsh chemicals.

Using Baking Soda and Degreasers

For filters with heavy grease build-up, a combination of baking soda and a degreaser can be effective. Create a paste by mixing equal parts of bicarbonate of soda and water.

Apply this paste generously to the greasy areas of the filter and let it sit for 15-30 minutes. The baking soda acts as a gentle abrasive and helps to dissolve grease. After the waiting period, spray the filter with your preferred degreaser.

Rinse the filter under warm water, using a soft cloth or sponge to wipe away any remaining grease. This dual approach ensures thorough cleaning without damaging the metal filter.

Manual Scrubbing Techniques

If residues remain, manual scrubbing may be needed. Use a soft-bristle brush, such as an old toothbrush, to gently scrub the surface of the filter. Focus on areas where grease is still visible.

Make sure to combine your scrubbing with a solution of warm soapy water or a degreaser for the best results. Avoid using abrasive materials that could scratch the filter.

After achieving the desired cleanliness, rinse thoroughly to remove any soap or cleaning agents. Regular manual scrubbing can help maintain the filter and prevent heavy build-up in the future.

Deep Cleaning and Dishwasher Techniques

Cleaning your extractor fan filters effectively enhances kitchen hygiene and appliance performance. Utilizing the dishwasher for metal filters and exploring alternative deep cleaning methods can simplify this necessary maintenance task.

Dishwasher Cleaning for Metal Filters

You can clean metal filters in your dishwasher for an efficient deep clean. Start by removing the filters from your extractor fan, ensuring they are free from any attachments. Place the filters in the top rack of the dishwasher.

Important tips:

  • Set your dishwasher to at least 65 degrees Celsius.
  • Use a standard dishwasher detergent that is effective against grease.

This method allows the high temperature to break down the grease effectively. Avoid overcrowding the dishwasher; the filters should ideally be the only items in there to ensure optimal cleaning.

Alternative Deep Cleaning Methods

If using a dishwasher isn’t an option, consider alternative methods for cleaning grease filters. A simple soaking solution can be quite effective:

  1. Fill a large container or sink with hot water.
  2. Add a mixture of dish soap and baking soda to the water.

Soak the filters for about 15-20 minutes, allowing the grease to loosen. After soaking, use a non-abrasive brush to scrub the filters gently. Rinse thoroughly under warm water and allow them to dry completely before reinstalling.

Using these methods consistently will extend the life of your extractor fan and maintain a cleaner cooking environment.

Cleaning and Replacing Carbon and Charcoal Filters

Maintaining your extractor fan filters is vital for ensuring your range hood operates efficiently. Knowing when to replace carbon or charcoal filters and how to clean non-washable options can significantly enhance air quality in your kitchen.

When to Replace Carbon or Charcoal Filters

Carbon and charcoal filters typically require replacement every 3 to 4 months, depending on usage. Heavy cooking, particularly frying, may accelerate the need for a change. Signs that it’s time to replace the filters include:

  • Odor persistence: If you still smell cooking odors after using the range hood, the filters may be saturated.
  • Reduced airflow: A noticeable decrease in suction power indicates clogging.
  • Visible dirt accumulation: If filters appear dark or greasy, they need replacement.

Refer to your range hood manufacturer’s guidelines for specific recommendations on filter lifespan. Keeping track of filter statuses ensures your kitchen remains fresh and free from smoke and odors.

Basic Cleaning Tips for Non-Washable Filters

For non-washable carbon or charcoal filters, cleaning isn’t an option. Instead, you should focus on periodic replacement. However, you can maintain your range hood’s overall efficiency with these strategies:

  • Regular inspections: Check filters every month for signs of buildup.
  • Vacuum regularly: Use a vacuum with an upholstery attachment to remove loose debris from the filter surface.
  • Wipe down the hood: Keeping the exterior clean prevents grease from entering the filter.

While these steps won’t clean the filters, regular maintenance can prolong the effectiveness of your range hood. Always follow the manufacturer’s instructions for the best results.

Reassembling and Maintaining Clean Extractor Fan Filters

Proper reassembly and regular maintenance of your extractor fan filters are essential for optimal performance. Keeping your filters clean ensures effective ventilation and helps remove grease buildup, which can impact both air quality and appliance longevity.

Properly Reinstalling the Filters

Once your extractor fan filters are clean and dry, it’s crucial to reinstall them correctly. Start by inspecting the filter for any remaining grease or damage before placing it back.

Make sure to align the filter with the correct side facing outwards—usually, the clean side goes towards the outside of the unit. Secure the filter firmly in place, ensuring there are no gaps, which can compromise airflow.

Remember to refer to the manufacturer’s instructions, as each system may have specific requirements. Tightening any screws or clips is vital to ensure that the filter does not fall out during operation.

Routine Maintenance Tips

To keep your extractor fan filters functioning optimally, perform routine maintenance every few months. Here are key tasks to include:

  • Regular Cleaning: Clean removable filters every 1–3 months using hot water, dish soap, or specialized cleaners. For stubborn grease, consider baking soda paste.
  • Check Ventilation Ducts: Periodically inspect the ventilation ducts for blockages or grease buildup, which can hinder airflow.
  • Replace Filters: If you notice any damage or excessive wear on the filters, replace them accordingly to ensure efficient operation.
  • Upgrade When Necessary: Consider investing in higher-quality filters designed to trap more grease and particulates, enhancing ventilation and performance.

By following these guidelines, you ensure that your extractor fan operates efficiently, contributing to cleaner air within your home.

Frequently Asked Questions

Cleaning extractor fan filters involves specific techniques and methods to ensure they are maintained effectively. Below are answers to common inquiries regarding the cleaning process, materials, and techniques.

What is the best method for cleaning metal mesh cooker hood filters?

The ideal method for cleaning metal mesh filters involves soaking them in hot, soapy water. Use a degreasing dish soap to assist with removing grease. After soaking for about 15-30 minutes, scrub gently with a non-abrasive brush to dislodge any stubborn grime.

Can I use a dishwasher tablet to clean my extractor fan filters effectively?

Yes, using a dishwasher tablet can be effective. Dissolve the tablet in hot water and soak the filters for a while. This helps break down grease and grime, making it easier to scrub clean afterward.

What are the proper steps to clean the grease filter of an extractor fan above the hob?

Start by removing the grease filter from the fan. Soak it in a mixture of hot water and degreaser for 30 minutes. After soaking, scrub the filter with a non-abrasive brush, rinse thoroughly, and allow it to dry completely before reinstalling.

How can you clean kitchen exhaust fan grease without causing damage?

To clean without causing damage, avoid using harsh chemicals or abrasive materials. Instead, use a mixture of warm water and mild dish soap. A soft cloth or sponge is suitable for wiping down surfaces, and you can use a non-abrasive brush for tough spots.

Is it possible to clean extractor fan filters in a dishwasher safely?

Generally, many metal filters can be cleaned in a dishwasher. However, confirm that your filter is dishwasher-safe by checking the manufacturer’s instructions. Use a gentle cycle and allow the filter to dry completely once cleaned.

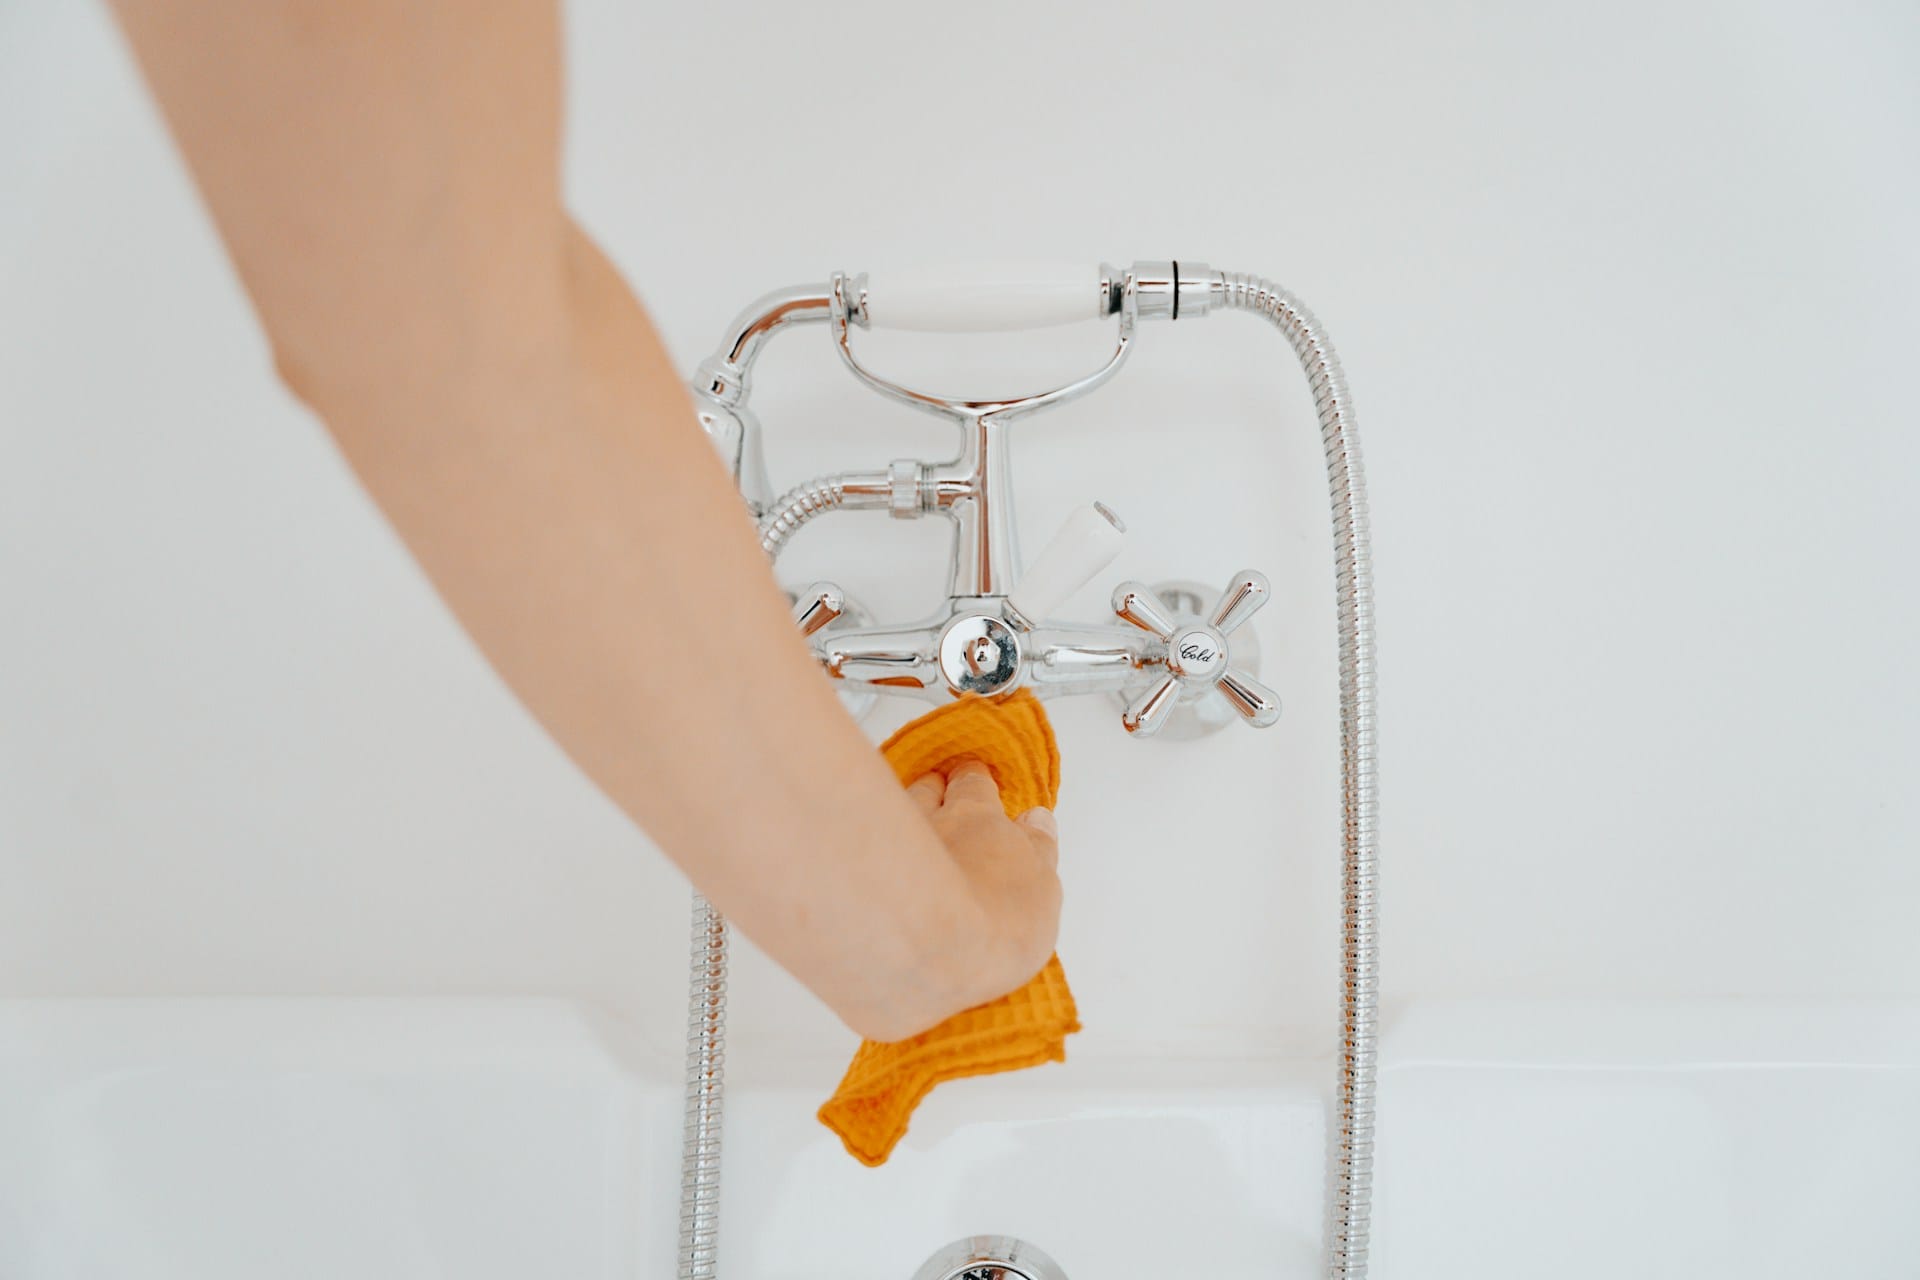
What is the correct technique to clean the bathroom extractor fan filter?

Remove the bathroom extractor fan filter carefully. Wash it in warm, soapy water, using a soft cloth to eliminate dust and grime. Rinse thoroughly and ensure it dries completely before reinstalling it back into the fan.

How Often Do You Clean Gutters to Prevent Damage and Maintain Efficiency?

Cleaning your gutters is an essential part of home maintenance that many homeowners tend to overlook. You should clean your gutters at least twice a year, ideally in the spring and fall, to prevent clogs that can lead to costly repairs. Neglecting this task can result in water damage, foundation issues, and other problems that could have been easily avoided with regular upkeep.

If you have trees near your home, you may need to clean your gutters more frequently, such as every three months, to manage leaves and debris effectively. Understanding the specific requirements for your property will help you maintain it more efficiently and preserve its value over time.

By prioritizing gutter maintenance, you protect your home from unnecessary damage and extend the lifespan of your roofing and drainage systems. Keep reading to find out more about best practices and tips for keeping your gutters in top shape.

Why Regular Gutter Cleaning Matters

Regular gutter cleaning is essential to maintain a well-functioning home. It helps prevent water damage, preserves structural integrity, and avoids pest infestations that can arise from neglected gutters. Keeping gutters clean is a straightforward step that leads to significant long-term benefits.

Preventing Water Damage

Clogged gutters can cause water to overflow and pool around your home’s foundation. This standing water can lead to serious water damage, including leaks in your basement. By ensuring your gutters are clear of debris, you facilitate proper drainage and protect your home from costly repairs related to water damage.

A consistent cleaning schedule reduces the risk of mold growth, which thrives in damp conditions. This is particularly crucial in areas where heavy rainfall occurs, as blocked gutters exacerbate these issues. Regular maintenance will help direct rainwater away from your home effectively.

Protecting Structural Integrity

The integrity of your home can be compromised if gutters are not routinely cleaned. Blockage can result in water seeping into walls and foundations, leading to structural damage over time. Water can erode foundations, causing cracks and shifting that are expensive to fix.

Additionally, when gutters overflow, the excess water can saturate the ground nearby, undermining your home’s stability. By keeping gutters free from debris, you enhance the longevity of your home’s structural components, allowing you to avoid significant repair bills in the future.

Avoiding Pest Infestations

Neglected gutters can create an inviting environment for insects and rodents. Debris accumulation offers a breeding ground for pests, which can invade your home. The presence of standing water becomes a habitat for mosquitoes, while debris attracts ants and insects that can find their way inside.

Rodents may also be drawn to these areas as potential nesting sites. Regular gutter cleaning helps deter these pests by eliminating sources of attraction, thereby maintaining a healthier living environment for you and your family. Keeping gutters clear minimizes the likelihood of infestations, ensuring a more comfortable and safe home.

How Often Should You Clean Out Your Gutters?

Maintaining your gutters is crucial to ensure proper drainage and prevent costly damage to your home. Cleaning out your gutters regularly can keep them functioning effectively while considering specific factors that may influence your cleaning schedule.

Recommended Gutter Cleaning Frequency

You should aim to clean your gutters at least twice a year, typically in the spring and fall. This helps to remove leaves, dirt, and debris that accumulate from seasonal changes. If your home is surrounded by pine trees, you may need to clean your gutters every three months to manage the influx of pine needles, which can lead to clogs.

In certain circumstances, such as after heavy rain, inspect your gutters for any blockages that might have formed. This vigilance can prevent potential water damage to your roof and foundation.

Factors That Influence Cleaning Schedules

Several factors can affect how often you need to clean your gutters. The proximity of trees, particularly those that shed leaves frequently, can significantly impact debris accumulation. If you live in an area with lush vegetation, you might find yourself cleaning your gutters more often.

Weather conditions also play a role. Regions that experience intense rainfall or storms may require more frequent maintenance due to the greater amount of debris that can wash into your rain gutters. Ultimately, your specific environment will dictate a tailored schedule to maintain effective gutter functionality.

Seasonal Considerations

Seasonal changes should inform your gutter cleaning routine. In the spring, snow and ice may have melted, leading to an accumulation of debris in your gutters. It’s essential to clean them to ensure spring showers can drain properly.

During the fall, leaves can clog your gutters rapidly. It’s wise to remove them regularly, especially if you have trees shedding their leaves. Regular cleaning during these seasons helps maintain good drainage and prevents long-term damage to your home’s structure.

Signs Your Gutters Need Cleaning

Keeping an eye on your gutters is crucial for maintaining the integrity of your home. Recognizing the signs that your gutters need cleaning can save you from costly repairs down the line. Here are key indicators to watch for.

Visible Debris and Blockages

One of the most obvious signs that your gutters need cleaning is the presence of visible debris. If you see leaves, twigs, or dirt accumulating in the gutters, it indicates a buildup that can lead to blockages.

Clogged gutters prevent water from flowing freely, which can cause additional issues for your home. Frequent checks can help you catch these blockages early, ensuring proper water drainage and reducing the risk of damage.

Make it a habit to inspect your gutters regularly, especially after storms or during fall when debris tends to collect more easily. Remember, clean gutters function effectively and protect your home’s foundation.

Disrupted Water Flow

Another critical sign is interrupted water flow during rain. If you notice water spilling over the edge of your gutters, it’s a strong indication that they may be clogged.

Water should flow smoothly through the gutters and down the downspouts. If you see water pooling around your home’s foundation, this could lead to significant damage over time.

It’s essential to address these flow issues promptly. Ensure that your gutters are clear so water can be diverted safely away from your structure, reducing the risk of flooding and erosion in your yard.

Water Overflow and Ice Dams

In colder climates, ice dams can form at the edge of your gutters due to trapped water. If you notice icicles forming or water overflowing during warmer periods, your gutters may be obstructed.

Ice dams lead to water buildup, which can freeze and thaw, damaging both your gutters and roof. If you see signs of water overflow or ice accumulation, it’s time for a thorough cleaning.

Maintaining clean gutters helps prevent these ice dams and ensures that water drains effectively during the warmer months. Taking care of this issue early can save you from costly repairs in the future.

Effective Gutter Cleaning Methods

Maintaining clean gutters is essential for preventing water damage to your home. Several effective methods can help you keep your gutters free from debris and functioning properly.

Manual Cleaning Techniques

Manual cleaning is a straightforward and effective approach. Start by gathering necessary tools: a sturdy ladder, gloves, a scoop or trowel, and a bucket for debris.

  1. Safety First: Always use a stable ladder and consider having someone hold it for stability.
  2. Remove Debris: Scoop out leaves, twigs, and dirt from the gutters. Pay special attention to downspouts.
  3. Flush with Water: After debris is removed, using a garden hose to flush out remaining dirt can ensure the gutters are clear.

This method is ideal for regular maintenance and allows you to visually assess your gutters’ condition.

Using Leaf Blowers and Tools

Leaf blowers can streamline the cleaning process significantly. This method can save time, especially for larger homes with extensive gutter systems.

  1. Choose the Right Blower: A gas or electric leaf blower with a nozzle attachment works best for blowing debris out of the gutters.
  2. Technique: Position the blower at an angle to direct leaves and debris towards the downspouts.
  3. Check for Clogs: Ensure that the downspouts aren’t clogged, as the blower will only clear the gutters but not the pipes.

Combining this method with manual techniques can enhance overall effectiveness.

Installing Gutter Guards

Gutter guards can reduce the frequency of cleaning and the amount of debris that enters the gutters.

  1. Types: Options include screen filters, mesh guards, or solid coverings. Each type has its benefits based on your environment.
  2. Installation: Many gutter guards are easy to install yourself, but hiring a professional can ensure a proper fit.
  3. Maintenance: While guards reduce debris, occasional checks are necessary to remove any buildup and ensure functionality.

With gutter guards in place, you’ll find that your cleaning routine becomes less labor-intensive.

Safety Precautions and Professional Services

Cleaning your gutters is an essential home maintenance task, but it comes with its own safety risks and considerations for cost. Understanding how to mitigate these risks and knowing when to hire a professional can help you maintain a safe and efficient home.

Ladder Safety Tips

Using a ladder safely is crucial when cleaning gutters. Always choose a ladder that is tall enough to reach your gutters without stretching. Opt for a sturdy extension ladder rather than a step ladder, as it provides better stability.

Important ladder safety practices:

  • Ensure the ladder is on a flat surface and is fully extended.
  • Keep your body centered on the ladder, avoiding excessive reaching.
  • Consider using a ladder stabilizer for added security.

Wear appropriate footwear to avoid slipping. If you’re not comfortable on a ladder or lack experience, it’s best to seek professional help.

When to Hire a Professional

While many homeowners can clean their gutters, there are times when hiring a professional is the best option. If your home has multiple stories or if the gutters are particularly clogged with heavy debris, consider bringing in an expert.

Professional gutter cleaning services can:

  • Safely navigate difficult heights.
  • Use specialized equipment for thorough cleaning.
  • Identify potential issues that you might overlook.

If you’re hesitant about the dangers involved or simply lack the time, opting for a professional can ensure the job is done correctly and safely.

Understanding Gutter Cleaning Costs

The cost of gutter cleaning can vary based on several factors, including the size of your home and the extent of debris removal needed. On average, you might expect to pay between $100 to $300 for professional services.

Costs can vary based on:

  • Home size: Larger homes generally incur higher costs.
  • Location: Prices may differ by region due to demand.
  • Condition: Heavily clogged gutters will require more intensive work, increasing costs.

Getting multiple quotes can help you find a fair price. Regular maintenance can prevent buildup, potentially reducing future cleaning costs.

Supporting Roof and Home Maintenance

Regular gutter maintenance is essential for preserving the integrity of your roof and exterior walls. Properly functioning gutters and downspouts help prevent water damage, thereby protecting your home’s value and longevity.

Preventing Roof and Exterior Wall Damage

Clogged gutters can lead to water pooling on your roof or overflowing onto your exterior walls. This can cause serious issues, including mold growth and deterioration of materials.

To keep your roof safe, ensure gutters are clear of debris at least twice a year. If your home is near trees, consider cleaning them more frequently.

Signs that your gutters need attention include:

  • Water stains on your exterior walls
  • Water pooling around the foundation
  • Sagging or damaged gutters

Cleaning your gutters regularly mitigates the risk of these damages and preserves the aesthetic and structural integrity of your home.

Maintaining Downspouts and Seamless Gutters

Downspouts play a critical role in directing water away from your home. When they are blocked or misaligned, they can cause serious issues like foundation leaks or erosion.

Inspect downspouts during your gutter cleaning routine. Make sure they are firmly attached and directing water away from the foundation. Additionally, consider using seamless gutters as they reduce the chances of clogs and leaks.

To maintain downspouts effectively:

  • Clear any obstructions
  • Check for leaks or rust
  • Ensure proper drainage away from your home

By consistently maintaining your gutters and downspouts, you contribute to effective home maintenance, safeguarding both your roof and exterior walls.

Frequently Asked Questions

Maintaining clean gutters is essential for protecting your home from water damage. Below are common inquiries that can guide you in understanding the best practices for gutter maintenance and answer specific concerns homeowners frequently have.

What is the recommended frequency for cleaning gutters in areas with no nearby trees?

In areas without nearby trees, it’s generally sufficient to clean your gutters once a year. However, factors like weather conditions and roof types can influence this frequency. It’s wise to inspect your gutters after heavy storms or significant rainfall.

What are the best practices for cleaning out gutters effectively?

To clean gutters effectively, start by ensuring you have the right tools, such as a sturdy ladder, gutter scoop, and gloves. Begin by removing large debris by hand, and then flush the gutters with water to clear smaller particles. Ensure downspouts are free from obstructions to facilitate proper drainage.

Does installing gutter guards affect the frequency of gutter maintenance?

Yes, gutter guards can reduce the frequency of gutter maintenance. While they significantly minimize debris accumulation, periodic inspections and cleanings may still be necessary. Check the guards at least once a year to ensure they are still functioning properly.

What techniques do gutter cleaning professionals typically use?

Gutter cleaning professionals often employ specialized tools such as vacuums and hydro-jetters. They may use cameras to inspect for hidden issues. This ensures a thorough cleaning and helps identify any potential problems that may need addressing.

Is there an optimal season for gutter maintenance to prepare for fall foliage?

The best time for gutter maintenance is before the fall foliage begins. Cleaning your gutters in late summer prepares them for the impending leaf drop and prevents clogs. This proactive approach protects your home from potential water damage.

When should homeowners consider replacing their gutters?

Consider replacing your gutters if they are sagging, leaking, or showing signs of rust. Damaged gutters can lead to larger issues, such as water damage to your home’s foundation. Regular inspections can help you identify when a replacement is necessary.

How to Empty Water Tank: A Step-by-Step Guide for Efficient Drainage

Emptying your water tank can seem daunting, but it’s an essential task for maintaining its efficiency and lifespan. To properly empty a water tank, you will need to turn off the water supply and heater, attach a hose to the drain valve, and open the drain valve to let the water flow out. Following these steps ensures that you can effectively remove sediment buildup and prevent potential issues down the road.

Understanding how to carry out this process will empower you to handle your home maintenance responsibilities more confidently. By regularly emptying your water tank, you not only improve its performance but also extend its longevity, saving you from costly repairs in the future.

In this article, you will find a detailed guide that walks you through each step, making this task much more manageable than it may initially appear. Let’s dive in and get your water tank emptied efficiently.

Understanding Your Water Tank System

Knowing how your water tank system operates is essential for effective maintenance and operation. This section covers the various types of water tanks, their components, plumbing connections, and how to identify your specific water heater model.

Types of Water Tanks

Water tanks primarily fall into two categories: hot water tanks and fresh water tanks.

  • Hot Water Tanks: These are typically used in residential settings to store heated water. They can be powered by electricity, gas, or propane.
  • Fresh Water Tanks: These are designed to hold potable water for household use, often found in conjunction with well systems or municipal water supplies.

You may also encounter tankless water heaters, which heat water on demand instead of storing it in a tank. Each type has specific advantages, such as energy efficiency for tankless models versus the higher capacity of traditional tanks.

Components and Plumbing Connections

Understanding the components of your water tank helps you troubleshoot and maintain it effectively. Key components include:

  • Tank: The container that holds water.
  • Heating Element: For hot water tanks, this element heats the water.
  • Thermostat: Regulates the temperature of the water.
  • Inlet and Outlet Valves: Control the flow of water in and out of the tank.
  • Drain Valve: Allows for draining or flushing the tank.

Plumbing connections link these components to your household water supply. Ensure that connections are tight to prevent leaks, as these can lead to increased water bills and potential water damage.

Identifying Your Water Heater Model

To properly maintain your water heater, you need to know its model. Look for the manufacturer’s label, commonly located on the side or back of the unit. The label will include:

  • Model Number: Essential for finding manuals and replacement parts.
  • Serial Number: Often indicates the manufacturing date, helping you assess the age of your water heater.

Familiarize yourself with the specifics of your model, as maintenance and repair requirements can vary significantly between different brands and types. This knowledge will aid in making informed decisions when draining or servicing your tank.

Preparation Before Emptying the Water Tank

Before you begin draining your water tank, it’s crucial to prepare adequately. Proper preparation ensures safety and efficiency during the process. You should focus on shutting down the water and power supply, locating necessary valves, and assembling required tools.

Shutting Off Water and Power Supply

To ensure safety, your first step should be to shut off the power supply to the water heater. If you have an electric model, turn off the circuit breaker. For gas models, set the thermostat to the “pilot” setting.

Next, locate the cold water intake valve and turn it off. This will prevent more water from entering the tank while you drain it. Confirm that both the power supply and water intake are effectively shut off before proceeding.

Locating Valves and Drain Access

Identify the drain valve at the bottom of the water tank. This valve is typically found on the side or bottom of the unit. You may need a hose bib or a wrench to open it, depending on the model.

Also, locate the pressure relief valve, which is essential for releasing built-up pressure during the draining process. It’s beneficial to have a clear path to these valves to avoid spills and ensure that you can easily access them when necessary.

Assembling Required Tools and Safety Precautions

Gather the tools you will need before starting. A bucket or large drain pan is essential to catch the draining water. You might also require a garden hose to connect to the drain valve for easier water disposal.

Don protective gear, such as gloves and goggles, to safeguard against any splashes. Additionally, ensure that the area is well-ventilated and free from clutter to minimize the risk of accidents during the process. Being well-prepared will make the draining operation smooth and efficient.

Step-by-Step Guide to Emptying a Water Tank

Draining a water tank involves a few essential steps to ensure safety and efficiency. By preparing correctly and utilizing the right tools, you can make this process straightforward. Here’s how to go about it effectively.

Opening the Drain Valve Safely

Start by locating the drain valve, usually found at the bottom of the tank. Ensure the power supply to the water heater is turned off if it’s an electric unit. If it’s a gas heater, set the thermostat to the “pilot” setting.

Next, attach a garden hose to the drain valve. Make sure the other end of the hose directs water to a nearby sink or outside where it can go without causing damage. Before opening the valve, you might want to slightly open a hot water faucet in your home, allowing air to enter the tank and facilitating better drainage.

When ready, turn the drain valve counterclockwise to open it. Be cautious as hot water may escape. If you notice any leaks around the valve, close it immediately and troubleshoot the issue. Safety is important during this initial step to prevent injuries or water damage.

Using a Garden Hose for Efficient Drainage

A garden hose is your most efficient tool for draining a water tank. Select a hose long enough to reach your chosen drainage point—consider a sink, floor drain, or outside area. When attaching the hose to the drain valve, ensure it fits snugly to avoid water leaks.

Once the valve is open, gravity will help the water flow out through the hose. Monitor the process regularly to ensure consistent drainage. If the flow slows, check for kinks in the hose or obstructions at the drain point.

This step helps in removing sediment buildup from the tank, enhancing its efficiency. It’s a good practice to flush the tank entirely, allowing it to run until the water is clear. This maintenance can prevent future issues and extend the lifespan of your hot water tank.

Managing Cold and Hot Water During the Process

Managing the temperature of the water is crucial while draining your tank. Always shut off the cold water supply to your tank before beginning the process. This prevents additional water from entering as you drain.

If you’re dealing with a hybrid system, remember that hot water can severely scald you, so safety gear like gloves may be necessary. If you expect a significant amount of sediment, it might be beneficial to let the tank sit for about an hour after shutting off the supply.

Once drained, you can refill the tank by opening the cold water supply valve. Do this carefully to reduce air pockets. After confirming the tank is refilling, check for leaks around the drain valve again. This ensures your system remains leak-free and functions correctly after maintenance.

Special Considerations for Water Heaters and Tankless Systems

When draining water heaters, specific considerations apply based on whether you have a traditional water heater or a tankless model. Understanding the differences in procedures helps ensure safety and efficiency during maintenance.

Draining Electric vs. Gas Water Heaters

Before draining, it’s essential to turn off the power or gas supply to your water heater. For electric units, switch off the breaker and ensure that the water is sufficiently cool to avoid scalding. In gas water heaters, turn off the gas valve.

  1. Cold Water Inlet: Shut off the cold water inlet to prevent additional water from entering the tank during the draining process.
  2. Drain Valve: Attach a garden hose to the drain valve, directing it to a suitable location for draining.
  3. Opening Valves: Open the pressure relief valve to allow air in; this helps the tank drain more effectively.

Regular maintenance can prevent sediment buildup, which can cause inefficiency. Always follow manufacturer guidelines for the best practices in your model type.

Tankless Water Heater Procedures

Draining a tankless water heater requires a slightly different approach due to its construction and operation. Here’s what you need to do:

  1. Power Off: Start by turning off the power supply to your unit.
  2. Close Water Supply: Shut off the cold water that feeds into the unit.
  3. Open Taps: Open the hot water taps in your home to relieve pressure.
  4. Flush Process: For sediment removal, use a descaling solution or vinegar through the system, allowing it to sit before flushing with water.

Tankless systems often accumulate minerals, which can reduce efficiency. A proper flush procedure can extend the lifespan and maintain optimal performance, helping to avoid costly repairs down the line.

Cleaning, Maintenance, and Seasonal Preparation

Maintaining your water tank involves thorough cleaning, effective winterizing techniques, and proper insulation methods. These practices ensure your water supply remains clean and functional throughout the year.

Sanitizing the Tank with Bleach

To sanitize your water tank, begin by draining it completely. After emptying, prepare a solution of water and bleach, typically using 1 cup of bleach for every 50 gallons of water in the tank.

Steps:

  1. Pour the bleach solution into the tank.
  2. Fill the tank with fresh water and stir to mix thoroughly.
  3. Allow it to sit for at least two hours to disinfect.
  4. Drain the tank again and rinse with clean water until the bleach smell dissipates.

This process helps eliminate harmful bacteria, ensuring your water remains safe for consumption. For detailed guidelines, refer to this resource on cleaning and disinfecting tanks.

Winterizing and Antifreeze Usage

Winterizing your water tank is crucial for preventing damage during colder months. Drain all water and inspect any vulnerable components.

Follow these key steps:

  • Drain the Tank: Ensure all water is removed to prevent freezing.
  • Use Antifreeze: If applicable, add non-toxic antifreeze suitable for potable water systems to prevent freezing in pipes. Follow manufacturer instructions for the right amount.
  • Inspect Insulation: Check any existing insulation around pipes and the tank to ensure maximum protection.

This proactive approach will help safeguard your system from winter damage, promoting longevity and reliability.

Insulating to Prevent Future Issues

Proper insulation can greatly reduce the risk of freezing and other seasonal issues. Consider using insulation sleeves or blankets specifically designed for pipes and tanks.

Tips for Effective Insulation:

  • Identify Vulnerable Areas: Focus on unheated spaces where temperatures can drop significantly.
  • Materials Needed: Use foam, fiberglass, or specially designed insulation kits.
  • Seal Gaps: Ensure all openings are sealed to minimize heat loss.

Investing in insulation not only helps maintain consistent water temperatures but also improves energy efficiency for your home overall.

When to Seek Professional Help

Knowing when to call a professional can save you time and prevent further damage to your water tank system. Certain signs indicate that it’s best to consult someone with expertise, especially if you face persistent issues or lack experience with home maintenance.

Identifying Common Problems

You should be alert to specific signs that indicate a professional is needed. If your water tank is producing strange noises, leaking, or failing to heat water efficiently, these could be serious issues. For instance, a malfunctioning water pump may not only lead to inadequate hot water but could also create more extensive damage if left unchecked.

Additionally, if sediment buildup is suspected, the risk of tank corrosion increases. Attempting to resolve such matters without proper knowledge may exacerbate the situation. In such cases, seek assistance from verified experts who can diagnose and address the problem correctly. Websites like JustAnswer can connect you with professional plumbers for immediate advice.

Consulting Verified Experts

When you encounter issues beyond your technical skills, contacting verified experts is a wise choice. Professionals are trained not only to tackle complex problems but also to provide preventive maintenance measures.

By hiring someone knowledgeable, you gain insights into how to extend the lifespan of your water tank system. This can include regular maintenance checks and services tailored to your specific needs. Using resources that verify professional credentials ensures you are choosing experienced individuals who follow safety standards.

If you’re unsure where to begin, look for platforms that offer vetted professionals, ensuring you receive quality service. Investing in expert help can save you money in the long run, preventing costly repairs due to neglect.

Frequently Asked Questions

This section addresses common questions about draining water tanks. You’ll find specific guides and techniques that can be applied depending on your water heater type and setup.

What is the fastest way to drain a hot water heater?

To quickly drain a hot water heater, turn off the power supply and the cold water inlet. Then, attach a hose to the drain valve at the bottom. Open the drain valve, allowing water to flow out until the tank is empty.

Can you drain a hot water tank without shutting off the water supply?

You can drain a hot water tank without shutting off the water supply, but it’s not recommended. Keeping the supply on will cause water to flow in as you attempt to drain it, making the process longer and more complicated.

What are the steps to empty an electric water heater?

First, turn off the power supply at the circuit breaker. Close the cold water inlet valve. Attach a garden hose to the drain valve, leading it to a suitable drainage area. Then open the drain valve and let the heater empty completely.

How do I properly drain a gas water heater?

Begin by turning off the gas supply. Close the cold water inlet valve. Connect a hose to the drain valve, making sure it directs into a drain. Open the valve and let the water flow out until the tank is empty, ensuring proper safety measures are followed.

How can I drain a hot water tank if it lacks a drain valve?

If your hot water tank lacks a drain valve, your best option is to use a pump. You can connect a hose to a sump pump to remove water from the tank. Alternatively, consider siphoning the water out using a siphon hose.

What is an effective method to drain a water heater using a garden hose?

To drain a water heater using a garden hose, first ensure the power is off and the cold water inlet is closed. Attach the hose to the drain valve and place the other end outside or in a drain. Open the valve to start the water flow out of the tank.

How to Clean Water Heater Sediment: A Step-by-Step Guide for Optimal Performance

Maintaining your water heater is essential for its efficiency and longevity. Over time, sediment can build up inside the tank, reducing performance and leading to costly repairs. Cleaning water heater sediment is a straightforward process that can greatly enhance the lifespan of your appliance and ensure it runs effectively.

By regularly flushing the tank, you can remove sediment that accumulates from minerals in the water. This simple maintenance task not only improves heating efficiency but also safeguards against unexpected breakdowns. By taking the time to clean out your water heater, you are investing in the reliability of your home’s hot water supply.

With a few easy steps, you can tackle this important maintenance task yourself. You’ll find that knowing how to clean sediment buildup will empower you as a homeowner, saving you both time and money in the long run.

Understanding Water Heater Sediment

Sediment build-up in water heaters can lead to reduced efficiency and increased costs. Knowing its nature, causes, and impacts can help you maintain your water heater more effectively.

What Is Sediment Build-Up

Sediment build-up refers to the accumulation of minerals and debris at the bottom of your water heater tank. This typically consists of mineral deposits like calcium and magnesium, especially common in areas with hard water. As hot water rises and cool water enters, these particles settle. Over time, they can create a thick layer, which may restrict water flow and heating efficiency. Regular inspection and maintenance are essential to prevent significant build-up, as neglecting sediment can lead to costly repairs or replacements.

Common Causes of Sediment in Water Heaters

Several factors contribute to sediment accumulation in your water heater. The primary cause is water quality; if your supply contains high levels of minerals, sediment formation is more likely. Utilizing hard water can exacerbate this issue. Other causes include infrequent maintenance or a lack of flushing. Seasonal changes in water supply can also introduce additional debris. Additionally, heaters that operate at lower temperatures might not effectively dissolve these minerals, allowing them to accumulate faster.

Impacts of Sediment on Water Heater Performance

Sediment can significantly affect the performance of your water heater. Even a small amount can lead to reduced heating efficiency, increasing energy costs. Sediment acts as an insulator, preventing heat from effectively transferring to the water. This can result in longer heating times and inadequate hot water supply. Moreover, excessive sediment build-up can cause corrosion and damage to the tank, leading to leaks or complete failure. This not only disrupts your access to hot water but can also incur substantial repair costs. Regular maintenance helps mitigate these risks and ensures optimal performance.

Signs Your Water Heater Needs Sediment Cleaning

Your water heater’s performance can be significantly affected by sediment accumulation. Recognizing the signs early can prevent further issues and maintain efficient operation. Below are the symptoms to watch for, which indicate that your water heater may need immediate attention.

Symptoms of Sediment Accumulation

Sediment accumulation typically manifests in several noticeable ways. One of the first signs is a reduction in hot water availability. This happens when the buildup of minerals and debris settles at the bottom of the tank, taking up space that hot water should occupy.

You might also notice cloudy water or discoloration. If your hot water appears rusty or contains particles, this is often due to corrosion or sediment disrupting the water quality. Regularly checking for visual changes can help you catch any potential problems early.

Consistent monitoring of these symptoms helps maintain excellent water quality and extends the lifespan of your water heater.

Reduced Hot Water Pressure

If you’ve noticed a drop in hot water pressure, sediment buildup could be the culprit. Sediment can obstruct water lines or accumulate near the heating element, reducing flow.

You can test your hot water pressure by turning on the hot water faucet. If the pressure is noticeably weaker than before, it may be time to check for sediment. Regular maintenance helps prevent this problem, ensuring a steady supply of hot water for daily needs.

Be sure to inspect both consistency and volume during your hot water usage. Early detection can save you from more extensive repairs down the line.

Unusual Noises and Debris

Unusual noises coming from your water heater can indicate sediment buildup. Common sounds include popping or rumbling noises, which occur when the heating element works harder to heat water around the sediment.

It’s also essential to pay attention to any debris that may escape the faucet. If you see small flecks of sediment or rust in your hot water, the accumulation could be reaching problematic levels.

This kind of cleaning issue calls for immediate action. Addressing unusual noises or visible debris can enhance performance and prevent further damage.

Evaluating Water Quality Issues

Poor water quality can stem from sediment buildup in your hot water heater. If you notice changes in taste, odor, or clarity, sediment removal may be necessary.

Cloudy or foul-smelling water typically signifies mineral accumulation or potential bacterial growth, both of which can affect your overall water quality. Regularly testing your water can help you stay ahead of these issues.

Investing time in evaluating your water quality leads to better health outcomes and more reliable hot water experiences. Awareness of these factors can guide you in cleaning and maintaining your water heater effectively.

Preparing for the Sediment Removal Process

Before starting the sediment removal process, it’s essential to ensure that you’re well-prepared. The right tools and safety measures will streamline the procedure and enhance safety. Familiarizing yourself with turning off your water supply and power will further ensure a smooth experience.

Gathering Essential Tools and Materials

To effectively clean sediment from your water heater, gather the necessary tools and materials beforehand. You’ll need:

  • Garden Hose: Make sure to have a long garden hose that can reach your outdoor area for draining the tank.
  • Bucket: A bucket can be helpful for any excess water.
  • Funnel: This can aid in pouring and managing water if needed.
  • Wrench: Use this to open or close valves securely.
  • Towels: Keep some towels handy to wipe up any spills during the process.

Having everything ready will make your job easier and more efficient, minimizing the chance of forgetting anything during the procedure.

Safety Precautions for Home Repair

Safety is a priority when working on your water heater. Here are important precautions:

  • Protective Gear: Wear gloves and goggles to protect against hot water splashes and debris.
  • Ventilation: Ensure the area is well-ventilated to minimize inhalation of any gases, especially if you have a gas water heater.
  • Clear Surroundings: Remove any flammable materials around the heater to avoid accidents.
  • Inform Family: Let others in your home know you will be working on the heater to prevent accidental interruptions.

Taking these steps will enhance your safety while performing the task, making it a more secure experience.

Turning Off Power and Water Supply

Before proceeding, it’s critical to turn off the power and water supply to your water heater:

  • Electric Water Heater: Locate the power switch or circuit breaker and turn it off. This prevents electrical hazards while you work.
  • Water Supply: Shut off the cold-water valve connected to the water heater to stop water from entering the tank.
  • Hot Water Faucet: Open a nearby hot water faucet to relieve pressure in the system.

These actions are crucial for ensuring that you can work safely without risking electric shocks or leaks. It sets the groundwork for the entire sediment removal process.

Step-by-Step Guide to Cleaning Water Heater Sediment

Cleaning sediment from your water heater is essential for maintaining its efficiency and longevity. This guide provides a clear process to help you manage sediment buildup and ensure your water heater operates effectively.

Draining the Tank with a Garden Hose

Start by turning off the power supply to your electric water heater. This ensures safety while working on the unit. Next, connect a garden hose to the drain valve located at the base of the tank. Position the other end of the hose in a suitable drainage area, such as a floor drain or outside.

Open a hot water faucet in your home to allow air into the system, which helps with the draining process. Once the air is introduced, open the drain valve, letting the water flow out. Allow the tank to drain completely. Keep an eye on the hose to ensure it doesn’t clog with sediment.

Flushing Out Sediment and Debris

Once the tank is empty, it’s vital to flush out any remaining sediment. With the drain valve still open, turn off the cold water supply valve. Then, briefly open the cold water valve to let water flow back into the tank. This process stirs up any lingering debris.

Let the water run for a few minutes, then close the drain valve and remove the garden hose. Open the cold water valve fully to fill the tank again and switch on the power supply. This step ensures that any sediment is cleared out completely, enhancing the efficiency of your water heater.

Cleaning the Drain Valve and Dip Tube

After flushing, inspect the drain valve for any debris that may be stuck. If it’s clogged, clean it thoroughly. A small brush can help dislodge sediment from inside the drain valve. Ensure the valve is functional by opening and closing it a few times.

Next, locate the dip tube, which directs cold water to the bottom of the tank. Check for blockages or corrosion. Cleaning the dip tube can greatly improve the water heater’s performance by ensuring proper water flow. If the dip tube is damaged, consider replacing it for optimal efficiency.

Inspecting Anode Rod and Sacrificial Anode

An essential part of maintaining your water heater is to check the anode rod, which helps prevent corrosion inside the tank. Access the anode rod by removing the top cover of the water heater. Visibly inspect for significant wear or corrosion.

A well-maintained anode rod typically lasts several years, but if it is thin or corroded, replace it. You may find different types, such as magnesium or aluminum rods. A new sacrificial anode will extend the life of your water heater by absorbing corrosive elements, ensuring that the tank remains intact and functional longer.

Preventing Future Sediment Build-Up

To maintain the efficiency of your water heater, it’s crucial to take proactive steps that prevent sediment accumulation. By focusing on specific interventions, you can significantly extend the lifespan of your water heater and improve overall performance.

Installing Water Softeners and Filtering Systems

Installing a water softener can greatly reduce sediment build-up. Hard water contains minerals like calcium and magnesium, which contribute to scale accumulation over time. A water softener works by replacing these minerals with sodium ions, resulting in softer water that minimizes sediment formation.

In addition to water softeners, consider a filtering system. This system will help capture contaminants before they enter your water heater. Look for filters that are designed to tackle sediment, rust, and other impurities. Regularly maintaining these systems ensures that your water remains clean and reduces wear on your water heater.

Regular Maintenance Procedures

Implementing a schedule for regular maintenance is essential for preventing sediment build-up. At a minimum, you should flush your water heater once a year. This process involves draining the tank to remove built-up sediment.

In addition to flushing, check the anode rod periodically. This rod helps protect your water heater from corrosion. If the rod is significantly corroded, replace it to ensure continued protection. Regular checks and flushes not only improve performance but also extend the longevity of your system.

Adjusting Thermostat for Optimal Heat Transfer

Setting your water heater’s thermostat correctly can also prevent sediment build-up. Keeping the temperature too high can accelerate mineral deposits. A temperature setting between 120°F and 140°F is generally recommended for efficient heat transfer without excessive sediment creation.

When the temperature is optimized, it promotes better circulation within the tank. This circulation helps to dissolve any minerals that might settle. Regularly review and adjust your thermostat setting as needed, especially if you notice changes in water quality or heater performance. This simple adjustment can have lasting benefits for your water heater’s efficiency.

When to Seek Professional Assistance

When dealing with water heater sediment, certain situations may require professional attention. Understanding when to seek help can ensure the longevity of your tank and provide peace of mind.

Identifying Complex Plumbing Issues

If you encounter persistent issues like low water pressure or frequent temperature fluctuations, it’s wise to consult a plumbing expert. These signs can indicate underlying problems such as pipe obstructions or corrosion in your system.

Often, complex plumbing issues are not easily identifiable and can worsen without proper diagnosis. A licensed plumber can efficiently identify these problems and recommend a targeted solution, saving you time and potential future costs.

Regardless of whether you have an electric water heater or a gas model, addressing complicated concerns promptly can prevent further damage and ensure the safe operation of your system.

Understanding Warranty and Repair Services

Check if your water heater is still under warranty before attempting repairs. Many warranties require professional service to remain valid. If you perform repairs yourself or hire an unqualified technician, you risk voiding this essential coverage.

In some cases, using services like JustAnswer can connect you with professionals who can advise on warranty terms and repair options. They can assist you in determining the best course of action based on your specific water heater model and situation.

If repairs are needed, choose a service that understands the nuances of your warranty. This can save you from incurring unexpected expenses.

Upgrading Older or Inefficient Water Heaters

If your water heater is over ten years old or showing signs of inefficiency, replacing it may be a better option than repairs. Newer models offer enhanced energy efficiency and can reduce your monthly utility bills.

Consult a professional to evaluate whether an upgrade is necessary. They can help you select the right model for your needs and ensure proper installation.

Given the significant advancements in hot water heater technology, upgrading can also enhance your home’s comfort and convenience. An informed decision can lead to long-term savings, making professional guidance essential in this process.

Frequently Asked Questions

Understanding how to manage sediment in your water heater is crucial for maintaining its efficiency. Here are answers to common questions that can guide you in addressing sediment issues effectively.

What are the symptoms indicating the presence of sediment in a water heater?

You may notice several symptoms of sediment buildup. These include a decrease in hot water supply, unusual noises like popping or rumbling, and discolored or cloudy water. If your water heater is taking longer to heat water, sediment may be the culprit.

What is the recommended procedure for flushing sediment from a water heater?

To flush sediment from your water heater, start by turning off the power or gas supply. Next, shut off the cold water supply and attach a hose to the drain valve. Open the valve and allow the water to flow out until it runs clear. Be cautious, as water can be very hot.

Are there any dangers associated with sediment buildup in a hot water tank?

Sediment buildup can lead to a number of risks. It may cause the tank to overheat, which can damage the heating elements or even result in a tank failure. Additionally, sediment can reduce your water heater’s efficiency, leading to higher energy costs.

How can sediment accumulation in a water heater be prevented?

To prevent sediment buildup, consider flushing your water heater regularly, ideally every six months to a year. You can also use a water softener if you have hard water, reducing mineral deposits. Regular maintenance checks also help in identifying issues early.

Can vinegar be used to clean sediment from a hot water heater, and if so, how?

Yes, vinegar can effectively clean sediment. Pour a gallon of white vinegar into the cold water line, and let it sit for an hour to help dissolve sediment. Afterward, flush the tank with clean water to remove any remaining debris.

What does the sediment in a water heater typically look like?

Sediment in a water heater often appears as a layer of rust or mineral deposits, which may look like small flakes or granules. It typically collects at the bottom of the tank and can vary in color from yellow to brown or even white, depending on the minerals present in your water.

Do You Have to Flush a Tankless Water Heater for Optimal Performance?

When it comes to tankless water heaters, regular maintenance is crucial for optimal performance. Flushing your tankless water heater at least once a year is necessary to remove mineral deposits that can accumulate and impact efficiency. If you live in an area with hard water, this maintenance becomes even more important to ensure a continuous supply of hot water.

Neglecting to flush your tankless water heater can lead to decreased water pressure, longer wait times for hot water, and ultimately, costly repairs. Many homeowners wonder whether this maintenance task is essential, and the answer is a resounding yes. Your water heater works hard to provide comfort, and maintaining it properly will extend its lifespan.

In this article, you will discover the benefits of flushing your tankless water heater and learn how to perform the task effectively. Understanding this process can save you money and ensure reliable hot water when you need it most.

Understanding Tankless Water Heaters

Tankless water heaters are designed to provide on-demand hot water, making them a popular choice among homeowners seeking efficiency and performance. Understanding how these systems work and their maintenance requirements is essential for optimal use.

How Tankless Water Heaters Work

Tankless water heaters operate by heating water directly as it flows through the unit. When you turn on a hot water tap, cold water travels through a pipe into the unit, where a powerful heating element or burner activates. This allows for an uninterrupted supply of hot water without the need for a bulky storage tank.

Energy efficiency is a significant advantage of tankless systems, as they heat water only when needed. This can lead to lower energy bills compared to traditional tank models, which continuously heat and store water. For those with higher hot water demands, multiple units can be installed to ensure adequate supply.

Differences Between Tank and Tankless Systems

Tank water heaters store a set amount of hot water, typically ranging from 20 to 80 gallons. They must maintain this temperature, leading to standby heat loss, which can waste energy. In contrast, tankless systems have no storage and provide hot water instantly, significantly improving efficiency.

Additionally, tankless water heaters tend to have a longer lifespan, often exceeding 20 years with proper maintenance, compared to 10-15 years for tank versions. While tank models have lower initial costs, tankless systems save money over time through enhanced efficiency and reduced energy consumption.

Importance of Regular Maintenance

Regular maintenance is crucial for the performance of your tankless water heater. Over time, mineral buildup from hard water can affect efficiency and reduce the lifespan of the unit. Flushing the system annually helps remove these deposits, ensuring optimal functionality.

You may also need to check the water filters and intake pipes for clogs, as blockages can lead to decreased water flow and pressure. By staying on top of maintenance, you can ensure that your tankless system provides reliable hot water while extending its operational life. Regular care can minimize the risk of costly repairs or replacements in the future.

Why Flushing a Tankless Water Heater Is Necessary

Flushing your tankless water heater is crucial for maintaining its efficiency and longevity. Proper care can prevent common issues like scaling and mineral buildup that negatively impact performance and energy efficiency. Understanding these factors will help you make informed decisions about your home maintenance routine.

Preventing Scaling and Mineral Buildup

Hard water is a significant concern for tankless water heaters. When minerals like calcium and magnesium present in hard water accumulate, they lead to scaling inside the heating chamber. This scaling can erode the walls, diminishing the unit’s effectiveness and lifespan.

Regular flushing helps remove these mineral deposits, keeping your system clean. It is often recommended to flush your tankless water heater at least once a year, especially in areas with hard water. If left unchecked, scaling can create blockages, reducing water flow and leading to further plumbing issues.

Impact on Performance and Energy Efficiency

A tankless water heater that hasn’t been flushed may struggle to maintain the desired water temperature. Scaling acts as an insulator, requiring more energy to heat water effectively. This inefficiency can lead to increased energy costs, which is contrary to the benefits a tankless system offers.

By maintaining a routine flushing schedule, you ensure that your heater operates efficiently. This not only helps in providing hot water on demand but also optimizes energy performance. Homeowners who neglect this maintenance may experience reduced flow rates and inconsistent temperatures, detracting from the comfort and convenience their systems should provide.

Risks of Skipping the Flushing Process

Neglecting to flush your tankless water heater can result in serious consequences. Without regular maintenance, you put your unit at risk of costly repairs due to extensive scaling and mineral buildup.

Clogged systems often lead to decreased water flow, and in some cases, complete breakdowns. Additionally, reduced efficiency can increase energy consumption significantly, which is not ideal for your budget. Timely flushing not only extends the heater’s life but also enhances performance and maintains lower energy costs. Therefore, prioritizing this task can make a notable difference in your home’s plumbing health.

How to Flush a Tankless Water Heater

Flushing your tankless water heater is essential for maintaining its efficiency and lifespan. This process involves using a descaling solution, typically white vinegar, to remove mineral buildup inside the unit. Below are the required tools and a detailed step-by-step guide to perform the flushing.

Required Tools and Supplies

To effectively flush your tankless water heater, gather the following tools and supplies:

  • White vinegar or a suitable descaling solution
  • Submersible pump: This will help circulate the vinegar through the system.
  • Flush kit: Most kits include hoses and fittings for easy connection.
  • Isolation valves: These allow you to isolate the heater from the water supply.
  • Bucket: Use this to collect used vinegar or descaler.
  • Pressure relief valve: Ensure that the system is safely depressurized before starting.

Having these items ready will streamline the flushing process and help prevent unnecessary complications.

Step-by-Step Flushing Instructions

  1. Turn Off the Power: Before starting, make sure to turn off the power to the tankless water heater.
  2. Close the Isolation Valves: Shut off the cold water supply valve and the hot water outlet valve to isolate the heater.
  3. Connect the Flush Kit: Attach the flush kit to the isolation valves. Ensure all connections are secure.
  4. Add Vinegar: Pour 4 to 5 gallons of white vinegar into the bucket, then place the submersible pump in the bucket.
  5. Start the Pump: Turn on the pump to circulate the vinegar through the heater. Let it run for about 30 minutes.
  6. Flush the System: After the time is up, disconnect the pump and open the isolation valves to flush the system with fresh water.
  7. Check the Inlet Filter: Inspect and clean the inlet filter during this process to enhance efficiency.

Completing these steps will help ensure your tankless water heater operates efficiently.

Common Mistakes to Avoid

When flushing your tankless water heater, you should avoid certain common pitfalls:

  • Neglecting Safety: Always turn off the power and let the unit cool before starting.
  • Skipping Vinegar: Using only water may not effectively remove mineral buildup. White vinegar is preferred for descaling.
  • Improper Connections: Ensure all hoses and fittings are correctly attached to avoid leaks.
  • Ignoring Maintenance: Regular flushing is crucial. Don’t wait too long between flushes, as prolonged neglect can cause damage.

By being aware of these mistakes, you can achieve better results during maintenance.

Factors Influencing Flushing Frequency

Several elements affect how often you should flush your tankless water heater. Understanding these factors can help you maintain efficient performance and prolong the lifespan of your unit.

Effects of Water Hardness

Water hardness significantly impacts the flushing frequency of your tankless water heater. Hard water contains elevated levels of calcium and magnesium, which can lead to mineral buildup inside the unit. This buildup can impede efficiency and heat transfer.

If you live in an area with hard water, consider flushing your system every 6-12 months. Regular flushing prevents sediment from accumulating and helps maintain optimal performance. You might also notice decreased energy bills as the unit works more efficiently.

Role of a Water Softener or Filter

Using a water softener can greatly influence the frequency with which you need to flush your heater. A water softener reduces the concentration of calcium and magnesium in your water, minimizing the risk of mineral buildup.

As a result, this can extend the flushing interval to once every 12-24 months. If you install a quality filtration system, it can further help in reducing sediments and impurities, which can enhance your unit’s longevity and functionality.

Considerations for Well Water and Soft Water

If you rely on well water, you must be particularly vigilant about flushing. Well water can contain various minerals and sediments that contribute to buildup in your tankless water heater. This might necessitate more frequent flushing, potentially every 6-12 months, depending on your water quality.

On the other hand, if you use soft water, the risk of buildup is lower. In such cases, flushing might only be necessary every couple of years. Always test your water quality to tailor your maintenance schedule according to your specific situation.

Troubleshooting and Expert Recommendations

Maintaining your tankless water heater is crucial for optimal performance. Proper troubleshooting can help you identify issues early, and consulting verified experts ensures you receive the right care for your system.

Recognizing Signs of Issues

You should be aware of specific indicators that suggest your tankless water heater may need attention. Some common signs include:

  • Reduced Water Flow: If you notice a significant decrease in the water flow, it may mean that the system needs descaling.
  • Inconsistent Water Temperature: Fluctuations in temperature can signal mineral buildup affecting performance.
  • Leaks: Observe for any pooling water around the unit, indicating potential leaks that could require immediate attention.

It’s essential to address these issues promptly to prevent further damage and maintain efficiency.

When to Consult Verified Experts

If you notice signs of trouble that you cannot resolve, it’s time to consult a verified expert. Professionals can provide a comprehensive diagnostic of your system. Look for:

  • Certification: Ensure your technician has the appropriate certifications and experience with tankless water heaters.
  • References: Checking reviews or getting recommendations can help you choose someone who understands specific brands like Takagi.

Consulting an expert can ultimately save you money by preventing more costly repairs later.

Manufacturer Guidelines: Takagi and Others

Following manufacturer guidelines is essential for maintaining your tankless water heater, especially for brands like Takagi. Familiarize yourself with the specific maintenance schedule and recommendations, including:

  • Flushing Frequency: Typically, tankless water heaters should be flushed annually to remove mineral buildup.
  • Proper Ventilation: Ensure the unit is well-ventilated to reduce stress on the system.
  • Water Quality: Check that water hardness is within the recommended levels to avoid scale buildup.

Adhering to these guidelines can extend the lifespan of your water heater and optimize performance.

Frequently Asked Questions

Flushing a tankless water heater is an essential aspect of maintenance. Here, you will find answers to common questions that can help ensure your unit operates efficiently and lasts longer.

What is the recommended frequency for flushing a tankless water heater?

You should flush your tankless water heater at least once a year. If you have hard water, consider flushing it every six to nine months. This helps remove mineral buildup that can impede performance.

Can you use vinegar to flush a tankless water heater, and if so, for how long?

Yes, you can use vinegar to flush a tankless water heater. It is advisable to let the vinegar sit in the unit for about 60 minutes to effectively dissolve mineral deposits. Afterward, make sure to flush with clean water.

What are the steps involved in flushing a tankless water heater?

To flush the unit, turn off the power and cold water supply. Connect a hose to the heater’s service valves, and place the other end in a bucket with descaling solution or vinegar. Open the service valves and let the solution circulate for the recommended time before flushing with clean water.

Is a flush kit necessary for tankless water heater maintenance, and what does it typically include?

A flush kit is not strictly necessary but makes the process easier. A typical kit includes a pump, hoses, and fittings required for flushing. This equipment helps to efficiently circulate the cleaning solution through the heater.

What is the average cost of professional tankless water heater maintenance?

The cost for professional maintenance generally ranges from $100 to $300, depending on the service provider and region. This includes the flushing process and any additional checks on your unit.

Are there any specific flushing procedures for a Rinnai tankless water heater?

Rinnai units typically require a similar flushing process. Ensure to follow the manufacturer’s guidelines, which might include specific solutions or conditions. Flushing should be done annually, along with routine checks to maintain efficiency.

How to Remove Sediment from Hot Water Heater: A Step-by-Step Guide for Maintenance

If you notice your hot water isn’t as hot as it used to be or your water heater is making unusual noises, sediment buildup might be the culprit. Removing sediment from your hot water heater is essential to maintaining its efficiency and prolonging its lifespan. This process not only improves the quality of your hot water but also helps prevent costly repairs down the line.

Understanding how to flush your water heater is a straightforward yet crucial skill for any homeowner. It typically involves turning off the power, draining the tank, and flushing it out with water. This simple maintenance task can significantly enhance the performance of your water heater and ensure that you have consistent hot water when you need it.

By taking the time to manage sediment in your water heater, you can enjoy peace of mind and a more efficient system. Dive into this guide to learn the step-by-step process for removing sediment and keeping your hot water heater in prime condition.

Understanding Sediment in Hot Water Heaters

Sediment build-up in hot water heaters can significantly impact their efficiency and lifespan. Understanding the causes and types of sediment, as well as their effects, is crucial for maintaining optimal performance of your hot water system.

What Causes Sediment Build-Up

Sediment build-up in hot water heaters typically results from mineral deposits, especially in areas with hard water. As water is heated, minerals like calcium and magnesium precipitate out and settle at the bottom of the tank.

Additionally, organic debris such as rust and dirt can enter the tank through the inlet supply line. Inconsistent maintenance can exacerbate this issue. When these materials accumulate, they create a layer that can reduce heating efficiency, leading to increased energy bills and possibly affecting the quality of your hot water.

Types of Sediment and Debris

There are several types of sediment that can accumulate in your hot water heater:

  • Mineral Deposits: Mainly consist of calcium and magnesium, which come from hard water.
  • Rust and Corrosion: Often originates from deteriorating tanks or pipes, introducing iron and other contaminants.
  • Organic Matter: Includes dirt, sand, and other debris that may enter the system.

Each type contributes differently to the overall sediment build-up. The presence of these sediments can lead to scaling on heating elements, which negatively affects heating performance and can eventually lead to the need for repairs.

Effects on Hot Water and Performance

The build-up of sediment can have several adverse effects on your hot water heater’s performance:

  1. Reduced Efficiency: Sediment acts as insulation, preventing the efficient transfer of heat. Your heater has to work harder, increasing energy consumption.
  2. Temperature Fluctuations: As sediment accumulates, you may experience inconsistent water temperatures, which can be frustrating during daily use.
  3. Potential Damage: Over time, excessive sediment can lead to tank corrosion or even complete failure of the unit, requiring costly repairs or replacements.

Regular maintenance and flushing of the tank can help mitigate these effects, ensuring your hot water heater operates efficiently and lasts longer.

How to Remove Sediment from Your Hot Water Heater

Maintaining your hot water heater by removing sediment is crucial for its efficiency and longevity. This process involves several key steps, from flushing the tank to utilizing tools such as a garden hose and drain valve for a thorough clean.

Flushing the Tank Step by Step

To flush your hot water heater, start by turning off the power or gas supply to the unit. Next, turn the cold water supply valve off. Attach a garden hose to the drain valve at the bottom of the tank, directing the other end of the hose into a drainage area.

Open the drain valve slowly to release the water and sediment buildup. Allow the tank to empty fully, which could take several minutes. Once drained, briefly turn the cold water supply back on to disturb any remaining sediment. After this, close the drain valve, remove the hose, and refill the tank by opening the cold water supply valve.

Make sure to turn the power back on once the tank is full.

Using a Garden Hose and Drain Valve

Using a garden hose and drain valve is essential for effectively removing sediment. First, ensure you have a hose long enough to reach your intended drainage area. Attach the hose securely to the drain valve located at the bottom of the water heater.

When opening the valve, water will flow out, carrying sediment with it. Be cautious, as the water may be hot. For increased effectiveness, let the tank sit empty for a few moments before closing the valve and giving the tank a final flush. This method minimizes sediment buildup and helps maintain your heater’s efficiency, extending its lifespan.

Cleaning Out Remaining Sediment

After the initial flush, some sediment may still remain in the tank. To tackle this, consider using a vinegar flush. This involves pouring a solution of vinegar and water into the tank, letting it sit for a couple of hours. The acidic properties of vinegar work to dissolve stubborn sediment.

After the soaking period, flush the tank again. Open the cold water supply while the drain valve is still open to rinse away any dissolved sediment. Repeat this process if necessary. Regularly cleaning out sediment not only improves performance but also enhances water quality, ensuring it remains safe for use.

Tools and Precautions for Safe Sediment Removal

Ensuring you have the right tools and taking necessary precautions is essential for safely removing sediment from your hot water heater. Being well-prepared will make the process smoother and minimize risks during the task.

Necessary Plumbing Tools and Equipment

To successfully flush out sediment, gather the following essential tools:

  • Garden Hose: Use a reliable garden hose to direct wastewater safely outside or into a bucket.
  • Bucket or Drain Pan: Position this to catch any water that drains from the heater.
  • Wrench: A standard adjustable wrench will help with loosening and tightening fittings.
  • Screwdriver: A flathead screwdriver can assist with any screws on the water heater.
  • Thermometer: Optional, but useful for ensuring that the water temperature is safe before beginning.

Make sure all tools are in good condition before starting the process. Having these items ready allows you to address issues as they arise.

Safety Tips for Home Repair

Prioritize safety throughout the sediment removal process. Here are key precautions:

  • Turn Off Power: Before starting, ensure the water heater is turned off to avoid electric shock. This applies to both gas and electric units.
  • Check Temperature: Confirm that the water is cool enough to handle, ideally below 120°F (49°C).
  • Wear Protective Gear: Use gloves and safety goggles to protect against splashes and debris.
  • Ventilation: Ensure the area is well-ventilated to avoid fumes, especially if you’re using cleaning solutions.
  • Stability: Keep your work area uncluttered to prevent accidents. If you’re using ladders or other fixtures, make sure they are stable.

Following these tips can significantly reduce the risks involved in the sediment removal process.

Preventing Future Sediment Build-Up

To reduce sediment accumulation in your hot water heater, consider implementing specific measures. Utilizing water softeners and filters, along with routinely inspecting critical components like the dip tube and anode rod, can significantly enhance your system’s efficiency and longevity.

Using Water Softeners and Filters

Installing a water softener can be a game changer if you have hard water. Hard water contains minerals like calcium and magnesium that contribute to sediment build-up in your water heater. A water softener exchanges these hard minerals for sodium ions, effectively reducing scale formation.

Additionally, using a sediment filter can capture particles before they reach your water heater. Place the filter in the water supply line feeding the heater. Regularly replacing these filters ensures optimal functionality. Together, water softeners and filters mitigate sediment accumulation, prolonging the life of your heater and improving water quality.

Inspecting the Dip Tube and Anode Rod

The dip tube directs incoming cold water to the bottom of the tank, which helps maintain consistent heating. If your dip tube is damaged or deteriorated, it can lead to sediment stirring in the tank. Inspect it for cracks or blockage during regular maintenance. Replacing a faulty dip tube can help maintain efficiency.

The anode rod plays a vital role in preventing corrosion within the tank. As the rod degrades, it attracts corrosive elements, protecting the metal tank. Regularly check the anode rod and replace it if significantly corroded. By ensuring both the dip tube and anode rod are in good condition, you can effectively minimize sediment build-up and extend your water heater’s lifespan.

Special Considerations for Different Water Heater Types

Understanding how different water heater types function can assist you in effectively managing sediment removal. Electric and gas water heaters may require distinct maintenance approaches. Additionally, monitoring components like faucet aerators and pressure relief valves is crucial for overall functionality.

Electric Water Heaters vs. Gas Water Heaters

For electric water heaters, sediment buildup often occurs at the bottom of the tank. Flushing the tank regularly helps prevent this issue. Disconnect the power supply before starting the process to ensure safety.

In contrast, gas water heaters may have different sediment challenges due to the combustion process. High temperatures can contribute to mineral buildup. It’s recommended to maintain appropriate temperature settings to minimize sediment formation.

Both types benefit from periodic maintenance, but the approach may vary based on the energy source. Always refer to your specific unit’s manual for tailored advice.

Maintaining Fixtures Like Faucet Aerators

Sediment can also affect faucet aerators, which can lead to reduced water flow. Periodically inspect and clean aerators to ensure they are free from blockages. Unscrew the aerator from the faucet and soak it in vinegar to help dissolve any mineral deposits.

Make sure to rinse it well before reattaching. Keeping your faucet aerators clean will enhance water pressure and improve the overall efficiency of your plumbing system. Regular maintenance of these small fixtures complements your water heater upkeep.

Checking the Pressure Relief Valve

The pressure relief valve is a critical component of your water heater’s safety system. It regulates pressure within the tank, preventing dangerous situations. Test this valve at least once a year to ensure it functions correctly.

To do this, lift the lever on the valve and allow some water to escape. If water flows freely and stops when you release the lever, the valve is operating correctly. If not, it may need replacement. Ensuring your pressure relief valve works effectively contributes to your water heater’s safety and longevity.

Frequently Asked Questions

This section addresses common queries regarding sediment buildup in hot water heaters. Understanding these points can help you maintain your system effectively and prevent potential issues.

What are the symptoms that indicate sediment buildup in a hot water heater?

You may notice signs such as reduced hot water supply, unusual noises like clanking or popping, or discolored water. These symptoms are often indicators that sediment is accumulating at the bottom of the tank.

Can sediment accumulation in a hot water tank be hazardous?

Yes, sediment buildup can lead to overheating, which increases the risk of tank failure or leaks. In extreme cases, it may even pose a fire hazard, especially in electric water heaters.

What is the correct procedure to flush an electric water heater?

Start by turning off the power to the heater. Next, connect a garden hose to the drain valve at the bottom of the tank and place the other end in a suitable drainage area. Open the drain valve and allow the tank to empty, then flush it with cold water until the water runs clear.

How can vinegar be used to clean a hot water heater?

To use vinegar, first, you need to drain some water from the tank. Then, pour vinegar into the tank through the cold water inlet. Allow it to sit for several hours or overnight to dissolve the sediment. Finally, flush the tank thoroughly with water.

What are the steps to drain a hot water heater quickly?

Turn off the power or gas supply to the heater. Attach a garden hose to the drain valve and ensure it flows to a drain or outside. Open the valve and let the water flow out, then flush with cold water to remove sediments until it runs clear.

How can one prevent sediment from accumulating in a water heater?

Regular maintenance is key. You can flush your water heater annually to remove sediment buildup. Additionally, consider using a water softener if your water supply is hard, as this reduces mineral deposits.

How to Find the Best Gutter Maintenance Service for Your Home’s Needs

Maintaining your gutters is a crucial aspect of home upkeep that can prevent significant damage to your property. Clogged gutters can lead to water overflow, causing harm to your home’s foundation and structure. To find the best gutter maintenance service, focus on local companies with strong reviews and a proven track record in managing gutter systems effectively.

Your choice of service can greatly influence the longevity of your gutter system. Look for professionals who prioritize preventive maintenance rather than just repairs. This proactive approach ensures that issues are addressed before they escalate, saving you money and hassle in the long run.

When selecting a gutter maintenance service, consider those that offer comprehensive home maintenance options. A reliable provider allows you to tackle multiple tasks in a single visit, minimizing the need for various service providers and making your home maintenance more efficient.

Understanding Gutter Maintenance

Gutter maintenance is crucial for protecting your home from water damage and ensuring that your drainage system functions effectively. Regular care prevents clogs and other issues that could lead to significant problems down the line.

Importance of Regular Gutter Care

Regular gutter cleaning is essential to prevent clogs caused by leaves, twigs, and other debris. When gutters are blocked, water cannot flow freely, leading to overflows. This situation can cause water to seep into your roof, walls, or foundation.

By scheduling routine inspections and cleanings, you ensure that your gutters remain in optimal condition. This preventive maintenance helps identify minor issues before they escalate. Investing in regular care saves you money on costly repairs that stem from major water damage.

Consider hiring a professional service that specializes in gutter maintenance. Totally Maintained, for example, can handle multiple maintenance tasks during a single visit, saving you time and effort.

Consequences of Neglect

Neglecting your gutters can lead to serious consequences. Without routine cleaning, debris accumulates, creating blockages that can cause water damage to your home. Over time, this can result in structural issues such as mold growth, rotting wood, and damage to your foundation.

Water that overflows from clogged gutters can also pool around your property, leading to erosion and landscape damage. In extreme cases, neglect can force you into costly repairs or even replacements of your gutter system.

To avoid these issues, create a maintenance schedule. Aim to inspect your gutters at least twice a year, especially before and after heavy rain seasons. Taking these steps preserves your home’s integrity and protects your investment.

Choosing the Right Gutter Service

Selecting the right gutter service involves careful consideration of the company’s professionalism and understanding of costs. Evaluating these factors will help ensure your gutters are well-maintained and effectively protected from damage.

Assessing Professional Gutter Cleaning

When choosing a gutter cleaning service, prioritize professionalism and experience. Look for companies with proven track records in residential gutter maintenance.

Key factors to consider include:

  • Experience and Expertise: Ensure the company has a history of successfully handling gutter maintenance. Established businesses often have the best practices in place.
  • Customer Reviews: Check online reviews and ratings. Positive feedback from previous clients is a strong indicator of quality service.
  • Free Estimates: Obtain detailed quotes from multiple companies. A transparent estimate helps you understand the services offered and avoid hidden charges.

Additionally, inquire about their cleaning methods. Professional services should utilize safe techniques that protect your home’s exterior while ensuring the gutters are thoroughly cleaned.

Comparing Gutter Cleaning Costs

Gutter cleaning costs can vary widely depending on several factors. Understanding these variables allows you to make an informed decision.

Consider these cost-related factors:

  • Service Scope: The more extensive the service (e.g., repairs, maintenance plans), the higher the cost may be. Ensure you know what’s included.
  • Location: Searching for “gutter cleaning near me” can provide localized pricing options. Rates may differ based on your region.
  • Seasonality: Prices may fluctuate during peak seasons. Scheduling during off-peak times can sometimes lead to savings.

Always ask for specifics about what is covered in the fee. Establishing clarity on pricing will help you find a service that fits your budget while ensuring quality maintenance of your gutters.

Gutter Guards and Gutter Protection

Gutter guards play a crucial role in maintaining your home’s gutter system by preventing debris buildup. They significantly reduce the frequency of cleaning and the risk of clogs, ultimately protecting your home from water damage. Understanding the benefits of gutter guard installation and how to find the best system is essential for effective gutter maintenance.

Benefits of Gutter Guard Installation

Installing gutter guards offers several advantages. First, they significantly reduce the need for regular cleaning, saving you time and effort. With a quality gutter shutter system, you won’t have to climb ladders frequently to clear leaves and debris.

A common feature of many gutter guards is a clog-free guarantee or no-clog warranty. This ensures that your gutters will function properly, diverting water away from your home without blockages. Additionally, they can extend the lifespan of your gutters by preventing rust and corrosion caused by stagnant water.

Gutter guards also enhance the aesthetic appeal of your home. Many systems are designed to blend seamlessly with your roofline, offering a discrete appearance while functioning effectively.

Finding the Best Gutter Guard System

When searching for the best gutter protection, consider several factors. Start by evaluating the materials used in the construction of the gutter guards. Stainless steel and aluminum offer durability, while mesh options can provide excellent filtration.

Look for customer reviews and ask for recommendations to find reliable brands. Some well-reviewed options include systems that come with a no-clog warranty, ensuring you invest in a reliable product that fits your needs.

Consult professionals for gutter guard installation advice. Expertise can help determine the best match for your home’s architecture and local environment. Conducting thorough research will aid in selecting the right gutter guards, ensuring optimal performance and protection for your home.

Gutter Maintenance Techniques

Maintaining clean gutters is essential for preventing water damage and ensuring your home’s structural integrity. You can choose to tackle this task yourself or hire professional services, each offering its benefits.

DIY Cleaning Tips and Tools

When cleaning your gutters, the right tools can make all the difference. Start with a sturdy ladder to safely reach those hard-to-access areas. Wear protective clothing, including gloves and goggles, to shield yourself from debris and potential allergens.

Using a high-pressure hose or a standard garden hose with a spray nozzle can help wash out blockages effectively. A gutter scoop is also beneficial for removing leaves and dirt. For heavy buildup, consider using a power washer, but use it cautiously to avoid damaging the gutters.

Establish a routine cleaning schedule, ideally twice a year, or more frequently in areas with heavy foliage. This proactive approach helps maintain clean gutters and prevents costly repairs down the road.

Professional Services Vs. Self-Maintenance

Deciding between DIY maintenance or hiring professionals depends on your comfort level and the complexity of the task. Professional services typically handle the job more efficiently and may identify issues you might overlook, such as sagging gutters or leaks.

If you opt for a professional gutter cleaning service, choose a company with a solid reputation. Inquire about their cleaning process and the tools they use. For example, services that include power washing can ensure thorough cleaning.

While self-maintenance saves on costs, hiring professionals frees you from the physical demands of the work, allowing you to focus on other home maintenance tasks. Weigh the pros and cons to find what best suits your needs.

Making an Informed Decision

Choosing the right gutter maintenance service requires careful consideration of various options. Evaluating the services available and taking appropriate action will ensure your gutters are properly maintained for optimal performance.

Evaluating Service Options

Start by researching professional gutter maintenance services in your area. Look for companies that prioritize experience, using trained technicians to perform tasks effectively. Focus on those with positive customer reviews, indicating reliability and quality.

Consider the types of services offered. A comprehensive provider may include gutter cleaning, installation, and repairs to cover all your needs. Ensure they are familiar with different gutter styles and materials. It’s also essential to inquire about safety measures they implement during service.

Don’t forget to explore financing options if budget constraints are a concern. Many companies offer flexible payment plans that can make maintaining your home’s gutters more manageable. This way, you can prioritize necessary work without financial stress.

Taking Action for Your Home

Once you have evaluated your options, it’s time to engage with potential services. Reach out to a few top candidates for quotes and detailed descriptions of their offerings. Ask specific questions about their processes and the equipment they use to ensure high standards.

When hiring a professional, confirm that they have the necessary licenses and insurance. This protects you from liability in case of accidents. Always request written estimates and contracts to avoid misunderstandings.

After selecting a service, schedule an appointment for an initial assessment. This helps the provider identify specific needs, which might include regular maintenance schedules. Taking proactive steps now can extend the lifespan of your gutters, ultimately saving you money on repairs and replacements in the future.

Frequently Asked Questions

Understanding the common questions about gutter maintenance can help you make informed decisions. This section addresses essential factors to consider, maintenance frequency, signs of needed repairs, cost variations, qualifications for service providers, and the benefits of gutter guards.

What factors should be considered when selecting a gutter maintenance service?

When selecting a gutter maintenance service, consider the company’s experience and expertise in the field. Look for established companies with positive customer reviews and a solid reputation. Additionally, verify their licensing and insurance to ensure they meet industry standards.

How often should gutters be inspected and cleaned to prevent damage?

You should inspect your gutters at least twice a year, ideally in the spring and fall. Cleaning may be necessary more frequently if you live in an area with a lot of trees, as leaves and debris can quickly clog your gutters.

What are the signs that indicate the need for professional gutter repair or cleaning?

Look for signs such as water spilling over the sides of your gutters, rust or corrosion, or sagging sections. Additionally, if you notice mold or water damage around your home’s foundation, it may be time to seek professional help.

How do gutter maintenance costs vary by service and what influences these prices?

Gutter maintenance costs can vary based on factors like the size of your home, the type of service needed, and your location. Regular cleaning services typically cost less than repairs. Specific requirements, such as accessing high or steep roofs, may also increase costs.

What qualifications and certifications should a reliable gutter service provider have?

A reliable gutter service provider should have appropriate certifications and licenses to operate in your area. Consider looking for providers associated with industry organizations that highlight their commitment to best practices and ongoing education.

Can the installation of gutter guards reduce the need for frequent maintenance?

Yes, installing gutter guards can significantly reduce the frequency of maintenance required. These guards help prevent debris accumulation, thereby minimizing the need for regular cleaning and allowing for smoother water flow, ultimately protecting your home from potential water damage.

Who to Hire for Range Hood Maintenance: Ensuring Optimal Performance and Safety

When it comes to maintaining your range hood, knowing who to hire is essential for ensuring proper ventilation in your kitchen. For effective range hood maintenance, consider hiring professionals who specialize in home maintenance, focusing on preventive care rather than repairs. This approach not only helps extend the lifespan of your kitchen hood system but also enhances overall air quality in your home.

Preventive maintenance is crucial in managing your home’s ventilation systems effectively. By choosing dedicated service providers, you can schedule multiple maintenance tasks in one visit, saving time and effort. From cleaning to inspections, these professionals ensure your range hood operates efficiently, reducing the risk of unforeseen issues later.

In the long run, investing in routine maintenance services can save you money by preventing costly repairs and extending the life of your appliances. Ensuring that your range hood is regularly serviced not only improves its functionality but also contributes to a healthier and more pleasant cooking environment.

Understanding Range Hoods and Ventilation

Range hoods play a crucial role in maintaining air quality and safety in your kitchen. Proper ventilation is vital, especially in commercial settings, to control smoke, odors, and airborne contaminants. This section examines the functionality of range hoods and the importance of effective ventilation systems.

Basics of Range Hood Functionality

A range hood is designed to capture smoke, grease, and odors generated during cooking. It typically consists of a fan or blower, filters, and ductwork. There are two main types: ducted and ductless systems.

  • Ducted Range Hoods: These vent air outside your home, removing contaminants effectively.
  • Ductless Range Hoods: They filter air and recirculate it back into the kitchen, which is less efficient in removing smoke and odors.

Regular maintenance, including filter cleaning or replacement, is essential to ensure optimal performance. Clean filters improve air quality and extend the lifespan of your kitchen hood system.

Importance of Proper Ventilation in Kitchens

Proper ventilation in kitchens is critical for safety and comfort. Without effective ventilation, cooking can lead to the accumulation of harmful pollutants, including carbon monoxide and moisture. This is particularly important in commercial kitchens, where high heat and strong odors are common.

Effective ventilation helps maintain a safe temperature and reduces the risk of fires caused by grease buildup. In addition, good ventilation minimizes the likelihood of mold growth, which can be detrimental to your health.

Investing in a well-functioning range hood and ensuring regular maintenance can significantly enhance the air quality in your kitchen, safeguarding your cooking environment and improving your overall experience.

Identifying the Need for Professional Maintenance

Taking care of your range hood is essential for maintaining a safe and efficient kitchen environment. Knowing the signs that indicate the need for professional maintenance can help prevent potential hazards and extend the lifespan of your appliance.

Signs Your Range Hood Needs Maintenance

Several indicators can signal that your range hood requires professional attention. Watch for these:

  • Unusual Noises: If you hear grinding or rattling sounds, the motor might be struggling. This can affect airflow and efficiency.
  • Poor Ventilation: If smoke or odors linger longer than usual, your hood may not be venting properly.
  • Visible Grease Build-Up: Accumulated grease on the filters or surfaces can pose a fire risk. Regular cleaning is crucial.
  • Diminished Performance: If the fan speed seems weak or inconsistent, it might be time for a thorough inspection.

These signs suggest that routine professional cleaning should be scheduled to restore your appliance’s efficiency.

Benefits of Regular Professional Cleaning

Investing in routine maintenance offers several advantages. First, it ensures safety by reducing fire hazards associated with grease accumulation. The National Fire Protection Association (NFPA) stresses the importance of keeping kitchen hoods clean to prevent potential kitchen fires.

Additionally, regular cleaning improves air quality in your kitchen. A well-maintained range hood effectively removes smoke, odors, and airborne particles, promoting a healthier cooking environment.

Finally, consistent professional maintenance can extend the lifespan of your range hood, saving you money on premature replacements. By scheduling regular appointments, you can keep your kitchen appliance functioning optimally and reduce the risk of costly repairs.

Criteria for Hiring a Hood Cleaning Service

When selecting a hood cleaning service, it is crucial to consider certifications and compliance with industry standards, along with evaluating their experience and client feedback. This ensures that the service you choose meets safety and quality expectations.

Certifications and Standards Compliance

Ensure the hood cleaning service holds necessary certifications, such as those from the National Fire Protection Association (NFPA). Compliance with NFPA standards ensures that their cleaning methods reduce fire hazards effectively.

Ask for proof of training certifications from employees or the company. A reputable service will have undergone proper training, providing confidence in their knowledge and skills.

You should also inquire about insurance coverage. A licensed and insured service protects you from liabilities related to property damage or accidents during the cleaning process.

Confirm whether they follow a thorough checklist during cleaning. This checklist should align with industry standards to ensure a comprehensive service, meeting both safety and hygiene requirements.

Evaluating Experience and Client Testimonials

Evaluate the experience of the hood cleaning service by checking how long they have been in business. A well-established company likely possesses extensive knowledge and skills for effective cleaning.

Client testimonials provide valuable insights into service quality. Review online ratings and feedback from previous clients to gauge satisfaction. Look for comments on professionalism, thoroughness, and reliability.

Inquire if the service offers a free quote. A reliable company will assess your needs before providing an accurate estimate, ensuring transparency in pricing.

Ask for references from past clients to verify their work quality. Speaking with former customers lets you gain firsthand information about their experiences with the company, aiding your decision-making process.

The Maintenance Process Explained

Understanding the maintenance process for your range hood is essential for optimal performance. Regular cleaning and care not only extend the life of your equipment but also ensure safety in your kitchen environment.

Steps of Professional Kitchen Hood Cleaning

The professional kitchen hood cleaning process involves several critical steps. First, technicians assess the extent of grease buildup and determine the appropriate cleaning solutions. They use specialized cleaning products designed to break down grease effectively.

Next, they disconnect the hood from power sources and remove filters and other components. Once disassembled, each part undergoes thorough cleaning, often in a heated solution to maximize grease removal. The interior surfaces are scrubbed, ensuring no residue remains.

Finally, all units are reassembled, and the hood’s operation is tested for efficiency. This systematic approach ensures your kitchen hood operates effectively, maintaining proper ventilation.

Handling of Grease Traps and Exhaust Systems

Grease traps are vital for preventing clogs in your exhaust systems. During maintenance, professionals inspect and clean these traps to ensure they function correctly. The accumulation of grease can lead to foul odors and increased fire risks.

The cleaning process involves removing the collected grease and waste, often using powerful vacuum systems. Technicians may also apply solutions that help dissolve stubborn grease, promoting better flow within the system.

Additionally, they will check the entire exhaust system for obstructions. This includes cleaning ductwork to prevent buildup that can impede airflow. Proper handling ensures your kitchen operates safely and efficiently.

Choosing the Right Service for Your Needs

Selecting the appropriate service for range hood maintenance can greatly impact the efficiency and longevity of your kitchen systems. Understanding your specific needs, whether for a commercial kitchen or a residential setting, is essential to making an informed choice.

Commercial Kitchen Hood Maintenance Services

For commercial kitchens, regular hood cleaning is vital to ensure compliance with health regulations and safety standards. Hiring specialized commercial hood cleaning services can help remove grease buildup, which poses fire hazards and reduces air quality.

When selecting a provider, consider:

  • Experience in Commercial Settings: Ensure the company has experience with large-scale kitchen systems.
  • Compliance with Regulations: Verify that they follow local codes and standards for cleanliness.
  • Frequency of Service: Establish a schedule based on your kitchen’s volume of use.

Services like Hood Master provide deep cleaning, inspection, and maintenance tailored specifically for commercial settings, enhancing both safety and performance.

Residential Range Hood Cleaning Solutions

For residential range hoods, maintaining cleanliness is also essential, though the approach differs. You may seek kitchen hood cleaning services that cater specifically to residential needs.

Key factors to consider include:

  • Service Variety: Look for providers offering comprehensive packages that cover cleaning and maintenance.
  • Expertise in Home Systems: Choose a company familiar with residential exhaust systems to ensure effective service.
  • Preventive Maintenance Plans: Opt for options that focus on regular upkeep to avoid costly repairs in the future.

Many companies, such as Totally Maintained, emphasize preventive care, allowing you to schedule routine check-ups to keep your systems in excellent condition.

Frequently Asked Questions

Range hood maintenance requires specific knowledge and skill. Here are key insights to help you understand what to consider when hiring a professional for this essential task.

What qualifications should I look for in a professional performing range hood maintenance?

When searching for a professional, seek candidates with certifications in HVAC systems or appliance services. They should be familiar with various range hood models and have experience in both installation and maintenance.

How often should a range hood be serviced or cleaned for optimal performance?

It’s recommended to service your range hood every six months, especially in high-use kitchens. Regular cleaning ensures proper airflow and reduces fire hazards caused by grease buildup.

Can an electrician install a range hood, or should another type of professional be employed?

While electricians can handle the electrical connections, it’s best to hire a technician who specializes in kitchen appliances for complete installation. This ensures that both electrical and ventilation aspects are properly managed.

What are the average costs associated with repairing a commercial range hood?

Repair costs can vary widely, typically ranging from $150 to $400, depending on the extent of the damage. Consider factors such as parts needed and labor rates in your area when budgeting.

What is involved in the process of installing a range hood in a residential kitchen?

Installation usually involves measuring the space, securing the hood to the wall or ceiling, and connecting it to the ductwork and electrical supply. Proper alignment is crucial for effective operation and appearance.

Are there any specific considerations for maintaining restaurant-grade exhaust hoods?

Restaurant-grade hoods often require more frequent maintenance due to higher grease production. Understanding local codes and regulations for commercial kitchens is essential to ensure compliance and safety.

Home Air Quality Maintenance: Essential Tips for a Healthier Living Environment

Maintaining good indoor air quality is essential for creating a healthy home environment. The air you breathe indoors can significantly impact your well-being, with potential health effects ranging from allergies to more severe respiratory issues. Regular home air quality maintenance, such as identifying and controlling indoor pollutants, can enhance your overall health and comfort.

To achieve optimal air quality, it’s important to consider the sources of indoor pollution, such as dust, mold, and volatile organic compounds. Implementing simple strategies, like proper ventilation and regular cleaning, can significantly reduce these contaminants. By prioritizing air quality maintenance, you not only improve your indoor environment but also ensure a safer space for you and your family.

Professional home maintenance services can assist in these efforts by providing essential tasks like dryer vent cleaning and window cleaning. These services focus on preventive care rather than repairs, helping you maintain systems that contribute to better air quality. Investing in these maintenance practices can extend the lifespan of your home’s systems and lead to cost savings over time.

Understanding Indoor Air Quality

Indoor air quality significantly affects your health and comfort. By knowing the common pollutants, their sources, and the potential health implications, you can take proactive steps to ensure a healthier living environment.

Common Indoor Air Pollutants

Indoor air is often more polluted than outdoor air. Typical indoor air pollutants include volatile organic compounds (VOCs), which emit gases from products like paints and cleaning supplies. Other common contaminants are dustmold, and allergens such as pollen and pet dander.

Gases like carbon monoxide and radon are also crucial to monitor. Carbon monoxide can come from malfunctioning appliances, while radon seeps from the ground into homes. Regularly evaluating these pollutants can help maintain better air quality.

Sources of Indoor Air Pollution

Understanding the sources of indoor air pollution is essential for effective management. Many household products release VOCs, particularly during use. This includes various cleaning agents, air fresheners, and even furniture.

Mold thrives in damp areas, so bathrooms and kitchens can be hotspots. Leaking faucets or condensation contribute to its growth. Dust accumulates from everyday activities, including human and pet movement, along with indoor plants.

Carbon monoxide typically arises from gas ranges and heaters, while radon often accumulates in basements or ground-level areas. Addressing these specific sources can greatly improve indoor air conditions.

Health Implications of Poor Air Quality

Poor indoor air quality can lead to numerous health problems. Exposure to VOCs can cause headaches, dizziness, and respiratory issues. Dust and other allergens can trigger asthma and allergy symptoms, affecting your overall well-being.

Mold exposure may lead to coughing, sneezing, and serious respiratory conditions, particularly for those with compromised immune systems. Additionally, carbon monoxide is a colorless, odorless gas that can be fatal in high concentrations, causing confusion or loss of consciousness.

To protect your health, regularly monitor and manage indoor air quality. Using dehumidifiers and ensuring proper ventilation can significantly mitigate these risks.

Improving Ventilation and Air Circulation

Proper ventilation and air circulation are essential for maintaining healthy indoor air quality. By ensuring that stale air is replaced with fresh outdoor air, you can significantly reduce pollutants and enhance overall comfort in your home.

Role of HVAC Systems

Your HVAC system plays a crucial role in regulating indoor air quality. It manages temperature and humidity levels while filtering out dust, allergens, and other airborne particles. Regular maintenance of your HVAC system is necessary to ensure optimal performance.

Consider changing filters every 1-3 months to improve air flow and filtration efficiency. Scheduling professional tune-ups can help identify potential issues before they escalate, ensuring your system operates effectively year-round.

Utilizing a programmable thermostat can also enhance air circulation by optimizing heating and cooling schedules based on your lifestyle.

Importance of Outdoor Air Ventilation

Introducing outdoor air into your home is vital for diluting indoor pollutants. Open windows, vents, and doors whenever possible to promote fresh air exchange. Engaging in this practice, even on colder days, can help improve your indoor environment.

During warmer months, employing cross-ventilation can enhance airflow. This method involves opening windows on opposite sides of your home to create a natural breeze. Installing air exchange systems, such as energy recovery ventilators, can also facilitate outdoor air ventilation without compromising energy efficiency.

Using Kitchen Fans and Other Exhaust Systems

Kitchen fans and exhaust systems are essential for removing cooking odors, smoke, and moisture. Using these systems while cooking helps maintain air quality by preventing the buildup of pollutants.

Make sure your kitchen exhaust fan is appropriately rated for the size of your kitchen. Use it to expel heat, steam, and airborne particles generated during cooking.

In addition, consider installing bath fans in bathrooms to eliminate excess humidity, which can lead to mold growth. Combining these ventilation methods will significantly enhance air circulation in your home and contribute to a healthier living environment.

Air Cleaning and Filtration Strategies

Maintaining good air quality in your home involves effectively selecting and using air cleaners, purifiers, and filtration systems. Understanding these technologies can help ensure you breathe clean air and reduce contaminants.

Choosing the Right Air Cleaners and Purifiers

When selecting air cleaners or purifiers, consider the type of pollutants you want to address. Common options include HEPA filters, which capture small particles, and activated carbon filters, effective for odors and gases.

Look for portable air cleaners if you need mobility. The size of the unit matters; ensure it’s suitable for the room’s dimensions. For optimal efficiency, check the Clean Air Delivery Rate (CADR) ratings.

Additionally, consider special features. Some models incorporate UV light or ionization, which can further enhance purification. Choose a reputable brand with good reviews to ensure reliability.

Effective Use of Air Filters and Filtration Systems

To maximize the effectiveness of air filters, ensure you replace them regularly. Most HVAC systems have filters that should be changed every 1-3 months, depending on usage and the type of filter.

Using a medium to high-efficiency air filter can significantly improve your home’s air quality. Look for MERV ratings between 8-13 for residential use.

Consider upgrading your filtration system if you suffer from allergies or asthma. A whole-home filtration system can provide extensive coverage and reduce allergens, while portable systems can target specific areas.

Implementing these strategies can help maintain a healthier indoor environment, providing you with peace of mind.

Controlling Moisture and Mold

Maintaining optimal moisture levels in your home is crucial for preventing mold and mildew growth. These fungi thrive in damp environments, which can lead to health issues and structural damage. Here’s how to effectively control moisture and keep your indoor air quality high.

Addressing Humidity and Condensation

To manage humidity, you should aim to keep indoor levels below 50%. Utilizing a dehumidifier can help regulate moisture, particularly in basements or bathrooms where humidity often peaks.

Regular ventilation is essential. Open windows when weather permits and use exhaust fans during cooking or showering to diminish water vapor.

If you notice condensation on windows or walls, it’s vital to act quickly. Address leaks in plumbing or roofing that allow moisture to linger, as these can create breeding grounds for mold.

Preventing Mold and Mildew Growth

To prevent mold, regularly inspect areas prone to dampness. Focus on bathrooms, kitchens, and laundry rooms.

Here are proactive steps you can take:

  • Fix water leaks immediately.
  • Clean and dry wet surfaces promptly.
  • Ensure proper air circulation throughout your home.

Using mold-resistant paints and materials in construction can also prove beneficial. Additionally, regularly removing dust and debris can limit places where mold spores might settle, further enhancing air quality. Keeping your home dry helps maintain a healthier environment for you and your family.

Household Tips for Better Indoor Air

Maintaining good indoor air quality requires consistent effort. You can reduce dust and pet dander, keep your home surfaces clean, and even use houseplants to enhance the air you breathe. Here’s how to achieve a healthier indoor environment.

Reducing Dust and Pet Dander

To effectively reduce dust in your home, consider implementing a regular cleaning routine. Use a vacuum cleaner equipped with a HEPA filter, which captures fine particles that regular vacuums might miss. Aim to vacuum your carpets and rugs at least once a week.

When it comes to pet dander, brushing your pets regularly can significantly reduce the amount of hair and dander they shed. Ensure that you wash their bedding frequently and consider keeping pets out of certain areas, like bedrooms, to limit allergens.

Consider dust-mite-proof covers for pillows and mattresses. These simple steps can drastically improve indoor air quality by minimizing dust and pet dander.

Maintaining Clean Indoor Surfaces

Regularly cleaning indoor surfaces is crucial to ensure a healthy living environment. Use damp cloths to wipe down surfaces, which will trap dust instead of spreading it. Don’t forget often-overlooked areas, such as ceiling fans, baseboards, and light fixtures.

Change your air filters every 1-3 months to improve air circulation and filter out airborne particles. This process not only enhances air quality but also helps your HVAC system run more efficiently.

Incorporate deep cleaning routines, such as steam cleaning carpets and upholstery, to remove embedded allergens. A clean home not only looks better but also promotes healthier air.

Leveraging Houseplants for Air Quality

Houseplants can be powerful allies in improving indoor air quality. Certain plants, like spider plants, snake plants, and peace lilies, are known to filter out harmful toxins and release oxygen.

Place these houseplants in various rooms to maximize their air-cleaning benefits. Remember to keep the plants well-watered and groomed to ensure they thrive and remain effective.

Additionally, houseplants can increase humidity levels in your home, which can alleviate dry air and reduce respiratory issues. By strategically choosing and caring for houseplants, you can enhance both the aesthetics and air quality of your living space.

Technical Measures and Home Modifications

Maintaining good air quality in your home involves effective technical measures and modifications. By focusing on insulation and energy efficiency as well as ensuring proper assessments for impurities like radon, you can create a healthier living environment.

Home Insulation and Energy Efficiency

Proper home insulation significantly impacts indoor air quality and energy efficiency. Insulation helps control the temperature in your home, reducing the need for heating and cooling systems, thus minimizing the emissions and pollutants generated by these systems.

Consider using materials with low volatile organic compounds (VOCs) to prevent indoor air pollution. Air sealing is also essential; check for gaps around windows, doors, and ductwork. By ensuring your home is well-insulated, you enhance energy efficiency, saving on utility costs, and improve overall indoor air quality.

Regular maintenance, such as checking insulation in the attic and basement, keeps your home airtight. This prevents outdoor pollutants from entering while maintaining consistent indoor temperatures.

Professional Assessments and Radon Testing

Radon is a colorless, odorless gas that can pose serious health risks. Conduct professional radon testing to identify levels in your home. The EPA recommends testing every two years or after significant home modifications.

If high radon levels are found, mitigation strategies must be employed, such as venting systems that release radon outdoors. Additionally, professional assessments can evaluate ventilation systems to enhance air circulation.

Incorporate source control strategies to minimize the release of indoor pollutants. This includes regular inspection of heating and cooling systems. With thorough assessments and timely radon testing, you ensure a safe and healthy indoor environment.

Frequently Asked Questions

Maintaining good air quality in your home involves understanding various strategies and methods. This section provides insights into enhancing air quality through natural methods, effective strategies for specific rooms, and practical measures for different seasons.

What are natural methods to enhance air quality within homes?

You can improve indoor air quality using several natural methods. Consider adding houseplants like snake plants and peace lilies, which can help filter pollutants.

Also, ensure proper ventilation by opening windows when weather permits. Using natural air purifiers, such as baking soda and essential oils, can further contribute to fresher air.

What strategies are effective for improving air quality in the bedroom?

To enhance air quality in the bedroom, focus on maintaining low humidity levels. Use a dehumidifier to prevent mold growth, which thrives in damp conditions.

You should also regularly wash bedding in hot water and choose hypoallergenic materials to minimize dust mites. Consider using an air purifier to filter airborne particles effectively.

What measures can be taken to ensure good indoor air quality during winter?

During winter months, keep indoor air quality in check by using exhaust fans while cooking and bathing. Sealing windows and doors can prevent drafts and maintain consistent indoor temperatures, but be mindful of reduced ventilation.

You can introduce fresh air periodically to combat stale air. Running a humidifier can help maintain optimal humidity levels, balancing dryness from heating systems.

How can indoor air quality be monitored and assessed?

You can monitor indoor air quality using portable air quality meters, which measure levels of pollutants like VOCs and particulate matter.

Regular inspections can also help identify common issues such as mold or excessive humidity. Some smart home devices offer continuous monitoring and alert you to changes in air quality.

What are some common practices to reduce pollution inside homes?

To reduce indoor pollution, start by avoiding tobacco products indoors. Limiting the use of chemical cleaners and opting for natural alternatives can significantly help.

Regularly changing air filters in HVAC systems is essential. Vacuuming with a HEPA filter can address dust and allergens effectively.

What is the typical cost associated with a professional home air quality inspection?

The cost of a professional home air quality inspection typically ranges from $200 to $600. Prices can vary based on the size of your home and the specific tests conducted.

It’s wise to seek a detailed quote from providers to understand the services included in the inspection. Regular inspections can ensure that you maintain a healthy indoor environment.

Dryer Vent Service Provider: Ensuring Safe and Efficient Ventilation Systems

When it comes to maintaining your home, finding the right dryer vent service provider is essential. Regular dryer vent cleaning ensures your appliance operates efficiently and reduces the risk of fire hazards. Choosing a service that specializes in comprehensive home maintenance can save you time and hassle while ensuring your systems stay in optimal condition.

Opting for a professional service that focuses on preventive maintenance can extend the lifespan of your dryer and other home systems. By addressing maintenance tasks like dryer vent cleaning, you can avoid costly repairs and increase the safety of your home. This proactive approach allows you to keep your appliance working effectively while safeguarding your family.

In a busy world, a one-stop solution for home maintenance makes it easier to schedule necessary services without juggling multiple providers. By prioritizing preventive care, you not only enhance the functionality of your dryer but also enjoy peace of mind knowing your home is well taken care of.

Understanding Dryer Vent Services

Dryer vent services play a crucial role in ensuring the safety and efficiency of your laundry appliances. Proper understanding of these services can help you maintain your dryer system effectively, preventing potential hazards and improving performance.

Importance of Dryer Vent Cleaning

Cleaning your dryer vent is essential for several reasons. A clogged dryer vent can lead to reduced efficiency, causing your dryer to work harder and potentially increasing energy bills.

Furthermore, lint and debris accumulation poses a fire risk. According to statistics, a significant number of dryer fires are caused by unclean vents. Regular cleaning mitigates this danger, ensuring a safer home environment.

Scheduling professional dryer vent cleaning helps remove stubborn blockages that DIY methods often miss. This preventive maintenance is a proactive measure that extends the life of your dryer, allowing it to function optimally and efficiently.

Components of a Dryer Vent System

Understanding the components of your dryer vent system is vital. Key parts include the dryer, vent duct, and exterior vent hood.

  • Dryer: The appliance where clothes are dried.
  • Vent Duct: The pipe that transports moist air and lint from the dryer to the outside.

The vent duct must be made of non-flammable material, ideally using rigid or semi-rigid metal, which prevents fire hazards. A well-functioning exterior vent hood allows airflow while preventing animals or debris from entering the duct.

Keeping these components clear of obstructions, such as lint, is imperative for optimal performance. Effective dryer vent cleaning ensures that every part of this system functions correctly and safely.

Professional Dryer Vent Cleaning Process

Understanding the professional dryer vent cleaning process is essential to ensuring safety and efficiency in your home. This process involves thorough inspection, effective cleaning methodologies, and specialized duct cleaning techniques.

Inspection and Assessment

Before any cleaning begins, a detailed inspection of your dryer vent system is critical. Technicians evaluate the vent’s condition, identifying potential blockages like lint buildup or structural issues. This step often includes checking the lint trap for clogs and examining the duct’s length and configuration.

Using specialized tools, the technician may use cameras to assess hard-to-reach areas. You receive a report of the vent condition, allowing you to make informed decisions. An accurate assessment sets the stage for effective cleaning, ensuring that every aspect of the venting system is addressed.

Cleaning Methodology

The cleaning methodology employed by professionals typically involves several phases to ensure optimal results. Initially, the technician may disconnect your dryer from the power source. This step is crucial for safety.

Next, a high-powered vacuum is often used to remove loose lint and debris from the vent. This vacuuming process may be accompanied by brushing to dislodge stubborn clogs. Professionals may employ rotary brushes for thorough cleaning of the duct walls.

Finally, a thorough inspection follows the cleaning processes to confirm that the vent is clear. This careful methodology enhances safety and improves your dryer’s efficiency, reducing energy costs.

Duct Cleaning Techniques

Various duct cleaning techniques ensure the effectiveness of the service provided. Air sweep cleaning utilizes a combination of compressed air and mechanical brushes, ensuring a deep clean.

Vacuum cleaning is another common method, where a specially designed machine removes lint and obstructions from the duct. These specialized vacuums prevent the dispersion of dust and allergens.

Some companies utilize camera systems to visually inspect after cleaning, clarifying whether the job is complete. By combining these techniques, professionals ensure that your cleaning service provides long-lasting results for your dryer vent system.

Preventive Measures and Routine Maintenance

Maintaining your dryer vent is crucial for safety and efficiency. By implementing preventive measures and scheduling routine maintenance, you can significantly reduce the risk of lint buildup and ensure your dryer operates effectively.

Preventing Lint Buildup

Lint buildup is a leading cause of dryer fires and can also reduce efficiency. To prevent this, always clean the lint trap after each load. This simple task ensures that airflow remains unrestricted.

Additionally, consider using a lint brush to clean the vent hose and duct periodically. This will help eliminate any hidden lint that may have escaped the trap. You should also inspect the vent for any kinks or damage that could impede airflow, as these can exacerbate lint accumulation.

Regularly checking and cleaning the outside vent opening is important as well. Make sure it’s free of obstructions like leaves or nests. Implementing these practices helps maintain a safer environment and keeps your dryer running smoothly.

Scheduling Regular Cleaning

Establishing a routine cleaning schedule is essential for dryer vent maintenance. Aim to have your dryer vent professionally cleaned at least once a year. This service can remove accumulated lint and ensure that your system operates efficiently.

When choosing a service provider, look for experts specializing in dryer vent cleaning, such as those offered by Totally Maintained. They provide comprehensive maintenance services focused on preventive care, ensuring your home systems are well-maintained.

You should also consider seasonal cleaning. Scheduling maintenance at the start of each season can help maintain optimal performance and prevent unexpected issues. Making these practices a regular part of your home upkeep will pay dividends in safety and efficiency.

Cost Considerations for Dryer Vent Services

Understanding the costs involved in dryer vent services can help you make informed decisions. Factors like service charges and the availability of free estimates play significant roles in budgeting for dryer vent cleaning.

Understanding Service Charges

Service charges for dryer vent cleaning typically range from $100 to $200, depending on several factors. These factors include your location, the length of the duct, and the complexity of the service.

Technicians may have different pricing structures. For instance, some may charge a flat rate, while others calculate based on the square footage or estimated time required.

  • Location: Urban areas might have higher rates due to increased demand.
  • Duct Length: Longer ducts may require more effort and time to clean, affecting the price.
  • Additional Services: If you combine dryer vent cleaning with other maintenance tasks, you may benefit from bundled pricing, offering savings on your total service cost.

How to Get a Free Estimate

Many service providers offer free estimates for dryer vent cleaning, allowing you to gauge potential costs without obligation. To obtain a free estimate, contact companies directly and request a quote based on your specific needs.

  • Provide Specifics: Share information such as your home type and duct length.
  • Ask About Promotions: Sometimes, companies offer limited-time discounts for first-time customers.
  • Compare Estimates: Collect quotes from multiple providers to find the best deal.

Using these strategies will help you understand your options and choose a service that fits your budget while ensuring your dryer vent is maintained properly.

The Impact of Neglected Dryer Vents on Safety and Efficiency

Neglected dryer vents can lead to serious safety hazards and reduced efficiency in your home. Understanding the consequences of clogged vents is crucial for protecting your property and ensuring that your appliances work optimally.

Reducing Risk of Property Loss

Clogged dryer vents significantly increase the risk of fire hazards. Lint buildup is highly flammable and can ignite if the dryer overheats. Regularly cleaning your dryer vents can greatly reduce this risk.

Key Statistics:

  • According to the U.S. Fire Administration, nearly 3,000 home fires occur annually due to clothes dryers.
  • Prevention method: Schedule routine maintenance to keep vents clear.

Additionally, neglecting dryer vents can lead to more extensive damage to your property, resulting in costly repairs. Investing in preventive maintenance protects your home and your finances.

Enhancing Dryer Performance

When vents are obstructed, your dryer works harder to expel hot air, leading to decreased efficiency. A clogged vent can cause longer drying cycles and higher energy consumption, resulting in inflated utility bills.

Efficiency Tips:

  • Regular cleaning: Schedule dryer vent cleaning to improve airflow.
  • Monitor performance: If your clothes take longer to dry, it may indicate a blockage.

By maintaining clean and functional dryer vents, you not only enhance performance but also extend the lifespan of your dryer. Preventive maintenance allows your appliances to operate effectively, saving you money in the long run.

Frequently Asked Questions

When considering dryer vent services, it’s important to understand how to choose a reliable provider, recognize signs that your vent needs cleaning, and know what to expect in terms of costs and qualifications. Here are some common questions.

How can I find a reputable dryer vent service provider in my area?

Start by asking friends and family for recommendations. Online reviews can also provide insights into the quality of service. Look for companies with strong credentials and good customer feedback to ensure a positive experience.

What are the indicators that my dryer vent needs professional cleaning?

You may notice longer drying times, excessive lint buildup around the dryer, or a burning smell. If your clothes are still damp after a full drying cycle, it’s a strong sign that your vent requires professional attention.

How often should I have my dryer vent inspected and serviced?

For households with 1-2 people, an inspection every two years is sufficient. If you have a larger family, consider having it serviced annually to prevent fire hazards and ensure efficient dryer operation.

Are there any risks associated with neglecting dryer vent maintenance?

Neglecting maintenance can lead to lint buildup, which is a major fire hazard. It can also cause your dryer to work less efficiently, increasing energy costs and potentially leading to costly repairs.

What should I expect to pay for a professional dryer vent cleaning service?

Typical costs for dryer vent cleaning range from $100 to $200. Factors like your location and the extent of the service can influence the overall price, so it’s wise to get quotes from multiple providers.

What qualifications should a dryer vent service provider have to ensure safe and effective cleaning?

Look for providers who are certified by the National Air Duct Cleaners Association (NADCA) or have similar credentials. Experience and proper insurance coverage are also important to ensure you’re hiring a qualified professional.